msmcleod
-
Posts
6,113 -
Joined
-
Last visited
-
Days Won
26
Everything posted by msmcleod
-

[CLOSED] Cakewalk 2020.07 Early Access
msmcleod replied to Morten Saether's topic in Early Access Program
FYI - this has been fixed for the main release. -
Anyone still having sustain problem with some VST’s?
msmcleod replied to SynthManDan's topic in Cakewalk by BandLab
Ok - other things that can cause this: 1. Cheap USB MIDI "cables" can cause this because their internal buffer size is tiny. 2. Check your MIDI settings within cakewalk ( MIDI Playback & Recording) Make sure "controller" is checked Make sure your MIDI Prepare Buffers aren't set to some crazy value - the default of 200 should be fine for the vast majority of projects. If your project is particularly large (e.g. 75+ MIDI tracks, maybe try 250 or 300 ) Some older MIDI interfaces have problems with UWP - try MME (you need to have no projects loaded to change this) -
Anyone still having sustain problem with some VST’s?
msmcleod replied to SynthManDan's topic in Cakewalk by BandLab
I think you have to check the MIDI radio box first with the Enabled checked , then save, disable the checkbox then change it back to Computer. -
What new updates would you like to see in 2020 to Cakewalk - CLOSED.
msmcleod replied to Will.'s topic in Feedback Loop
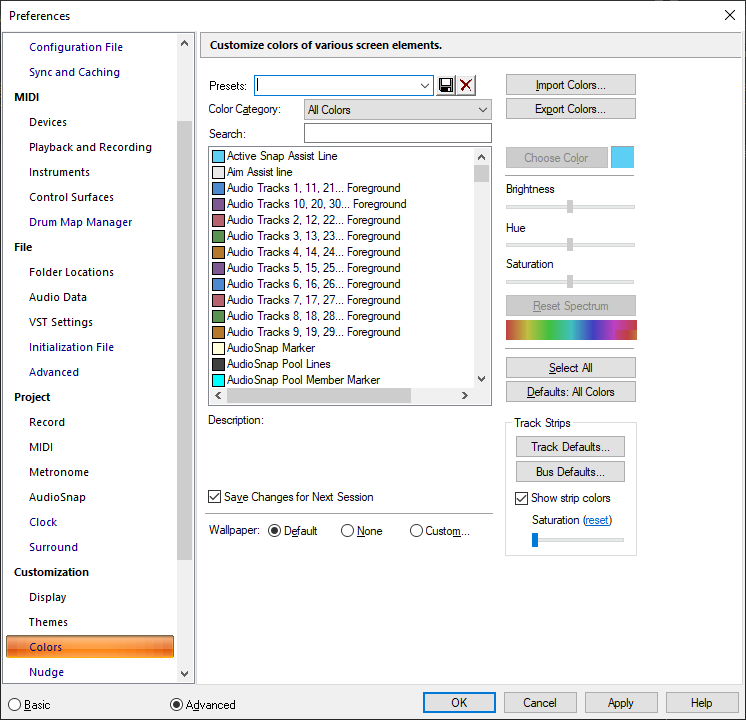
Select your clip(s), uncheck "Use Track Colors" in the clip properties and set the Foreground (waveform) and Background colors: e.g.: [Edit] If you want your colors to default to more "vibrant" ones all the time, change the colors within Preferences: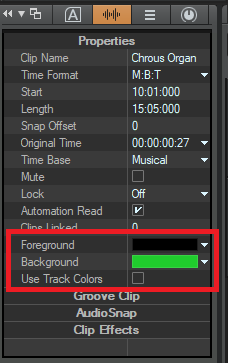

-
Anyone still having sustain problem with some VST’s?
msmcleod replied to SynthManDan's topic in Cakewalk by BandLab
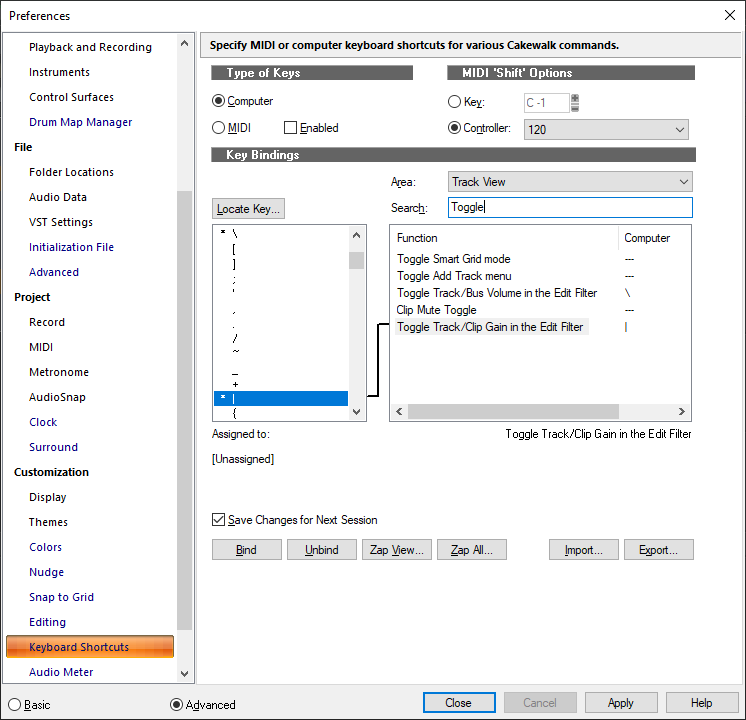
Check your keyboard shortcuts to see you've not got MIDI Controller 64 mapped as SHIFT: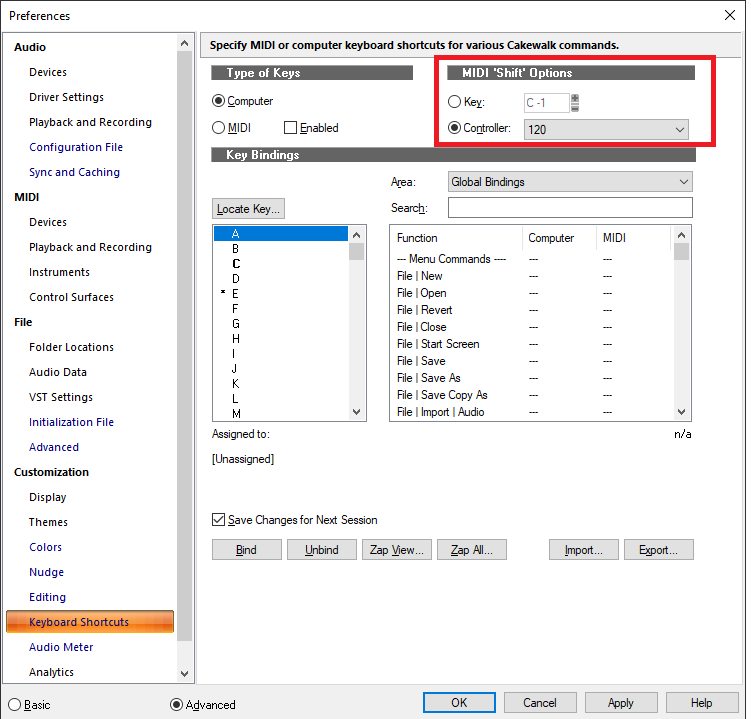
-
You need to change the clip Time Base to "absolute" then lock the clip position.
-
Locking clips to HMSF location for film
msmcleod replied to Josh Wolfer's topic in Cakewalk by BandLab
You need to change the clip Time Base to "absolute" then lock the clip position. -
How can I piece together sections of 1000's of songs? How does Metallica do it?
msmcleod replied to Morris Band's question in Q&A
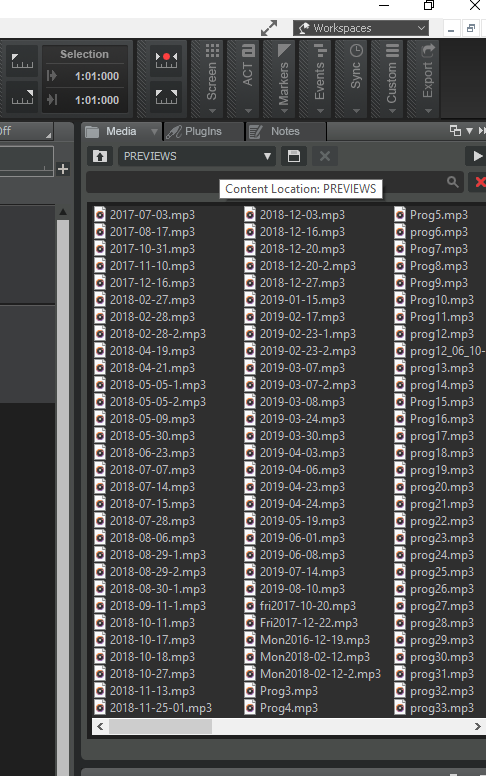
This is exactly how I work too. I've got well over 200 unfinished songs now - mostly 8 to 32 bar sections. What I've started doing is every time I save a project, I export it as an MP3 giving it the same name as my project. I copy the MP3 to a PREVIEWS folder, which I've added to the media browser. I don't bother with individual stems - just the whole export: When I'm stuck for a chorus for my verse (or vice versa), I go to the media browser and click through them so see if any might work. If they might, I'll drag the mp3 on to an audio track, cut it up / speed it up etc... if it sounds good, I'll open up the original project and copy the tracks over. For MIDI, it's easy enough to work with... audio I'll re-record if the key is wrong.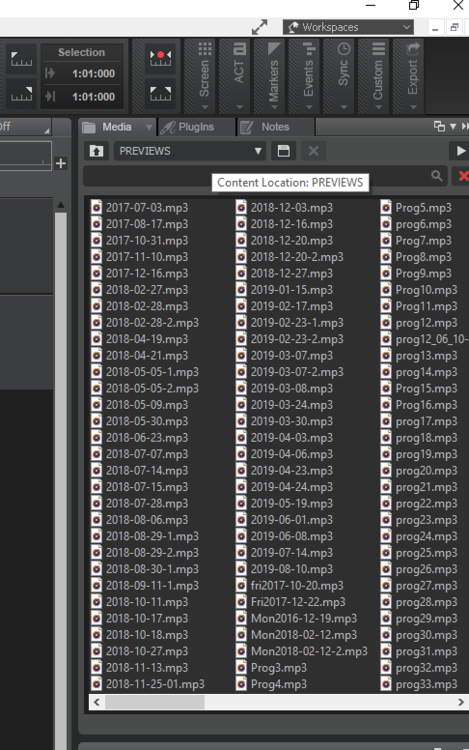
-
[CLOSED] Cakewalk 2020.07 Early Access
msmcleod replied to Morten Saether's topic in Early Access Program
I guess this is technically possible, but would it not put unnecessary wear on the faders, constantly changing bank? There's also the fact that you might not be using control surface on a %8 boundary.... it's possible to shift through tracks one at a time (e.g. go from 1-8 to 2-9 etc). -
[CLOSED] Cakewalk 2020.07 Early Access
msmcleod replied to Morten Saether's topic in Early Access Program
-
Split clips lock together on different lanes, help please!
msmcleod replied to Wolfcub's topic in Cakewalk by BandLab
When a split is across lanes, they always move together when they line up. The way I get around this: 1. Select the whole lane 2. Nudge it to the right 3. Move the split well out of the way 4. Nudge it back to the left 5. Adjust my split in the one lane -
And it's here....
-
FYI - the early access is now out with a keybinding to toggle between clip gain automation / clips:
-
The way I've got around this in the past, is to: 1. Create a new Cakewalk project based on the "Basic" template 2. Navigate to your .wrk file via Cakewalk's media browser 3. Drag the .wrk file to the clips view from the media browser. Save your new project.
-
[CLOSED] Cakewalk 2020.07 Early Access
msmcleod replied to Morten Saether's topic in Early Access Program
This plugin is way out of date, and AFAIK is 32 bit only. It quite clearly says on the page: The information in this article applies to: SONAR 4 Producer Edition SONAR 4 Studio Edition SONAR 3 Producer Edition SONAR 3 Studio Edition SONAR 2 Cakewalk already ships with the latest Mackie Control plugin. You may have to uninstall this plugin, run the roll back installer and re-install the early access. -
If you're using a Realtek device, switch to WASAPI shared.
-
[CLOSED] Cakewalk 2020.07 Early Access
msmcleod replied to Morten Saether's topic in Early Access Program
Key binding work by binding to the key, not the character it produces. For example, on a UK keyboard the \| key (between SHIFT and Z ) also works for toggling volume automation, and SHIFT + \| works for toggling clip gain automation. So you may find another key might work on a Swedish Keyboard. That being said, you can always rebind to something else. -
[CLOSED] Cakewalk 2020.07 Early Access
msmcleod replied to Morten Saether's topic in Early Access Program
This is dependent on the control surface you're using. Mackie compatible control surfaces already do this if you're using Cakewalk's MackieControl surface plugin. The ACT control surfaces and Generic Control Surfaces are one way - i.e. they only receive data, so there's no way of doing that with these. -
[CLOSED] Cakewalk 2020.07 Early Access
msmcleod replied to Morten Saether's topic in Early Access Program
The hint is in the name of the shortcut: Open Soft Synth on Current Track ... not selected clip. Using the selection would be ambiguous - i.e. what would take priority... the selection or the current track? And what if you've got multiple clips or tracks selected? You don't actually have to click on the name... you just have to set the current track. This could be by clicking the name, but it could also be by using the arrow up/down keys to go through the tracks, or pressing the track select button on a control surface. You can also set the current track by clicking on the synth on the synth rack. -
[CLOSED] Cakewalk 2020.07 Early Access
msmcleod replied to Morten Saether's topic in Early Access Program
Ripple in the Arranger works completely differently from Ripple in the clips. In 2020.05, the Arranger completely ignored the project Ripple status, as it has its own ripple behaviour. This behaviour has not changed. In 2020.07, the Ripple Edit does the following: 1. If either Ripple Selection or Ripple All is enabled, the Arranger Move/Copy drag operations act as if the SHIFT key is pressed - in other words instead of "Blend Clips", the operation is "Shift Existing Clips" 2. If Ripple All is selected, sections in the other Arranger tracks are also rippled. If you want to use the existing ripple behaviour, select the section with data then drag the clip instead of the section. -
@Jim Fogle - when you same multi-channel outputs, do you mean audio outputs? The video I posted earlier in this thread shows how to do this for Omnisphere. Unfortunately the process is different for every VSTi, so you'll need to refer to the user guide for each VSTi. I'm sure I did a similar one for Kontakt at some point... I'll try to dig it out.
-
Cakewalk only does load balancing on VST effects... not on VSTi synths.
-
Omnisphere is 8 channel multi-timbral. The setup part in the Multi tab is to route each channel to a separate audio out, so each instrument track is (a) on it's own MIDI separate channel and (b) on its own separate audio track... but yeah, they're all going to the same omnisphere instance. Omnisphere (which the OP was querying about) is actually pretty good with cores... so one instance works well vs multiple instances.... Kontakt is the same, if it's set up properly. But as you say, you do lose the ability to individually freeze each track - it's none or all of them.
-
I'm guessing your workspace is set to "Basic" ? (see top right hand corner ) The Basic workspace hide's a lot of the more complex functionality. Set your workspace to "None" and you'll see everything... including the Event View.
-
The easiest way to do it is like this: