


msmcleod
-
Posts
7,191 -
Joined
-
Last visited
-
Days Won
39
Everything posted by msmcleod
-
My DAW machine has a Win7 64 boot as well as my normal Win 10 boot. Audio performance is exactly the same (which makes sense - it's exactly the same machine), but for some reason, Win 7 feels much snappier than Win 10 for me... I suspect it's graphics related, but the difference isn't enough to make me want to go back.
-

Two Audio Interfaces (just for playback)
msmcleod replied to Video&Music's topic in Cakewalk by BandLab
If you use either WDM or WASAPI Shared, then Cakewalk will allow input from/output to multiple interfaces. Don't expect them to play exactly in time though, as only one can be timing master. If this is just to give you a different headphone out for mixing, that may not be an issue. For tracking though, you'll get a false set of timing - not completely insurmountable, as you can adjust the recorded audio afterwards by simply moving it, but something to bear in mind. It is worth mentioning however, that these timing differences could be very small, and in some cases not much different from the latency incurred when using microphones at different distances. But just as with the microphone case, you should be aware of possible phase issues. You really have to try it to see if it's suitable or not. -
Like I said, even if the DAW could generate some SMPTE audio code for striping, it wouldn't make much difference - the audio SMPTE striping devices generate/read is not standard in any way, only the SMPTE itself is. As an analogy... I take a 1K text document and save it on to tape in an old Commodore 64.... I take exactly the same 1K text document and save it on to tape on an old ZX Spectrum ( Timex 2000 for you guys across the pond ). The 1K text is exactly the same, but there's no way the ZX Spectrum will load it from the Commodore 64 tape , or vice-versa. In this analogy, the 1K text is your SMPTE, and what is on tape is the striped timecode.
-
The point is... what is generating/reading the SMTPE timecode audio? You need something to generate that SMPTE audio to record it in Cakewalk, just as you did on your tascam - and it has to be the same device, or a compatible device, that will be read by the lighting rig. The SMPTE audio code you use for striping is not standard across devices.
-
MIDI to DMX is more common in prosumer devices, where the lights are being directly controlled by MIDI ( I so wanted one when they first came out! ) The more high end lighting rigs use SMPTE, as they have their own light sequencer software built in, controlling literally hundreds or thousands of lights.
-
You can't "stripe" timecode in Cakewalk as such. SMPTE time-code requires the same device to both generate the timecode audio, and read it back. The way this used to work in the tape days was (I'll use my old PPS-100 SMPTE converter and MT8X 8 track as an example): I'd sync my PPS-100 to Cakewalk using MTC (MIDI Time Code) - i.e. Cakewalk is sending MTC over a MIDI cable, and the PPS-100 is receiving it - and and set the PPS-100 to generate a SMPTE time-code signal. I'd arm track 8 on my MT8X, start recording on it, then press play within Cakewalk. The PPS-100 would generate a time-code audio which was then recorded on to track 8 of the MT8X. I'd then set the PPS-100 to read mode, and take a direct audio out from track 8 into the PPS-100. The MIDI output of the PPS-100 was then plugged into the MIDI IN of my MIDI interface for Cakewalk to receive. I'd then set Cakewalk to slave to MTC. So at that point, my MT8X is now the master. I could FFWD to any part of the tape, press play and Cakewalk would automatically go to the correct position. Cakewalk has no need for a SMPTE audio generator/reader, as it has an internal digital clock (either from the PC, or your audio interface). Cakewalk does however transmit MTC, and MIDI Song Position Pointer information. This is basically the same as SMPTE, except over a MIDI cable. First, I'd check with your lighting guy to see if the rig will accept MTC over a MIDI cable - if it does, then all you need is a MIDI interface/cable, and to set Cakewalk to transmit MTC and MIDI Song Position Pointers. If it doesn't, then you need a hardware box (such as the JL Cooper PPS-100) that will convert MTC to SMPTE. Bear in mind, the PPS-100 is very old now and no longer in production... I'm not sure you can even get the equivalent of these devices new nowadays.
-
A word of caution regarding software that migrate your C drive... make sure you have the option to also copy over the drive partition id, or at least change it once you've copied it over. If the software doesn't do this, then expect to have to re-auth a bunch of your software, as it'll likely see it as a new machine. Personally, I use Clonezilla to clone the whole drive to a new one, then PartitionWizard to resize the partitions as necessary. Both apps are free, but for this to work your new drive will need to be at least as big, or bigger than the original.
-
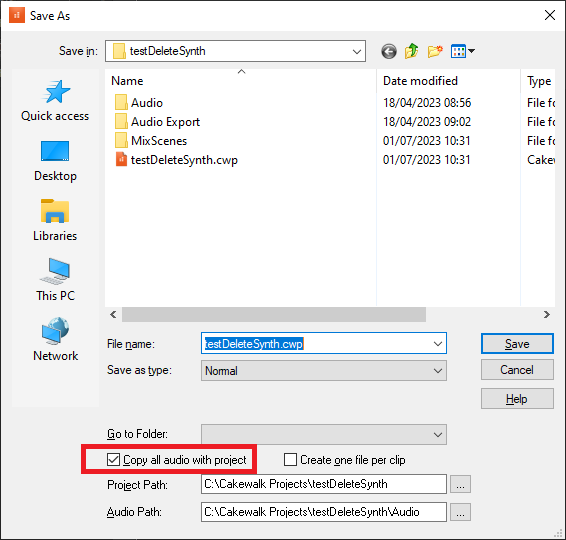
It's an option when you Save:
-
Please relocate "Arranger Sections" export parameter::.
msmcleod replied to MarianoGF's topic in Feedback Loop
As it stands, you pick "Arranger Sections" from the source category then choose which arranger sections you want to export in the sources area. You can easily do separate tracks / buses by using the selection fly-out, soloing the tracks/buses you want (or muting the ones you don't), and adding separate tasks for each one. With your suggestion, there would be no way to chose which arranger sections you wanted to export. -
It may also be that your articulation map isn't set up comprehensively. In more complicated VSTi's it can take more than one keyswitch to properly apply the articulation - e.g. it takes one key enter a particular "mode", then another to apply the correct articulation. In these cases it's important to ensure that each articulation sends all necessary notes to ensure it's entering any such mode before sending the articulation note - regardless of what mode it could be in beforehand, and optionally "ends" with exiting whatever mode it entered. If you play in the middle of an articulation, the current articulation should trigger. There's code to ensure this happens. Articulations are always sent out before the notes in each track, although some VSTi's require a small amount of time to actually do the switch.
-
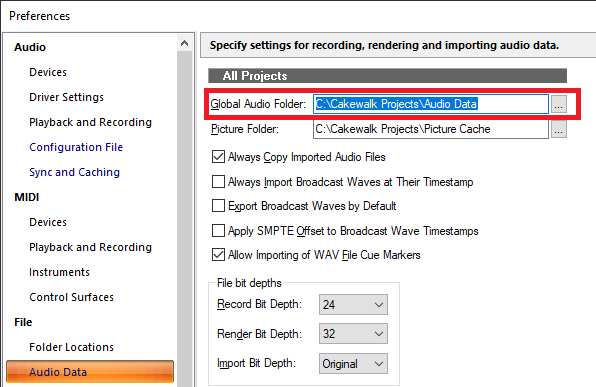
When you freeze tracks, the resultant audio file is written to either to the project audio folder, or your global audio folder - depending on your per-project audio setting in each project. If your projects are on already your D drive, then I suspect it's going to the default global audio folder on your C drive. You can specify a different directory in Preferences: However - it's important that you move all of the existing files in C:\Cakewalk Projects\Audio Data to your new audio folder. Otherwise, you'll get missing audio in your projects.
-
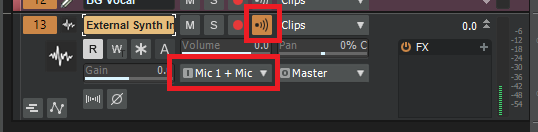
AFAIK, to record external synths in an export, all you need to do is: 1. Ensure both Audible Bounce and Live Input is checked in the audio export dialog: 2. Create an Audio track, with it's input set to whichever inputs your synth is connected to, and have it echo enabled, e.g.: If you find latency is an issue, then record the audio track first, and disable the input echo on export. This is what I did when I used hardware MIDI synths exclusively - I always recorded audio track versions of each synth before doing the export.

-
recording with Autotune and input monitoring
msmcleod replied to Jordi's topic in Cakewalk by BandLab
If you're also using your main audio interface as your Windows audio device, although it doesn't matter what bit depth Windows has your interface set to, most interfaces don't support different sample rates between Windows and ASIO. So it is important to make sure the Windows sample rate is set to your Cakewalk project sample rate. Also, although Cakewalk will attempt to set the sample rate of the interface to match your project, not all interfaces support this and will require opening the ASIO panel to change the settings. Of course all of this can be avoided by using your on-board sound device for Windows audio, and your audio interface exclusively in Cakewalk. If you need both to go through your speakers, get a Big Knob to easily switch between them...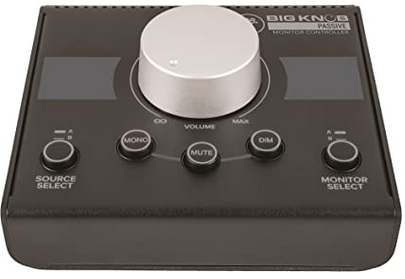
-
FWIW - I'm still using a 3rd gen i7 with the integrated graphics, and Cakewalk runs absolutely fine with it. In fact, the only apps that seem to struggle are NLE's, and that's only during export. Of course, most modern games are out the question too.
-
Windows 1803 -> 22H1: a procrastinator's tale
msmcleod replied to Colin Nicholls's topic in The Coffee House
I had a total nightmare upgrading from 1903 - six months of BSOD during the update, then it rolled back. Eventually, I found the cause: two drivers... 1. An old Korg driver ( I think it was the USB driver for the nanoKONTROL series) 2. An old Native Instruments ISO driver ( I think this was previously used in Windows 7 for mapping ISO files to fake drives for installing). Once I'd uninstalled these drivers, I successfully upgraded Windows 10. So basically, uninstall all unused / old drivers. You can do this from Device Manager - make sure you have "Show Hidden Devices" checked in the View menu. I found DriverView by NirSoft useful for getting a list of all drivers on the system, along with their location/filename. This way, I could rename/delete the underlying files too. -
Cakewalk tells Control Surfaces when tracks are armed, or the transport is recording. So, all you need to do is write a simple Control Surface DLL that listens out for that, and sends out the appropriate MIDI message to another device which relay. An Arduino should do it - and you can even set these up to look like a class compliant MIDI interface, but you can use the in-built serial ports, or a MIDI "hat" as well. If you don't want to write your own Control Surface DLL, @azslow3's AZController will do the job - I used it when testing some Arduino based hardware controllers I was building.
-
Set global reverb with wet/dry setting for each channel?
msmcleod replied to Louis Miles's topic in Instruments & Effects
Normally when sharing a reverb on audio tracks, the reverb is set to 100% wet and you have sends going from each track to control how wet you want each track. When working with multiple MIDI channels on a multi-timbral synth, reverb works in a similar way. The global reverb level is usually set to a high volume, and you then use the reverb send level of each MIDI channel to determine how much of a "wet" signal you want for that sound. If the the send level is high compared to the channel volume, it'll sound wetter; if the send level is low compared to the channel volume, it'll sound dryer. -
Aural Exciters and Enhancers attempt to add back high frequencies.
-
Dirty CTRL key perhaps? It is a key that is used a lot.
-
Personally, I'd set up a project template that matches the track setup you have - so basically, 20 tracks named and ordered in the same way you've got it set up on your Ui24R. When it comes time to import, just create a new project based on that template and drag the tracks into it.
-
Older Cakewalk/Sonar projects with new Sonar?
msmcleod replied to Codefreq's topic in Cakewalk by BandLab
A few years ago, I went through all my old projects and converted them to CbB projects. For years, I only used hardware synths/modules, so I used SampleRobot to create samples of all of my hardware instruments, and saved them in SoundFont format (I could have used Kontakt, but my SF2 player is much lighter on CPU). I've got a lot of modules, so it took a while to sample them all. On average, it took 24 hours per bank of 128 patches, preceded by an hour's prep choosing the options for each sound (i.e. length of the sample / is it looped or a one-shot / number of keys & velocity layers). Once the prep work was done, I just clicked go and let it do it's thing. I then went through all of the projects converting the MIDI tracks so Simple Instrument tracks using my SF2 player loaded with the appropriate sample. So not only have I got all of my projects in the latest Cakewalk format, I can play them on any of my PC's without needing the hardware modules - and of course I now have access to all of my hardware sounds on all of my PC's. The only downside is editing a patch, which means editing it on the hardware module and re-sampling (although the re-sampling for one patch only takes 10-15 mins). -
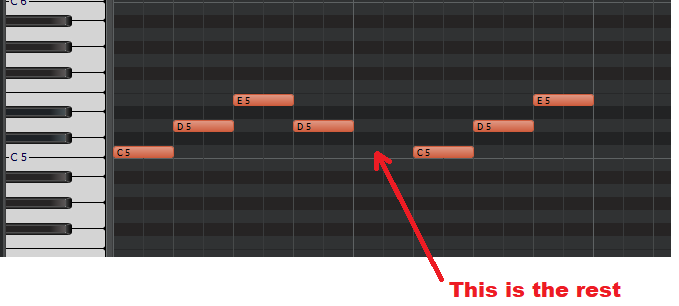
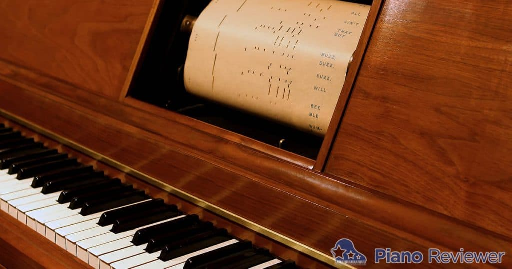
There's no need to "write" rests in the PRV. A rest is simply an absence of a note. Take the following phrase: This is how it looks like in the PRV: The PRV works in exactly the same way as an old Piano Roll Player piano does... ... i.e. it only has holes for where it has to play a note, and the length of the hole is how long the note is held down. It doesn't need to be told not to play one. Drawing a note in the PRV is the exact equivalent of the holes in a piano roll.

-
^^^^ This
-
I find Melda's MLoudnessAnalyzer more useful than MAnalyzer for LUFS, as it shows a summary of all the levels as well as the usual analyser window. AFAIK this is also in their free bundle.
-
Although you can set the metronome to play during playback, the count-in only works for recording. If you need a count-in during playback, the only way to do this is to shift your project along by a measure or two. You can do this by: Set the Now Time to the beginning of the project From the main menu, select Project->Insert Time/Measures Enter the number of measures you want to shift by, make sure all the check-boxes are checked, then press OK.


