
-
Posts
7,024 -
Joined
-
Last visited
-
Days Won
22
Everything posted by Starship Krupa
-

Favorite Freeware FX Thread
Starship Krupa replied to Starship Krupa's topic in Instruments & Effects
I, too, got Objeq Delay in that PluginBoutique giveaway. My advice: play with it. 😄 I know that MTurboDelay seems like it's the last delay anyone would need to buy, but Objeq Delay leverages the A|A|S physical modeling technology in unique ways. It's not just for demolition, of course, despite abacab's and my destructive tendencies. It's funny, A|A|S' plug-ins are some of my favorites (I have many soundpacks and all of the Sessions) but the only ones I've ever paid for were part of a Humble Bundle, so pennies on the dollar. I did do a service to the user community by sending them a detailed polite request email about their installers' behavior, spewing VST2's into every folder with the string "VST" in the name, 32-bit VST3's, AAX plug-ins, ad nauseum. And they've since cleaned up their act. I like to think my note helped inspire that. OB Freeware FX content: get on A|A|S mailing list. They often give out free soundpacks around the Winter holidays. -
Theme: Racing Green (updated for 2021.12)
Starship Krupa replied to Starship Krupa's topic in UI Themes
No, no, no, your critiques are most valuable. It's not possible for me to come up with a "public consumption" theme without feedback. Also, as I get better with Paint.NET, I can touch up things that were, at the time, the best I could come up with. Some of them are experiments anyway. And I can come up with a version for the public that is not the same as the one I use at home. Same with any creative pursuit, one can't please everyone with every aspect. Especially with all of the options and workflows available in Cakewalk. I had made it so that in one mode you couldn't even read clip names. And my poor clip fade lines, barely visible. I'll take another look at the EQ grids; it may have come from my tendency to want to use the same colors wherever possible, which....doesn't always scale. The goal being coherence and consistency. However, as it is said "a foolish consistency is the hobgoblin of small minds." It's a fine line, isn't it, between foolish....and....clever. As for the clip backgrounds, that's part of my idea to use Theme Editor to make the program more usable for myself (and maybe to others). To me, the high-contrast background says "active," while the other ones are "greyed out." I think it's appropriate for a "dark" theme. Tungsten's Clip Pane and Piano Roll have always looked to me like "Mercury with the brightness and contrast turned down." This comes out of frustration with Tungsten: why would unselected clips be higher contrast. I get that if you're used to Mercury-derived themes and having the brightest color be your "active," that setting the darkest color as "active" seems counterintuitive. This one's supposed to be "a dark theme done right" and it might take being a daily user of dark themes for it to make sense. There's a thing that I do where knowing which clips are active and which are not that is highly critical: acoustic drum editing and comping. I have 4 tracks of drums, each take grouped. If I mess up because one or more of the clips wasn't selected (which can happen even with grouped clips), it can louse things up pretty badly. Since I darkened the active clip backgrounds (and went with higher contrast grid lines), I feel more confident about which clips are in what state, and I'm able to concentrate better and work faster, stay in the flow. I guess if there were demand I could do a "vintage" version with Tungstenesque clip backgrounds, but I have no idea whether anyone but me is using my themes. One kid on Facebook said he was using EVA 01 (probably an anime fan). That's the extent of my known user base😂. -
Favorite Freeware FX Thread
Starship Krupa replied to Starship Krupa's topic in Instruments & Effects
I hear ya about the "MB" thing. I understand its potential, but in practice, I've not been able to make use of it, no matter how many video tutorials I watch. LOL MModernCompressor! The first non FreeFX plug-in I bought, and the one that gets the least love from either the users or Meldaproduction. I rode that thing like a rented mule until I figured out the advantage it has that none of their others do: front-facing access to multiple detector modes, including my favorite, psychoacoustic. I have MSpectralDynamicsle, which lacks the noise sampling feature, and I want that. Fortunately, Vojtech has mentioned that he would like to add that to the LE version. Per the actual topic here, ReaFir, is a pretty amazing surgical tool (and FREE). You can sample a section of audio and then apply reduction to that spectrum, also gate or compress individual frequencies or ranges by drawing your own freehand curves. I use it to clean up camcorder audio. Oh yes I have. I'm a drummer and I like to loop my own playing and then destroy it. The first plug-in I did this with was MComb, which is one of the hidden monsters in the Free bundle. Play to a click, then sync MComb to the tempo and it's hectically Reznoresque. I have almost all of the Glitchmachines and Unfiltered Audio processors and love to tempo sync drum processing. I also like to do the ambient soundscape thing, I have all 3 of the Freakshow Industries (also free if you know the trick, but I chose to pay for them) processors. This reminds me.... -
MeldaProduction MIndependence Week - 60% off on all plugin bundles
Starship Krupa replied to cclarry's topic in Deals
At least you all got to use referral codes! After popping $25 for someone else's FreeFX upgrade, I bought my first plug-in directly from Meldaproduction before I knew about referral codes. I had my 10 credits from the newsletter. It was a half-off sale, so I got it for $15. (It was what I suspect may be the lowest-selling and least-used product in their line, MModernCompressor 😆. But I rode that thing like a rented mule until I figured out some tricks it can do. If you want quick access to a variety of detector types, there's nothing better. It's the only plug-in where they're all front-facing. I'm especially a fan of the "psychoacoustic" detector on vocals) -
Favorite Freeware FX Thread
Starship Krupa replied to Starship Krupa's topic in Instruments & Effects
I can't think of another one that is as comprehensive and useful. I got MSpectralDelay as a loyalty gift from Meldaproduction when it first came out, and while it sure seems like it can do a lot, I've yet to get my head around what it does. Is it like a Glitchmachines or Freakshow Industries effect where you're not supposed to be entirely in control of it? Throw it on, start twisting the knobs and see what happens? It has similar controls to Unfiltered Audio Fault. or maybe SpecOps, but while I can get pretty quick results with those, it's not so for MSpectralDelay. It's the one I point to when I make the case that Meldaproduction's documentation (and sometimes ad copy) is not informative enough. Vojtech's standard retort is that it's not his job to explain how a compressor works, but I contend that it might be part of his job to explain what a "spectral delay" does. Just a simple "try it on X material with X settings while adjusting parameters Y and Z" would be so welcome. My head can only get so far imagining what something is capable of, with stuff that goes that far off the beaten path, I need more guidance. -
MeldaProduction MIndependence Week - 60% off on all plugin bundles
Starship Krupa replied to cclarry's topic in Deals
This. I had no idea, during the last 60% off sale I happened to scroll down and saw that the MEssentialFX bundle would cost me a whopping €17, and I had 13 credits in the account. So I posted about the free bundle upgrade, with my referral code, and sat back until enough rolled in. And BTW, for the "when will they fix that fugly UI" crowd, here's what's coming up in v. 15: The answer is: now, although I myself actually prefer flat and functional.

-
Favorite Freeware FX Thread
Starship Krupa replied to Starship Krupa's topic in Instruments & Effects
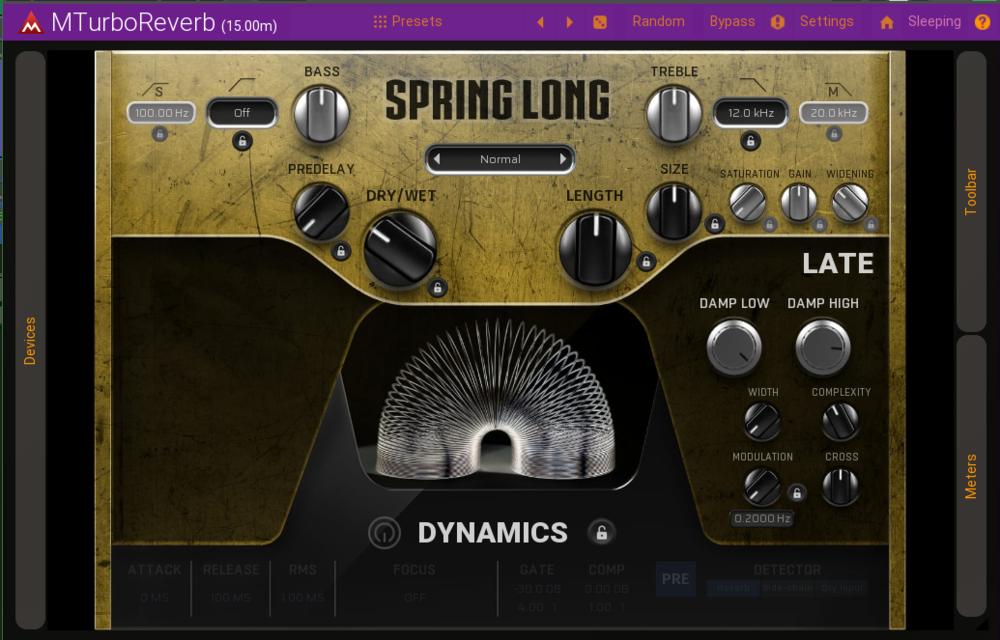
It's a successful business model, that loss-leader. It's one of the things I really respect about the way Vojtech runs the business. Some of those 37 plug-ins are the best I've seen in their categories. MComb is a favorite, MAutopan, MPhaser as well. MAnalyzer is, IMO, better than the Voxengo SPAN that is so popular (and rightly so). I use MStereoscope on my drum overhead bus on every single project that has drums. The test tone and noise generators, where else can you find those? The newest one, MTuner, isn't just a polyphonic tuner, it's a pitch-to-MIDI converter. He added a tap tempo to MMetronome after I asked in the forum. All of these can be used in their free versions. I had my great compression breakthrough with the stock version of MCompressor, which still has my favorite visual display of how the compressor is set and what it's doing to the sound. My friend showed me the 3dB/3dB recipe for beginners: to make a vocal "pop," set a sharp knee compressor at 4:1 so that it's reducing gain an average of 3dB. Then use a parametric EQ to sweep for the "honk" frequency, and cut that by 3dB. Highpass it around 200Hz, and suddenly I could crank my lead vocal without having it sound like a school auditorium PA. I use them whenever I'm teaching someone how to use basic processors. Give me the FreeFX bundle and I'll happily mix anything that was reasonably well-recorded. Suggestion: spend a little time going through the available styles. The stock one is a "light" style that I don't care for. They're skinnable like Cakewalk is. Here's my MCompressor with some tweaking of the color scheme: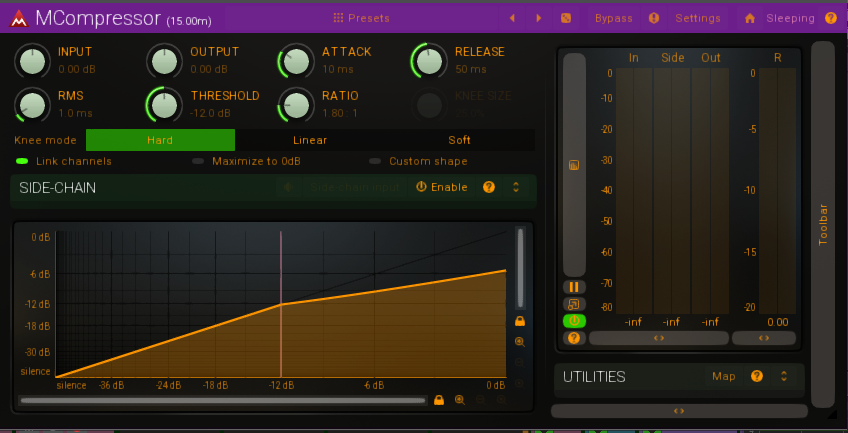
-
Maybe Erik Gets All. Most of what really piques my interest these days (since acquiring the Meldaproduction MEssentialsFX bundle) is things that go sclerch in the night. So whenever these come around, it's another nutso Unfiltered Audio effect (or two) for my collection. Of course, I already have BYOME, where they kind of give away the store in one plug-in....no matter, collect 'em all, it's more Jell-O to throw at the wall when I want to prime the pump.
-
Favorite Freeware FX Thread
Starship Krupa replied to Starship Krupa's topic in Instruments & Effects
I know this is not free, but for any free fx hound who has been using (or hasn't been using) the Meldaproduction MFreeFX Bundle, they are running one of their 60% off all bundles promotions, which includes the upgrade to the FreeFX Bundle. The last time Meldaproduction ran this promo I gifted two friends with this upgrade and the price came to $7 with the first-timer benefits. This how you do it: sign up for the newsletter, which gives you €10 credits. Then at checkout, apply a referral code (ask here and someone will probably drop you theirs, as they will benefit) to take 20% off the price. Apply your €10, and it brings the cost down around $7. For this you add some really nice features (access to the Preset Exchange and Styles are worth the small amount, but you also get access to their deeper features as well). This applies to any of their bundles, of course, but I figure first-timers are more likely to be doing the FreeFX upgrade. The Sonitus FX that come with Cakewalk sound good, but their UI's are tiny and looking kinda dated (they also can't be used in other DAW's due to being DXi). These are good replacements. 37 plug-ins for $7 is the best deal I can think of. (Also, for existing users, go to your My Licenses page and check out what your personal bundle prices are. You might be as surprised as I was to see how much you can get for little money) -
MeldaProduction MIndependence Week - 60% off on all plugin bundles
Starship Krupa replied to cclarry's topic in Deals
For any first time buyers, be sure to sign up for the newsletter and get your 10 euros credit. With the 20% referral credit (Brian beat me to it, so I'll let him collect the points😊), it brings the cost of the Free-to-Full upgrade down around $7. -
I see how they haven't made it out of the gate. They all look well-loved, though!
-
Most definitely. iZotope advertise that their plug-ins are compatible with Cakewalk by BandLab, so they need to know.
-
I just tried it with a mix of synth and simple instrument tracks and it worked a treat. I hadn't realized that Quick Groups worked from the Inspector as well. Neat. Maybe you're selecting a MIDI track along with your synth/instrument tracks? MIDI tracks can't be routed to audio buses. Only things that put out audio can be routed to audio buses. Conceptual thing you might not know: there are two kinds of instrument tracks you can have in Cakewalk. One is the "Instrument" or "Simple Instrument" track, which contains both MIDI and audio data. The output of these can be routed to buses. The other type is the Split Instrument, which is a set of separate MIDI and Synth tracks where the MIDI track is already routed to the Synth. Only the output of the Synth track from these can be routed to audio buses. BTW, someone else may have mentioned it, but posting in all caps is forum convention for YELLING. Use it sparingly, if at all. 😊
-
Wow, thanks for this elegant solution. Using a free plug-in is fine with me. If I understand the concept, the secondary tracks could also be Simple Instrument Tracks, which seems to be the best option. Control over automation and FX, less screen clutter. Drat, I'm having trouble getting them to show up in Cakewalk.... Nemmind, I see that they are instruments rather than FX. Cool.
-
Indeed. Static images, too. Don't have to include them all, but there are a couple, like the Clip Fade Line I mentioned, and maybe the Browser background and its scroll bar. Most of them are acceptable leaving them as dark chocolate, but that darn Clip Fade Line seriously harshes my buzz as someone who likes dark themes.
-
I saw this "bug" too after I turned off View/Display/Display Muted Clips in Parent Track and Display Ghosted Data. It still gets me from time to time, I'll kit "K" with the lanes closed and yikes, there goes my clip. Well, my parent/comp clip anyway, the actual clip is still in the lane when I open it up. So: do you possibly have these turned off?
-
Allow adding audio effects on track folder
Starship Krupa replied to Arka Banerjee's topic in Feedback Loop
In Mixcraft, my previous main DAW, folder=submix bus, and they are infinitely nestable. What this means is that in the Track View, they appear as folders, and in the Mixer View, all of those folder/buses appear as mixer strips. It's great for people like the OP who are used to mixing in the Track View. Although it might seem limiting in some ways, they also have conventional send buses that aren't folders if you want to do it that way. For things like reverb. A note to the OP regarding Cakewalk, if you still want to mix in the Track View, it is possible to show buses in Track View by clicking on the arrow at the lower right of the Track Headers pane. I'd suggest, however, getting used to switching around to the different Views in Cakewalk, especially if you can work with two monitors. The Console View and Piano View can both sit in the Multidock, which can then be floated to a second screen, and the individual Views can be dragged out of the Multidock to have individual windows for every View. It's the slickest and most flexible multi-monitor interface I've seen. -
If you have ambitions to do Control Bar Modules, and wish to go "full bleed" with a border or whatever, there are pixels that will get cut off if you use the entire image size. Specifically, there are 2 pixels along the top, 3 at the right, and 3 at the bottom. Here's an example of modules I had to adjust to account for this. Note that my borders could be no wider than 2 pixels due to interference from the buttons, although if you don't mind shaving a pixel or 2 from your buttons, going wider is possible: Here's the background for the Custom Module, blown up a bit, with pink in the dead zone: I hope that this will save time and heartache.


-
Theme: Racing Green (updated for 2021.12)
Starship Krupa replied to Starship Krupa's topic in UI Themes
Sure, you are a light theme guy. I see what you mean with Maximize waveform height, the clip names are not visible, duh. Well do I ever appreciate your telling me. It's one of those things, y'haveta go 'round and try it in modes other than what yer usedta. The difference between a good personal theme and one fit for release into the wild. (I don't drink, so I didn't notice the Speights issue) Okaaaay, let's see. All right, then. See how ye like this: Updated For Greater Track Name Legibility (color set also updated for greater visibility of measure lines) -
documentation Young Lady's Illustrated Primer to Theming Cakewalk
Starship Krupa replied to Colin Nicholls's topic in UI Themes
I'm also a "Lock Module Order and" man, and I think it only works when you're using one of those two modes. When not locked, or just locked and not centered or justified, it uses the default dark chocolate background. -
Theme: Racing Green (updated for 2021.12)
Starship Krupa replied to Starship Krupa's topic in UI Themes
@Colin Nicholls: one thing I'm curious to get your opinion on is what I did with my default clip backgrounds and headers. There's a section in YLIP about clip backgrounds; it's more oriented toward light clip backgrounds, but (in service to the dark .sth) what I'm trying to do is make it so that the clip(s) I'm working on stand out as darker, hence more contrast with and focus on the waveform. I've also made the selected clip header a brighter shade of green. The one thing holding me back is that the fade curve line on selected clips is always none more black, so I can't go as dark as I would like. I like the way the unfocused clips look in Mercury. Tungsten shares that, and makes the selected clip a "duller" version of the unselected state. This has always caused me confusion when working in Tungsten (and Tungstenesque themes). It's not intuitive, in a light theme like Mercury, going to a bright white background from a very dark one is exactly what should happen, it makes it easy to distinguish them. Tungsten just has various shades of blah to distinguish muted, selected, etc. The state that's most eye-catching is unmuted/unselected. My goal was (is) to make a dark theme that would have similar distinctions. So aside from your taste in light vs. dark, whaddaya think? -
Console View background now white, not usual dark gray.
Starship Krupa replied to Tom B's topic in UI Themes
See also the "random folder stats gradient" oddity that you and I have tried to hammer out. This one sounds more predictable, at least as far as what triggers it. It's funny, these issues seem to fix themselves over time. Maybe Cakewalk needs to get triggered to load a particular theme element before it completely settles down. -
It may not seem like much, but for me, this is pretty huge. I tried it out last night on a drum idea I had and was just ripping through my beat creation process. This, along with the persistent note names, really makes drum composition more friendly. Another hallelujah. The first time I tried recording drums with the new port naming, it took about half as long as it used to to set up the inputs, and once I did, I felt more confident that I was safely getting my performance down. For someone who is recording themselves, the stress reduction comes out in the music!
-
Trippy. I guess I've never started a theme from Mercury; I like darker themes so I usually start with Tungsten and go from there. So the bug is that no matter what changes you make, after the first save, Console Background #2 turns white? There are a few changes I would love to see in themeing in general, mostly elimination of fixed colors (as in can't be changed via Theme Editor or custom colors). The worst one I've run into is that no matter how you set it, the Clip Fade Line appears in black in selected clips. That makes it so you can't make your selected clip backgrounds completely black, as I would like to be able to do.