msmcleod
-
Posts
7,214 -
Joined
-
Last visited
-
Days Won
39
Everything posted by msmcleod
-
Click this button:
-
What I tend to do with Melodyne clips is copy the original track, archive it, then hide it. This means I can commit my Melodyne edits knowing I can always go back to the original if need be. I'll be honest though - I've never needed to.
-
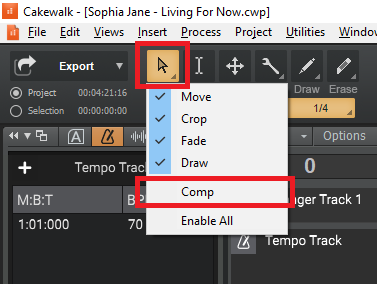
As @David Baay says, you can limit the editing behaviour of the smart tool. You can disable the comping behaviour of the smart tool by right clicking on the smart tool button and unchecking "Comp":
-
The stretch methods used are chosen in preferences: There are a number of reasons why stuttering could occur, but it's important to understand the difference between "Online Render" and "Offline Render". When you stretch clips in the clips view and play them back it's using the "Online Render" which is designed to be quick, but not for quality. The idea is that you can quickly get it to the length you need, and then commit the changes using the "Offline Render" method - which is slower, but much higher quality. "Bounce to Clip(s)" will commit the stretch using the Offline Render method. Of course, you could just make the Online method the same as the Offline, but this means all of your edits will be much slower.

-

CHANGE BPM OF A PROJECT - HOW TO PUT WAV FILES IN THE SAME BPM
msmcleod replied to Milton Sica's question in Q&A
You can try the different stretch algorithms to find out which one is best. However, stuttering may be down to transients in the wrong place. Switching the track filter to transients will allow you to check/edit them. -
CHANGE BPM OF A PROJECT - HOW TO PUT WAV FILES IN THE SAME BPM
msmcleod replied to Milton Sica's question in Q&A
This is how to do it: 1. Select the Tracks/Clips you want affected by tempo 2. Open the Clip Inspector, and go to the Groove Clip section 3. Enable "Stretch to Tempo", ensuring the Original Tempo matches your project tempo 4. Change your project tempo, and the clips with "Stretch to Tempo" enabled will follow the project tempo This will however try to preserve pitch. If you want to change it from 110 bpm to 121 bpm, then stretch it as you did originally using CTRL + SHIFT + drag, but by 90.9% - i.e. ( 100 / 121 ) * 110 -
While I can definitely see the advantage of this, it's really up to those VST/Kontakt Library developers to either not abuse modulation/expression for other things and/or implement Zero All Controllers better - i.e. if they know that Modulation is volume, then don't set it to zero when a zero all controllers message is received. Zero All Controllers is really a misnomer in some respects, as what it really means is "Reset all controllers to default". The default for volume is usually 100, and the default for expression is usually 127. Most MIDI devices/VST's set these values for volume & expression, and set everything else to zero. In addition, Bank Select MSB ( CC#0) and Bank Select LSB (CC#32) are usually excluded, as these are really just extensions to Program Change. The default for Modulation (CC#1) is 0 - however if a VST is using CC#1 for something else, they should reset it to a more sensible value. There's no way to exclude controllers from a zero-all-controllers message, as it's a single message. The only way to exclude a message, is to send a individual CC message for all other controllers... so instead of one message, you'd be sending 126 of them - on every channel, and to every device. This will be slow to say the least.
-
Cakewalk Bundle Files (cwb) remove transient information from your audio files to keep the size down. This transient information is always calculated at the time you create your audio clip - but it can be edited using Audio Snap, which is why Audio Snap is mentioned in the warning message. The only way to not get that message is not to use cwb files and use cwp files instead. You can always zip up the project directory into a single file for backup in any case. Whilst cwb files can seem convenient, they're not without risk... Firstly, you're putting your entire project into one file. If that file gets corrupted, you've lost your project. Having the files separately in a directory will give you a fighting chance of recovering your work should any corruption arise. Secondly, some cloud storage apps try to be clever when determining file types. CWB files store the WAV file data first, so other applications can actually play the file. I've seen some cloud apps strip all of the rest of project information out of the CWB (thinking it's just a WAV file) and leaving just the first track's WAV file when downloading it. In saying that, I've normally only seen this behaviour when using a browser interface, as opposed to a cloud-app, but it's something to be aware of.
-
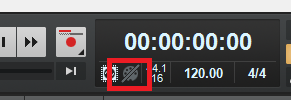
1. Stuck notes in general When starting with MIDI, the #1 reason for stuck notes is down to sustain pedal events (CC #64). For most instruments a sustain pedal event is either on or off - so a CC#64 of either over 64, or in some cases over zero will mean "sustain on" and a CC#64 value of zero will mean "sustain off". A non-zero CC#64 value is sent when the pedal is down, and a CC#64 value of zero is sent when the pedal goes back up. Even if a note off event is sent, if the synth hasn't received CC#64 value is still not zero, then the notes will continue to play until a CC#64 event is received. For piano, the sound just decays slowly, but for an organ sound or synth pad sound, it'll keep on playing - this is really useful BTW when you're playing live with multiple keyboards and need to switch both hands from one keyboard to another! So if you stop playback before CC#64 goes back to zero (or a "Reset All Controllers" message), you'll get stuck notes. You can get around this by: a. Having Cakewalk send "All Notes Off" / "Reset All Controllers" on playback stop; or b. Clicking the "Reset MIDI and Audio" button next to the transport module: c. Pressing and releasing the sustain pedal if the stuck notes are on the active track 2. VST's receiving All Notes Off The delay in playback is completely dependent on (a) how the VST handles All Notes Off messages, and (b) how many of those VST's you have in the project. The All Notes Message is a channel message, which means to silence a synth, which means it needs to be sent on all 16 MIDI channels per VST. If you've got 100 VST's, then that's 1600 messages... and each message is 2 bytes long. A lot of VST's simply ignore the All Notes Off message. Some VST's / VSTi's deal with the message quickly, by just stopping everything. If the VST isn't multi-timbral, or always listens in MIDI Omni mode, it can do this. Some VSTi's however deal with it in a slow way by internally sending a note off on all 128 notes, on all 16 channels - so 2048 internal MIDI messages per instance of that VST.... and MIDI note off messages are 3 bytes long. What makes this worse is if the VST processes this on the UI thread, as it will literally block everything else until it's done handling the messages. Only then can it go on to the next VST. Although this might be only a fraction of a second, multiplied by 100's of instances, it can add up to a few seconds.
-
Korg Nano Kontrol 1 as Mod Wheel in Cake
msmcleod replied to Steve Patrick's topic in Cakewalk by BandLab
CC#0 is bank select MSB CC#1 is mod wheel -
Narrow strip supports quick-grouping, and quick-grouping only applies to tracks OR buses (depending on which has focus), so... 1. Click on a track 2. CTRL + A to select all tracks 3. Keep holding down CTRL, and select "Narrow Strip" for one of the tracks This will make the tracks narrow, whilst keeping the buses wide.
-
In my experience three things can cause a delay in playback: 1. Lookahead plugins - any plugin that has to look ahead will cause a delay in playback, as it has to effectively start playing for the lookahead before the audio is actually heard. Linear Phase EQ's are the most common culprits. 2. The "Always Open All Devices" and "Allow Arm Changes During Playback/Record" settings "Always Open All Devices" causes all audio devices to be initialized when the engine is started/restarted. Checking this will make arming a track almost instantaneous, but at the price of doing all the work up front any time the engine restarts. You can mitigate this to some extent by disabling any audio inputs/outputs you're not using. Alternatively, just uncheck it and accept there will be up to around a second's delay when you arm a track. "Allow Arm Changes During Playback/Record" will set up recording buffers for all tracks at the start of playback, so that arming a track during playback is instantaneous. Depending on the number of tracks, this can take time. 3. "Suspend Audio Engine When Cakewalk is Not in Focus" - this will stop the audio engine when you tab away from Cakewalk, and restart it when Cakewalk regains focus. This can be especially slow if "Always Open All Devices" is checked.
-
Just to be devil's advocate... The assumption here is that the plugin you skip is actually the problem plugin. It could actually be a previous plugin that causes the issue (e.g. it could corrupt memory), and then CbB crashes on loading the next one. By forcing you to accept them one by one, it allows you to narrow things down to the point at which the crash occurs. In saying that, I generally agree that a nicer interface would be better and in most cases being able to ignore all plugins of a certain type would certainly speed things up. There are only so many hours in the day though....
-
^^^^ This
-
If you could only have "ONE PLUGIN" which one?
msmcleod replied to whoisp's topic in The Coffee House
I guess I'd be cheating if I chose Melda Production's MXXX ? But in truth, if I had access to all of Cakewalk's stock-plugins - actually even if I was just restricted to the ProChannel modules - my one 3rd party plugin would be Kazrog's TrueIron. For me, nothing comes closer to getting that "I recorded this analog" sound. -
I regularly run this after doing a Windows update: 1. Win Key + X, then press A to enter Windows Powershell in Admin mode 2. Execute the following: sfc /scannow This will check the integrity of all of your system files, and repair them if need be.
-
I've not tried the 01v96 v2, but I do use the older Yamaha 01X with Cakewalk (and also SONAR Platinum) and it works fine with both. The biggest issue I had with the Yamaha 01X was getting the drivers to work (and also finding a compatible firewire card). This was a real headache. Once the drivers were working however, it worked fine in every DAW I tried - including Cakewalk. So as long as the drivers for the 01v96 work with your current operating system, it should work fine in Cakewalk. I would add however... the 01v96 v2 is very old now, and if it is still supported it's likely it won't be for too much longer. Also the preamps / converters, whilst pretty clean, are also old and not as good as more modern ones. If you can, you might want to consider a more modern unit.
-
Sonar 8.5 Producer: Is This File Broken?
msmcleod replied to Annabelle's topic in Cakewalk by BandLab
File recovery programs do the best they can. They can usually identify where the blocks of a file were on your hard drive and rebuild the file. If you're lucky, the file will come back intact but there's always the danger that something else has written data to that part of the disk. For text files this means you may get back at least some useable information, but for binary files like .cwp files the file will be useless. -
You've just not got your selection after split settings set up right. This is easy to do either using "TAB" and "S" key, or simply by using ALT + Click to split:
-
Multitrack export mixes the sound of the other outputs.
msmcleod replied to grando yoshi's topic in Cakewalk by BandLab
It's hard to tell what is going on without seeing the routing of your project, how you've got OPUS set up, and what export options you're using. Does OPUS support more than one "bank" of MIDI inputs? AFAIK you need to use VST3 to use more than 16 MIDI channels, and only if the VSTi itself supports it. VST2 will only ever support 16 MIDI channels. Although the easiest solution would be to limit OPUS to 16 MIDI channels, and create a new instance of OPUS to give you another 16, Cakewalk should support multiple banks of 16 MIDI channels in a VST3 VSTi if the VSTi itself supports it. If you can PM @Jonathan Sasor your project, we can take a look and see if we can work out what is going on. Please include steps to reproduce the issue, including exactly which options you're using to export - a screenshot of the Export Audio dialog with all the sections expanded should suffice. -
FWIW The last time I had this issue, it was down to the custom Kensington mouse drivers I'd installed. Once I'd uninstalled those, and Windows was using its own internal mouse driver, everything was working fine. Cakewalk wasn't the only application that had strange behaviour... IIRC it seemed to be older MFC based applications that were most affected. If you do have 3rd party mouse drivers installed, you may find they aren't fully Windows 11 compatible. Try uninstalling them and see if it helps.
-
Sounds like you may have a plugin somewhere that has gone into demo mode? Check all of the plugins in your project are authorized.
-
Track Templates ( not all tracks visible) & User Menu Plugins
msmcleod replied to Александр Кулаев's topic in Feedback Loop
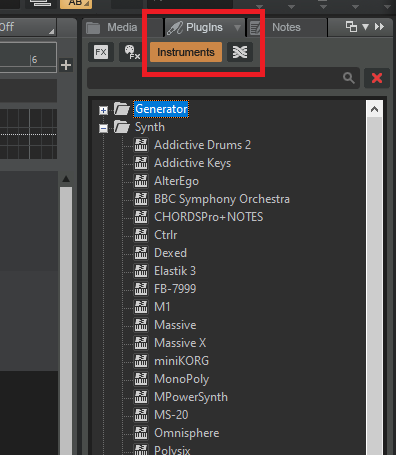
The track template menu is a standard Microsoft menu, which unfortunately has a limit to the number of entries. While we have gone some way to fix this for plugins, it still remains an issue for templates. As a workaround, you can use the Media Browser, with the filter set to "Track Templates" and just drag the template into the project: I'd recommend doing the same for synths / audio fx: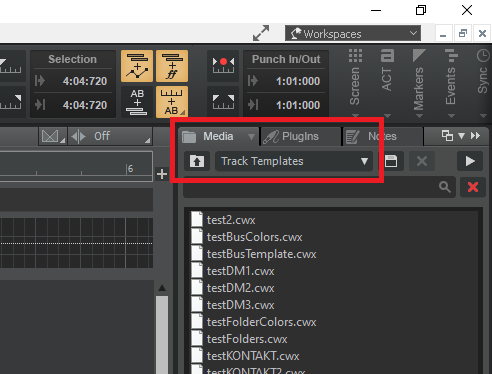
- 1 reply
-
- 2
-

-

-
Recording Cakewalk with Screenpresso - Error msg
msmcleod replied to Sven's topic in Cakewalk by BandLab
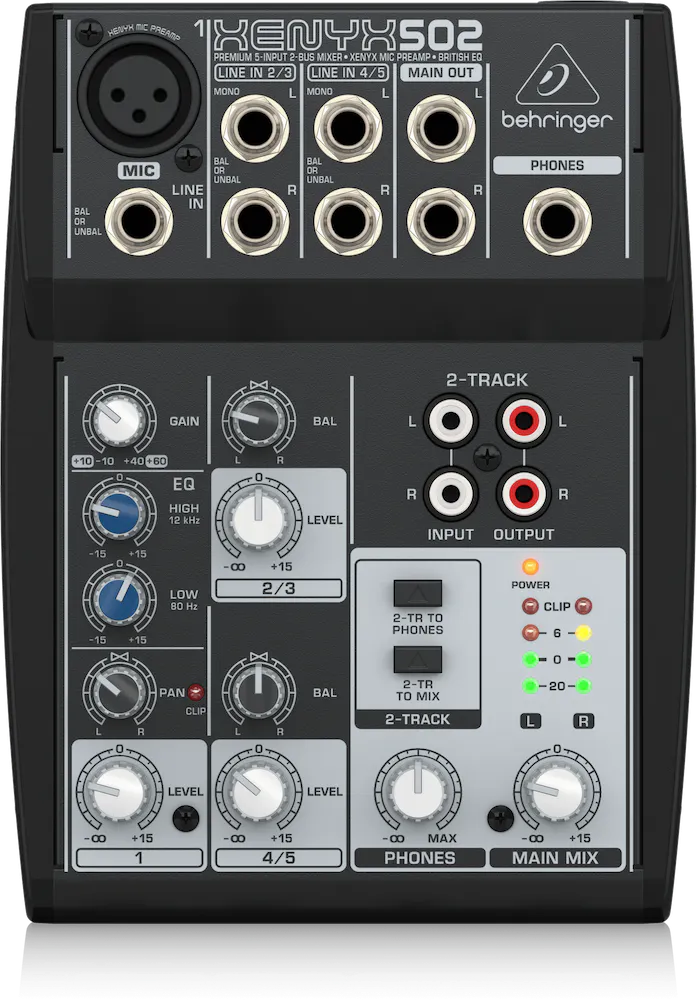
Yeah, I'd change it back to ASIO for normal use. There's no difference in sound quality, but the latency is much higher when using WASAPI Shared. BTW - this is the mixer I use for screen capturing with Cakewalk running: https://www.thomann.de/gb/the_t_mix_mix_502.htm It looks like this is actually cheaper than the Behringer and has the benefit of having phantom power. -
Recording Cakewalk with Screenpresso - Error msg
msmcleod replied to Sven's topic in Cakewalk by BandLab
If you're doing screen recording, the easiest way is to set Cakewalk to use WASAPI Shared. That way all applications can share the audio device. You also want to make sure that "Suspend Audio Engine When Cakewalk Is Not in Focus" is unchecked. Both of these can be set within Preferences->Audio->Playback and Recording. Personally however, I find it easier to use a small hardware mixer and set the screen recording software to use the internal sound card. Something like this is ideal to capture the output of my audio interface and a microphone, and route it back to my on-board audio device: The one I have is similar to this, but it also has phantom power for the mic.