Leaderboard


Popular Content
Showing content with the highest reputation since 11/21/2025 in all areas
-
You'll find Modules Manager in C:\Program Files\IK Multimedia\T-RackS 6. Run it and you'll likely be delighted to see what it does. Background/tl/dr: I had read the blurb about T-RackS 6 before I Bumble Hundled it that mentioned that they had added the ability to only install the modules you own (or wish to install). The spamming of unowned modules is a longtime complaint about T-RackS. By default, they dump every module in the line into your VST3 folder, which causes them to show up in your hosts' plug-in lists with no indication as to whether you own licenses for them or not. So two types of clutter, both hard drive and visual. In the past I solved this by creating a "bullpen" folder where I would move unowned modules until such time as I acquired licenses for them. I expected this ability to be part of the installer or built into IK Product Manager, but it's not. Weeks later I was doing some cleaning work on my C drive and poked around in IK Multimedia's programs folder. That's when I discovered Modules Manager. Modules Manager allows you to see what licenses you own and choose to only install those modules. IK seem to be still into the idea that you (or they) want to dump the unlicensed modules onto your system, and some of the design of this tool reflects that. So you need to be careful when using it. When you first run it, select "Show All" in the left column. Then you can look over on the right and see the ones you own and the ones that are only available as trials. Toggle the button as appropriate for each one. Then click "Apply Changes" down at the bottom. This will remove unwanted modules. What to watch out for is that the next time you run it you may get a message about how your installation doesn't match your preferences. Do NOT click yes to this dialog. If you do, it will reinstall all of the modules you previously excluded. It's a useful tool, you just have to keep an eye on it.19 points
-
16 points
-
KV331 is giving away Synthmaster ONE for free until 4th Jan. https://www.synthmaster.com/synthmasterone.aspx?referrer=youtube&campaign=wintersale2025&couponcode=YOUTUBE15 points
-
Giveaway - iZotope Insight 2 https://www.pluginboutique.com/product/2-Effects/25-Spectral-Analysis/16306-Insight-2-2025-Freebie (valid until Dec 31)15 points
-
Dawesome: SOL - FREE Textural Ambient Reverb https://www.dawesomemusic.com/hues/sol14 points
-
"Black Friday Freebie Pick Your Plug-In It’s on us! Grab a free UAD plug-in from our curated list and start creating right away. Yours free, Black Friday through Cyber Monday only." Code: BFPICK1FREE https://www.uaudio.com/products/pick-one-free-plug-in14 points
-
https://www.uaudio.com/products/pick-one-free-plug-in discount code: HOLIDAYFREEBIE A list to chose: Teletronix LA-2A Tube Compressor (Promotional) UAD Showtime '64 Tube Amp (Promotional) UA 1176 Classic FET Compressor (Promotional) Galaxy Tape Echo (Promotional) PolyMAX Synth (Promotional) Pultec Passive EQ Collection (Promotional) Verve Analog Machines Essentials (Promotional) Century Tube Channel Strip (Promotional) Oxide Tape Recorder (Promotional) Pure Plate Reverb (Promotional)12 points
-
https://www.native-instruments.com/en/products/komplete/expansions/massive-x-expansions/ I believe it works with the Free Massive X Player as well.11 points
-
Hi there Developer replying here: yes, it IS true We are doing this because we need to reach a much wider audience to survive. Please spread the news to help us! Happy holidays everyone! Bulent11 points
-
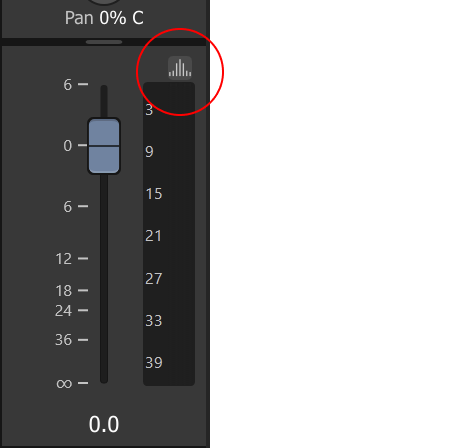
We're excited to have you preview some new features before they go into production - please check out these headliners slated for our next release: Signal Probe Theme Editor Download links 2025.12 Early Access: Download full installer 2025.11 Stable Release (rollback): Download full Installer Membership required Please note that Signal Probe and Theme Editor are available only through BandLab Membership. Signal Probe Signal Probe is a specialized diagnostic tool designed for real-time analysis of audio signals in Cakewalk Sonar, allowing you to analyze signals before or after processing by any track, bus, or plugin. Signal Prove provides three analysis visualizations: Spectrum Analyzer Phase Scope Level Meters Usage Note: Signal Probe is not a plugin. You can access it as follows: For plugins: Click the new "analysis"on any plugin's toolbar. For tracks: Click on the new "analysis" button located on console strips, just above the meter. Toggle the PRE/POST/BOTH switch to instantly compare the signal entering the plugin versus the signal exiting it. Note that you can choose from any combination of analysis modules (spectrum analyzer, phase meter, level meters) to inspect the signal at the tap point, using the Pre, Post, or Both (visualize pre and post signals overlaid). Accessing Signal Probe from the plugin toolbar: Accessing Signal Probe from the console strip: Accessing Signal Probe from the Pro Channel: Note: For plugins, multiple signal probe windows may be opened. For tracks or buses, only a single probe window may be open at a time which is contextual to the track/bus. Signal probe for instruments only allows Post monitoring since there is no input. Color Theme Editor Theme Editor is designed to streamline the color editing process by providing control over the application's entire color theme by adjusting a few core palette colors. Sweeping color changes can be made with just a few adjustments to a small set of core palette colors. To access Theme Editor, go to Preferences > Colors and click Edit. This action will hide the Preferences dialog and display the Theme Editor. When you close the Theme Editor, the Preferences dialog will automatically return. Membership Required The Theme Editor will be available to users with BandLab Membership. Things You Can Try Checkout the included color schemes - they will appear slightly different from those in the current production build, but they should also look better (barring a handful of known color assignment issues we're still working on). Create and save your own custom color schemes. Be on the lookout for UI elements that don't update as you expect, or become hard to see due to low color contrast. DISCLAIMERS The color theming system is nearing complete, but we're still wrapping up loose ends. The default themes included with this release should be considered experimental and will change before the final release. Please be aware or the following: Theme Editor UI is subject to change before we roll it into a stable release. Theme persistence may break during the course of feature preview, but don't worry - themes are very easy to recreate. The feature is not finished and may contain incomplete functionality. Known Issues Some UI elements don't follow theme colors as expected, especially using light-colored themes. Theme Editor Undo and Redo operations are limited in range and may yield unexpected results. 1080p displays may not render some colors properly. Please leave feedback if you using a 1080p display and observe unexpected color rendering. Editor Layout The editor is divided into two main sections: Palette and Overrides. Currently, the core palette is derived from the Dark Theme (our only available base theme in this build). 1. Theme Palette (Core Colors) This section contains the 10 fundamental colors that dictate the entire application's aesthetic. Adjusting one of these colors will propagate across most of the UI. The colors are arranged in five vertical pairs, representing the background and foreground colors for key hierarchical surfaces: Surface 1: Primary application surface, including app title bar, main menu, and overall application background. Surface 2: Primary framing elements, including main structural borders, menus, and top-level toolbars. Surface 3: Secondary toolbar controls and general panels. Surface 4: Tertiary panel displays and view content (e.g., project data display areas). Accent: A highlight color used to draw attention to important information, alerts, or selected items. 2. Overrides This section allows you to adjust specific component color IDs (e.g. Control Bar Background). If you adjust an Override color, you are deliberately deviating from the core palette color normally assigned to it, allowing for granular control. Color Swatch Interactions Click: Opens a Color Editor for precise adjustments. Sonar’s UI will update in real-time. Double-click: Highlight the corollary UI in the application, helping you locate the affected components. Copy/Paste: Color values can be copied from one swatch and pasted onto another. Swap: Exchange color assignments between foreground and background colors. Reset: A small reset button (circular arrow icon) appears when a swatch's value deviates. Clicking it restores the original color. Menu Operations New, Open..., Save, Save As...: Standard file management User themes are saved to %AppData%\Cakewalk\Sonar\Themes Revert: Resets ALL custom color adjustments (Palette and Overrides) back to their original Dark theme defaults. Options: Only one option thus far, Show button backgrounds, toggles the visual state of buttons in the application UI.

 10 points
 -
🎁 A gift from AAS… (Check your emails Annual free Sound Pack!) It’s the holiday season and we would like to take a moment to thank you for using our products. For the occasion, we would like to offer you a gift and let you choose a title from our Sound Pack Series for free. To choose and download your sound pack, simply visit the following page in your account and click on the Get Your Gift button at the top of the page. https://www.applied-acoustics.com/portal/gift/10 points
-
12 Days. 6 Free Effects. We’ve got some gifts for you between December 8 and 19! These creative tools aren’t available for individual sale, and each is available for two days only. This is our year-end thank you to all the creators who make noise and keep us inspired. To kick it all off, your first gift is: Little PrimalTap GET IT FOR FREE Available thru December 9 at 11:59 PM EST (New York) only at soundtoys.com10 points
-
It’s been a while since our last update, but rest assured, we’ve been busy preparing a big end-of-year push across our product lines and can’t wait to serve up this batch of tasty updates! Read on for a recap of recent updates and a preview of what’s on deck. Cakewalk Sonar 2025.11 Release: Cakewalk Assist The Sonar 2025.11 release is live, headlined by Cakewalk Assist, a unified command palette designed for maximum speed and productivity. Assist instantly puts the entire DAW at your fingertips, eliminating workflow friction. With Cakewalk Assist, you can: Instantly execute any command Jump directly to any view Quickly adjust common settings — such as metronome behavior, and snap to grid preferences — without navigating the Preferences view Directly access any help topic Upcoming: December Release & Assist Roadmap We’re wrapping up final details on the December release, which will introduce two crucial new utilities: A signal analysis feature that provides multiple visualizations of your audio for precise analysis. A new color theming feature allows you to customize your workspace color palette. Watch for an Early Access invitation in the coming weeks! We’re also bringing Cakewalk Assist over to Next. This is just the beginning - expect more capabilities as Assist expands its assistive expertise in 2026. Cakewalk Next Maintenance & Performance ICYMI, a recent maintenance release delivered crucial performance boosts under the hood, significantly reducing UI rendering overhead, making the UI feel snappier and more responsive across the board. Coming Soon: Piano Roll Overhaul We are most excited about major updates to MIDI editing. This release will bring improved tools, streamlined editing, and sweeping under-the-hood improvements to deliver a world-class workflow focused on speed and precision in the Piano Roll view. Watch for an Early Access invitation soon! Plugins TH-U Cakewalk Edition Last month, in collaboration with our friends at Overloud, we released TH-U Cakewalk Edition. This powerful new addition includes: Updated photorealistic gear panels New multi-line routing capabilities MIDI-controllable Polyphonic Transpose Stereo Doubler and integrated Jensen Speakers™ libraries Upcoming: Core Suite and Linear Phase Look for updates to the Core plugin suite and the (re)introduction of Cakewalk’s Linear Phase series, starring LP MB and LP EQ. Together, these plugins support professional-quality production from tracking through mastering. We look forward to sharing more exciting news about our 2026 plugin roadmap in the new year! We'll be back before the end of the month with another update! Best regards, The Bakers10 points
-
10 points
-
https://promixacademy.com/course/mixing-pop-rock-in-the-box/ use code TURKEYDAY at checkout10 points
-
The only difference between a Simple Instrument Track and a Split Instrument Track is that the Simple Instrument track is shown as one track in the UI. A Simple Instrument Track is in fact still two tracks, it's just that in the Track View, the header part shows the audio track, and the clips view shows the midi track. The reason they're called "Simple" instrument tracks, is that they're generally created with a stereo only output, and the MIDI track part is sent to the synth on all MIDI channels. That, and the fact they only use up one track space in the UI. Up until the introduction of Per-Output Instrument Tracks, using split instrument tracks was the only way to properly leverage multi-timbral synths. Now you can use either for multi-timbral synths - it's really down to preference, and whatever you're used to in your workflow. As a rule, we try our best not to introduce anything that would require users to change their existing workflow - and obviously there's the backwards compatibility thing with older projects, so both options still exist. FYI: Per-output instrument tracks are really just Simple Instrument Tracks where: 1. The synth is set to have more then one stereo output 2. The audio track is set to receive audio from the synth on a specific audio output 3. The MIDI track is set to output on a specific MIDI channel. ... and those audio output channels / MIDI output channels are incremented each time you "append" a new per-output track for that synth.9 points
-
Plugin boutique: Soundiron Elvish Choir for $3.50 - Cheapest item to get weekly giveaways for free at PiB The gifts you can currently choose from are: Lunacy Time IK Multimedia MixBox Universal Audio UAD Galaxy Tape Echo Native Instruments Massive Excite Audio Bloom Vocal Edit Lite https://www.pluginboutique.com/product/1-Instruments/55-Kontakt-Instrument/7213-Elvish-Choir9 points
-
Tape Double Track https://www.airmusictech.com/effects/tape-double-track/ AIR Amp Sim https://www.airmusictech.com/truefire-offer/9 points
-
https://venustheory.gumroad.com/l/vtlichen9 points
-
Melda MBitFunMB (Free with code - limited time) Use: WRUBF25 https://www.meldaproduction.com/MBitFunMB9 points
-
Run MPluginManager to download beta. https://www.meldaproduction.com/ElectricKeysTines8 points
-
https://www.arturia.com/products/software-instruments/pigments/overview Free update. V 7.0.0 New Features Play View Revamp: Focused on sound visualization, playing the sound and quick editing it Rage Filter: Original filter integrating a distortion within its feedback loop achieving unique raw aggressive sounds Ripple Filter: Combining successive Allpass filters at the same frequency, it creates intense phase shifts to achieve new timbre, ringing or laser sounds Reverb Filter: A reverb that is so short that it mostly induces timbre modification rather than time modification, great for metallic textured sounds Corroder Effect: Using audio rate short delay modulation, this effect applies controlled degradation without removing the core of the dry signal New Content 15 User Centric Sound Design Tutorials 150 Factory Presets 50 Wavetables 30 Samples 20 Noises Improvements Audio Improvements Sharper Amplitude Envelope for better precision Added FM Input on the Classic Filter GUI Improvements Light Theme Rework providing better contrast for accessibility requirements Reworked The "Quick Edit Blue" color in Light Theme Improved Modulations visibility in Light Theme UX CPU improvements - Modulation handling, MultiCore in On by default, Default granular state improvements Quick Edit modulation V3 : displaying the modulation range on the target parameters Audio device selection is now automatically tracking your current OS setting unless you specifically choose a manual device Store Audio preview for each soundbank Bugfixes Sequencer Page : Missing Tooltip for the Swing parameter has been restored FX: Visualizer is now correctly updated when Delay and Feedback parameters are modulated (Flanger BL20/Flanger/Chorus/Chorus Jun6) FX: The default loaded preset is now consistent with the Default preset in the preset menu Theme: No more crashes when switching between Dark and Light Interface Themes Display: Fixed the screen offset text when the Macros field is empty Wavetable: The 2D visualizer now displays the correct waveform, even when morphing is off Engine: Modulations now correctly re-trigger the polyphonic Gate Audio: Removed oscillator clicks on the Wavetable on attack phase Audio: Eliminated "zipper" noise on the Harmonic Engine's Output Volume Analog Lab V also updated. V 5.12.2 New Features Pigments 7 compatibility Instruments with Quick Edit modulation V3 : displaying the modulation range on the target parameters Audio device selection is now automatically tracking your current OS setting unless you specifically choose a manual device Audio Preview for each soundbank in the Store Bugfixes & Improvements Generic 9 Knobs controller now working as expected Fixed a crash in Logic when undo-redo track insertion with an Astrolab connected Refined Onboarding mechanics Various visual feedback improvements when using Arturia's controllers AstroLab Important: Please ensure to first update Analog Lab to this version before updating your AstroLab8 points
-
https://www.overloud.com/products/thu#air8 points
-
sonible smart:comp 3 $74.76 with code GROUP https://www.jrrshop.com/sonible-smart-comp.html Sonible smart:comp 3 Upgrade $24.36 with code GROUP https://www.jrrshop.com/sonible-smart-comp-upgrade.html8 points
-
LANDR - Get your free plugins - LANDR FX Voice, Electric, Beats and Bass (Limited Time Free) Get your free plugins Get studio-ready sound in seconds with the LANDR FX Voice, Electric, Beats and Bass — a full collection of creative plugins, free for a limited time during LANDR’s 12 Days of Free Plugins. Offer valid Dec 4 – 15. Sign-up to get your free plugins https://www.landr.com/giveaways8 points
-
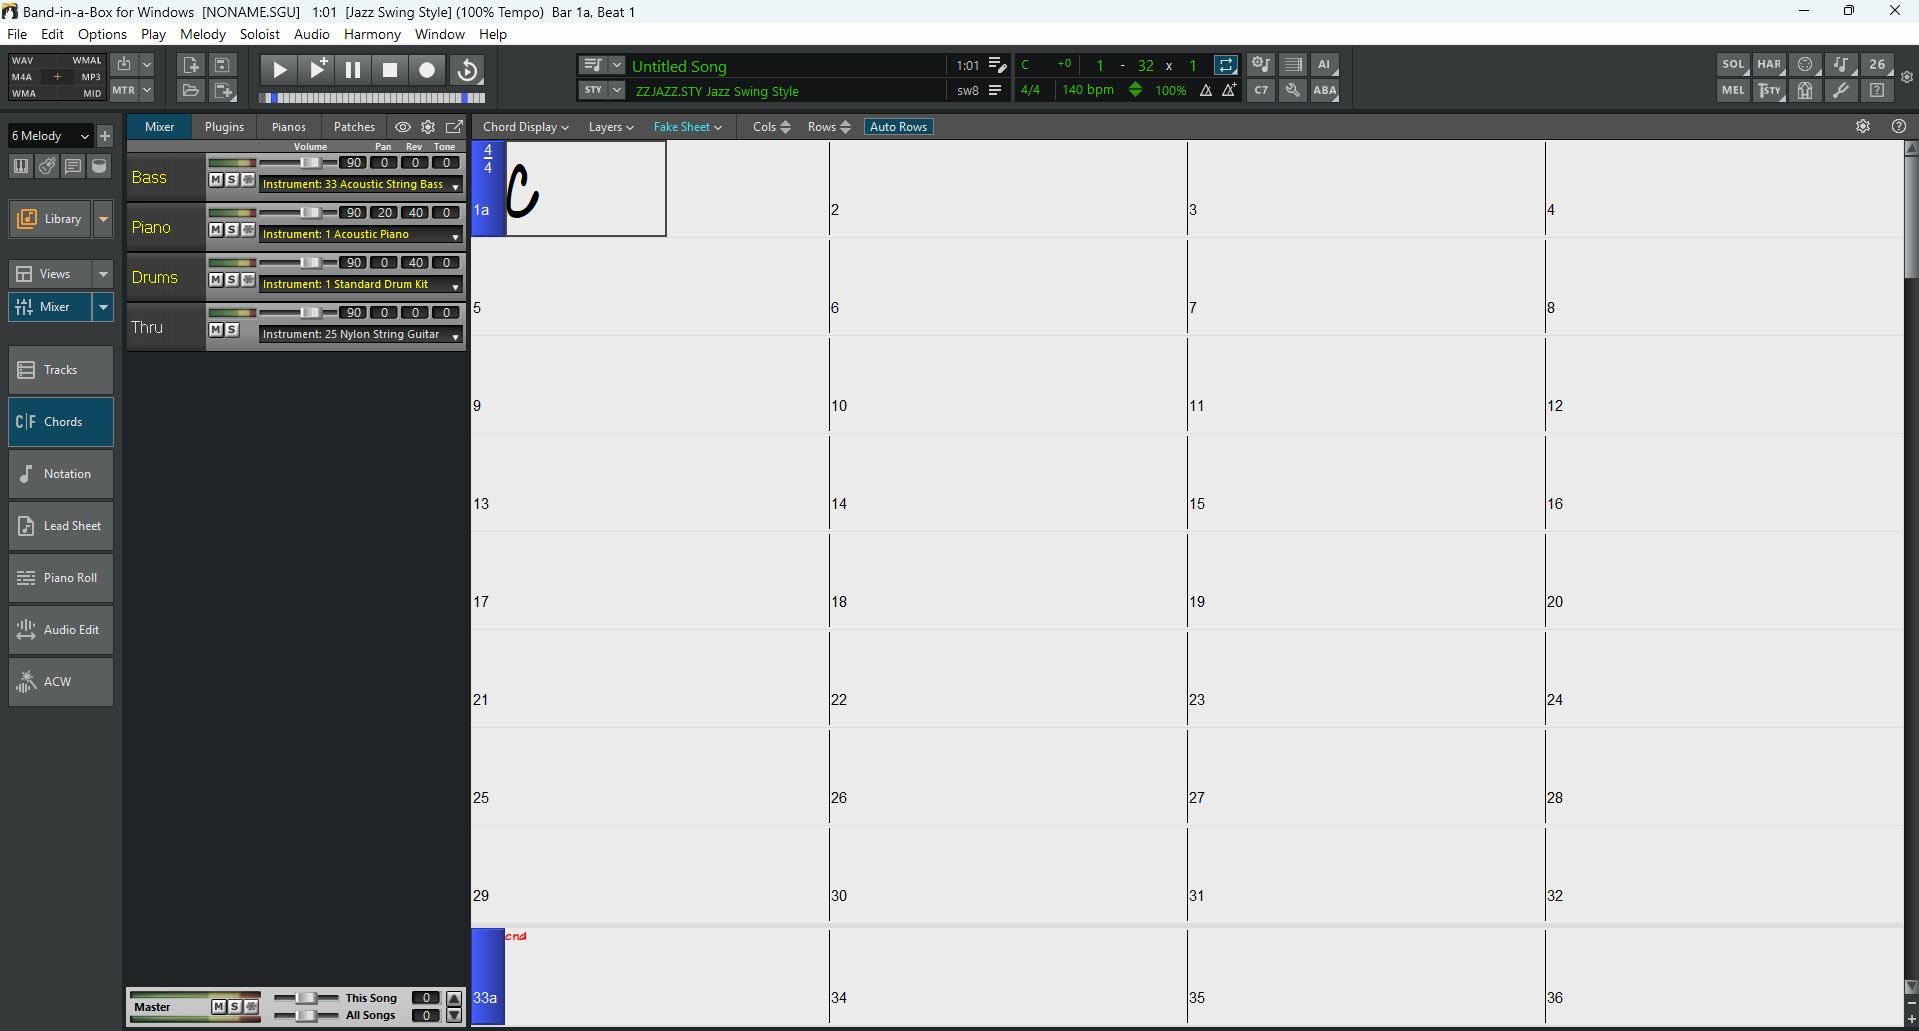
Sale prices until December 31, 2025 The Band-in-a-Box (BiaB) GUI interface has been redesigned. An Artificial Intelligence (AI) Notes feature can transcribe polyphonic audio to MIDI for viewing in notation or played as MIDI. BiaB for Android is new for 2026. Realband's audio engine is updated. The BiaB VST/AAX DAW plugin has been updated. Bunches of new Styles, RealTracks, MIDI SuperTracks, MIDI Styles, Instrumental Studies, Artist Performances, RealDrum Stems and Playable RealTracks. Here is a link to the "Features and Content" webpage: https://www.pgmusic.com/bbwin.htm Here is a link to the "Packages" webpage: https://www.pgmusic.com/bbwin.packages.htm Notes: PG Music includes a 2024 BiaB version for 32 bit operating systems. A $49 "program only" special is available until the end-of-the-year if you have 2025 BiaB, don't care about the additional content and want to update BiaB, RealBand and the plugin. Band-in-a-Box doesn't look like Band-in-a-Box anymore.
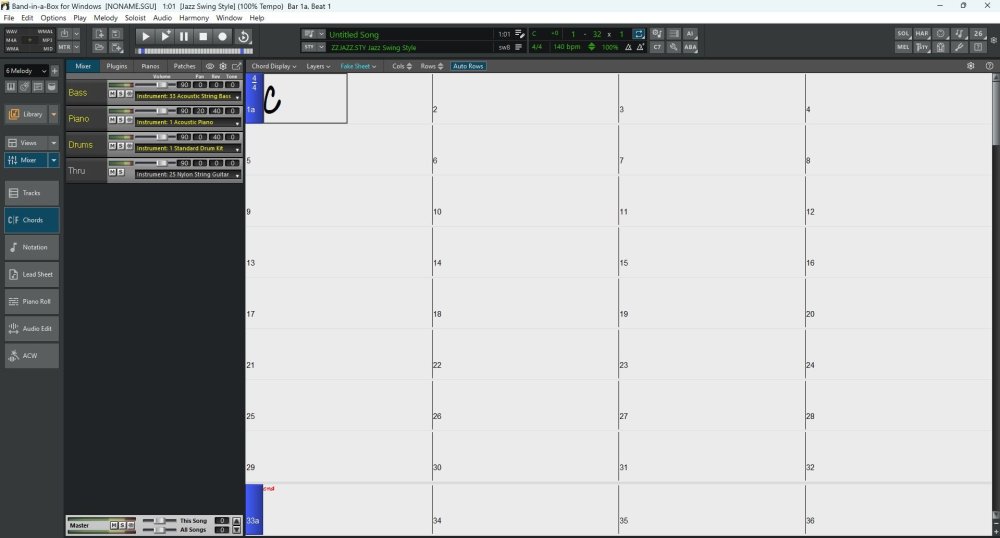 8 points
 -
Free with any purchase: EastWest Voices of Passion or UVI Model D Extra 10% Off with Code BFCM10 | Some Exclusions Apply Ends Dec 5 https://audiodeluxe.com/8 points
-
For just 2 weeks, the FREE $211 BLACK FRIDAY BUNDLE will be offered 100% FREE! This exclusive freebie is available to new and old Audio Plugin Deals customers. This offer ends on Dec 4, 2025 https://audioplugin.deals/product/free-211-black-friday-bundle/8 points
-
Warhammer: Vermintide 2 (Free Limited Time) Get Warhammer: Vermintide 2 Free to keep when you get it before 24 Nov @ 2:00am. Some limitations apply. (?) https://store.steampowered.com/app/552500/Warhammer_Vermintide_2/8 points
-
Code - holidays-25 20 more years until I own Metropolis Ark I What are you guys planning to get? Happy Holidays guys.7 points
-
Some Applied Acoustic System synths have been updated. Some Applied Acoustic System synths were updated to versions than what the website states exists. I just downloaded the installer file for all off my products from my Applied Acoustic System user page (I used the single installer for all). Here is a list of the synths I own licences for and what versions they were updated to. Chromaphone 3 v3.2.0 Lounge Lizard EP-4 v4.4.4 Lounge Lizard EP-5 v5.1.1 String Studio VS-3 v3.3.0 Strum GS-2 v2.4.4 Ultra Analog VA-3 v3.3.0 Objeq Delay v1.3.4 I am not sure about CV-1, CV-2, CV-3 You can download the installer file for all off your products from here: (Of course, logon is required) https://www.applied-acoustics.com/portal/products/7 points
-
Hi all - please use this topic to post feedback specific to the Sonar 2025.11 release. Release-specific feedback is valuable to us, and consolidating it in a single topic is extremely helpful. We request that discussion in this thread be restricted to issues directly concerning this release, to make it easier for us to assist users. For other topics, kindly use the feature request section or create new posts. Off topic messages will be deleted. Thanks in advance!7 points
-
Hello to all my Sonar/CW friends! Circumstances have taken most of my personal internet time this past year, but I had to give up something to keep my musical hobbies alive. Being a caregiver is a 24/7 job though I'm happy to have this opportunity to do so. I still have managed to create some music, and this production will be one of my last done in Sonar so I want to share this with all of you who have helped and taught me so much over the last 12 years or so. I wouldn't have gotten this far without you. This song is called "Créme de la Créme" and is about the sunrise and sunset of a relationship (I've had a few). It can be found here: I look forward to hearing from you, and all comments and critiques are welcome, as nothing is set in stone. Lynn7 points
-
Sign up at Plugin Boom today and get the Thenatan BLUR plugin — FREE. https://pluginboom.com/7 points
-
I'm over it now, more or less. I never stopped trying little amounts now and then until I got over it. April to December.7 points
-
I had 17 updates listed: The vast majority of these have the following change in their Release Notes: ## ADDED NICNT file for optimized Native Access experience. With a couple of other updates for specific plugins: Form V 1.1.2 Changes Missing content after updating from 1.0.1. Mikro Prism V1.1.0 NKS compatibility Reaktor Factory Selection R2 V1.0.1 Browser previews for Komplete Kontrol and Maschine Also Kontour and Razor have no Release Notes available.
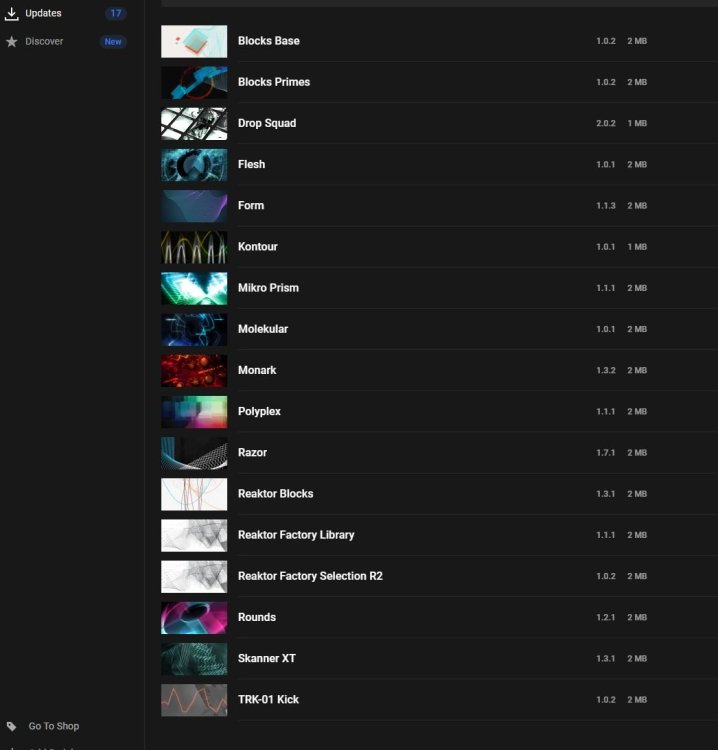 7 points
 -
$39, updated to version 1.5.0 - NEW: Real-time spectrum analyzer for visual frequency feedback - NEW: UI scaling support - choose from 100% to 200% to match your display and workflow preferences - NEW: Refreshed visual design with improved clarity and modern aesthetics - IMPROVED: Enhanced Preset Voyager with cleaner, more vibrant preset visualization - ADD: 50 new presets including some by Venus Theory7 points
-
Excite Audio: Evolve Elastic Lite - Free with code Free with code: MusicRadarElastic https://www.pluginboutique.com/product/1-Instruments/64-Virtual-Instruments/16352-Evolve-Elastic-Lite7 points
-
their earlier giveaways still work. Air Channel Strip https://www.airmusictech.com/summer-offer/ Air Stutter https://www.airmusictech.com/black-octopus-offer/ Air Transient Shaper https://www.airmusictech.com/transient-offer/ update: added 2 more AIR Vintage Filter https://www.airmusictech.com/skio-offer/ AIR Flavor https://www.airmusictech.com/pluginb-offer/7 points
-
2025.11 has now been formally released. Thanks for your participation with Early Access!7 points
-
2025.11 Release Notes Build 31.11.0.068 This build introduces the new Cakewalk Assist feature and includes numerous stability, performance, and workflow improvements. New Feature: Cakewalk Assist Stop diving into menus. Cakewalk Assist is your new unified command palette, designed for speed and productivity. Assist instantly puts the entire DAW at your fingertips, accelerating feature discovery and eliminating workflow friction. Core functionality Instant Command Execution: Type any command (e.g., "Insert Audio Track," "Group Tracks into Folder") and run it instantly, without touching the menu bar. Quick Navigation: Search and jump directly to any setting, preference screen, or view. Unified Discovery: Find application commands, settings, views, and help documentation simultaneously from one place. How to use it Access it anytime by pressing: Ctrl + / Note: This shortcut is reassignable in Preferences > Keyboard Shortcuts Start typing something you want to do, e.g., a command: "Bounce" or a view "Matrix"... A list of associated commands, settings, views and help topics will appear - select the one you want You may discover new features or find your workflow has accelerated 10x. Assist's core capabilities are included in the Free Tier to ensure everyone gets a boost. We hope you use it often - let us know what works for you and what improvements you'd like to see! Plugin Updates TH-U Cakewalk Edition Redesigned, photorealistic amp and effects UI New multi-line sound chain routing MIDI-controllable Polyphonic Transpose Stereo Doubler effect for wide, double-tracked tones. Integrated official Jensen Speakers™ libraries Core Plugins Bug fixes and performance improvements Performance & Stability Fixes This update resolves several issues that could cause instability or sluggish performance, ensuring a smoother user experience. ASIO Hang Fix: Resolved an issue where Sonar could hang indefinitely if the ASIO driver was in use by another application at a different sample rate. Project Save Issue: Fixed a rare bug where saving certain projects could fail with a "Cannot write file - disk may be full" error. Clip Editing Performance: Optimized performance to prevent sluggishness during slip editing when playback is underway. Lasso Selection Performance: Resolved an issue where lasso selection could be sluggish while playback was running. System Idle Crash: Implemented a fix to prevent Sonar crashes during system idle or power state changes by properly suspending and resuming hardware and control surfaces. Crash Fix: Resolved a crash that occurred when clicking between tabs in the Start Screen. Workflow & Bug Fixes Plugin Parameters: Fix issue in which Sonar could potentially send invalid parameter values leading to plugin instability Arranger Track Sync: Fixed an issue where the Arrangement Loop Enable/Disable command was not correctly updating the Arranger Inspector UI. Undo History: Fixed an incorrect Undo History entry; executing a Tempo Offset operation now shows as 'Offset Tempo Map' instead of 'Commit Arrangement.' Audio File Location: Added the "Open File Location" option to the context menu for Associated Audio Files. Double-clicking a file in this view also opens the file location in Windows Explorer. Articulation Fix: Resolved a critical issue where Articulations could be deleted when using the Transform tool in the Piano Roll View (PRV). FX Rack DPI: Resolved an issue where the initial FX Rack window size was incorrect, particularly on high-DPI scaled displays. Loop Browser Drag & Drop: Fixed issues where the mouse cursor would flicker when dragging BandLab sounds and prevented dragging past time zero.7 points
-
https://www.proaudiostar.com/arturia-v-collection-x-software-instrument-bundle-software-download-code.html7 points
-
Please note the EA build has been updated to 31.11.0.065. Please be sure to grab the latest version. Thanks!7 points
-
https://store.dreamtonics.com/ This sale is on until 1st December... 25% off all voice upgrades 20% off Synthesizer SV Studio 2 Pro & Single SV Voices 15% off Bundle purchases 30% off Vocoflex They also have two new English voices (Etta and Danny)... and two new Chinese Operatic voices, Lang Chuan (baritone) and Yun Hua (mezzo-soprano), which also do English well according to one review I read...7 points
-
Opinions are like A##holes, everyone has one, thinks they're entitled to proclaim it to the masses, and most of them stink thanks to YT. As an over-educated and practicing Electrical Engineer for over 40 years, I'll state these facts, which obviously only apply to the accurately emulated analog modeling algorithms, most of which one has to pay real money for: Beyond the EQ curve or compression ratio are factors that are captured from the analog circuitry that are meant to emulate things like Intermodulation distortion, Total Harmonic distortion, slew rate, hysteresis, and transformer ringing, among other stuff that gives a distinct difference (to well trained ears) between, for example, a Dbx 160x and a genuine Teletronix LA2. They actually sound different if done correctly as a plug-in, as they do in the hardware version. Does the "average" wannabe musician/recordist/content creator know the difference? No. Therefore, it matters to a very slim minority of modern engineers.7 points
-
UGRITONE: DARK DECEMBER: Use Voucher DEC25 for $25 Discount (No Minimum Spend - Free Plugins, MIDI or IRs) Can get amp sims, reverb, IRs, or MIDIs for free with code DEC25 or a $25 discount for anything more expensive. Examples of free options: https://ugritone.com/products/ampenstein-daim100 https://ugritone.com/products/trve-cab-ir-loader https://ugritone.com/products/fourverb https://ugritone.com/products/usa-thrash-metal-ir-pack https://ugritone.com/products/black-metal-anthology-midi-pack https://ugritone.com/collections/all-products?page=1&sort_by=price-ascending6 points
-
A new original song. Playing my Yamaha flute and guitar, jazz bass, Fishman midi guitar for keys, Ezdrummer3.6 points
-
Now it's EchoBoy Jr. plug-in.6 points
-
https://valhalladsp.com/shop/reverb/valhalla-supermassive/6 points
-
Exclusively free with your purchase this week, you can claim your free copy of Lunacy Time, IK Multimedia MixBox, Native Instruments Massive or Excite Audio Bloom Vocal Edit Lite at the checkout with any eligible purchase. https://www.pluginboutique.com/articles/20736 points