


Nigel Mackay
-
Posts
924 -
Joined
-
Last visited
Everything posted by Nigel Mackay
-

Integration between BandLab and Cakewalk - getting a Codec error when trying to load stems
Nigel Mackay replied to jason's question in Q&A
Cakewalk uses whatever codecs Windows has. The problem is probably damaged/zero-lenght files when downloaded by Bnadlab Assistant, as @scook says. -
Questions about using/installing Cakewalk go in Q&A. Questions about instruments and effects go in Instruments and Effects. So this was the correct place for your question. ?
-
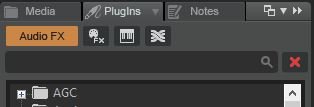
When you installed it you must have selected VST, whether or not you installed the standalone version. It should be in a folder that is already in Cakewalk's scan path list. If Cakewalk isn't set for auto scanning, you will have to scan manually: Edit -> Preferences -> File -> VST Settings -> Scan Options -> Scan Then: Top-right corner Click on PlugIns and select Sort by Manufacturer Click on the little keyboard Click on the plus sign next to Native Instruments Drag and drop Kontakt onto the left pane In the dialog select MIDI Source and First Audio Output Click on the icon as seen in track 2 here. (It will say Kontakt, not SI-Bass Guitar) In Kontakt select an instrument from the left pane You can preview the sound by clicking on the keyboard at the bottom of Kontakt

-
Some plug-ins seem to lie to Cakewalk about the number of outputs.
-
Spitfire BBC Symphony Orchestra Discover
Nigel Mackay replied to Colin Nicholls's topic in Instruments & Effects
It seems not. -
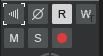
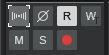
Not with a simple instrument track. With a split track, in Inspector or Console, the audio track has this: Mono: Stereo:
-
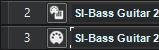
See the little icon next to the track number. Sort of looks like a keyboard. That is a simple instrument track. The track can contain MIDI data, MIDI automation, audio automation, audio data. In this example track 2 is the instrument-audio, track 3 is the MIDI data. MIDI track icon is a DIN connector, used to connect MIDI devices to each other. Instrument-audio icon is a tiny DIN connector next to the keyboard icon, showing that MIDI data is fed to the instrument. They each have the relevant data and automation. If it is a simple instrument track you enter the MIDI notes into it. And monitor/process the audio on it. In the 2nd example you enter the MIDI notes onto the MIDI track and monitor/process the audio on the instrument-audio track.

-
Not multi-timbral, you need an instance (copy) for each instrument. For each instrument: When you add the instrument, in the dialog, select Simple Instrument Track. (This has MIDI data and the audio in one track, all set up and routed correctly for you.) After adding, select the instrument and articulation (style of playing) you want. Then rename the track the same as the instrument. While getting started, if you want clarinet Sustain Vibrato and Staccato add 2 instances, one of each. When you are happy getting things going you can learn about switching articulations.
-
Spitfire BBC Symphony Orchestra Discover
Nigel Mackay replied to Colin Nicholls's topic in Instruments & Effects
1) Nobody said it was multi-timbral. Very little is. 2) I would have a look, but with my PC, if I shut down I have to remove all traces of Spitfire and start from scratch. Includes LABS. 3) Ditto. -
Thanks. You have 2 audio outputs selected. I suspect that audio is being routed through the one that has no speakers attached. You have FaceRig listed as an option, RealTek Digital, RealTek Speakers, and 2 CABLE options. Where are your speakers actually connected? Select only that option. If plugged into the headphone jack, select RealTek Speakers. Also, until your projects get resource heavy, change Playback and Recording - Driver Mode to WASAPI Shared. That way you will still get Windows notifications and the like. Now give it another test for sound output. If not lucky: Start a new project, selecting the Basic template. Arm the MIDI track for recording - the red circle button. On the control bar, next to the time display, above the symbol of a metronome are the Metronome During Playback and Metronome During Record buttons. Enable Metronme During Record. Press Record, the button with the red dot in the transport controls. You should hear the metronome. (It can be quite soft depending on your volume settings.) If you don't hear the metronome, give us a screenshot of Inspector. Views -> Inspector. Also, press d tom open the Console view, press Shift-d to make it full-screen. Give us screenshots of the 2 faders on the left and the 3 faders on the right. If you can't see the faders on the right (Master, Metronome and Preview) in the screenshot below, click and drag to the left the left-most of the thin vertical strip. Once you have done that, there is still one more thin strip. If you click and drag that you will see a final fader that controls the output to the selected output device.
-
Thanks. Need : Devices - Output Drivers Playback and Recording - Driver Mode Screenshots is better.
-
You need a synth per track. If you want 3 MIDI tracks playing 3 different LABS instruments you must add 3 LABS synths. Opening the MIDI file probably inserted a TTS-1. This is a multi-timbral synth - can play up to 16 instruments. But LABS is one instrument at a time. You want the Soft Piano - insert an instance of LABS, then use the drop-down to select the Soft-Piano. You also want the LABS Strings? Add another copy of LABS, use the drop-down and select Strings. Try this way: Decide which instruments you want. Add them, one by one, choosing First Audio Output for each, no MIDI Source. Then, one by one, point the relevant MIDI tracks to them.
-
For a start, let us see Devices, Driver Settings and Playback and Recording under Edit -> Preferences -> Audio.
-
Do what you did with this project with all of them. Using simple instrument tracks has advantages - only one track with MIDI, audio, both MIDI and audio automation. But, if you use separate MIDI and instrument-data tracks, when you do a safe open everything is there except the synth. You can then add a new synth and quickly fix the routing. Also, simple instrument tracks are no good if you add synths that have multi-channel outputs. Such as drums, where you can have separate auio tracks for kick, snare, hihat, toms, etc., so you can process them differently. Just a bit of info. Always install both VST3 and VST2. If you have problems with a project, do what you have done with the project that now works. Disable VST3, enable VST2, replace in project. Copy data.
-
You could also put a dab of superglue onto a thin metal rod, aim it carefully down the shaft of the socket, give it a moment to dry, and pull it out.
-
Need Help with Routing and TAL Vocoder
Nigel Mackay replied to razor7music's topic in Instruments & Effects
I presume you are talking about one of their synthesisers. You cannot add a MIDI track and think you can route it to any synth/instrument that you have. You must first add the synth to the project, and only then you can route a MIDI track to it. There is more than one way to add a synth/instrument, but this is the closest to what you describe: Create a new blank project. From the Browser drag the TAL synthesiser to the track pane. In the dialog, select MIDI source and First Synth Audio Output. You will have an instrument-audio track and a MIDI track. Click on the MIDI track. Open the Inspector. (Views -> Inspector.) Look right at the bottom of the left-hand channel strip. O (output) will be routed to the synth. Whichever one you added. (The name can be abbreviated a bit, but you will recognise it.) If you want to route the MIDI to a different synth/instrument add it to the project. Then you can route the MIDI track to it. By the way, when you add things to an audio track, you add effects. Reverbs, equalisers, compressors and the like. They go onto audio tracks that already have audio in them to change the audio. -
"i dont have that options on windows im using M-audion as my main source for audio" Input device is basically irrelevant. Cakewalk sample rate MUST EQUAL Windows sample rate. You have been given 2 routes to finding out what Windows' sample rate is. Have a look. Set Cakewalk the same. Then try using the M-Audio.
-
The speaker icon on the left of this screen shot.

-
Windows: Right click on speaker icon Select Open Sound Settings Device Properties Additional Device Properties Advanced tab Default format shows you bit-depth and bit rate (sample rate) Cakewalk: Edit -> Preferences Audio -> Driver Settings Default Settings for New Projects Sampling Rate must be the same as that of Windows
-
You must have a MIDI or Simple Instrument track selected to export MIDI.
-
Ezdrummer - How to track 2 or 3 outputs into CW
Nigel Mackay replied to Nuance's topic in Instruments & Effects
MIDI data goes to EZD on 1 MIDI channel. So you only need a single MIDI track. With all the drums on it. EZD has 16 audio channels. Those you can mix and match in the EZD mixer. Useful information. You are currently using 3 audio channels - kick, snare, rest. If you should decide to have the toms on their own channel: Click on the EZD audio track with the highest channel number (In your case rest) Above the track pane do Tracks -> Append Instrument Track. This will add EZD audio channel 4. In the EZD mixer assign the toms to audio out 4. (It also adds a MIDI track, which you can delete.) -
The clue is in the page name MFX. MIDI effects. ?
-
Tempo take over from Keyboard
Nigel Mackay replied to Bart Scholtes's topic in Instruments & Effects
Have a look at this discussion. -
It seems Bandlab Assistant thinks Cakewalk is installed, and so won't download the installer. Have you done a complete uninstall of Cakewalk, as shown here.?
-
Make sure that bitrate and bit depth match: Windows <=> Cakewalk.

