Nigel Mackay
-
Posts
926 -
Joined
-
Last visited
Everything posted by Nigel Mackay
-
It seems Bandlab Assistant thinks Cakewalk is installed, and so won't download the installer. Have you done a complete uninstall of Cakewalk, as shown here.?
-
 Make sure that bitrate and bit depth match: Windows <=> Cakewalk.
 -
Have a look at SustainFix at this page.
-
Ezdrummer - How to track 2 or 3 outputs into CW
Nigel Mackay replied to Nuance's topic in Instruments & Effects
To add EZDrummer: Use the + above the track pane. The dialog defaults to Aio, change it to Instrument. Use the dropdown to choose EZDrummer. Click on Advanced. Select Spl;it Instrument Track. Bottom left, set it to 3 Tracks(s). Click create. You get 3 instrument-audio tracks, channels 1 to 3, and a MIDI track. Put your MIDI in the MIDI track. You only need the one. In EZDrummer, click on Mixer. Just above the drum names is an orange number. That is the audio channel number. Leave Kick at 1, change Snare to 2, change all the others to 3. The 3 instrument-audio tracks will be kick, snare and everything else. -
Exported audio lacks bass compared to playback
Nigel Mackay replied to Daniel Segelov's question in Q&A
Check your Windows sound settings for the audio out you use for Cakewalk. Maybe Cakewalk goes through a Custom setting and other apps don't. -
Cakewalk has suddenly started auto saving every few seconds
Nigel Mackay replied to Mehrdad Shamsi's question in Q&A
Hold down Shift while opening a project. It asks about loading VSTs. Leave one at a time out. Repeat for each VST. Choose the project with the fewest VSTs. ? -
Decay is how long it takes before the reverb stops. Take a piece of music. Loop it so it will play for hours. Press one button at a time, turn one knob at a time. Listen to what it does. Take notes. Load a different reverb.Do the same as above. Compare.
- 11 replies
-
- 1
-

-
- mixing
- surround mixing
- (and 4 more)
-
Calculations: no 2 reverbs are the same, so you can't. After all, how big is a medium hall? Small rooms sound a bit flat. Large halls are boomy with long reverberation. Medium is half way. Just turn the knobs and push the buttons until it sounds the way you want.
-
Just created 3 linked clips. Unlinked the middle one. Created a new linked group of 1st and 3rd clip. Copied and pasted as linked repetitions. It maintains the integrity of the links. New middle clips are linked to the original middle clip. "Outer" clips linked to original "outer" clips.
-
Agree 100% there.
-
When Cakewalk is running, listening to Music files is disabled?
Nigel Mackay replied to Yellowpen's question in Q&A
@User 905133 Everybody's system is different, everybody has different experiences, Windows has so many vagaries, the PC hardware varies, the input interfaces all differ, it is very difficult to work out solutions. -
When Cakewalk is running, listening to Music files is disabled?
Nigel Mackay replied to Yellowpen's question in Q&A
Cakewalk wants to hog all resources for itself. Large projects can be pretty intense. I don't have a input device, so I use WASAPI Shared as my Driver Mode with Suspend Audio ... off, and so I can do anything. Having the mp3 in the project is pretty useful because you can get the tempo just right, line things up, use it as a reference when mixing. Start/Stop is in the same interface. -
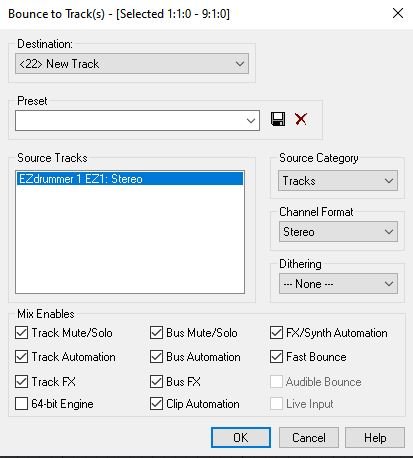
Let's assume you want to convert the MIDI to audio so you can process it and do your mix. To do the snare drum. Select the MIDI track. Ctrl-click on the snare drum instrument audio track to select it as well. Above the tracks, click on Tracks -> Bounce to tracks. The Source Category must be tracks. The name of your Source Track(s) will be different, depends on what you have selected. Click OK. Cakewalk will process the MIDI track and you will end up with the snare drum as audio in a new track. (Track 22 in this case, but will be the neaxt available track number.) Repeat for each drum channel, making sure you always select the MIDI track, and then each instrument-audio track, one by one. You will end up with a set of audio files, each one one of the channels you selected in the mixer in EZDrummer. Do your (multichannel) mix they way you want it.
-
You want one to follow the original, and you want the others there so you can play with variations, harmonies? Not immediately obvious from wording of the dialog. But makes sense. I would get very mixed up using it if the first copy wasn't linked, but the rest were.
-
When Cakewalk is running, listening to Music files is disabled?
Nigel Mackay replied to Yellowpen's question in Q&A
You want background music while recording? Isn't it a bit confusing? Or are you recording along with a piece of music? If that is the case, add the mp3 to your project. -
How do I get VST plugins to work / be recognised
Nigel Mackay replied to Damian Sutherland's question in Q&A
Make a backup. Always make backups. Even if you are not about to reinstall.. -
How do I get VST plugins to work / be recognised
Nigel Mackay replied to Damian Sutherland's question in Q&A
Just as a side note - Cakewalk scans recursively. This means that if you add a folder to the scan list, Cakewalk will drill down into every sub-folder, and every sub-folder of sub-folders. So you don't need to have C:\aa\bb\cc and C:\aa\bb\dd. You just need C:\aa\bb. It will do the cc and dd folders automatically. So just have C:\program files (x86) \steam\steamapps\common\cakewalk and it will do all of them. Never have anything except VST stuff in those folders. -
Yip. My apologies.
-
You can't change the audio. You need: MIDI -> EZDrummer -> multiple audio tracks . Insert a new copy of EZDrummer, but with these settings: Copy the edited MIDI data from your original EZDrummer simple instrument tarck and paste it into the new MIDI track. Set EZDrumer for multichannel output - do you know how to do that? Now when you play that MIDI track you will get multichannel to all the inserted instrument-audio tracks. To convert to audio, you will need to bounce to audio.

-
Use Task Manager to stop all running copies of Bandlab Assistant. Navigate to C:\Users\ yourusername\AppData\Roaming\ Bandlab Assistant\ Downloads. Run the file Cakewalk_by_BandLab_Update_Setup_26.09.0.006.exe
-
It asks how many repetitions. If the value is 1, it does one paste. It always does at least one paste. If the value is 3, it does 1 paste, with 2 repetitions. The problem is trying not to label the selections "This is only for the first paste." "This one is for the pastes over and above the first paste." "This one refers to all the pastes." ? Or, isntead of the label "Repetitions" it could say "How many repetitions over and above the first paste?" With the default value 0, not 1.
-
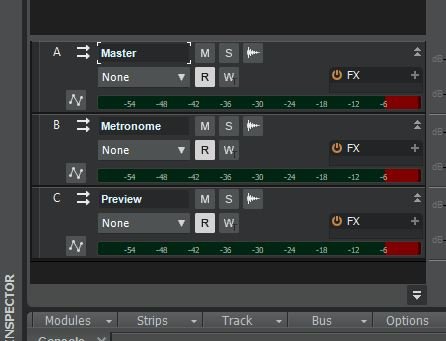
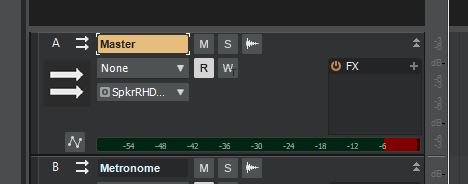
There is audio visible on the meter in a few of your screenshots. Routed to Master. In this screen shot There is a broad strip above Modules Strips Track .... Above that is a thin strip. Click and drag that up, so you see this: Then just below the meter on the Master strip click and drag it downwards to make it bigger. When you play notes and the meter shows activity on the track , do you see meter movement on the Master strip? What is it routed to? O. Mine says SpkrRHD... On the control bar at the top, to the right of the time display, are a play button, a record button, and a metronome button. Click the record dot. This makes the metronome sound when recording. Arm any one of the tracks for recording - click the red button. At the top, click Record - the red button with funny squiggles on it. You should hear the metronome.

-
Hi Support says the crash dump shows the VST3 version of Iota Mini caused the crash. VST3s often give problems, and can work with some people and not others. Windows. ? If you haven't done it already, install the VST2 version of Iota Mini: Double-click on Iota Min (PC).zip Double-click on Iota Mini (PC) Double-click on PC Files Double-click on x64 Double-click on IOTA MINI WIN64 VST Click on Iota Mini.instruments Hold in the Ctrl-key and click on Iota Mini.dll (The .DS_Store file shouldn't be there) Ctrl-C to copy the file and the folder. Navigate to C:\Program Files\VstPlugIns\Iota Min (PC) Click on the Iota Min (PC) folder to select it. Ctrl-V to paste. You should see the instruments folder and the dll file in the Iota Min (PC) folder. Then disable the VST3 version: Run a VST scan. Then: Utilities -> Cakewalk Plug-in Manager In the left pane click on VST3 Instruments (VST3i) In the middle pane click on Iota Mini Below the left pane, click on Exclude Plugin In the left pane click on VST Instruments (VSTi) You probably won't see Iota Mini in the middle pane, so: Below the left pane select show excluded In the middle pane you should see Iota Mini Click on it Below the left pane click on Enable Plugin Iota Mini will disappear from the middle pane. Click on Show Enabled and you should see it in the middle pane. Close the Plug-in Manager Make sure you have a backup up of your projects. They will all have lost their Iota Mins because they were all the VST3 version Create new projects, add Iota Minis (they will be the VST2 versions) Do the copy and paste thing from the old projects Hold thumbs, you should be OK now. A good chance that the LABS was just incidental. Support ask that you contact them. Cakewalk Support Tell them you are Nicole with the Iota Mini VST3 problem, referred to them by Nigel.
-
It is looking promising. When I said paste the dump file I meant actually add it to a post. ? Look below where it says "Drag files here to attach, or choose files... Clicjk on Choose files, navigate to C:\Users\Alex Amansec\App Data\Roaming\Cakewalk\Cakewalk Core\MiniDumps and open _09082020_204315.dmp I suggest that next one or two time you download VSTs, just ask for guidance in installing them. In the meantime watch this.