


-
Posts
8,670 -
Joined
-
Last visited
-
Days Won
30
Everything posted by Starship Krupa
-
 For those who don't know how to do this, the feature is accessible in Synth Rack. Alt+9 to open Synth Rack, then hover the name of the instrument.
 -
I trust our dedicated .STH lords will give it a thorough assessment. So far the biggest issues I have with it are that there is STILL no way to set the color of beat and measure grid lines 🤬 and that too many of the element colors are tied to other disparate elements. That is, when you change one element, it affects something in a completely different area of the UI, and not necessarily something that you wanted to have match.
-
I think this was @Noel Borthwick's baby. Noel, any insights?
-
They didn't put it in my Start Menu, which is why I gave the full path in my original post. This is on two Windows systems, one Windows 10 and the other Windows 11. I'd like to see your video when it's done.
-
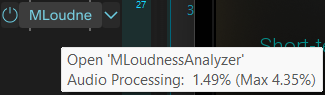
The ones you get when you hover the name of the plug-in in the FX bin: It's a percentage, but of what? Is this explained in more detail in the documentation somewhere? I couldn't find anything.
-
When I got SampleTank 4 MAX a year and change ago, Product Manager installed and authorized Miroslav Philharmonik 2 correctly. Also Syntronik 2 and SampleTron 2. Product Manager isn't perfect, it still has a way to go, but it at least now does what it was created to do. I still ran into big problems when installing SampleTank 4 MAX. I wound up with multiple copies of some libraries and missed about 1/3 of the content I was entitled to. Part of it was that I didn't understand that so much of SampleTank 4 MAX v2 consisted of separate products and add-on content that were otherwise sold separately. I wound up writing a tutorial on installing SampleTank 4 MAX that helps ensure that all of the content was installed correctly with no duplication. When your end users have to write tutorials for each other on how to install your products, that seems like a sign that your install process needs work. They seem to be listening regarding installation issues. Some of their moves may be baffling, but they're at least improving the installation and authorization process.
-
To paraphrase a great movie, "forget it, Eusebio, it's IK Multimedia."😁 Really, though, at least in the past year or so, Product Manager has come into its own as the unified solution it was originally intended to be. I haven't fired up Authorization Manager in a long time. I no longer have any Custom Shops installed. So I have to hand it to them, they are cleaning up their act. And yes, I had the same impression about there being competing interests within the company coming up with Modules Manager. The ones who pay attention to customer/forum gripes and the ones who think it's good marketing to keep cluttering your plug-in collection with unlicensed demo FX. The fact that I had to stumble across Modules Manager, that it's not even included in the IK Multimedia Start Menu folder, suggests that someone doesn't like it.
-
Humble Bundle The Audio Master Suite Bundle has arrived 🎶🧑💻
Starship Krupa replied to cclarry's topic in Deals
Oh man, me too. I didn't realize how much I was going to like it when I picked it up in the previous IK HB. The way you can combine components from whatever models you happen to have is crazy. The controls for string age, picking style, pickup position, active vs. passive electronics, it's possible to put together just what I want. I had underestimated both of the MODO instruments. MODO Drums is a similar laboratory for drum sounds. The ability to combine different kit pieces to assemble what you want is brilliant. Like most drummers, I'm picky about my snare sound. -
Humble Bundle The Audio Master Suite Bundle has arrived 🎶🧑💻
Starship Krupa replied to cclarry's topic in Deals
With great competition comes great deals. The plug-in market has grown so much in the past 25 years. The transition from latest hot plug-in to long tail cash cow now takes a lot less time for companies like IK Multimedia. They get the big fees from the people who want the latest great thing they come out with, then a couple of years later cut killer deals for people like me who have more plug-ins than they can use and are only interested once the price comes way down. Free stuff has improved so much in quantity and quality, even in the past 10 years. I remember when CbB first shipped as freeware, and Noel speaking disparagingly about the reliability of freeware plug-ins. Umm.... TBF, in those days there were still a lot of bedroom-coded 32-bit Synthedit ones around. These days you can get SO MANY great loss leader plug-ins from the likes of Native Instruments/iZotope/Plugin Alliance, Kilohearts, and MeldaProduction. The bedroom coders have much better tools to work with, like JUCE. -
I'm more concerned about the resource usage, which IS important at the mix/master stage when the mixing plug-ins start piling up. The comment about waking up to it cooking breakfast was for comedic effect. It looks like MMultiAnalyzer is most similar as far as features, although the different meters aren't simultaneously front-facing. I picked up MPS during the Schroedinger's Upgrade glitch a couple of years back and I'm kind of surprised how little I've used it. I don't regret spending the money, having such a powerful set of tools ready to go is comforting. But iZotope's plug-ins are such HOGS that I find myself not reaching for them. It's not so much an issue on my main DAW system, but when I copy a project to my laptop, I need all the resources I can get. Gotta ask Noel what those numbers really signify. I can't find it in the documentation.
-
Humble Bundle The Audio Master Suite Bundle has arrived 🎶🧑💻
Starship Krupa replied to cclarry's topic in Deals
I don't actually know everything about their product line. It's much easier to just front like I do.😂 Really, outside of the FreeFX bundle and MEssentialsFX bundle (but together that's what, almost 50 plug-ins?), the rest of the stuff in my MComplete bundle is pretty dusty. They hold my interest because I think Vojtech is a really smart guy and I like the way he runs his business. It's fun to see what he comes up with. I do remember hearing something about the MB trick at one point. Thanks for reminding me. Have you tried it? Is it fairly straightforward? It sounded kinda over my head. I've tried messing about with the MB versions of MeldaProduction stuff and didn't click with it. Maybe I'll try it some time when I want to mess with some M/S flanging or something. I bet Chandler could come up with a tutorial for it. So far it's come down to whether I want to spend a couple hours trying to get MDynamicsMB to do independent mid/side processing or just throw on Cyclone or one of the T-RackS dynamics or EQ FX that's already built that way. The way that IK Multimedia do it is elegant and simple. MLimiterX is my go-to master bus limiter and I always try flipping it over to M/S just to see if I like the sound better that way. I usually end up leaving it in M/S mode. Any thread that I participate in seems to have a decent chance of going down the MeldaProduction garden path at some point.... -
I have it because Music Production Studio and never fired it up until seeing all these endorsements by people whose opinions I trust. It seems to provide much in the way of analysis, but it also induces much in the way of latency, 49mS to be exact. It also spikes up to about 9% "audio processing" in Sonar, not sure exactly what that means but it has something to do with the load it puts on Sonar's audio engine, and compared to other plug-ins it's high. For a metering plug-in it's nuts, even for iZotope. I took a brief sweep through my plug-in collection to see if I could find something NOT made by iZotope (and not a linear phase EQ) that read more than 9% and the only ones so far that did were Unfiltered Audio BYOME with 7 of its modules active, sonible proximityEQ+, and Motion Fractal. Which doesn't seem unreasonable given how much number crunching those are doing. Freakshow Industries Dumpster Fire had about the same impact (if you've never tried Dumpster Fire on a full mix, where is your sense of adventure?). After seeing this, I compared it to APU Spectrum Analyzer, MStereoScope, MLoudnessAnalyzer, MTM LEVELS, Voxengo SPAN, HoRNet StereoView and LUMeter, TBProAudio dpMeter5, and T-RackS 6 Metering. To get an idea of what to expect from an analysis plug-in. Only APU Spectrum Analyzer induced any latency at all at 30mS. That sucker's going right into the dustbin. SPAN uses FFT too and doesn't have to induce a slap delay to do it. LEVELS (max 3.5%), Metering (max 2%), LUMeter (max 2.5%), MLoudnessAnalyzer (max 4%), APU Spectrum Analyzer (max 2%), and dpMeter 5 (max 3%) were the biggest engine "hogs," with SPAN, StereoView, MAnalyzer, MMultiAnalyzer, and MStereoScope never making it to 1%. (WTF is MLoudnessAnalyzer's problem?) LEVELS measures stereo field and loudness/peak/dynamic range and has a "bass space" feature that checks for overlaps down in the boomies. TR6 Metering has VU meters, loudness meter, phase scope, spectrogram, and spectrum analyzer all running at once. MMultiAnalyzer has spectrum analyzer, sonogram, collision checking, loudness, stereo, and an oscilloscope. Both LUMeter and MMultiAnalyzer support grouping via inter-plug-in communication. If Insight 2 needs 49mS of latency to do some metering, I better wake up to it cooking breakfast wearing nothing but one of my shirts.
-
Humble Bundle The Audio Master Suite Bundle has arrived 🎶🧑💻
Starship Krupa replied to cclarry's topic in Deals
The T-RackS FX that I use most, like the 670, have been around for a very long time, probably due to my snapping up every freebie that they offer. So the algorithms are coded for the systems of 15 years ago. The newer ones....I'd use them at mix/master time, so CPU hoggery is not such a big deal. I'm one of those who still remembers that I can freeze tracks.😊 I already have most of the bases covered by notoriously resource-frugal MeldaProduction FX. I go to T-RackS when I want a pretty, skeuomorphic UI, and when mid/side processing is important. The 670 "widening" preset is what introduced me to the wonders of mid/side compression, and it has that ear candy circuit emulation too. They've added mid/side capability to many of their applicable FX (dynamics and EQ), and it can be accessed in a single instance, which is important. Even MeldaProduction's stuff needs 2 instances in order to have different settings for mid and side. With T-RackS, I can click a button to change it from stereo to M/S, and then get a second view where I can make independent settings. -
Humble Bundle The Audio Master Suite Bundle has arrived 🎶🧑💻
Starship Krupa replied to cclarry's topic in Deals
Indeed, and it's a decent complement to the previous IK Hurdle Blurble, enough added to have me considering it. I've become fond of MODO Bass and MODO Drum, so the extra models plus the couple of T-RackS processors I don't already have are tempting. -
Sooo.... What did everyone get? (Not A Deal, Full Kontakt Not Required)
Starship Krupa replied to husker's topic in Deals
Regarding @Carl Ewing's visual comparison of channel strips, I really like the most recent iteration of Eventide's UltraChannel. There are knobs, buttons, and sliders, and they look enough like those things for their functions to be clear. However, there's no imitation 3-D stuff, no drop shadows or reflections. I think it fits between the bx and the Softube. I don't like the Softube, I don't really want to learn a new control paradigm, knobs and sliders are fine. I just prefer the flat look over the 3-D. No offense intended to those who prefer them (even I love my T-RackS processors), but those screws and 3-D controls feel like 70's simulated woodgrain to me these days.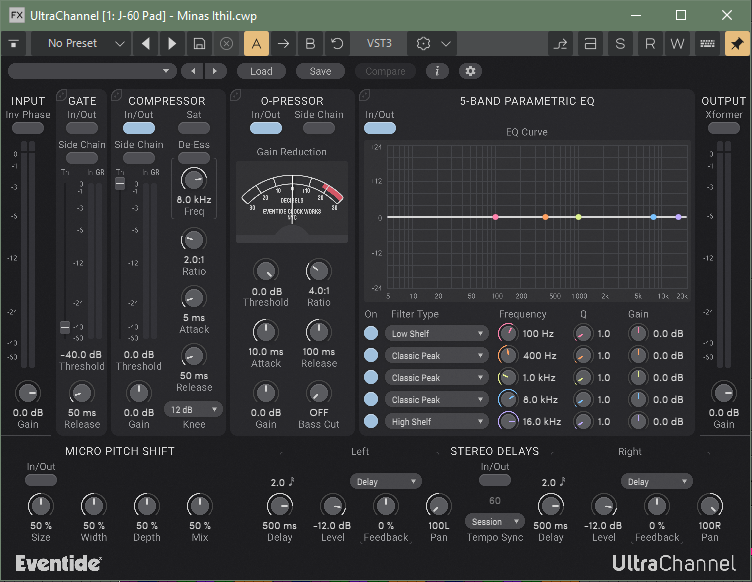
-
You'll find Modules Manager in C:\Program Files\IK Multimedia\T-RackS 6. Run it and you'll likely be delighted to see what it does. Background/tl/dr: I had read the blurb about T-RackS 6 before I Bumble Hundled it that mentioned that they had added the ability to only install the modules you own (or wish to install). The spamming of unowned modules is a longtime complaint about T-RackS. By default, they dump every module in the line into your VST3 folder, which causes them to show up in your hosts' plug-in lists with no indication as to whether you own licenses for them or not. So two types of clutter, both hard drive and visual. In the past I solved this by creating a "bullpen" folder where I would move unowned modules until such time as I acquired licenses for them. I expected this ability to be part of the installer or built into IK Product Manager, but it's not. Weeks later I was doing some cleaning work on my C drive and poked around in IK Multimedia's programs folder. That's when I discovered Modules Manager. Modules Manager allows you to see what licenses you own and choose to only install those modules. IK seem to be still into the idea that you (or they) want to dump the unlicensed modules onto your system, and some of the design of this tool reflects that. So you need to be careful when using it. When you first run it, select "Show All" in the left column. Then you can look over on the right and see the ones you own and the ones that are only available as trials. Toggle the button as appropriate for each one. Then click "Apply Changes" down at the bottom. This will remove unwanted modules. What to watch out for is that the next time you run it you may get a message about how your installation doesn't match your preferences. Do NOT click yes to this dialog. If you do, it will reinstall all of the modules you previously excluded. It's a useful tool, you just have to keep an eye on it.
- 26 replies
-
- 19
-

-

-

-
Wow, $129 for a refurbished 4i4 is a great price. I like refurbished gear. It often means that it was either an open box return or a warranty return due to whatever factory defect (defects happen) that has been recertified (and repaired if necessary). So what? Well, whereas final QA on the manufacturing line is performed by people who just connect it to the test rig and push a button. Go or no go. And these days, often/usually done in China. Returns are usually processed by higher level technicians who know how to make repairs and adjustments. And depending on the company and the individual unit, it might be done in the US office. So such units can end up being very well gone over.
- 1 reply
-
- 1
-
-
Here's a tip for anyone using MeldaProduction plug-ins: when you go into Settings/Style and select a style, there's a selection of color presets, and you can download color presets from the Online Preset Exchange. I've uploaded a couple for my favorite style, Argon. Mostly I turn the background darkest black and use aquamarine text with burnt orange highlights. I highly recommend fiddling with Styles and colors with MeldaProduction's plug-ins. I agree with those who say that the stock style and colors are....plain? Fugly? Whatever, their basic UI is purely functional, designed for high visibility over sexiness, and I find that it increases my enjoyment of using them if I can give them a color makeover. I like the darker styles like Argon, Titanium, and Uranium Dark. I'd love to dig deeper into Styles and even Devices, but it's pretty complicated and has the traditional MeldaProduction minimal documentation.
-
Sooo.... What did everyone get? (Not A Deal, Full Kontakt Not Required)
Starship Krupa replied to husker's topic in Deals
I'll claim here that there's a difference between "easy-to-use" and "easy-to-learn." There's also a difference between (what used to be called "shrink wrap") software like Sonar or Vegas where there are a zillion features, some of which may be touched by the user only once over a matter of weeks or months, or even never, and software designed for a more specific task like data entry or point of sale. In the second type of software, the user is expected to be given intensive hands-on training and then probably at least at first, operate it with an experienced user close at hand, ready to answer any questions and give useful advice. In the former type, the user will have nowhere to turn to except documentation and Reddit /YouTube/forum (if the program has a large enough user base to have a useful Reddit/YouTube/forum community). With these two types of software, there's a big difference in the importance of how easy features are to figure out. In the case of DAW or NLE software, the user could go long enough between using a certain feature that they don't remember how to access and use it the first few times they need it. In the case of DAW software, it's important for the export/render features to be easy to figure out because of how infrequently a user may actually get a project to the point where it's suitable for rendering.😒 Deciding which features, options and operations should be the more "front-facing" vs. buried behind menus is important. Case in point: MeldaProduction's MDynamics vs. MCompressor, MModernCompressor and MLimiterX. MDynamics is the flagship and wins hands down in the "will it do what I want it to do" category, but I have used it on exactly zero projects despite having access to every MeldaProduction processor (and instrument). On the other hand, I use MCompressor and MLimiterX all the time, and even use MModernCompressor (MeldaProduction's Edsel) occasionally. Why, when MDynamics will do any dynamics processing task you'd ever want to do? Its feature set eclipses the other three. The answer is that MCompressor and MLimiterX are easy to learn and easy to use, and MModernCompressor has one important feature front-facing (this would be the ability to select different types of detection algorithm, including "psychoacoustic," which is buried 3 configuration screens deep in MDynamics). It saves me time and loss of flow to be able to set up the less capable processors so quickly and easily vs. the more complex and capable one. Of course, if my task were to do nothing but set up dynamics all day long, and I had to choose only one of them, MDynamics would win hands down because once you get good at it, you can do everything with it that the other three do, and probably just as quickly if it were the only choice. Despite having to negotiate multiple menus to do the same thing, I could get good at it to the point where it wouldn't matter. Much of MeldaProduction's product line has been revolutionized by the addition of "devices" that present subsets of the products' features in a variety of simplified formats with more skeuomorphic UI's. You can still ignore those and use the products in their "under the hood" mode, but I am sure that the devices have helped sell a lot of plug-ins and have helped a lot of existing users make more use of them. So software isn't always just software, design philosophies and objectives can vary depending on the intended audience and function of the program. -
VEGAS Pro 22 and SOUND FORGE Pro 17 Humble Bundle $45+
Starship Krupa replied to MusicMan's topic in Deals
Grumble grumble, while Vegas 22 would be an upgrade, I already have that version of Sound Forge Pro. Pondering whether a single digit upgrade of Vegas is worth $45. Any Vegas users help me out as to whether it's worth it? I've never clicked with Movie Studio or Music Maker. -
I, too am a "splitter," despite having begun using the program when CbB came out. One thing that I do regularly that I'd find more difficult to do with a Simple Instrument track is drive multiple synths with a single MIDI track. Although, frustratingly, Sonar has no native way of doing this, it can be done with the help of certain MIDI plug-ins that themselves include MIDI out. Part of my song creation process is to experiment on the fly with different sounds, especially drum sounds. Having the MIDI data separate from the drum machine allows me to quickly switch back and forth between two different drum machines. When I was first learning CbB, separate MIDI/Synth tracks just seemed more versatile, so I got used to using them. I agree that part of the Sonar culture still seems to involve hanging on to old workflows so as not to disturb the set in their ways grumpy old man contingent. I've learned to emphasize the word "option" whenever I make a FR like this one, because there will inevitably be someone totally opposed to whatever change and don't want to be forced to adopt it.
-
Sooo.... What did everyone get? (Not A Deal, Full Kontakt Not Required)
Starship Krupa replied to husker's topic in Deals
Okay, I need to set something straight here, as I got a fact wrong about a line of virtual instruments that I really like. Chromaphone is NOT the only A|A|S synth that lets the user mark favorite patches. There is a valid reason that I got it wrong, which is that the synths' UI's differ and it can be difficult to find whatever they are calling the preset manager. I've been using them more in the past few days, and poking at them more. As I discovered, 3 of them actually allow the user to set favorites among the zillions of presets. That amounts to less than half the line if you count Player, which a lot of people use. Details, in order of modernity: Chromaphone 3 has the most contemporary UI and has the ability to mark favorites. Ultra Analog VA-3's editing panels still party like it's 2015, but the front-facing UI looks similar to Chromaphone 3, complete with a similar browser that allows marking favorites. Lounge Lizard EP-5 has most elements of the newer look, including being able to mark favorites, but it varies from the above in that you click on a button labeled "Library" in order to open the view that the others call "Browser." There aren't as many editing options with this one anyway, Multiphonics CV-33 has elements of the new UI but as far as I can tell, only has a list of patches, not the full-featured browser that the above 3 have, missing the very important (to me) ability to mark favorites. String Studio VS-3 has the old "Session" style UI, but it does have a browser that allows you some of the category sorting that the other newer browsers do, but no favorites and the browser is hard to find, the button for it is just an unmarked down arrow next to the previous/next patch buttons. Strum GS-2 looks and functions like Strum Session, except it can also load soundpacks. No favorites here either. It's the one most in need of a UI refresh. Overall it looks like they got the Chromaphone 3 UI just like they wanted it, then transplanted elements of it down the rest of the line never making it down to Strum GS. -
Mic Parts has interesting ideas for mic upgrades, and an interesting business model (people love to customize and upgrade our stuff) but they really undermine their credibility with the $99 IEC cable. Kinda makes me wonder if their prices on other things are inflated. The idea of "Compared to stock AC power cords or even premium cables at similar or higher prices, NRG-X cables have always delivered enhanced bass definition, improved transient articulation, greater soundstage scale, and more of the precious spatial cues that bring recorded music to life." Some of this is due to "Direction-Controlled Long-Grain Copper (LGC) in a Semi-Solid Concentric Topology." Are they implying that they somehow found a way to make a copper wire conductor directional? This would be an odd thing to have in an IEC cable, because IEC cables carry alternating current....
-
To answer the question in the topic title, the "MIDI+Keyboard" icon was retired from service with the introduction of Cakewalk Sonar. The MIDI jack icon is used for MIDI tracks. The keyboard icon is used for Synth (VI) tracks. There is no longer a special icon for Simple Instrument tracks (which are tracks that include both the VI and the MIDI tracks displayed as one unit), which leaves the "Keyboard" icon to do double duty on both Synth and Simple Instrument tracks. Long form blather: While I do agree that it would be handy to be able to tell at a glance when a track is a synth track vs. instrument track, not being able to tell is better than having it be backwards. And the way it was was backward: the "Keyboard" icon was displayed on Simple Instrument tracks while an icon that consisted of the "MIDI" and "Keyboard" icons overlaying each other was displayed on Synth tracks. There was a lot of lobbying, especially from the theme creator community, to swap them so that the icon that was essentially one with Synth and MIDI stuck together would appear on the tracks that were essentially Synth and MIDI stuck together. This lobbying was not acted upon, and the "MIDI+Keyboard" icon was quietly dropped. Those of us who cared kept our mouths shut because anything was better than having it be backward. Most users probably use either Simple Instrument tracks or separate Synth and MIDI tracks in their projects, but not both at the same time, so being able to tell them apart is not a big deal. The "MIDI+Keyboard" icon is pretty ideal for indicating a Simple Instrument tracks. I have no idea how or why they got mixed up originally, but looking at it drove me nuts. One of the first things I did with creating themes was to swap those icons around. This could theoretically have led to confusion with the images in the documentation but I didn't care.
-
34" Samsung Ultrawide Issue with Cakewalk Plugin UIs
Starship Krupa replied to sjoens's topic in Feedback Loop
Does toggling the plug-in's DPI awareness change anything?
