


Nigel Mackay
-
Posts
926 -
Joined
-
Last visited
Everything posted by Nigel Mackay
-

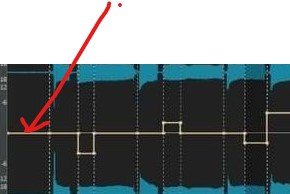
Bulk changing automation envelope nodes from Jump to Linear
Nigel Mackay replied to Simon Wilkinson's question in Q&A
If you look you will see that there are sections which are straight lines. Until you get better advice you can use the CAL script Thin Controller Data. Process -> Run CAL. You select the range, run the script and enter the controller number. It will reduce the number of steps. A bit easier to fix. -
SI bass > piano roll > note velocity > volume not changing
Nigel Mackay replied to jf's topic in Instruments & Effects
Use CC11-Expression for the volume. -
Cakewalk comes with SI Drums which will work fine.
-
Sonar & Kontakt multitrack issue
Nigel Mackay replied to Hans Varland's topic in Instruments & Effects
I presume you do add a 2nd instrument to Kontakt? You can change things, but Kontakt does automatically assign channels 1, 2, 3, .. as you add instruments. The next step, is you must have instrument-audio tracks for each MIDI channel. Kontakt sets all outputs to audio1, so as you add instruments you have to change them to audio2, audio3, ... There are a few tutorials about using Kontakt. Here, here and here. -
Try this
-
Can't see Pedal Off Mark (CC#64=0) in Piano Roll View
Nigel Mackay replied to Jun Yamamoto's question in Q&A
Have you told Sonar to show CC values? It defaulst to only showing Velocity. In Cakewalk you click the + sign and select CC64. If you recorded the MIDI you should then see it. But it is assumed to be zero, and you will see nothing until the sustain pedal is pressed (and released.)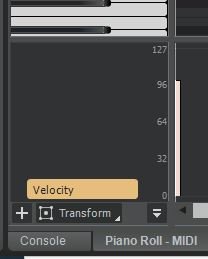
-
Bandlab project Kontakt upgrade problems
Nigel Mackay replied to Sven's topic in Instruments & Effects
No. Kontakt is a black box as far as Cakewalk is concerned. Cakewalk sends MIDI data to Kontakt, audio comes out. -
Bit depth doesn't matter. Sampling rate does.
-
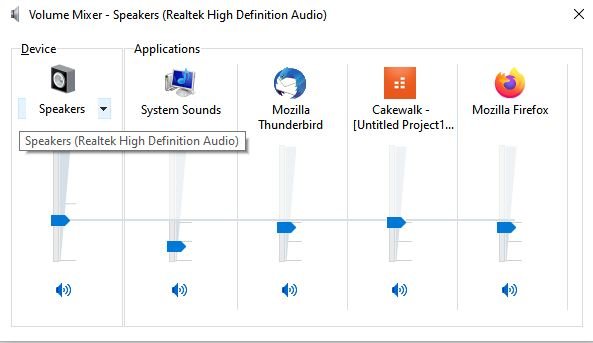
One more thing... Right-click the speaker icon in the notification area and select Open Volume Mixer. Make sure Cakewalk volume is turned up.
-
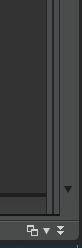
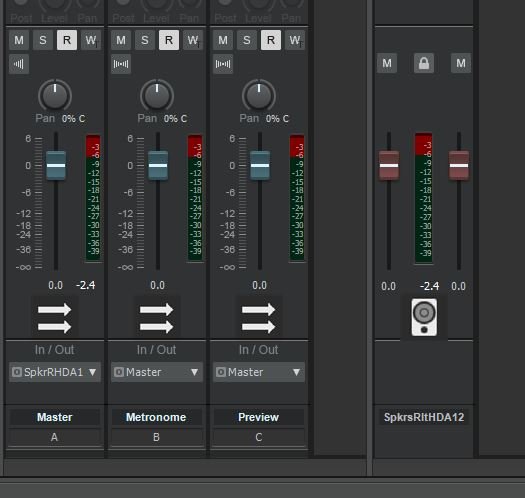
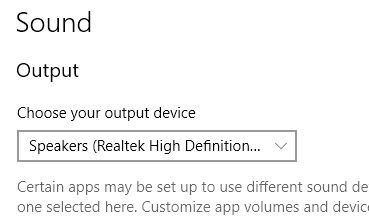
It isn't notify by email, it is just a badge (little number like on your phone with new SMS, WhatsApp, etc.) on the bell shaped icon in the top right corner. You have to open up the forum and look. Most of us find out the hard way. ? Open Console View. If you can't see the Master, Metronome and Preview faders, drag that thin strip on the right of the window to the left. The left hand one. Then drag the 2nd one to the left as well. You see your hardware output fader. The one with the brown knobs. Make sure you see meter activity there. If you do, then maybe you have not selected the correct output device. In the Windows notification area, right-click on the speakers icon and select Open Sound Settings. There you can see what Windows is using. My Windows is using Speakers (Realtek High Definition Audio.) My Cakewalk Preferences -> Audio -> Devices: Cakewalk is also using Speakers (Realtek High Definition Audio.) Can we see a screenshot of your Preferences -> Audio -> Devices.
-
Just checking, you did look in C:\Users\yourusername\AppData\Roaming\Cakewalk\Cakewalk Core\Minidumps
-
Adding Amplifiers, FX chains w/my own VST's
Nigel Mackay replied to David Weddle's topic in Instruments & Effects
@treesha And that makes it very similar to a Simple Instrument Rack. In mulab you add a rack by selecting an instrument. It has a built-in MIDI track. In Cakewalk you add a Simple Instrument Track by selecting an instrument. It has a built in MIDI track. @David Weddle This will make Cakewalk very similar to what you have been doing in mulab: You have a VST folder called Guitars, so I assume you have at least one guitar VST. From the Browser, choose the guitar you want, click and drag it to the track pane. In the dialog you get, select Simple Instrument Track. It will look like this: except it will be named after the guitar you chose. Expand it and you will get: Very close to mulab, except horizontal. It currently says Clips. That will be the audio, after it has been generated/recorded. Change Clips to Notes. Now the track info will be MIDI. Empty at the moment, of course. Open the Piano Roll View and you can enter MIDI data. You will see it in the track pane. You already have some MIDI data, so you can copy it from the old track and paste it in the new track. Important info: If the drop-down says Notes, the FX Rack is for MIDI effects. If the drop-down says Clips, the FX rack is for audio effects. So, finish adding/pasting your MIDI data. Change the drop-down to Clips. Add the guitar amp you want to the FX rack. Solo this track and press play. When you are happy with doing it this way and you have saved your project, try this: Select a simple instrument track. Tracks -> Split Instrument Track. You get an instrument-audio track and a MIDI track. Each with their own data and effects. All routed correctly for you. This is the most common way of doing things: separate MIDI and instrument-audio tracks. To start from scratch like that: Choose your instrument in the browser. Drag and drop on track pane. Select First Synth Audio Ouput. Select MIDI Source. You get 2 tracks - a MIDI track, routed to the selected instrument an instrument audio track receiving audio from the selected instrument.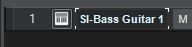

-
Adding Amplifiers, FX chains w/my own VST's
Nigel Mackay replied to David Weddle's topic in Instruments & Effects
The MIDI track is routed to an instrument - TTS1, Spitfire BBC Orchestra, SI-Bass Guitar, whatever. This instrument must have an audio track. A normal audio track has the icon shown in track 2: That track has an FX rack. Audi FX, such as guitar amps, go in there. In the Browser select Instruments at the top, then find the FX you want, then click and drag it into the FX RACK OF THE AUDIO TRACK. You always have a MIDI-audio track combination. (Tracks 2 & 3 in the screenshot.) There is a Simple Instrument Track, but this is just a MIDI track and an audio track combined as one. So it is still a MIDI-audio track combination. If you currently only have MIDI tracks, then for each MIDI track you must drag and drop an instrument onto the track pane. This creates an audio track for that instrument. Then you must route the MIDI tracks to the instruments. Then you can add FX to the audio tracks.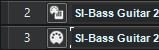
-
'Cut itself' like feature for 808s
Nigel Mackay replied to Arabic Dude's topic in Instruments & Effects
A CAL script could be written to clean up the MIDI file before you press play. -
'Cut itself' like feature for 808s
Nigel Mackay replied to Arabic Dude's topic in Instruments & Effects
Your answer is in your opening statement "there's this feature in FL Studio." Different sampler won't help. It is an FL Studio feature. And no, it doesn't exist in Cakewalk, so you will have to edit. @treesha has made two suggestions as to method. -
MIDI Device not enabled...
Nigel Mackay replied to Sebastien Ferland's topic in Instruments & Effects
Autosave uses a different file name "Autosave Copy of project-name." -
Feature request? ?
-
Acoustic guitar samples
Nigel Mackay replied to Corin Schroder Christensen's topic in Instruments & Effects
Have you checked your levels? Distortion may make it sound electric. Can you give us a screenshot of your track pane. -
Where Are My Instruments & Effects
Nigel Mackay replied to Raymond Coats's topic in Instruments & Effects
You need to open the Browser. A few ways: 1) The double-arrow pointing to the left 2) b on the keyboard 3) Views -> Browser -
It is the [Workspace] setting. Select Track Control Manager and you can see which selections enable/disable things.
-
Correct.
-
Could be you need to reinstall Cakewalk.
-
There has to be a good reason to use Save As. For example, you want to do your piece of music in straight 4/4 time, and you also want to do it with a swing 6/8 time. Every time you use Save As you save everything, and are wasting even more space. And have all these "old" copies of the project to delete using File Explorer. What you would do: You get all your notes in using Straight44 in the name. Then you use Save As using Swing68 in the name. Now you can modify. Instead: Use Utilities -> Clean Audio Folder. It defaults to the correct folder. Click Find. It Finds all the "replaced" audio files from the tracks. The files are named after the track names and are numbered sequentially. You can select individual tracks and use Play to listen in case you are worried about a version of a specific track. You can delete them one-by-one after checking or whatever. You can delete all the old copies in one go.
-
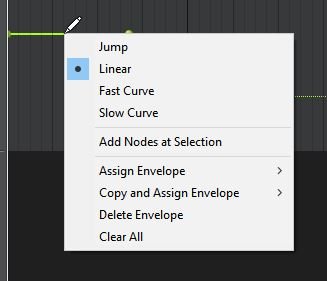
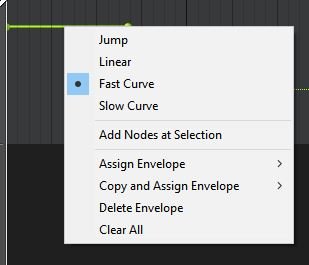
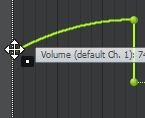
On the envelope. This example is with volume on a MIDI track, but an envelope is an envelope. Right-click on horizontal part of envelope Currently Linear Select Fast Curve Drag node Where the line is vertical, drag the node. (In this case the bottom node.) Now the curve has a bit of horizontalness ? and can be right-clicked.

-
The last time I had bits missing like that it was the hard drive that was on its way out. Made icons disappear from the toolbar.

