msmcleod
-
Posts
7,120 -
Joined
-
Last visited
-
Days Won
39
Everything posted by msmcleod
-
@Psychotronic - we got a cwp file from you, but not the audio... so there's not much we can do investigation wise. Best thing to do is zip up your project directory and sent it to Jon.
-

Using an external Pedal as effect in cakewalk?
msmcleod replied to Marcello's topic in Cakewalk by BandLab
@Marcello - one thing I forgot to mention... If your delay pedal is designed for a guitar's input, it may be expecting a Hi-Z level impedance input rather than the line level impedance your audio interface will be sending out. Your pedal might accept a line level, in which case you're fine - check your pedal's user guide. If it doesn't accept a line level, you might get away with turning the send level down, but really you need to match the impedance otherwise you'll get sub-standard quality. This can be done with a re-amp pedal (they're pretty easy to build if you want to save money): -
That might suggest the sample rate in Windows and the sample rate in Cakewalk are different (e.g. 48Khz in Windows, 44.1Khz in Cakewalk).
-
Using an external Pedal as effect in cakewalk?
msmcleod replied to Marcello's topic in Cakewalk by BandLab
Using MIDI won't help you at all. All the MIDI is used for is to remotely control the pedal (or perhaps for matching delay to tempo) - it carries no audio signal at all. If you just want to use the pedal as an effect, record your guitar dry as normal (i.e. plug the guitar directly into a Hi-Z input on your audio interface), then use a spare output on your audio interface to connect to the input of your pedal. The output of your pedal should go to a spare input on your audio interface. Then use the "External Insert" plugin on your recorded guitar track to send the audio out to the pedal. -
re-activation: fail to recognize userid or pwd...but
msmcleod replied to gamo sphere's topic in Cakewalk by BandLab
The re-activation process within Cakewalk itself uses the Microsoft Edge WebView component. If your Windows 7 has all the latest updates, this should work fine (I've tried it on my Windows 7 boot, and this definitely works). I believe The Edge browser was included in the penultimate Windows 7 update. Failing that, you can use BandLab assistant to re-activate. -
Using an external Pedal as effect in cakewalk?
msmcleod replied to Marcello's topic in Cakewalk by BandLab
You can use external effects using an External Insert... ...however, you may find that it increases latency too much as its having to make two round trips. What I normally do is record 2 tracks for my guitar: one mono track with the dry guitar signal, and a stereo track coming out of my guitar effects. You could do a similar thing using an ABY pedal or DI box: So your guitar goes into the Y input, output A goes directly to your audio interface; output B goes to your effects pedals and then on to your audio interface. If you like what you've recorded, then you're good to go. If you need to change things, unplug your effects from output B of your ABY and connect it to one of your audio outputs, insert an External Insert effect on the dry track, tweak the effects and then either re-record on to another track... or just leave it as an external insert on your original dry track.
-
Sounds like you've got Ripple Edit switched on:
-
Chan eil a ’cheist seo co-cheangailte ris a’ chuspair tùsail. Feuch an cuir thu a ’cheist sa chuspair aige fhèin agus sa Bheurla.
-
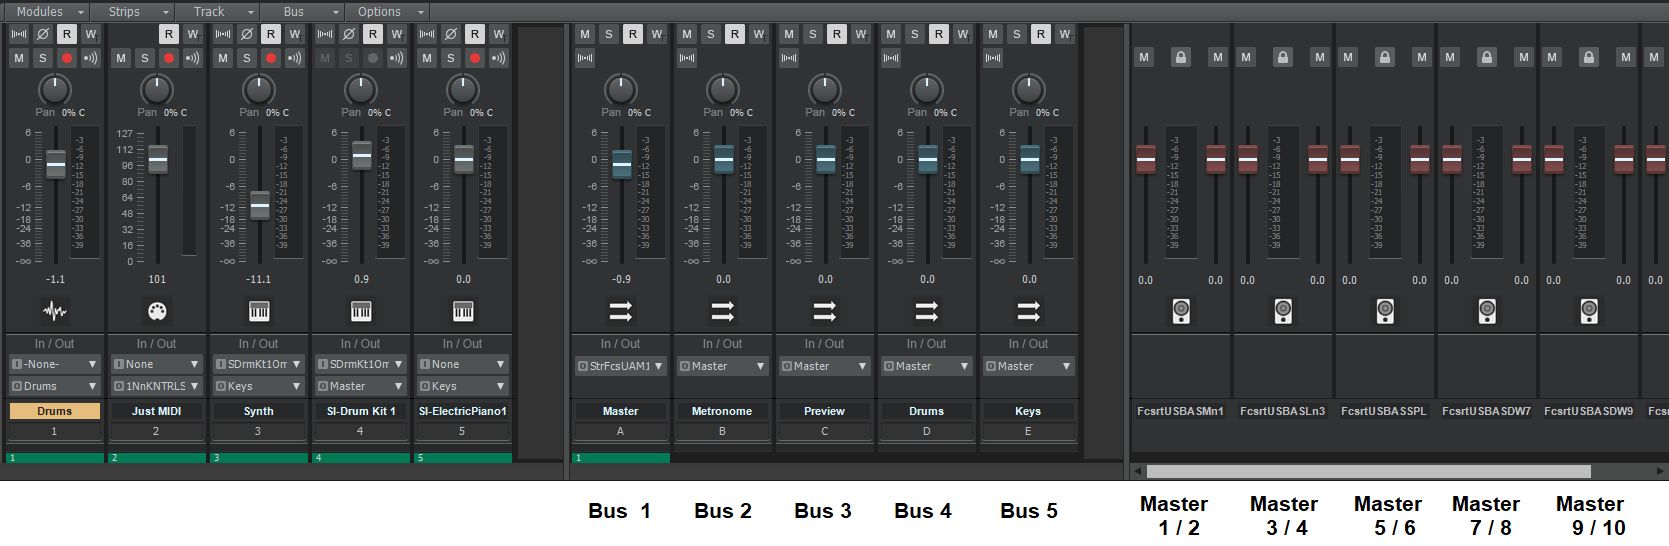
What is being routed to Bus F? Does it have input echo on it, or does it have a high gain plugin on it (e.g. a guitar effects), or a plugin with analog modelling on it?
-
Normally the master fader should be set to whatever your Master Bus is, e.g.: This will control both L&R of a stereo bus. If it's set to Master, however, it'll control a master output - which is normally the Left output of your audio interface. This should give you a better idea of what this control is setting the MCU master fader to:


-
Only triggered events are sent out by clicking on them. Transforms are not, because there is nothing to "send out" - they transform MIDI data being played by the track before it reaches the VSTi. According to the Hollywood Orchestral Percussion manual, it does actually support key switches, so I recommend you consider using them instead.
-
@Czerwony lis - is there any reason why you're uninstalling Melodyne? Even with an expired trial version installed, it allows Cakewalk to do Audio to MIDI conversion by dragging an audio clip to a MIDI track & Tempo Extraction by dragging an audio clip to the timeline. If you uninstall Melodyne, you'll lose these features.
-
@Bill Phillips - we've identified the issue here (it has to do with the clip gain region crossing tempo change boundaries). It'll be fixed for the general release.
-
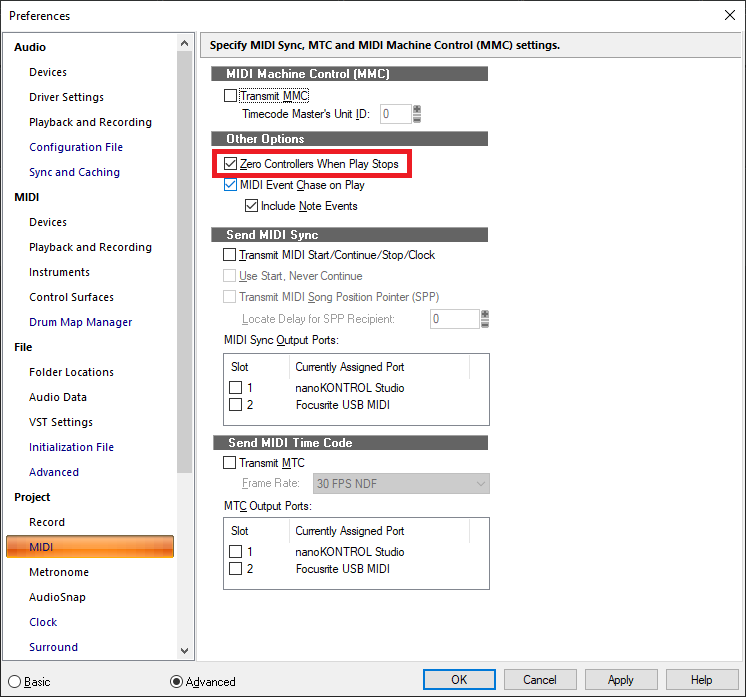
Setting up MIDI-OX is certainly not for beginners, and would probably involve adding at least loopback device as well to intercept the notes. It would be better for you to detail exactly how your keyboards are connected within your system, and go from there. Using keyboards which have their own internal sounds (e.g. SY77) brings an extra layer of complexity as you can easily get MIDI feedback problems. Some synths actually try to stop the feedback which, although is good in a way, confuses the matter because you don't always know the feedback is taking place - the result can be very similar to what you're describing. If you are sending MIDI back out to your SY77, then you need to either turn off MIDI echo within Cakewalk, or set Local Off on the SY77. Even doing this however, won't necessarily stop stuck sustain pedals. If you've stopped a project at a point where the sustain pedal event is down, or half way through a note playing, then it'll remain down/sounding after you've stopped. You need to either just press and release your physical pedal yourself, or make sure zero controllers on stop is enabled within preferences: You can also click the MIDI panic button... which is used 99% of the time for stuck notes / stuck sustain pedals! You mention that the stuck notes are random: - is this always when using the sustain and never when you're not, and does pressing and releasing your sustain pedal at this point fix it? - is it only when you've stopped playback halfway through a performance? - do you have zero controllers on stop enabled within preferences?
-
It looks like you might have several un-muted lanes with clips in them. The clip gain envelope is being applied to the top most clip only, but the waveform display is showing you the mix of all the clips together. You've two choices: - Do the clip gain on each individual lane. - Flatten the comp, and do it on the flattened lane only.
-
automation How to easily select the first and the last automation nodes
msmcleod replied to Rogério's topic in Cakewalk by BandLab
As I said before, this functionality will be in the next EA drop. -
Ok, according to the manual (p 39 ) Notepad-8FX Using the Soundcraft USB Audio Control Panel for PC on the Soundcraft.com website, users can select the “Audio Routing” tab, to select the point in the console feeding the USB bus to computer. For Inputs 1+2, users can select from: Mic Inputs 1+2 Stereo Input 3+4 Stereo Input 5+6 Mix L+R USB return will come into the input channel 7+8, which is the channel where the USB-B connector is attached. This signal is summed with signal coming in the RCA 7+8 jacks, before proceeding down the input channel strip. So it looks like you've got yours set to Mix L+R.
-
You've not mentioned what audio interface you're using, so it's difficult to give you exact steps, but the gist of it is: Some audio devices offer the choice between just the recording what's coming through the line/mic input, or the "stereo mix" - the latter being a mix of what's being played as well as your audio input. You need to deselect the stereo mix option, and only use the audio input. This is done using whatever software comes with your audio device - it can't be done from within Cakewalk. If you're using an on-board device, you can do it within Windows itself:
-
automation How to easily select the first and the last automation nodes
msmcleod replied to Rogério's topic in Cakewalk by BandLab
You could manually enter the selection start time in the selection module? Note: The next EA drop will have some improvements for node selection cut/copy, so this will actually be a lot easier: -
automation How to easily select the first and the last automation nodes
msmcleod replied to Rogério's topic in Cakewalk by BandLab
Don't use the select tool. Use CTRL + Left Click to individually select the nodes, or use right click to lasso the nodes. -
The exported MIDI file does have the program changes. What is happening, is when you load the MIDI file (which is effectively an import), the first program change is automatically assigned to the track:
-
The original site this came from has unfortunately gone, but I've got a copy of it here: https://msmcleod.co.uk/cakewalk/Cakewalk Application Language Programming Guide.pdf
-
[SOLVED] Vertical scrolling bugs on Piano Roll track list
msmcleod replied to Rogério's topic in Cakewalk by BandLab
That's been fixed in the EA release.- 1 reply
-
- 1
-

-
What graphics drivers are you using? Not saying this is the issue, but I remember a while back I had issues with Jamstix and my laptop's NVIDIA card. Forcing Cakewalk to use the onboard Intel graphics completely solved it for me. Might be worth a try. You could also try running dxdiag ( Windows Key + R, type dxdiag, then press enter ) - this will show up any possible problems with your DirectX setup. If UJAM uses DirectX for graphics, any problems highlighted here might explain the crashes. But regardless, you should report it to UJAM.
-
Whenever I've used SONAR / Cakewalk for live arrangements, I've always used stereo mixdowns for each song, so I've essentially got one song per track staggered across the timeline. I'd been doing it this way since Cakewalk Pro Audio 9. Having audio only vastly reduces the amount of resources needed. What I'd do then is get all the levels more or less equal in Cakewalk, then record each song on to Minidisc and CDR as a backup. I was singing / playing guitar or bass at the time, so had no need for Cakewalk itself to be running (and I'd had bad experiences using computers live before going back to my Amiga days). However if you need to use Cakewalk itself live (e.g. because you're playing VSTi's), you can always add only those synths as separate tracks.