msmcleod
-
Posts
7,120 -
Joined
-
Last visited
-
Days Won
39
Everything posted by msmcleod
-
That decision was made before I joined the team. I don't know the reasons behind it.
-
Yeah, I do this too - especially when switching between laptop & desktops. I tend to use loopMidi as you can rename the ports so they even look the same.
-

Please consider a "Non-Quantize Range" similar to Cubase
msmcleod replied to Ben Chase's topic in Feedback Loop
From what I remember, the Window and Strength parameters give you similar functionality: https://www.cakewalk.com/Documentation?product=Cakewalk&language=3&help=EditingMIDI.39.html -
FWIW - in this scenario I use one of the two workflows: 1. Use SHIFT + double click to maximise the waveform, then either SHIFT+double click again or CTRL + ALT + Z to minimise. 2. Open a new screenset and use SHIFT + double click on the other screenset. I can then switch between screensets quickly using keys 1 through 9.
-
You need to turn the groove clip back into a normal clip. Select the clip and right click "bounce to clip(s)"
-
Yes, this is exactly what the issue is. You need to use 64 bit DLL's.
-
No signal in one of the tracks in Cakewalk
msmcleod replied to Victor Flores's topic in Cakewalk by BandLab
I'm not sure why this should be happening, but you shouldn't need to restart Cakewalk to get it working again. At most, just switching the audio engine off and back on again should do it: Is it possible it's just a UI glitch? In other words, does Cakewalk continue to record on those channels?
-
It's working for me.
-
We don't have the TTS-1 source code. TTS-1 is a Roland product.
-
You probably need to add the Native Instruments VST installation path to your VST Search path within Preferences->File->VST Settings. It's normally "C:\Program Files\Native Instruments\VSTPlugins 64 bit" Then click the Scan button on the same page.
-
Thanks @Promidi - we've found the cause and fixed it for the next update.
-
@John Vere - @scook is correct here. The Record Bit depth is the bit depth the WAV files will be recorded at, which is totally separate from the Audio Bit Depth in your driver settings. You can set your audio bit depth to 16 bit, and still record a 24 bit file - it'll only be 16 bit quality though. The audio bit depth of interfaces (for recording) is slightly misleading in any case.... AFAIK... and maybe this has changed... but, most AD converters are pretty much 20 bit in any case simply due to the limitations of the hardware. They use 64 x, 128 x, or 256 x oversampling to mitigate this to some extent. The DA converters in most modern interfaces are pretty spot on though. When audio interfaces say they're 32 bit, that usually means they're sending/expecting audio data as 32 bit words. It doesn't necessarily mean that they're actually sampling incoming audio at 32 bit accuracy.
-
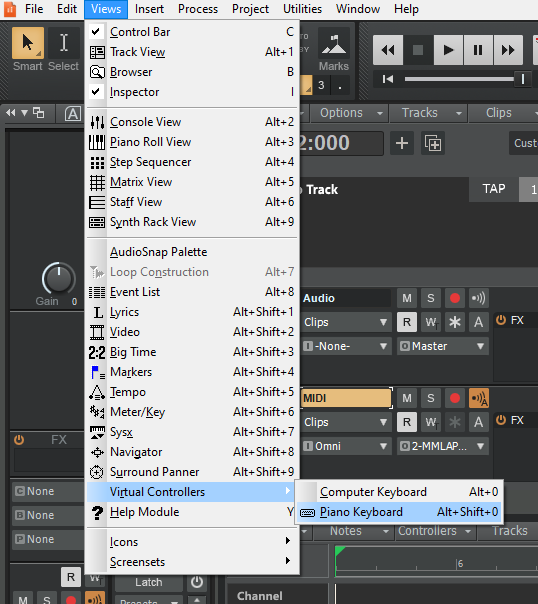
bug report MIDI input routing bug and virtual synths
msmcleod replied to Ronny.G's topic in Cakewalk by BandLab
I took a look at this earlier on - it is a bug. While its true that in Windows there isn't any way of truly distinguishing between hardware MIDI ports (although Cakewalk does try its best to get around this by also using the device name), this is not what is happening in this case. The issue is that it's losing the internal MIDI device ID of the soft synth when loading the template. It then gets that mixed up with the real hardware device ID. Disabling the MIDI output of synths that you don't need MIDI output for will go some way to mitigate this issue. -
Quick groups work on visible items (so you don't end up changing something you can't see and are unaware it's been changed), so this is expected.
-
You cannot buy SONAR anymore. In fact you can't buy anything anymore. Cakewalk by BandLab is what SONAR Platinum was, but now it's free with loads of new features and well over 1000 bug fixes (maybe even 2000 by now).
-
You can find an old comparison chart between SONAR & Cakewalk by BandLab here: https://docs.google.com/spreadsheets/d/1AwrivrPMMqFyAnbRfV03U2ki00VwOJNHeFXolbyyzKA/edit#gid=0 The current (2021.04) release, also includes the following: Cakewalk Classic Effects Suite: Alias Factor, Compressor/Gate, HF Exciter, Modfilter, Multivoice Chorus/Flanger, Para-Q, Tempo Delay ... and also Channel Tools and the PC2A pro channel module.
-
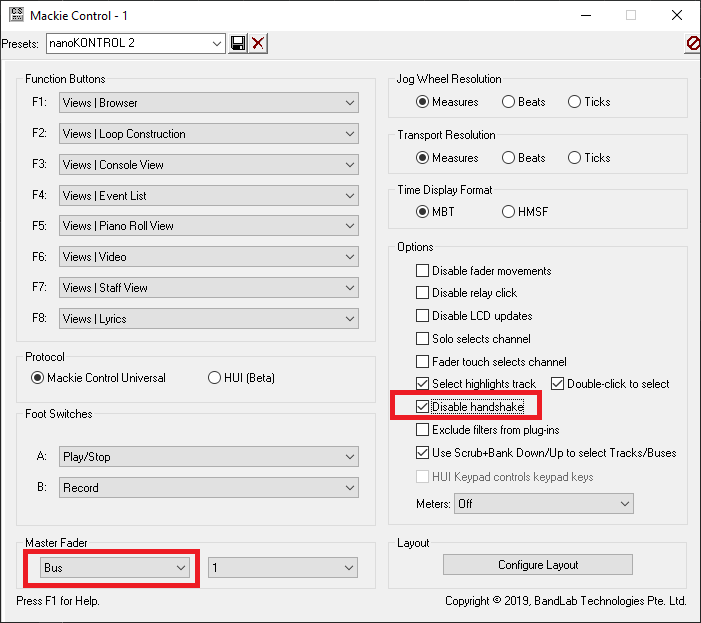
The iCon devices don't officially support Cakewalk or SONAR, so there's bound to be areas that don't work properly (especially the button mapping). You should be able to get basic Mackie faders/transport working however. Any device that doesn't officially support Cakewalk/SONAR should have "Disable Handshake" checked within the Mackie Control Surface Panel (accessed from the Utilities menu): Also, make sure Master fader is set to Bus 1:
-
Yes, this is correct - apologies for the ambiguity in my first statement.
-
Tempo Track settings definitely do get saved in Workspaces as well as screensets. What I said at the time was, you need to re-save your workspaces/screensets in 2021.04 for them to save those settings, as obviously 2021.01 versions of the them have no knowledge of the tempo track.
-
No this isn't possible. Have you considered using articulation maps? They're far easier to use than using the PRV to enter key switches.
-
Just use the tempo inspector. It essentially gives you the same functionality as the old tempo view. FWIW - the old Tempo Map is exactly the same as it was behind the scenes. All the tempo inspector / tempo track, is give you a different way of editing it.
-
If you set the following within Preferences->File->Initialization File: TempoImportErrorThreshold=0 ... the tempo will be imported exactly as it was in the old project and won't try to fit an envelope shape to the map.
-
Reaper's ReaStream plugin will stream over the network (although it's meant for a LAN rather than a WAN)... but it might work. It's just a standard VST2, so it should work in Cakewalk: https://www.reaper.fm/reaplugs/ If it doesn't support WAN streaming directly, you'll definitely be able to use Reastream to stream to OBS, then get OBS to do the streaming over the internet.
-
If the project is loading ok, you can do a "Save As" to a new location - that should only bring the audio that is actually being used with it.
- 1 reply
-
- 1
-