

-
Posts
2,178 -
Joined
-
Last visited
Everything posted by Glenn Stanton
-

Not Liking the look of the New Sonar Interface
Glenn Stanton replied to mark foster's topic in Cakewalk by BandLab
seems to be missing "linear fade in, linear fade out" ? -
are you using export tasks? if not, use them. you can set up the export with the exact set of tracks muted/unmuted etc the time range set the wya you want, etc. i usually create one for the WAV export and then use that to also create the MP3 version. also any stems or no vocal mixes, and of course from my recording template - tracks. so - definitely take a few moment to set up the export task. you will find it makes things very repeatable and easy. one caveat - if you add tracks - you'll need to go into each export task (load existing settings) then edit to mute/unmute and then save the settings. if you remove tracks then usually you don't need to edit those.
-
thanks! i have no issues with ASIO4ALL. i've had it installed for years and never had a problem with it.
-
thanks. i guess they upgraded to WDM. dunno. i only use ASIO4ALL when i need to handle some VI which only operate on even boundary buffer settings and cannot change it in my usual ASIO or WASAPI.
-
this seems like a very personal question to be asking in a public forum ? LOL yes, i do check and pediodically clean the membranes (on my microphones). probably 12-15 years ago i read that spit and other things on the mic capsule can reduce response as well as cause noise, so i've been checking and gently cleaning - distilled water with very soft cotton pad after brushing (very soft paint brush) any dust and particles... i usually use a very low power vacuum for "dusting" the mesh on a couple of mics i have on stands all the time, and also my headphones (and cleaning any gunk of my IEM pair). for live performanc mics, i also take of the mesh and any foam windsceening and give them a good cleaning with mild soap and water and dry throughly. A/B - meaning seeing which mic is best sounding for a given source? most times no, but vocals i may have 3-4 mics initially closely set up to do some tests and record them all (just in case the test is the final one... ? ) then scale those to 1-2 once i know which ones are best for the vocals.
-
it's possible that people still run their software on older systems. not sure if it's a wrapper or not, usually the ASIO driver will have a lot less latency than the WDM. of course, reaching out to their support folks could answer it more directly.
-
backwards compatibilty. possibly a worse reason - they use the WDM/KS with an ASIO overlay (sort of like ASIO4ALL does using MME)
-
Converting Audio to Midi - having problems
Glenn Stanton replied to Roy Slough's topic in Instruments & Effects
here's how it works for me: 1) create the region fx - no blobs 2) simply left-click on the clip (not double-click) and the blobs appear. if you have full screen view of the melodyne window, then you might have additional steps. but if the ARA is working then you just need to sync the position in melodyne with the clip time. in best programming - this would be done for you already. since it's not (at least for me), i just automatically click on the clip once the window opens.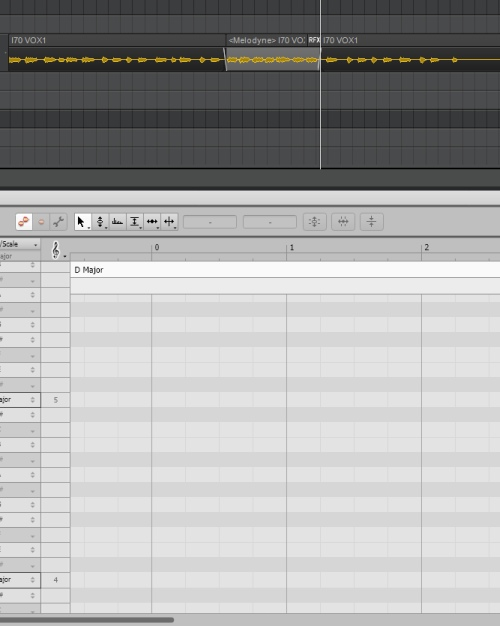
-
$5 million dollars.... <dr evil cackling>
-
Converting Audio to Midi - having problems
Glenn Stanton replied to Roy Slough's topic in Instruments & Effects
maybe you need to install the version you signed up for from the celemony site? i know whenever i install a version or update i have to get it from the site as it contains the license. so even a trial version might need this. -
Converting Audio to Midi - having problems
Glenn Stanton replied to Roy Slough's topic in Instruments & Effects
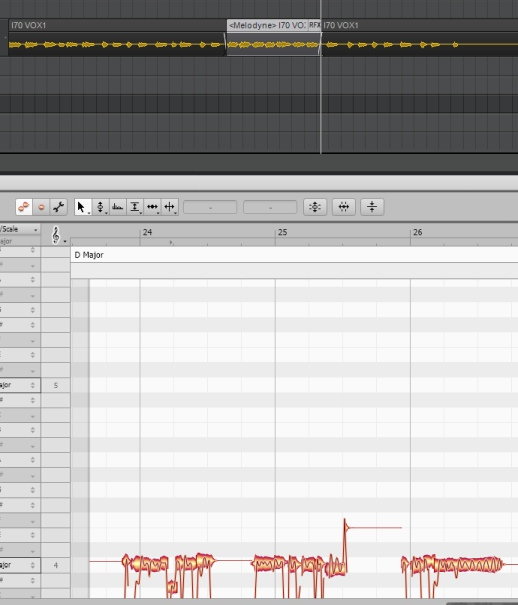
if you're getting a single note, it's likely the percussive algorithm is being used which results in a single note. you'll want to switch to universal etc. -
Melodyne Missing From Region Effects
Glenn Stanton replied to Gregg Markus's topic in Instruments & Effects
it may be those are the reg entries used to control if it's a region fx or not. i didn't have time to search via the uuid values and i could not find a "region fx" registry entry anywhere (even just searching "region"), so i think the BL folks will need to look at this for suggesting a fix. -
Converting Audio to Midi - having problems
Glenn Stanton replied to Roy Slough's topic in Instruments & Effects
the drag to a MIDI track should produce something - usually the Melodyne (which is doing the work) may popup with information about the type (like drums use percussive algorithm). -
Melodyne Missing From Region Effects
Glenn Stanton replied to Gregg Markus's topic in Instruments & Effects
definitely do not edit anything until a thorough check and export a copy before editing so you can restore the entry -
Melodyne Missing From Region Effects
Glenn Stanton replied to Gregg Markus's topic in Instruments & Effects
i have 2 registry entries, a normal looking one and a second with "*0 ... " stuff on the end. the lefthand is the normal looking entry.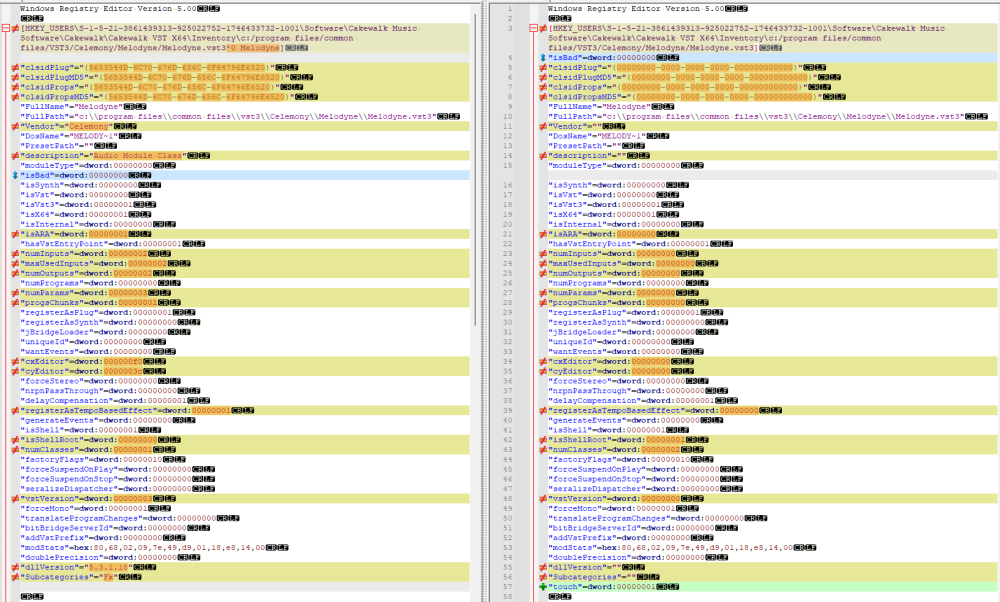
-
Melodyne Missing From Region Effects
Glenn Stanton replied to Gregg Markus's topic in Instruments & Effects
and you checked that is somehow wasn't in the excluded plugin list? it's possible an old registry entry exists saying it's excluded? -
Garage Band on the Mac is free and easy to use, then export the audio and share with you.
-
MIDI Control Of Soundtoys 'Little Alter Boy' in Cakewalk
Glenn Stanton replied to Steve Ennever's question in Q&A
go into your plugin manager - select the LAB plugin and click on plugin properties -> check the "configure as synth". close the plugin manager. then find it in the instruments plugin and load into the audio track. in the MIDI track select the LAB plugin.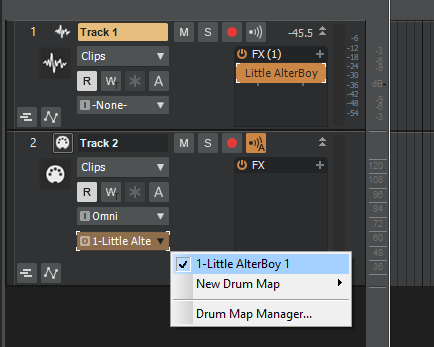
-
MIDI Control Of Soundtoys 'Little Alter Boy' in Cakewalk
Glenn Stanton replied to Steve Ennever's question in Q&A
checked their FAQ from the video: it's an older video. this user seemed to sum it up nicely: maybe they could fix some of their other plugins and then announce undocumented features later... -
MIDI Control Of Soundtoys 'Little Alter Boy' in Cakewalk
Glenn Stanton replied to Steve Ennever's question in Q&A
dunno if it does support MIDI as there is no reference in the manual for it. you might just use envelopes to control it.
-
Who has a good video on ripple editing ? -solved-
Glenn Stanton replied to mark skinner's question in Q&A
do a split on the audio tracks at the time marker to get the cross fades (it's set to auto) (MIDI tracks don't need to be pre-split) set ripple edit on use project -> insert time/measure, ensure it's going to insert 1 (or however many) at the time selection (very important) and insert turn ripple edit off (very important) i find reliably selecting and dragging a bunch of tracks is an iffy proposition. esp if ripple edit is on and a simple miss on the selection can be a painful recovery. -
Melodyne Missing From Region Effects
Glenn Stanton replied to Gregg Markus's topic in Instruments & Effects
maybe a quick check to see if it got excluded somehow (in the plugin manager). then check that that your using the default or manufacturer listing? -
maybe check: C:\Cakewalk Content\Common\Plug-in Menu Layouts (or whichever drive you're using for Cakewalk Content)
-
I have to reopen Melodyne for notes to show up
Glenn Stanton replied to T Boog's topic in Cakewalk by BandLab
i usually just left-click once on the clip and it re-aligns the time marker with Melodyne. then again, the FX window opens over top of the console view for me (same as PRV). -
WHAT!!! you have electronics and no electronics cleaner spray? LOL ?


