
-
Posts
2,301 -
Joined
-
Last visited
Everything posted by Glenn Stanton
-
same issue - no scan seems to be taking place. maybe the bug is that we shouldn't have a menu item under the layout section for VST scan folder on that menu since we have the plugin manager in utilities? 🙂
-

What happened to the Split Instrument/ Instrument track Icons?
Glenn Stanton replied to Bass Guitar's topic in Cakewalk Sonar
as a note: i also never use instrument tracks, always a dedicated MIDI and a dedicated audio for my VI. simply a matter of the way i organize my templates and my workflow. i'm sure if the instrument tracks work for folks, good. my preference is to keep them separate. makes aligning my record and mix templates much simpler, and if i'm "cheating", i can readily render my VI and remove the MIDI tracks and VI and drop right in to mixing. -
What happened to the Split Instrument/ Instrument track Icons?
Glenn Stanton replied to Bass Guitar's topic in Cakewalk Sonar
hmmm in your Sonar one, and i see keyboards on the Instrument, and keyboard and MIDI icons on each respective split. i think we need to have another icon for Instrument similar to the old one then with the keyboard AND MIDI combined like those of yore... -
What happened to the Split Instrument/ Instrument track Icons?
Glenn Stanton replied to Bass Guitar's topic in Cakewalk Sonar
when i set up a project like you show, an Instrument track (i.e. contains both MIDI and the VI audio output) the instrument tracks all have the piano icon, and when i split that or simply insert synth, i get both a piano and midi icon (per track respectively). are you thinking the Instrument track should resemble the older MIDI+keyboard icon rather than simply the keyboard icon? fwiw, i never use Instrument tracks, just MIDI or audio, this way my templates are organized as "audio outs or record clips" in the top section, and all the MIDI tracks sit all together. i do this A) to avoid confusion, B) i can render and delete all the MIDI and VI and save as a mix project, and C) my record and mix templates are essentially all the same except the mix template has no MIDI tracks. -
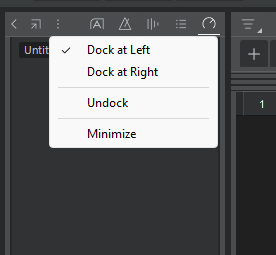
as far as i can tell, the inspector strip is it's own child window. it has it's own docked left/right, undocked etc view options but if you're running multiple monitors (for example) i would presume you could undock both the console view and the inspector and place them into the preferred monitor...
-
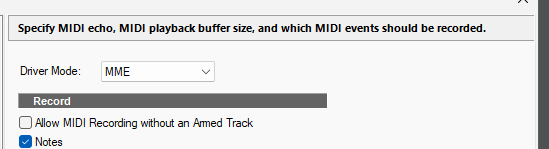
is the issue that you have multiple MIDI devices sending DAW control signals? in my setup, i have one device which (in addtion to all the other MIDI info) is the controller of DAW commands (Start, stop, etc) and the other simply provides note, velocity, modulation etc and volume information. i guess technically i could use the non-controller to send commands as well but i just don't). if it's things like program changes, presumably that is based on the channel rather than the controller MIDI.
-
also un-check:
-
i found the 2.2 version online in "MyProducts" but not the earlier version... good luck on finding your CD...
-
for me, on my D: content drive D:\Cakewalk Content\Z3TA+ 2\Programs
-
if you don't need the graphics, this EQ is excellent: https://www.wavefoundry.net/post/antelope-audio-releases-free-eq-plugin-veq-mg4 and free now...
-
yeah, i have a number of custom workspaces which give me different tool sets and views so i can jump into whatever i'm working on - viewing just tracks, view just busses, viewing tracks and console, viewing busses and console, record, mix, and compose. when i open a project, i just select my custom workspace and get to work. don't care what it was when i last exited. at most 0.5 seconds to switch it. 🙂 i'll switch workspaces probably 8-10 times during a given work session. i find it easier than using screensets...
-
workspaces span projects. in mine, if i last used "mix" (custom) and then open up a recording project, the workspace will still be "mix"
-
thanks! i have that one already myself. i thought you meant the main product. LOL
-
Finding a project template using the Quick Start menu
Glenn Stanton replied to norfolkmastering's topic in Cakewalk Sonar
you need to put them into your DRIVE:\Cakewalk Content\Sonar\Project Templates folder. on my system that is the D: drive.
-
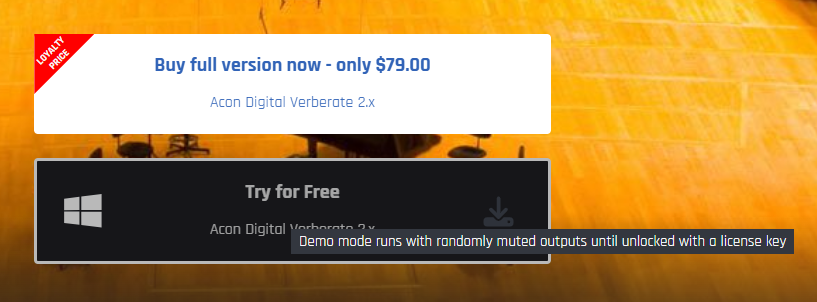
fyi -- the Acon verberate is $199 ($79 for existing customers) and the "free" version is demo...
-
Using Sonar for recording and playback
Glenn Stanton replied to Forlænget Spilletid's topic in Cakewalk Sonar
if you set the pan to -3db center when centering, you should see the levels match. -
Bit Depth Stuck at 24 bit (ghosted out) (Sonar paid)
Glenn Stanton replied to ZincT's topic in Cakewalk Sonar
i think the IO unit only supports 24-bit - https://g1.ikmultimedia.com/html/Manuals/AXEIO/AXE-IO-User-Manual.pdf you know you can use 16-bit tracks in a 24-bit recording (the LSB is just padded until you use effects etc). -
Synthesizer V Studio 2 Pro 2.1.2 plugin won't load in Sonar
Glenn Stanton replied to Johnny Algoma's topic in Cakewalk Sonar
use it as region FX. Sonar has great ARA and the region FX works. as a note however, i rarely use it this way. i tend to do all my work in the standalone app using a 2-track export of the instruments as a guide, then import the audio. if you do use the ARA keep in mind several things - render when done, and save external your work (to be safe). -
all that sounds good, but what if?
-
and a more 21st century approach, replace their vocals with a combination of Synth V and an AI voice-over rendering engine 🙂 use Melodyne to force best pitch correction w/o too much weirdness export as WAV and load into Synth V and do convert to audio pick approximate voice and tweak as needed export Synth V to WAV, then import that into the AI voice-over render engine and pick a decent voice similar to theirs or whatever they want Render new vocal into the AI voice. export, and import that into the DAW project. ok, so now their lead vocal sounds like Bob Seger, Celine, that Grande person, or someone else in perfect pitch etc. but hey, at least they get to go home with a pro sounding track. 🙂
-
i don't have K7 installed anymore but K8 seems to properly size etc in Sonar. so maybe it is something not getting communicated to K7 or used by it...
-
nope. all my config and libraries are intact. as a note - all my content is on my 😧 drive and all program bits on the 😄 drive
-
ok, updated. it went pretty fast (download and install - 10 minutes?) so it doesn't feel like a large update. so far, testing (~15 min) MIDI with all my devices, everything seems normal. one of my main concerns was Kontakt 8 and KompleteKontrol to my S49 - works fine. all other MIDI functions (for me) are good.
-
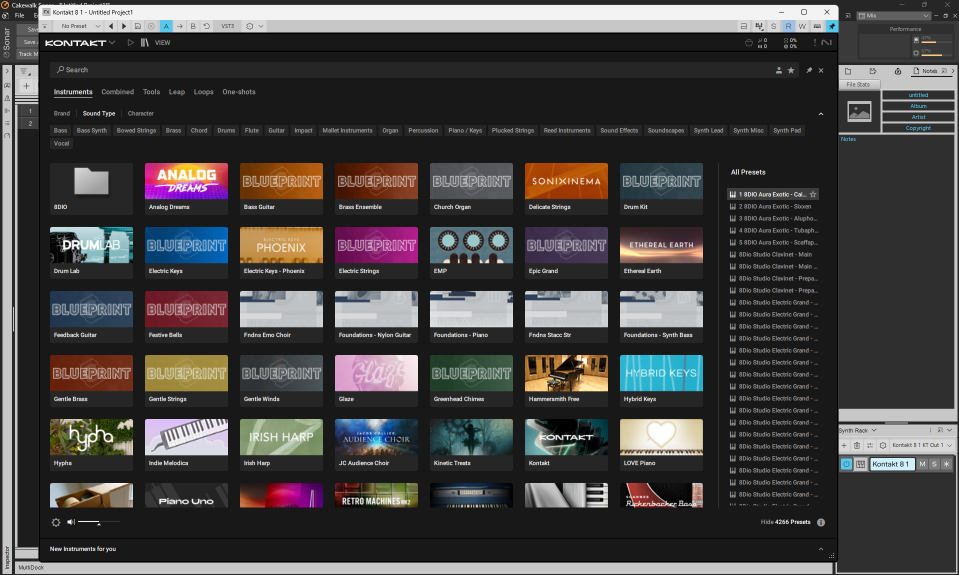
i have to say, Kontakt 8 is a good upgrade. i was reluctant at first, but then a couple of libraries i wanted only ran on K8, so i installed the trial version, and voila, everything in K7 was there (and faster). a few updates later and it's stable so i bought the upgrade (cry once...) and then removed K7. as a couple of folks noted - check your display settings. Kontakt never had a very large UI (possibly the #1 thing i don't like) but on my screen with the display enlarged to counter the pixel density, it's all good.
-
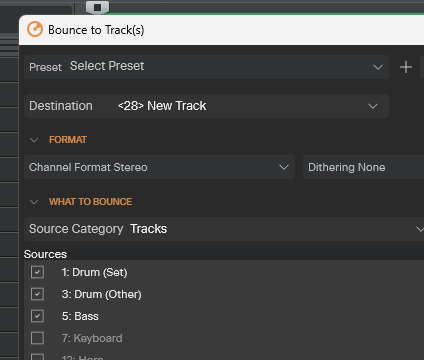
[SOLVED] Bounce multiple tracks to 1 stereo track?
Glenn Stanton replied to Salvatore Sorice's topic in Instruments & Effects
it seems easy enough to setup: select the tracks, select the destination, go... if you need to, set the time range (if defaults to the length of the tracks selected, or loop or punch range) press OK... if you want the tracks "mixed" in a bounce, then you need to assign/send them to a single source - a buss or aux track then bounce that. pretty sure this is different than "export" (even though the UI seems similar if not the underlying code bits) as it's intended for bounce operations inside the project... whereas export would be something i use for stems and track exports (as well as mixes and sub-mixes).