

jono grant
-
Posts
607 -
Joined
-
Last visited
Posts posted by jono grant
-
-
Hi,
Is there a way to set all tracks waveform visual to the default value all at once? I know how to do them individually, and increase or decrease all tracks at once, but how to set to default?
(The same as double clicking does to the right of the track properties area for an individual track, only for all tracks at once)
Thanks
-
Hi,
When I capture the resulting audio waveform on a bus and I add an envelope, say volume, the envelope displays BEHIND the waveform so you can't see what you're doing when moving the nodes of the envelope. It doesn't do that on a regular waveform only on a waveform preview drawn waveform.
Seems like a bug unless I have a setting on that I don't know about. I thought x-ray might have something to do with it but it's the same whether x-ray is on or off.
Edit: I realize I can create an automation lane but sometimes it's nice to be able to tweak the envelope while looking at it on top of the waveform..
Any way to change this?
Thanks
Jono
-
39 minutes ago, Detwoen said:
Sounds like you might have Auto Track Zoom on. Try Shift-Z to toggle it off or on.
Yeah, that's got it! Thanks!
I must have been doing a redo command and messed it up.
Cheers!
-
I think I've clicked on something that is making all my tracks resize when I'm only trying to click/drag/resize one of the tracks.
I know this is normal within lanes but it's doing it out in the normal track view.
PS. If I "maximize" one of the tracks it will let me resize independently but not otherwise.
Any idea what I've clicked on here?
Thanks
Jono
-
Hi,
I have my record preferences set to "do not group tracks" yet, if I record some takes on a single track (sound on sound) they seem like they are grouped. When I slip edit one of the clips in a lane, they all slip edit with it. Though, it does let me slip edit from the end of the clips separately, in a random kind of way (some clips are grouped, some not)
Is this normal? I can't seem to find a good tutorial on take lanes/recording. I'm still used to earlier versions where it was just layers...
Thanks
Jono
-
Hi there, wondering how to set up Cakewalk's "external insert" with my UAD system.
When I open an instance of the external insert on a track, I see only the UAD "virtual 1" input showing in the list. Under outputs I see all my available outputs.
Am I supposed to use the virtual input to do this? In other words: Choose Virtual as the "send" and then in the UAD console, send Virtual to the output of my choice and then choose that same channel in the external effect return?
Thanks
Jono
-
Thanks very much for the detailed explanation! Will give it a try.
JG
-
Thanks for the replies!
Auto-save has auto-saved my butt too many times to turn off, however, now that I know about plugins causing the changes I can control it a bit more.
Cheers!
Jono
-
Okay, thanks. It's a pretty big file with over 100 tracks etc. and many plugs. Perhaps an automation envelope on plugins might cause that do you think?
I assumed it would only consider manual changes made by the user. It gives me something to test, thanks!
I will say that sometimes it will happen after not playing the file or anything for a minute or two, and when I return to do something it auto-saves.
Interesting indeed
Jono
-
Hello, I have my auto save set to save after 10 minutes or 10 changes but it seems to be doing auto saves way more frequently than I have it set to.
Any reason for that?
Thanks
-
Thanks. Yes, the tracks etc are identical.
I'm not sure what file to drop where though, sorry, just learning about the mix scenes.
I see there is a folder called "mix scenes" saved with the session file but I don't see the mix scene that I created and named, only mix scene 1 and 2.
If I can find the correct mix scene, how do I drop it onto the file I want to bring it into?
Thanks
Jono
-
Anyone there who could answer this?
-
I did a mix of a jazz quintet in Cakewalk and saved the mix scene with the session file.
Is there a way to open the next song and open that mix scene for it? I can't figure out how.
Thanks
Jono
-
On 3/5/2019 at 6:38 PM, msmcleod said:
IMHO JBridge is FAR superior to BitBridge, as it has so many compatibility options to tweak.
Cakewalk's integration with JBridge is good to. You no longer have to fire up JBridger to create 64bit wrappers around your 32 bit plugins.
If you go into the plugin properties (either from the Synth rack, or Plugin Manager), check "Load with JBridge wrapper" and the next time you load it, it will be with JBridge.
Cakewalk also uses its original VST id, so you can swap between BitBridge and JBridge without it thinking it's a different plugin.
FYI JBridge can also help with 64 bit plugins, such as the UJAM Virtual Guitarist VSTi's which seem to require a crazy high buffer size otherwise.
So do this with any VST I have that is 32 bit, would you suggest?
-
23 hours ago, Noel Borthwick said:
They are not
Well, whatever they're using seems to work. Hopefully Microsoft can do something about it if they become aware of it.
Thanks
Jono
-
35 minutes ago, Noel Borthwick said:
OK so if I'm summarizing correctly:
- You import an MPEG4 video file into cakewalk and choose to import its audio.
- The audio has padding applied at the beginning to line up with the video.
- Within Cakewalk when you play the imported audio along with the video it plays perfectly in sync.
- Now if you export just the audio from cakewalk it is out of sync with another app that plays the same video because of the padding.
If the above is correct this is related to the video engine that we're using for playback and transcoding. All the video support in Cakewalk is based on Microsoft's built in video support. We don't really have control over how it internally handles video playback and transcoding. In fact if the offset to the audio didn't get applied, then it would be out of sync with the video in Cakewalk itself. I think that would be a far worse problem.
I can pass on this information to Microsoft since its not something we can solve internally. If you are taking audio out of Cakewalk that originated from an MP4 your only solution right now is to manually trim the silence from the audio before exporting.
Yes, that's correct; but why don't the other programs have this problem? Aren't they using Microsoft's video support as well? Assuming that they are, it would be a cakewalk issue. Are they not using Microsoft video support? J
-
Hi Noel, thanks for the reply.
When an MP4 or QuickTime file is inserted into Cakewalk, it adds silence before the start of the MP4/QT. Whereas other programs don't.
There is nothing wrong with the way Cakewalk is exporting audio, it's rock-solid. It's that the MP4/QT has the silence added to itself, so when you watch it and score to it in Cakewalk, everything looks fine. But when you export any audio and someone tries to marry the audio with the same video in another program, that program won't have the added silence issue, so the audio exported from Cakewalk will be late when brought into another program.
Cakewalk is functioning properly except it adds the silence to the MP4/QT. So the video and video's audio track both play later than they should. My tests were done by exporting the MP4's original audio so the sync issue would be obvious as I was zooming in on the exact same audio.
If you did the same test with an AVI or something, there's no padding added to the video file, so it wouldn't have the issue. Everything would look identical when brought into another program.
Another simple test would be: make an AVI and an MP4 of the exact same video. Bring the MP4 and it's audio into a cakewalk session, then replace that video with the AVI (keeping the MP4 audio in the session) - the newly imported AVI's audio would be out of sync with the audio from the MP4. The MP4's audio would be late by a frame or so. Even though they are the same footage. The padding is added when the MP4/QT is inserted into cakewalk, not on export.
I was able to test it, exporting from ProTools, Cubase, Sound Forge and then re-marrying the video and audio in Vegas and there was no sync issue. So those programs don't add any padding/silence to MP4s or QT files. This is a different issue than with MP3 files, which add the padding in any program.
PS. Someone here in the original post suggested trying "vidplayvst" which is a VST that you can use to insert video into Cakewalk, but it did the same thing. That might offer a clue of some sort...
Hope I explained it a bit more clearly.
If there's anything else I could supply to help any investigation, I'd be happy to!
Thanks
Jono
-
Hi Noel, just wondering if you got a chance to look at my reply on this. Thanks!
Jono
-
I think cakewalk staying open after closing is related to something 32 bit VST related, or bit bridge... I will see a teleport stopped working message from time to time.
I used to use J bridge on older Sonar, is that still necessary to install to use 32 bit vsts? Everything is mostly 64bit but there are a few 32 bit things in there still. Just wondering if I can minimize the program hang on closing.
Thanks
-
I do normally put things on their own track if they need to be. I have it set for sound on sound as well.
I might have a bunch of clips of one instrument on the same track that have cross-fades for instance. It's one of the great feature of Sonar/Cakewalk that there is no restriction as you what you put in one track, as long as you know what you're doing. In many cases, it's midi, you might have a bunch of clips that all trigger the same midi sound etc. and don't want to have tons of tracks in your session. Many of my files have over 100 tracks in some cases, if I had a separate track for every different cross-faded clip or added midi harmony etc. the file would get very messy.
I just kind of liked how "layers" worked in previous versions. The new features are cool but a little confusing for me to get the work flow happening.
I guess I'll look for some good tutorial vids online. The ones I've looked at perhaps aren't detailed enough.
J
-
I think what's happening, is that when video is in full screen, Cakewalk BL can't receive key commands... play being the main one but I tested others, like trying to "undo" or "save" etc. The full screen video blocks the key commands, which is why it won't play. Frustrating stuff...
No one else having this issue?
Thanks
Jono
-
3 hours ago, msmcleod said:
Full screen is working fine for me.
The only thing I can suggest as a workaround is to make a separate screenset with the multidock taking up the whole of the track area, and the track inspector minimised. You want to set the video stretch options to "Stretch to Window".
You can then press "C" to hide the control bar (press "C" again to show it).
This will show the video on most of the screen, e.g.:
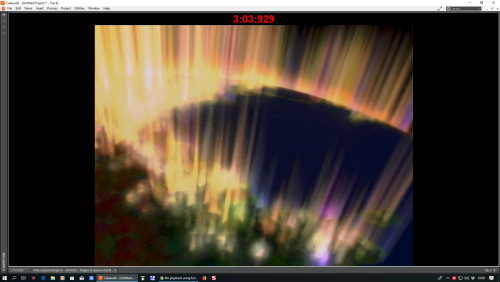

The advantage of this approach is, that if for example, you set this to be screenset 2, with your normal tracking in screenset 1, you just press "2" to view it "almost full screen" and press "1" to go back to normal tracking view.
Cool idea, thanks! Still wonder why it isn't working. It does, sort of, sometimes...weird. Anyhow thanks
-
1 hour ago, John said:
What is your graphics card? Are you running the latest drivers for it? Do you dual monitors?
AMD radeon HD 7900... it says it has the current driver... Platinum and X1 play video in full screen no problem. It's just the Band Lab version which I'm trying to migrate to.
-
It seems that when I choose full screen in Cakewalk BL, I have no playback. The video window just sits there if I hit play. If it's not full screen, it plays normally.
What is going on???
J
Default waveform display size
in Cakewalk by BandLab
Posted
Anyone?