-
Posts
2,816 -
Joined
-
Last visited
-
Days Won
8
Everything posted by Lord Tim
-

CW freezes when Input Echo is engaged
Lord Tim replied to Michael McBroom's topic in Cakewalk by BandLab
Yeah, if this is freezing, this is saying driver issue to me. Even if you're not using the driver, just having certain things installed can cause big issues for a lot of audio apps, Cakewalk included. I'd go into the registry and delete any device other than the one you're using in here: HKEY_LOCAL_MACHINE\SOFTWARE\ASIO That said, if it's just not playing and the driver is tied up, you'd be surprised at how some apps like to hog stuff in the background. Chrome is a great example of that. -
Kevin is on the money here - Cakewalk won't allow you to save to UNC drive shares, but if you map a drive letter to it, it'll work fine if you save to that letter. EDIT: Just to elaborate further, if you go to your network shares inside Windows File Explorer, you'll see \\scfc\shared$ in the Network places. Find the folder you want to save to in that share. Right-click on that and do Map Network Drive and choose a letter (eg: Z: ) And now you'll have a new "drive" in your computer called Z: In Cakewalk, you'll want to navigate to that drive letter rather than \\scfc\shared$ to save your projects. It'll save to exactly the same place but it'll just appear to be a local drive to Cakewalk and work correctly.
-
I would do this: Set up 2 busses: Master and Metronome. Set your Master bus output to your soundcard outs. Pan your audio track to the right and set its output to the Master bus. Pan the Metronome bus to the left and send its output to the Master bus. Then go into your metronome settings and make sure the metronome output is going to the Metronome bus. That'll get you what you want. If you actually want to bounce this down to an exported mix with the backing track and metronome in it, there's an extra few steps involved because Cakewalk won't export the live metronome sound, but if you're just playing this live from Cakewalk, this will be all you need.
-
Aha! There it is!
-
That all said, I was lucky enough to grab a mug and a couple of shirts when they went up just after the Bandlab purchase and I know it's just a matter of time until I break the damn mug ?... it'd be great to see Cakewalk merch up online again, not even necessarily as an income generating source - that seems to be pretty well covered already - but just so as people who use CbB can have something they can own related to their DAW of choice. And to replace broken mugs.
-
I think the idea there is to make any colours be non-distracting unless you're specifically "activating" it, which I agree is counter to what the button actually does and is a bit confusing. I think a better icon is needed - one with FX and a line through it, so in the deactivated state, it's not lit, but when it's activated you'll clearly see that "the button with the FX crossed out is on" kind of thing, meaning your FX are bypassed. I have a vague recollection that someone has done something similar in the Themes forum? Colin? Erik? Anyone? But yeah, I think that would be nice to be added into the stock themes. I'd suggest the PDC button could have something similar too.
-
Yes, with a project loaded, go up to the Workspaces dropdown in the top right of the screen, then choose Manage Workspaces, and in the dialogue box that pops up, you can select which options get applied or not.
-

Sonar 8.5 Producer: Cakewalk TTS1 Audio Suddenly Disappears
Lord Tim replied to Annabelle's topic in Cakewalk by BandLab
Yeah it's playing for me too, however it looks like there's something that's getting mixed up with the CC event that's controlling the Master Volume. It should be CC 3 in this case, but I managed to get it into a state where it was resetting to 0 each time, and the only way to fix it was to clear the controller number from TTS-1 itself. Somewhere in the project is some rogue CC data which is affecting the slider in certain circumstances. What I might be inclined to do is Select All events in the timeline, then go up to Edit > Select > By Filter > and have a tick ONLY in the Control checkbox, pressing OK and then pressing Delete. That will remove all the controller data. The only issue is that if the Master Volume is down, you won't hear the synth at all until that's turned up, which would require JAWS somehow getting to that control... and if it could do that, then my earlier solution would be much easier to do. The other option I can think of is if someone who still has 8.5 installed could open the project, clear the Controller binding from the Master Volume in TTS-1 and re-save it and send it to Annabelle, that would at least get her back up and running with this project. -

Sonar 8.5 Producer: Cakewalk TTS1 Audio Suddenly Disappears
Lord Tim replied to Annabelle's topic in Cakewalk by BandLab
This might be tricky for JAWS to see. My nephew is blind and has similar frustrations getting around with screen readers, so I sympathise! I'm not sure how JAWS will see the tabbing layout of the controls, but the Master Fader is the very last slider in the GUI, if that helps at all. -

Sonar 8.5 Producer: Cakewalk TTS1 Audio Suddenly Disappears
Lord Tim replied to Annabelle's topic in Cakewalk by BandLab
OK, what I think is happening is you have a controller applied to the TTS-1 Master volume slider, and it's either changing or setting it to zero when you play the song. See if this helps: Open up the TTS-1 synth itself, find the Master Volume control and right-click it. In the dialogue box that pops up, click the Clear button. Then set the Master Volume to maximum (127). If I'm right, the project should play every time. -

Sonar 8.5 Producer: Cakewalk TTS1 Audio Suddenly Disappears
Lord Tim replied to Annabelle's topic in Cakewalk by BandLab
Just looking at this now. The first thing I noticed was TTS-1 crashed. ? But after that it opened and I got no sound. Dim Solo was enabled for the project but that didn't affect anything. When I opened up the TTS-1 GUI, I noticed the master output was set to 0. So that's likely why this had gone silent. Now let's find out why it's doing that. -

Sonar 8.5 Producer: Cakewalk TTS1 Audio Suddenly Disappears
Lord Tim replied to Annabelle's topic in Cakewalk by BandLab
Could there be a faulty MIDI controller (eg: a USB MDI keyboard) transmitting volume changes to your synth? I know on my cheap UMX61 it has days where it sends heaps of random controller information by itself... thankfully not anything that interferes with anything I use, but I do have to go in and remove it later if it happens during recording. -
This looks like parts of it have been deleted independently of the uninstaller at some point. Try the Clean Install procedure here: https://help.cakewalk.com/hc/en-us/articles/360034066393-Clean-Install-Cakewalk-by-BandLab
-

How do I use an iRig2 Audio Interface in Cakewalk for Guitar?
Lord Tim replied to Lawson Currie's question in Q&A
That's the iRig HD2 in the video (which I have, and it's pretty good actually, although I've only used it on an iOS device, as you can see in my ridiculously compact live rig) but the iRig2 only has a TRRS connection, not the USB/Lightning connector the HD2 has if I recall correctly. ASIO4ALL is pretty disappointing though. Theoretically, that should be able to use WASAPI though, shouldn't it? EDIT: Bam! Jacques beat me to it by 2 seconds! ? -
Yeah, this all looks pretty normal to me. What happens if you do a Render in Real-time export? You should be able to do an Audible Bounce too, to hear that it's all going down OK. If that works, I'd say some plugin is having some weird freak-out about going faster than real time in this particular project for some reason. EDIT: Or untick 64-bit engine, that can also make some plugins have a bit of a cry.
-
I just did a scan on it on VirusTotal.com and only 1 out of 70 vendors flagged it, and even then it was listed as a 'Generic Potentially Unwanted Application', which isn't actually malware, but it's been somehow been flagged to this vendor as bundled crapware. I'd call this a false positive from your AV.
-
Could you share a screenshot of your Export Audio dialogue screen? If the Export module is working properly but the main Export Audio dialogue isn't, that might give us some clues as to what's happening.
-

Envelope Adjust Over Time Range Bug (?) [SOLVED]
Lord Tim replied to Bill Phillips's question in Q&A
Apologies in advance if I'm not understanding this properly! If you're in an Envelope mode in the edit filter and you already have a segment created (by doing one of the methods we talked about in this thread), ie: you have 2 automation points, a segment, and 2 more automation points, then CTRL+drag down on the actual envelope segment itself and it should do what you're after. -

Envelope Adjust Over Time Range Bug (?) [SOLVED]
Lord Tim replied to Bill Phillips's question in Q&A
Champion! -
What you're after is either a Bus or an Aux, and I'd say an Aux is probably more what you're after. Click on the output of one of your guitar tracks and look for New Aux Track in the menu that pops up. That'll make a new track that this track feeds into. Then assign all of your other guitar tracks to this one the same way. Alternatively, choose New Stereo Bus and it'll make a bus channel down in the lower pane. It works almost exactly the same but I do find it more convenient to have anything grouped like this up with the regular tracks.
-

Waves L2 problem with old projects
Lord Tim replied to Thomas Bones's topic in Instruments & Effects
I can't begin to tell you guys how much I wish I'd followed that advice over the years ? -

Envelope Adjust Over Time Range Bug (?) [SOLVED]
Lord Tim replied to Bill Phillips's question in Q&A
Yeah, valid points there for sure - being able to adjust multiple envelopes is a useful feature! Because I only had a single track open when I was doing this, it felt like it should do the same thing because it'd be contextual as to what envelope you'd want to adjust if I hovered over a particular track, but now I think about it, you'd lose a handy feature by forcing it to be this way. I do typically do the time range over a clip thing rather than the ruler method though. EDIT: That said, when the cursor changes and it doesn't allow you to actually move an envelope (caused by the Tempo track), it's a bit confusing because you'd expect it to do something based on the cursor changing. @Bill Phillips - that sorts out my question/issue. Does that apply to what you're seeing too? -
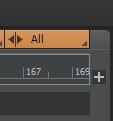
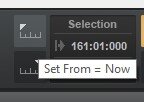
Bonus tip: If you want to just delete everything from the end of your project, including any left over bits that are making your project to continue to play past the end, do this: 1. Put your cursor at the place where you want your project to end 2. Do CTRL+A to select everything 3. Enable Ripple All (just above the ruler): : 4. Click the Set From = Now button in the Select Module on the Control Bar: 5. Press Delete. Everything from where your cursor is to the last event on your timeline will be deleted, making this now the new end. 6. DISABLE RIPPLE ALL! Seriously, double check you did this before you tangle yourself up in a big mess. I've done this. It sucks.
-
Projects automatically stop at the last event on the timeline when you render them, so if it's stretching out past that, there's likely some automation node or something like that somewhere past the end. There's no project length as such, but if you drag your mouse over the time ruler at the top and select the portion you want to export, that's all that will be mixed down. Alternatively, you could look for and delete those rogue events that's causing the project to stretch past the end. I'd also recommend having a look at the fantastic tutorials in the Tutorials sub-forum if you're finding it a slog to go through the manual: https://discuss.cakewalk.com/index.php?/forum/35-tutorials/


