-
Posts
4,917 -
Joined
-
Last visited
-
Days Won
5
Everything posted by David Baay
-
To clarify further, Plugin Delay Compensation is active on all tracks that aren;t affected by the PDC-inducing plugin, and the button of the same name is actually 'PDC Override',. Enabling it overrides PDC on input-monitored tracks. But it sounds like the OP understands this. The question is what are the MIDI tracks driving... soft synths, input monitored hardware synths or direct-monitored hardware synths. Live soft synth audio gets buffer up in advance, and behaves just like rendered/recorded audio tracks. But MIDI to hardware ports isn't compensated for PDC so audio from hardware synths can get out of sync one way or the other, depending on how they're monitored, and whether you're playing back or recording.
-
Pause enables 'CPU Conservation Mode' that limits UI updates one per second.
-
 Looked at it briefly last night. Didn't see anything particularly unusual about the set, except for the mono inputs to Aux tracks getting set to stereo as you mentioned. It could be related to how the template is structured when all the components are already in the project on the first save. Possibly your progressive build-up bypassed a bug. That'll be difficult to track down. Maybe best to let the Baker look one of the broken templates alongside the working one.
 -
How do I insert a CC 7 event at a certain spot of a track?
David Baay replied to tdehan's topic in Cakewalk by BandLab
In Views > Event List, hitting the Insert key on your PC keyboard makes a copy of the event at the current Now time. You can then double-click the Kind field, select Control, OK, and then set the controller number and value. More on the above: https://www.cakewalk.com/Documentation?product=Cakewalk&language=3&help=EditingMIDI.45.html Overview of other options: https://www.cakewalk.com/Documentation?product=Cakewalk&language=3&help=EditingMIDI.44.html Details on drawing controllers in the PRV Controller Pane: https://www.cakewalk.com/Documentation?product=Cakewalk&language=3&help=EditingMIDI.20.html In a lot of ways, the easiest is to use a CC7 automation envelope In a MIDI track, but that will require some general knowlege of working with envelopes as well as how to add one for CC7 so you'll want to begin at the beginning: https://www.cakewalk.com/Documentation?product=Cakewalk&language=3&help=Automation.11.html -
I haven't used it as much as I should, but I've generally recorded the Jamstix MIDI output early in the game and switched it to MIDI Playback mode. Then I can re-arrange and edit the MIDI to get the best fit to the music I've already composed, and maybe move some parts to another VST if I'm not getting the sound I want for a particular kit piece from Jamstix. In that case, I typically take the quick and dirty path of moving the MIDI for that part to the relevant note number on another synth track . The more 'elegant' way would be to use a Drum Map on the MIDI output to send that part to the desired note number(s) on the desired synth, but it takes more time to set that up, and since It's usually a one-time thing for a particular project, I don't bother.
-
Track templates are saved as .cwx files in this default location: C:\Cakewalk Content\Cakewalk Core\Track Templates
-
If you save a copy of the track template without the plugins loaded, does that cause trouble by itself when re-loaded? If so, maybe share a copy of that 'empty' template for others to try and see if it's reproducible on other platforms.
-
For one thing because MIDI CC messages are, in fact, discrete events, not a continuous curve as implied by an automation line. When using automation, you have little or no control over the density of controller messages being sent (not sure whether or how Studio One addresses this). Not such a big deal when working with soft synths, but when working with a multi-timbral hardware modules on a single MIDI port, it can be very important to minimize the event density by using no more than the necessary number of control changes to get the desired change in sound. That's not to say a new approach isn't possible, just that there are reasons for the way it's currently implemented.
-
I'm pretty sure this is all working as intended. When soloing a track, everything contibuting to its output needs to be soloed also, or you'll lose the sound so the Synth and any MIDI tracks feeding it will also get soloed. That's not the case with Muting. Muting anywhere in the chain silences the ouput. When you mute the synth in the rack, it mutes any tracks that depend on it so you can see that those tracks aren't going to sound even when the rack isn't visible. But a synth can be feeding more than one audio track (either via multiple outputs or multiple tracks assigned to the same output) so muting a track should not mute the synth unless it's a MIDI track, and it's the only MIDI track driving the synth. An Instrument track associates a single MIDI track and a single audio track with a synth, so muting an Insturment track will also mute the synth.
-
Set Beats in Clip value in Groove Clip section of the Track Inspector to the full length of pattern.
-
I didn't actually see any mention of a specific Melodyne feature that's available via Rewire but not via ARA integration. But I'm not a Melodyne power user; maybe it's obvious to those who know the standalone app well. I mostly use it for Tempo and MIDI extraction which is best done inside Cakewalk.
-
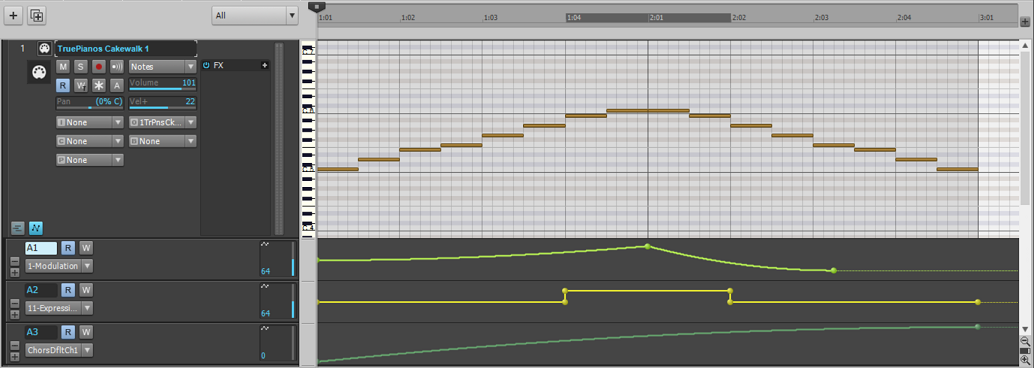
Probably wasting my time, but that Studio One screenshot looks a lot like an Inline PRV with automation lanes under it:

-
Steps: Expected Result: Actual Result:
-
It does of you use Alt+left-click with snap to zero crossings enabled.
-
I didn't get the e-mail. But after logging into Eventide, I got the $29 offer by clicking on the 'Crossgrade' button on the Octavox page.
-
Glad to help, and totally understand where you're coming from. It can be very hard to find stuff like this, so it was a good move to ask the forum. And I agree that mute tool (and normal split tool) should have an auto-fade option.
-
Global snap applies when drawing tempos with the 'Freehand' tool, but the line tool (and probably other pattern tools) do not appear to honor snap. If you don't want to draw freehand, you could use Project > Insert Series of Tempos, but that works by entering a step value for bpm rather than a duration between changes, so you have to calculate the step size which is awkward, and the biggest tempo step it allows is 1 bpm, so its still generally going to insert more changes than necessary (this is an ancient function that needs updating). Since I record everything in real time, I'm usually coming at it from the other direction: making the timeline conform to existing tempo changes in the recording, using Set Measure/Beat At Now, so I end up with changes right at the start of each note whatever the interval is - no more and no less. Cakewalk really needs a 'smart' tempo drawing tool that only inserts tempos at note starts, regardless of what tool you're using to draw them. In the mean time, feehand drawing with snap enabled and then tweaking out any undesired 'roughness' in your drawing by clicking above or below the 'wayward' values (still with snap enabled so you modify existing tempos rather than drawing new ones) is probably the best option.
-
I think you were right the first time that plugin delay compensation should just take care of it all transparently. And it does for the most part. I would urge you to take some time to figure out exactly what plugin or combination of plugins and/or project routing/setup is cuasing the problem in your current case, and report it to the Bakers with a demo project. If it isn't in fact due to misreporting of delay by the plugin, they may actually be able to address the problem. And if it is a problem with the plugin, they have relationships with major plugin vendors to help push for a solution.
- 25 replies
-
- 1
-

-
- new takes not synced
- plugin latency
- (and 2 more)
-
The only real 'difficulty' with Cakewalk in achieving the same result is that MIDI automation envelopes are only available in MIDI tracks, so you'll have to split your beloved Instrument track. It seems that just addressing this one limitation would go a long way toward addressing your needs, and shouldn't take a huge development effort; all the necessary functionally is already in place. Sure the flexibility of bezier curves is cool, but it shouldn't be a showstopper not to have that. Was Studio One unusable when it didn't yet have that?
-
Change Source in the bounce dialog from Tracks to Buses, and select only the Master bus or the first bus where they come together.
-
I doubt the Prepare using buffer has much to do with this. The root of the issue is having too many tempo changes. Musically, there's no value in having tempo changes at a higher frequency than notes are being played, and having that many changes will play hell with the rendering of some synths and FX. When drawing tempo changes, set snap to equal the smallest interval between notes events - looks like a quarter or an eighth in this case.
-
Just to be clear, the pop is not being 'added'. It's the natural result of truncating a waveform where the amplitude is high. Stopping a high-amplitude signal dead at a zero-crossing will still result in a pop. The issue is not so much where in the cycle you stop the signal, but how fast the signal level is changing when you stop it. So, if you can't avoid cutting off the signal in a high-amplitude area, you must add short fade in/out. The easiest way to make this happen automatically is to use the Comp tool in lanes to split out the section before muting it. Comp tool automatically creates a short crossfade at split points. It defaults to 5ms which will suffice for most cases, but can be adjusted : Preferences > Customization (Advanced view) > Editing > Auto Crossfade Comps. And if you're actually compiing, Comp tool also lets you mute one section and unmute the corresponding section in the parallel lane just by clicking on the one you want to hear. Cakewalk as a deep and capable as any DAW out there; you just need to learn it.
-
Replacing/augmenting bass tracks etc using /Audio Snap/Drum Replacer
David Baay replied to Gary Shore's question in Q&A
I'm always happy to give guidance via the forum where everyone can benefit from it. A lot of the more general quesions you have are probably better addressed by Googling the web at large for articles that that explain MIDI, synth, and DAW technology more broadly. Although many forum members have enough knowledge to write a book (and some have), not many have the time or inclination to write more a than a paragraph or two at a time on the forum. Where the forum shines is in answering specific question about how to accomplish some relatively narrowly-defined task in Cakewalk. You'll get the best mileage out of the forum and your time with Cakewalk by just diving in and trying some things, and asking more specific questions as they arise. The way you use Cakewalk will depend greatly on what kind of musician you are (or aspire to be) and how you personally like to work. Everybody's different in this respect, and you'll need to find your own way to a great extent. -
Sort of. brundlefly is yours truly. The new forum defaulted to showing my real name, and I decided to leave it that way. David Baay, a.k.a. brundlefly, a.k.a Seth Brundle.
-
CC messages are not typically referred to as 'automation'. So what you want is per-clip controller messages. Is it mainly that you want the messages to go with the clip when you move/copy it around?