


Larry Jones
-
Posts
462 -
Joined
-
Last visited
Everything posted by Larry Jones
-
My bad. I thought it might be something like that, and I should have been more clear. Thanks!
-
Continuing from previous post: Installed the new version of Melodyne (4.2.2.004), opened the same project, and voila! - I have blobs. I tried a short region and a long region, and blobs appeared in the Melodyne editor, although I had to chase around a little to find them as they did not appear in the visible portion of the editor on my screen. I still don't have the option you show in your screenshot @Noel Borthwick, but at least the plugin now seems to be usable. This project was always just a test project. I'll have to use Melodyne on something bigger to be sure it's really working, but for now I'm happy -- except for not really knowing why it's working now and not before, or why I don't have the same Options menu as Noel.
-
Back from my travels. Tried to follow your screenshot @Noel Borthwick but I don't have the choice to set clips to follow selection: Also, so far this evening, no blobs. Also, I just noticed that a Melodyne region that I thought I had rendered last week is not only still there, but it is the entire track, not just the region I selected originally. Also, I created a short Melodyne region, got no blobs, then discovered that I cannot Remove Region FX - that option is greyed out in the Melodyne menu, as is all the other options except for "Create Region FX. Undoing back to "start" doesn't get rid of the region, either. Closing without saving and reopening doesn't help - the Melodyne region is still there, with no option to remove it, and no Melodyne editor. I'm running Cakewalk by Bandlab 2019.05 (Build 31) and Melodyne Editor 4.2.1.003, but as I type I am downloading the latest Melodyne update (4.2.2.004). Since I have to restart my computer to complete the installation, I'll post this, restart, see if there's any improvement, and report back - right away, I hope.
-
Thanks @Noel Borthwick! Since I access Melodyne the same way each time and get intermittent "no blobs" results, my problem may not be related to what you write above. When I get back to town later this week I'll test again using the good information you provided, and report back. I really appreciate your input on this.
-

CbB 2019.05 and Melodyne 4.2.1.003 BUG
Larry Jones replied to Ciodontrax's topic in Cakewalk by BandLab
FYI, the latest version of Melodyne is 4.2.1.003. And despite some issues, the latest version of Cakewalk is working well with the latest version of Melodyne. Unfortunately for me, I am having issues. I'd still recommend going ahead and updating. -
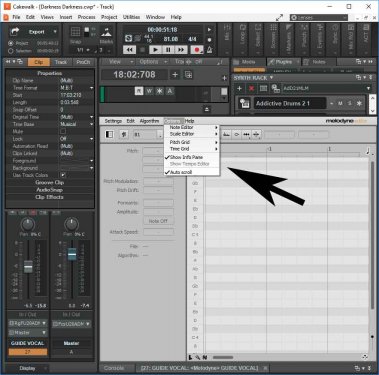
Do you mean "Options|Note Editor|Clip Mode?" The Note Editor flyout is one of the things that's greyed out when this happens. On my system, "Track Mode" is the one that has the checkmark, and I can't change it. On occasions when the blobs are displayed this menu item is active.
-
'preciate it, Craig. Take a look at Harry C.'s problem, too. It looks a lot like mine. I don't know if it would be a GUI issue, though, because when there are no blobs, most of the Melodyne menu items are greyed out, too. The blobs are (evidently) not just invisible. They really are not there.
-
CbB 2019.05 and Melodyne 4.2.1.003 BUG
Larry Jones replied to Ciodontrax's topic in Cakewalk by BandLab
I can confirm this is really happening. Before I saw this thread I posted one of my own, describing a problem just like this one, only in my case it's intermittent and random. -
I'm running Cakewalk by Bandlab 2019.05 (Build 31) and Melodyne Editor 4.2.1.003. I think these are the latest versions of both. When Melodyne works, it's great, but it's hit or miss when I create a region FX with it. Sometimes when the editor opens I have blobs, and sometimes not. I have tried making sure my timeline cursor is in the region. I have selected long regions (12 measures) and short ones (less than one bar), and it's erratic either way -- sometimes I get blobs, and sometimes not. If I have no blobs I can't do anything, so I "remove region fx" and try again. Eventually it works, but it doesn't seem to be related to anything I'm doing. It just decides to work. Any ideas about this? Thanks! UPDATE: Just noticed this other thread about what seems to be the same problem. User thinks it might be in the German version of Melodyne, but I'm using the English version.
-
Is Melodyne Essential now a time-limited trial? When I first got it with SONAR it was a freebie, no timeout.
-
I didn't know you wanted to work this in to a live performance. In that case Cakewalk automation is probably not the right way to go. Frankly, I don't what would be the right way. I'm not familiar with Ableton, but I hear it's geared more for live performance.
-
Pursuant to Bob's suggestion, go here (PDF) and search "automation." There are many parameters that can be automated, not just volume/fades.
-
MIDI Sound on Sound Bounce to Clips
Larry Jones replied to Larry Jones's topic in Cakewalk by BandLab
This doesn't work, although I have a vague recollection that it used to. To be clear: I record a simple piano part. Then, in sound on sound mode, I record another piano part on the same track in the same section of the timeline. This yields two clips, one hidden on the timeline behind the other. I select the track by clicking on the number of the track and bounce to clips. I still have two separate clips, as if I haven't bounced anything. Two suggestions above (scook's and chris.r's) both work for me (the two clips are combined into one), though, so I'm happy. -
You don't need to solo it. Just select the track it's in, click on the clip, and export audio.
-
I can't recall ever needing a wav file from a single MIDI clip, nor have I seen anyone complaining about in this forum or the old forum (until now). It's just never been in my workflow. However, if I needed this, I would just select the clip and export audio. It would take a few seconds.
-
I'll see your Pauls, and raise you Mick Jagger and Frank Sinatra. Nailing notes is for opera singers. (For my voice, I need pitch correction just to get in the same time zone with the note I'm trying for.)
-
MIDI Sound on Sound Bounce to Clips
Larry Jones replied to Larry Jones's topic in Cakewalk by BandLab
Reporting back as promised: @msmcleod - Nothing to report, as I've already tried this with take lanes closed, and it didn't work. I'm now wondering if something changed recently, because it seems to me that I used to just select the whole track and bounce to clips, and that made my various SoS clips into one clip. @scook - "Flatten Comp" with take lanes open does what I want. Thanks! @chris.r - Yes, if I lasso the clips I get the intended results just by bouncing to clips. This is marginally quicker for me than scook's solution. No need to open take lanes. Thanks! @Lynn - Nothing to report, as I'm recording all on one track. -
I used tape recorders for 20 years before DAWs even existed, so I usually punch guitar parts in overwrite mode. It's the way I learned, and hey -- if I'm punching in, it's because I don't like the way I played it the first time. But you should think about comping -- maybe not for guitar, but for vocals it is a HUGE advantage to do it that way. Take a look at these videos here and here. I try to record a bunch of complete vocal takes, just one after another, and then make a comped vocal track using only the best phrases I can find in the take lanes. If you're making records, this is what your competition is doing, and in the end I think you'll find its not really that hard to do.
-
So are you wanting to hear both guitars playing together after you do your punch? If so, use separate tracks. Otherwise... ...When you punch in in comp mode with "Mute Previous Takes" checked (that's the way to do it), the existing audio in the punch region is muted and moved down to the next "Take Lane." You can see the take lanes by opening them using the button in the left end of the timeline. See here for details on this. I don't work this way myself, so I'm rusty, but if, after you've done a punch, you then want to hear your earlier take, you can open the take lanes (at first there will be just the top track and one lane), click on your punched-in audio and (as @Base 57 says above) press "K" on your keyboard to unmute it and, I believe, promote it up to the top track. But for me, the point of comp mode and take lanes is to do a number of takes -- either complete or partial -- and when you are done, composite or comp a track using the best sections of your playing. I gather you want to hear the old take as soon as you've done a new take? I hope this makes sense to you. I'm still not entirely sure what your end goal is here, so help me if I've got it wrong.
-
Yes, this piques my curiosity as well. So you have a MIDI clip but no soft synth assigned to it, and S1 or Tracktion figures out which soft synth to use and renders the wav file for you? Does it also determine what bit depth/resolution you want to render to?
-
MIDI Sound on Sound Bounce to Clips
Larry Jones replied to Larry Jones's topic in Cakewalk by BandLab
Take lanes closed. Bounce to clips after selecting the whole track. No love. Honestly, I never even looked for take lanes. I didn't think I'd find any in SoS record mode. I'll check that and report back. I think this might do it! The problem might be that the clips I can't see are not selected, thus don't get bounced. Lasso might capture all the clips. Will try this and report. The clips are all on the same track. Sound-on-Sound record mode. ? Thanks, guys! I'll try these and report back. -
Because I'm not much of a keyboard player I sometimes use sound-on-sound record mode when creating a MIDI track. For example, I'll record the left hand of a piano part, then add the right hand on the same MIDI track in SoS record mode. This yields two MIDI tracks (or more) sitting on the timeline, one in front of the other(s). They play back as expected, but here's my question: How can I blend these MIDI clips into one MIDI clip? Seems to me I used to select the track they are in and "Bounce to Clips," but this no longer works -- if it ever did (I might have been dreaming). Thanks for any advice!
-
This "feature" is already part of Cakewalk. It has been for decades. It's the default behavior. I tried to help you sort it out in your other thread, but I never was able to understand exactly what you thought wasn't working the way you wanted it to work. Still happy to go through the process with you step by step if you want to get it working.
-
When you just hit record you will only be able to hear the input. When you are punching in, you will hear the track up to the point where you punch in, then it will switch to input. Is this not what's happening? This is the way it worked in the Cubase video you posted. This is the way it works in CbB. Could you describe exactly how you are setting up autopunch?
-
The default behavior in CbB is just like what's in the video you posted ("tape machine mode"). You arm the track, turn on input echo, roll the transport. You hear the track until you punch in, then you hear the input. When you stop the transport or punch out, you hear the track again. I feel like I'm missing something here. This is the way it works. If it doesn't do this for you, something's wrong, either with your installation or your settings. Sorry, I don't follow this:
