-
Posts
148 -
Joined
-
Last visited
Everything posted by Dave G
-
Thank you for the response to this question. I do wish that the bundled software and other functions in Cakewalk were more completely documented. Just making sure those knobs would/wouldn't be useful one day.
-
I'm sorry I'm just getting back to this topic. Thank you for the detailed replies! As I don't really dabble in compression or EQ, I'm still learning other ways (more within my personal comfort zone) to tweak the sound of my instruments to make them come out less..."cheap-sounding". Usually, I use TTS-1 as a reference instrument, and then later replace it with one from Cakewalk Sound Center or Studio Instruments. That way, with a higher quality instrument, I feel I have to do less tweaking.
-
Thank you for the responses! I have always wondered if the velocity in the PRV behaved the same way it did in the drum synth GUI -- or if that realism could only be triggered through the use of an external MIDI controller. ?
-
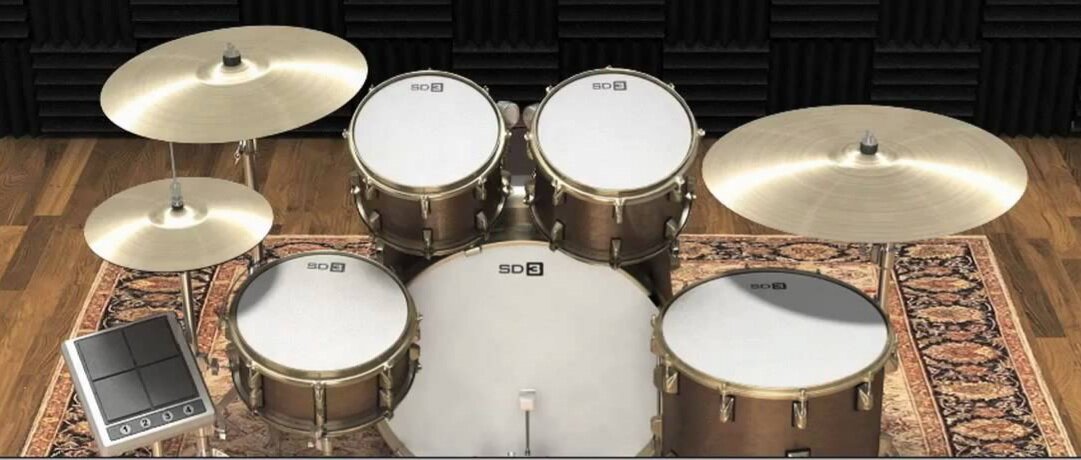
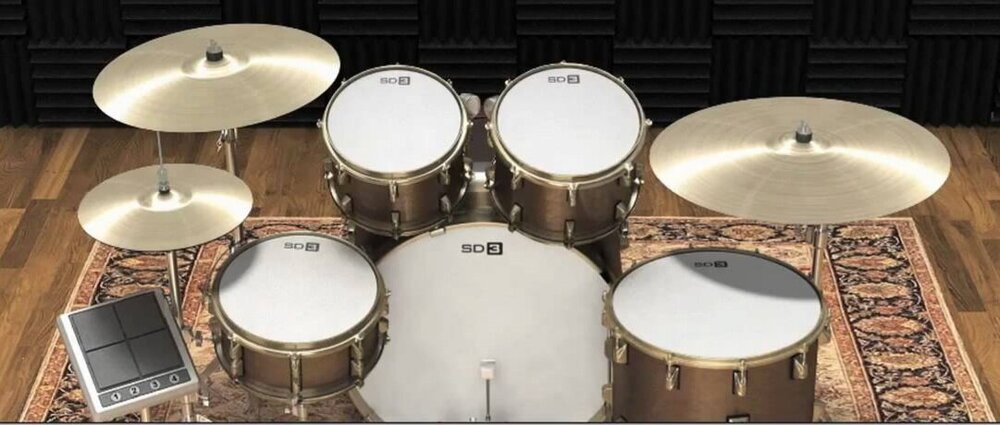
I notice that, in the drums GUI of Session Drummer 3 and SI Drums (for example), where the drum piece that's hit affects the velocity (high hit: harder, low hit: softer). I think this is an exceptional element for realism when simulating the hardness of the drum hit. However, I've always wondered: Is the same effect applied with the velocity controllers in the Piano Roll? In other words, does the velocity level of a drum note correspond to the hardness of the hit the same way it does in the GUI? Or not, because those numerically-designated controllers are MIDI-based? [ Because I notice that hitting the drum harder not only increases velocity, but also amplifies the other properties of the drum piece. ] Just wondering. ?
-
I'm an amateur MIDI musician who started composing in the 90's. Using Voyetra Digital Orchestrator, I created General MIDI tracks strictly within the confines of my PC: simply drawing notes into the Piano Roll, no live instruments or external hardware. I knew nothing about mixing; I just created the tracks, effects/controllers, set volume levels and called it done. Needless to say, when I listen to these tracks now, I could've done much better. Twenty+ years later, I work in Sonar/Cakewalk in the very same manner as above. Synths used: TTS-1, Studio Instruments, Session Drummer, Cakewalk Sound Center, and Addictive Drums 2. I'm not a professional musician...I just simply wish to create the melodies I hear in my head. Target audience is the casual listener. I live in a small apartment environment which isn't suitable for acoustically-treated walls or a large assortment of equipment. However, once I get further along, I may purchase an audio interface and studio speakers/headphones. Otherwise, I have to work with what I have and be happy with it. That being said, I will explain my experiences the best way I can. I've recently begun the process of remixing my old MIDI songs in today's DAW. Having started in Sonar but also experienced in Studio One, I feel my place is in Sonar/Cakewalk. However, the drastic evolution and advancement in digital music software has left me consistently overwhelmed and questioning my processes. I've sat on this project for over six years, because I constantly get frustrated, annoyed, second guessing, overthinking -- and repeatedly abandoning the project to start up again. But now I feel determined and motivated to keep pushing, do it right and finish some day. To the point: I've watched countless videos on mixing, volume levels, gain staging, and the like. I've taken notes of everything I learned, especially things that I can't find in the Manuals, documenting it in my personal reference guide. But I'm still confused, unprepared, and unsure of what I'm doing, worried about doing everything wrong. I seek guidance and education to help get my projects off the ground without fear of messing up. To begin, here's my understanding of the gain staging process: Set every channel's fader volume at 0db. Begin setting track volume using the console's Gain knob, staying below -12db to -18db. Implement each track's plug-ins/effects. (I don't use EQ or compression, as these techniques are beyond my comprehension.) At some point, I intend to bounce these tracks to audio to preserve them. (Before/after step #2? And how do I convert the audio back to MIDI?) When the mixing is complete, set fader levels accordingly, preventing clipping. I'll have to export and store my finished projects in both raw and final formats without losing any plug-ins...I have no idea how. All my TTS-1 instrument tracks are gradually upgraded to SI Instruments, Sound Center, etc. Problem is, these other "synthtruments" are about 15-25% louder than TTS-1 instruments. But when I lower that track's Gain knob, the instrument becomes muddy, muffled, and distorted, and the Gain knob has reached a horrendously ridiculous level (< 50/60%). I've also heard that I can raise that synth's volume level to compensate lowering the Gain knob too much. (But by how much?) The entire gain staging process has gotten me so conflicted and rattled that I don't know how do it right. On the other hand, I've seen articles that suggest simply ignoring the gain staging hype (don't worry about that Gain knob) and focus solely on preventing clipping throughout the entire process. So, my biggest pain point is to gain stage/not gain stage...and that darn Gain knob. Properly balancing the volume levels without misusing the Gain knob. I don't think I even want to use that anymore. Can I create a balanced mix without even using the console's Gain knobs, and just use the faders in the end of the process? I know every musician's routine is a subjective personal preference, but I'm having a great deal of trouble establishing a process that works for me...after all, still an amateur. Because of the complexity, this project is literally taking me forever because I can't make a decision. CONCLUSION I apologize for the rambling, as I have to lay out all the details. It could be said that, after so many years, I clearly have no business making music and perhaps should be pursuing other hobbies. But I truly feel I can do this. It's been complicated, but I'm thankful for several users here on the Forums who've answered so many of my questions in the past as I work on these projects. Therefore, I hope for some insight to get me going with confidence and hopefully more education. I could really use some help here, and dumb it down if you have to. Please provide your thoughts and guidance to above? Thanks in advance!
-
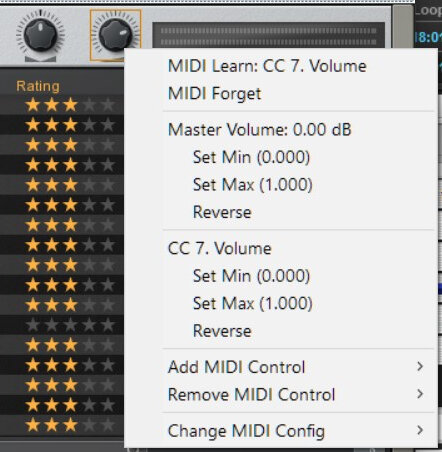
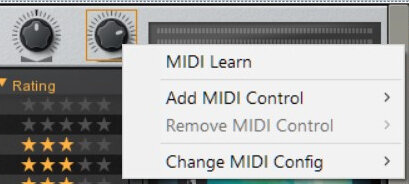
Cakewalk Sound Center's Pan + Volume knobs are clearly explained in the F1 online help, but not their right-click menus. I accidentally changed one of the values of these menus recently, and I'm confused and wondering if I messed something up. The knobs' menus indicate their current level. But they also show a current MIDI Learn CC selection (see fig. A) or a short menu with no Learn (see fig. B). It appears the context of these menus changes when "Add MIDI Control" is selected. This applies to both knobs and they can be set independently. I don't understand the right-click menus. Is there a default MIDI Control to set it to, or can it be anything I choose? I don't use MIDI Learn. Do I have to worry about these right-click menus, and will these "learned" controls affect playback? And for that matter, can someone explain "Set Min, Set Max, and Reverse"? As stated, I've only recently discovered these menus. Any help would be greatly appreciated. Thanks in advance.
-
Sometimes, while I'm drawing a note in the PRV, the velocity tail appears. It's a vertical line from the beginning of the note being drawn. But this only happens sometimes, and sometimes the new note is drawn without the tail. I can't figure out why. How does this happen, and can it be disabled? Thanks in advance
-
I've set up an instrument track for SI Drums -- nothing quirky/out of the ordinary set up here. In the SI Drums synth window, all the drum pieces in the kit play fine and at normal velocity. However, in the Piano Roll and in playback, only some of the drum pieces are heard -- and some are much lower volume. Again, this is all one drums track and I have adjusted no velocity/volume dials here. Then I noticed that the culprit could be the Gain dial in the Console. When adjusting the Gain dial (traditional gain staging), I notice that some drum pieces are affected more than others (i.e. only the toms). The pieces of the drum kit don't seem to respond to gain at the same consistency. However, this seems to work fine in other drum synths (TTS-1, Addictive, Session Drummer 2, etc.) I really like the SI Instruments suite, but if the Drums don't work well with Gain, what am I to do here? I've read that gain staging is a necessary step in mixing. But it's diminishing the output of only some of my drum pieces. How do I manage/fix this? Any information is appreciated. Thanks!
-
I believe I'll consider this resolved, by reason of "Run as administrator". I'm considering this topic closed. I can't delete it, so I'm going to let this issue go.
-
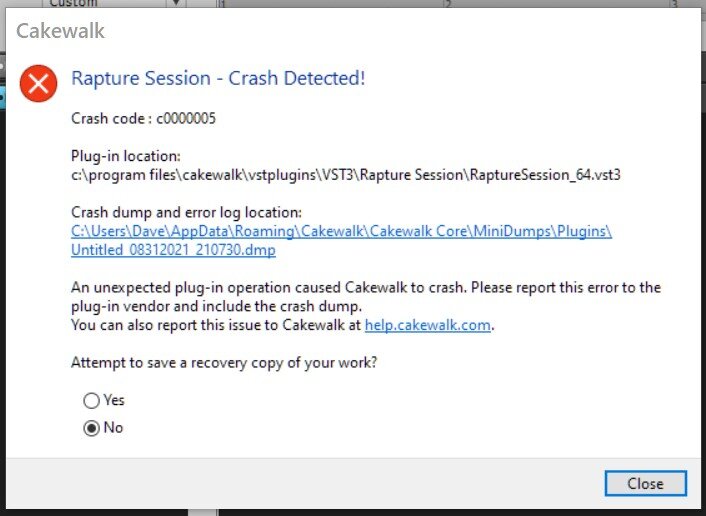
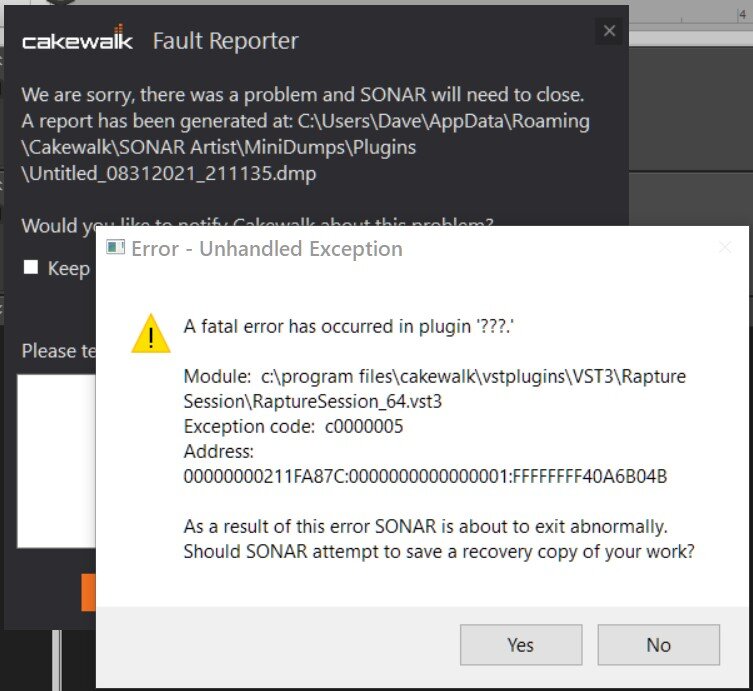
I installed Rapture Session (via the Cakewalk Command Center). I drag the synth into a new Track, and when I click the synth icon to open it, I encounter a c0000005 crash. This occurs in Sonar and Cakewalk by BandLab. I have tried these steps: Uninstalling both DAW's and removing the Cakewalk registry keys. Then I reinstalled both DAW's with Rapture Session as the only synth. Moving the Rapture VST3 from Program Files/Common Files/VST3 (why would it put that there?) to the actual DAW VST3 plugins folder. Has anyone had this happen? Can anyone provide guidance to help resolve? Thanks in advance. EDIT, 9:51PM: I modified one of the DAW shortcuts to "Run as administrator"...but I only did this for one of the DAW's. Now, on loading the Rapture synth via the track icon, it loads up fine with no crash. I honestly don't know what to make of this -- forcing only one DAW's shortcut to "Run as Administrator" and it works now in both of them. Even considering I moved the VST file out of Common Files.
-
Thank you for the responses. I've figured out how to create the effect via Sonitus EQ, but only as a consistent effect that sustains throughout the melody. How do I automate it so that the effect begins and slowly fades away/fades into clarity once the melody progresses?
-
 Where is the recommended window to draw controllers and/or automation...in the Track Pane or the Controller Pane? In Cakewalk's arsenal of built-in synths: Sound Center, DropZone, Session Drummer, SI Suite, TTS-1, etc., does it matter one way or the other where these are drawn? This is one of those things I would like to learn as I'm developing consistency in my projects, before I discover I'm doing anything wrong. Any advice and insight is appreciated. Thank you!
 -
Thank you for the wealth of information. ? I still find myself confused, because it seems like a lot to chew on. But, what I feel like you're saying, is basically: in regards to my confusion with the adjustment of octaves...it simply doesn't matter? I can rest easy and live with that, as long as it doesn't change the output of my tracks and affect the structure of future projects.
-
I guess I get that part. But my confusion is not with the note numbers, but the octave placement. Why it would set those in octave C3 instead of C1 as represented everywhere else -- and why I guess I didn't know about this until right now? (shrug) But as I stated above, I changed the setting to -2, and this corrects the placement of those keys to C1 in consistency with every place else (GM map, Studio One, and Addictive Drums' drum map...) Sorry to be frustrating. Just confused. ?
-
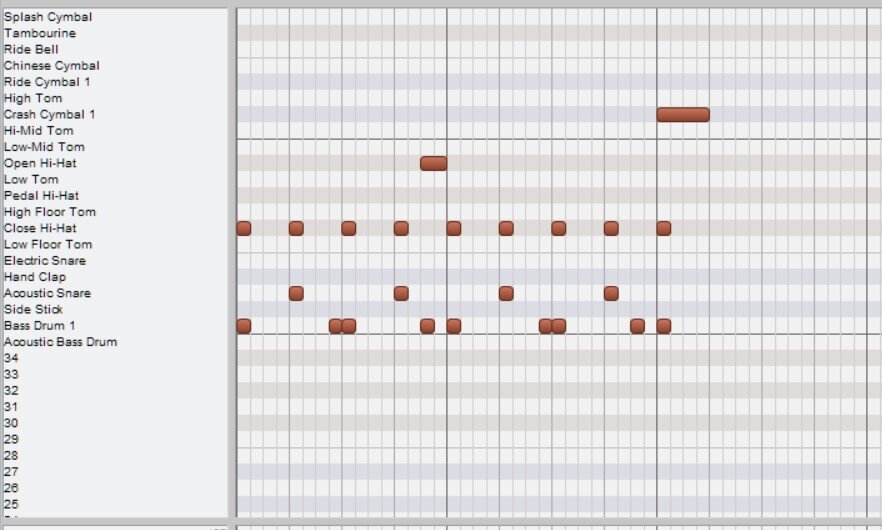
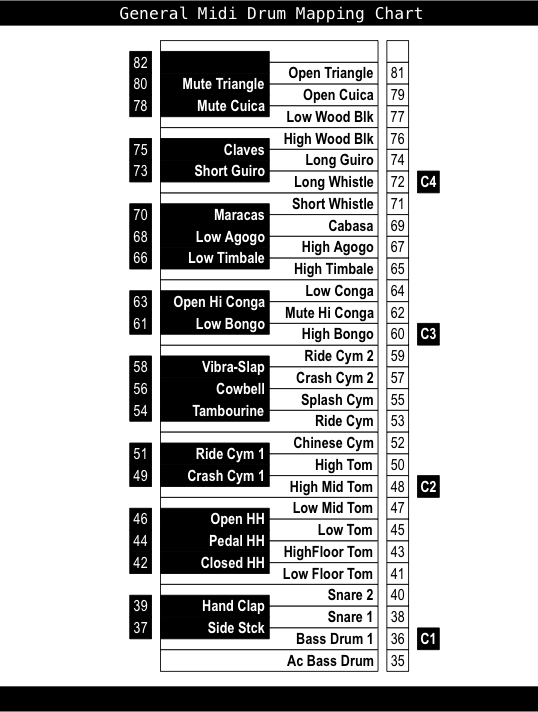
Thank you for your prompt response. Beforehand, I was going to post these screenshots: 1) An image of the universal GM drum map (indicating note #36 at C1) 2) Screenshots of my sample drum riff on the PRV (#36 at C3) As you can tell, that scale is inconsistent with the GM Drum Map illustration. They don't start in the same place. Per your response, my default setting for that value is 0 also. But after I changed that 0 value to...-2, for example, the PRV "corrected itself" in accordance with the universal GM standard drum map...setting those notes beginning at C1 instead of C3. Now, I'm more confused than ever. I've never had to change this setting. I don't understand why Cakewalk's PRV wouldn't be consistent with that? (It seems, however, that my projects all play the same with that setting change, no keys have been adjusted.)

-
[I first noticed this anomaly when using Addictive Drums 2...] It seems that my drum keymap in the Piano Roll View is inconsistent between CbB and Studio One. For example, in CbB, the drum sounds (starting from Kick & Snares) go from C3 upward. However, in Studio One, they go from C1 upward. Addictive Drums 2 built-in keymap PDF represents the drum sounds going up from C1. I've never noticed this until now. Is this typical behavior, and if not, what are the standard GM drum map? Can this be corrected? If so, is it the culprit of CbB, SO, or Addictive Drums? Please advise. Thank you in advance!
-
I apologize for the confusion. In my scenario, I'm referring to the Pitch Wheel. When I draw a line within the Controller Pane for the Pitch Wheel, the resulting measure will be a few hundred off from the intended value.
-
I'm trying to draw lines in to the controller pane (expression, velocity, pan, etc.). For example, let's say I draw a 1/16th-step line from -2180 to 0. When I finish the controller, the final node ends up a few hundred steps off, like -2180 to -463. You can see the final level doesn't sit exactly at 0, and that final step in the Event list confirms this. This just started for me recently. Has anyone had this happen? What's the fix for this and how can I get accurate controller measures like I used to? Thanks in advance.
-
I'm an amateur MIDI musician who doesn't plan on "going pro" or promoting my music. However, I want it to sound its very best. I don't play instruments or record vocals; I transcribe all my notation through the Piano Roll. I've been doing much research on gain staging, and although I have a general understanding, I'm seeking more insight. This is the way I understand the gain staging process: 1) Ensure each instrument track's volume fader is at unity (0db). Don't adjust the Master or Stereo tracks. 2) Find the loudest part of the song and the most prominent instrument track. 3) Watch the meters and adjust the Gain dial accordingly, keeping around -18db. Repeat for each instrument track. 4) Bounce the tracks to audio. Apply the desired plug-ins and effects. 5) Finalize the mix by adjusting the volume faders accordingly, keeping to around -18db per track and -6 in Master. What I wonder is: What if I don't want to use gain staging? Why can't I just finish all the tracks, add the plugins-effects, and then just use the volume faders to mix? Bonus question: What if I have an instrument track that's too loud by design, and I can't lower the Gain/volume enough? I know this sounds kind of uneducated and foolish, but I would just like some clarification. Thanks in advance!
-
I realize that, in the TTS-1 synth, there are limited options to change the sound of the instrument. Is there perhaps a way to muffle/soften the sound of an instrument? Like, any instrument that sounds too tinny, metallic, or "twangy"? Any info is appreciated. Thank you!
-
I'm sorry, I think I wasn't clear. I don't mean the selection "bar" -- I'm referring to the note icon bars along the top there, next to the Tracks menu. How do I enable that note bar? EDIT: Never mind. The note bar seems to be a UI feature only available in Bandlab and not Sonar.
-
How do I enable the mini note selection bar at the top of the PRV as shown here?
-
Thank you both for your prompt answers! I'm only able to tag one of you as best answer, but both helped equally. ?
-
Looking at the Console view of my project (in which I use TTS-1 synths along with others), I noticed that the TTS-1 meters are different from the others. Their meters tick marks range from 0-127, but the others are in decibels. Why are these different? And there are no numbers on the TTS meter itself, so how do I properly gain stage/mix my TTS tracks in correlation to the other synths' meters? Please see image. Thanks in advance.
-
I actually did change the Output Driver to the Speaker(s), and that naturally was the solution. I did watch your video. It was very informative and easy to understand! Thank you for including that, as that helped very much.