-
Posts
148 -
Joined
-
Last visited
Everything posted by Dave G
-
Thank you for the explanation! I didn't realize these techniques are very YouTubeable, so I've learned a lot there. Having just watched several of these videos, I notice that these drummers are saying the RimClick and SideStick are the exact same technique... But, as you said, RimClick is simply just striking the rim like one would play the drum (not as common as SideStick?) I think the way you explained it makes more sense to me. What about the Snare Open & Shallow hits? Aren't those the same strike, but with different force? ? I've confirmed that these assigned sounds change with each drum kit, and therefore not permanently assignable to a Flexi (i.e. assigning a hand clap, tambourine, and a cowbell, saving the custom map, and changing to a different kit...but those Flexis didn't "stay".)
-
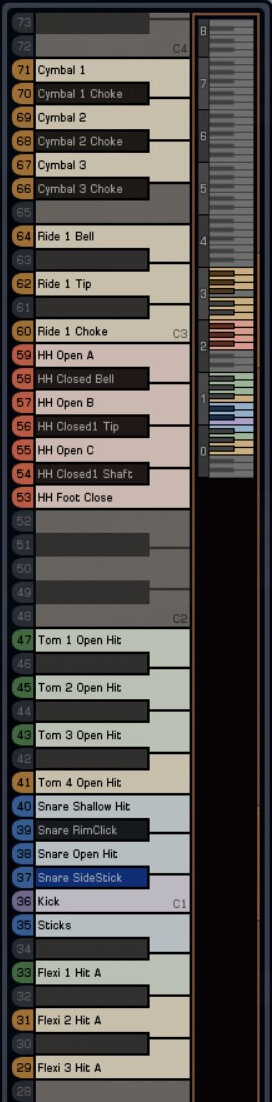
I've created an Addictive Drums 2 "minimalist" drum map. I found the default AD2 drum map too elaborate and too jumbled to manage, so I've reduced the entire map down to the sounds I'm most likely to use. Image is attached here. As pictured, I've neatly grouped each category of drum piece together as closely to the traditional GM map as possible. (I wasn't satisfied with the AD2 custom GM map either.) I'll eventually create a Cakewalk drum map that matches this so it's reflected in the PRV. But, to further educate myself and tweak the drum map accordingly, I request clarification of the behavior of some drum sounds: What's the difference between Bell, Tip, and Shaft hits (esp. Ride and HiHat)? What's the difference between Snare Open / Shallow hits? (These sound alike.) What's the difference between a Snare RimClick and SideStick? Am I clear in understanding that the designated Flexi hits don't stay saved in the map, as they're variable with each AD2 kit? Part of my confusion is that many of the corresponding hits sound alike. If any drum enthusiasts out there can enlighten me, much appreciated. After all, this will be a universal drum map for me and I don't want to change it later after I've used it in several projects. Thank you!

-
I've never heard of Orchestools. I'll have to give that a look. I never thought CSC instruments sounded dated or bad at all. But then again, I purchased a bundle of Digital Sound Factory instrument expansion packs to populate my library. As far as Studio Instruments Drums and Session Drummer 3, I like those about the same. I don't hear anything substandard of those VST's. Possibly though, because I'm not a seasoned audiophile, or I'm simply used to working with the resources I have. Besides, I'm learning that a little bit of tweaking of the knobs/dials of the drum kit pieces can make a big difference. I just want to make music and have fun. ?
-
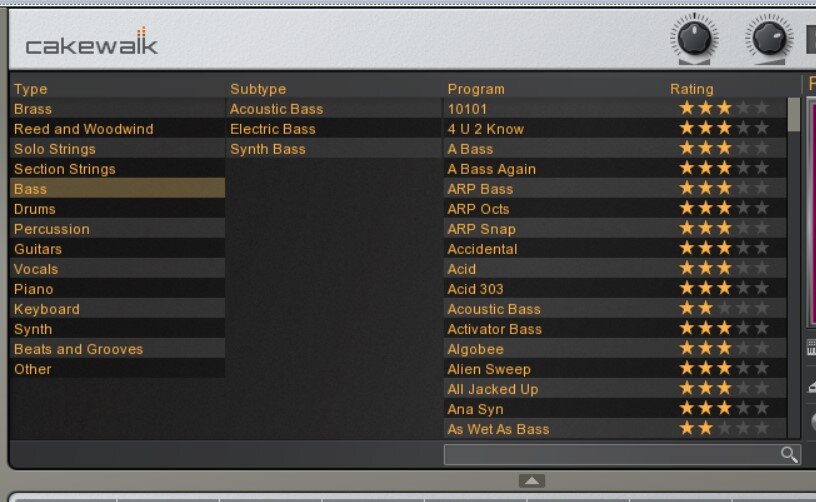
Which do you consider is the better VST: Studio Instruments Suite or Cakewalk Sound Center? In choosing an electric piano, bass guitar, or stringed instrument, it's hard for me to decide which library to pick from. I like them both, and I don't necessarily have a "go-to" VST yet for these particular instruments. (However, I ultimately opt for CSC by the end of the mix process.) Side note: They both have infinite possibilities for Strings! I'm not particularly well-versed in assembling string sections, so I usually opt for a generic string ensemble instrument. I'm just kind of curious about others' thoughts as I try to commit to certain instruments. What is your opinion between the two? Thanks in advance.
-
Hmmmm...I suddenly wonder if we're talking about two different functions. RPN or NRPN? I've learned the use of RPN and confirmed its functionality in TTS-1. However, I also learned that it doesn't work for Cakewalk Sound Center and Rapture Pro. If we're crossing our signals, I apologize for dragging you through this. LOL. I'm inquiring whether NRPN events would satisfy the large bend function in the way that RPN doesn't? If this is indeed the case, I'm perfectly happy delegating my large pitch bend needs strictly to TTS-1 and leaving it at that. TTS-1 and Cakewalk Sound Center are the only VST libraries I have (which I'm completely content with).
-
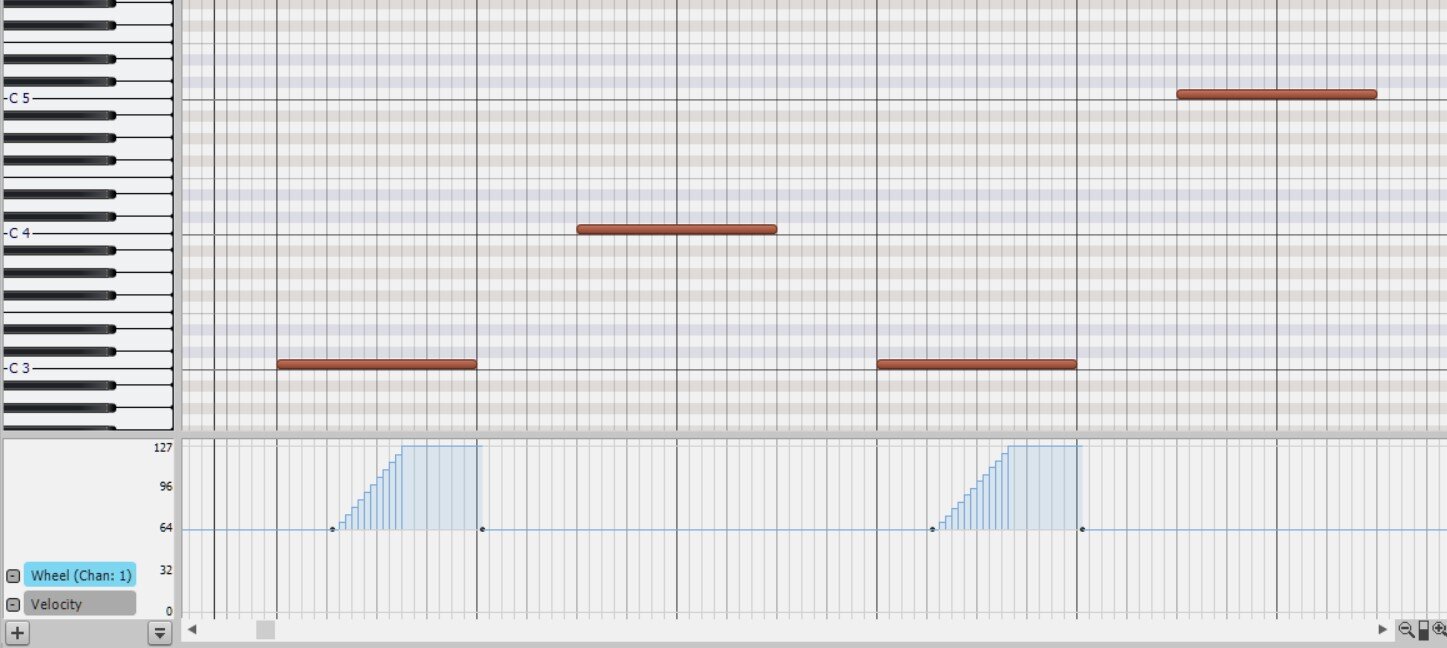
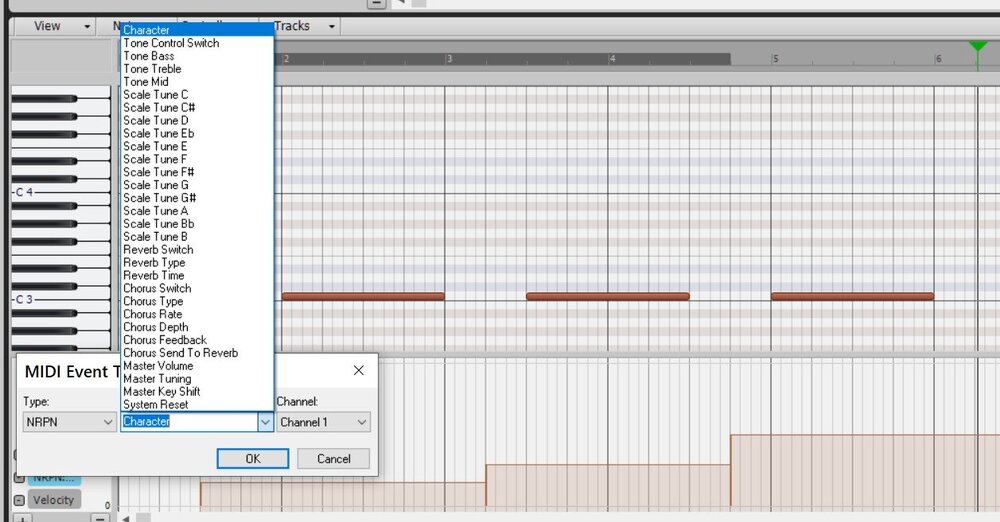
Per the attached screenshot, I drew three notes with a maxxed pitch wheel event on each (0 to 8,192), resetting it to 0 after each note is played. I inserted three preceding NRPN's which only resulted in a two-note bend, as expected. Then I realized that I neglected the Value drop-down menu... I don't see a Bend Up/Down selection therein. Which entry from the Value menu am I supposed to select for this technique? EDIT: I also just realized that the Value menu is dependent on the Track type. This menu appears for a Simple Instrument Track (the one below, TTS-1) and a MIDI Track, yet appears as a numerical input menu for a Waveform Track.
-
Thank you for the clarification on this. I believe this might be my last shot at making this work. Apart from that, back to existing methods. LOL.
-
Thank you for the explanation. I've researched the potential usage of NRPN for pitch bend range, but couldn't locate anything useful. Would you please elaborate on the equation you provided above, maybe give an example? I still kinda fail to understand this compared to a typical 2-note bend or an RPN bend...
-
In another topic, I learned that RPN + pitch bend function doesn't work in Cakewalk Sound Center either. This was after I tried entering a Wheel (i.e. full octave pitch bend) automation lane, then an RPN automation lane in the Track window. The Wheel lane worked fine, however, the RPN automation wouldn't work for me either. Just wouldn't do what I thought it was supposed to do (at the time). I may try using NRPN events in the Controller pane to see if that works out. But it's been an extensive amount of research and discussion for this simple little function, that may be all for me. Noted, of course, I don't use an external controller/keyboard. I mouse draw everything into the PRV; just the way I've grown accustomed to this hobby. Taking everyone's input into consideration, if large pitch bends otherwise absolutely cannot be done in the DAW using this method, I'll probably just say quits on that experiment. And just go back to using a TTS-1 instrument track for large pitch bends, as this is where I've confirmed RPN's to work as, when, and often as needed in the track progression. I realize that a large pitch bend of, say, six notes, an octave or more isn't realistic unless I want to create some sort of flair or outrageous fancy upward/downward effect for an instrument. But I feel that a pitch bend of a default of two semitones might restrict some creativity at some point. (shrug)
-
Okay. So that being said, how would one use NRPN in the PRV Controller Pane the way I would normally use RPN to set the pitch bend range in the fly (rather than just once from the GUI?) I was looking around for this information, and I couldn't find any documentation of NRPN being applied to control bend range events in the PRV. Still, however, I guess Rapture Pro is a moot point because I'm using the demo and Pro is no longer available for sale. ?
-
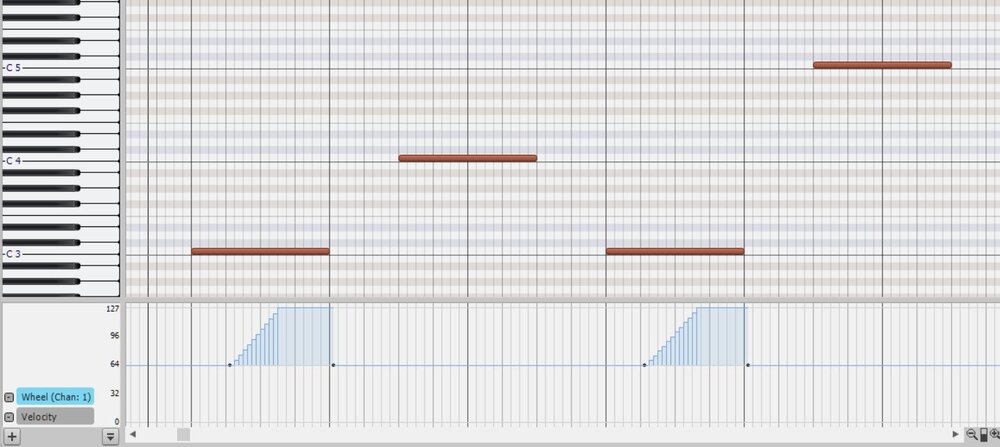
The only function I know of to do this is to draw the RPN's into the Controller Pane, but Rapture Pro's Bend value overrides that completely. And if it did work, you could insert several RPN's into your track at every different pitch bend, but it would ignore them. I've never used NRPN events. How does that relate to RPN? I don't understand it either. (Unless I'm misunderstanding your explanation...?) I can't draw a 3,072 RPN in the beginning of the track as a catch-all to each pitch bend above 2 notes. Every pitch bend has to be preceded by a custom RPN that sets its range. In the PRV screenshot of my original post, I've drawn two pairs of notes: the first of each pair bent upward to match the key of its partner note (the 2nd and 4th notes). The Wheel line is drawn all the way up to 8,192. I also inserted two RPN events (not pictured) in the Controller pane. The first one, inserted before note 1, tells it to bend up one octave (1,536). The second one, inserted before note 2, tells it to bend up two octaves (3,072). But those two RPN instructions will be ignored because I already told the Rapture to default bend by 24 anyway. So it will do that with every pitch bend in the track. Therefore, this setting cancels out varied bend ranges unless they are the typical default pitch bends (2 semitones). Should I want large bends in my projects, this could be an unfortunate impediment and restriction to my creativity. However, TTS-1 allows this technique. Fortunately, TTS-1 allows the option of either setting a range in the synth window or drawing RPN's into the Controller Pane. And as you play the track, the Bend Range display value changes accordingly with every RPN event that is passed.
-
Thanks for the clarification on this. That is disappointing... I would hope that Rapture would fulfill that need for the extra flexibility. Looks like back to TTS-1 for using RPN controllers when the need arises.
-
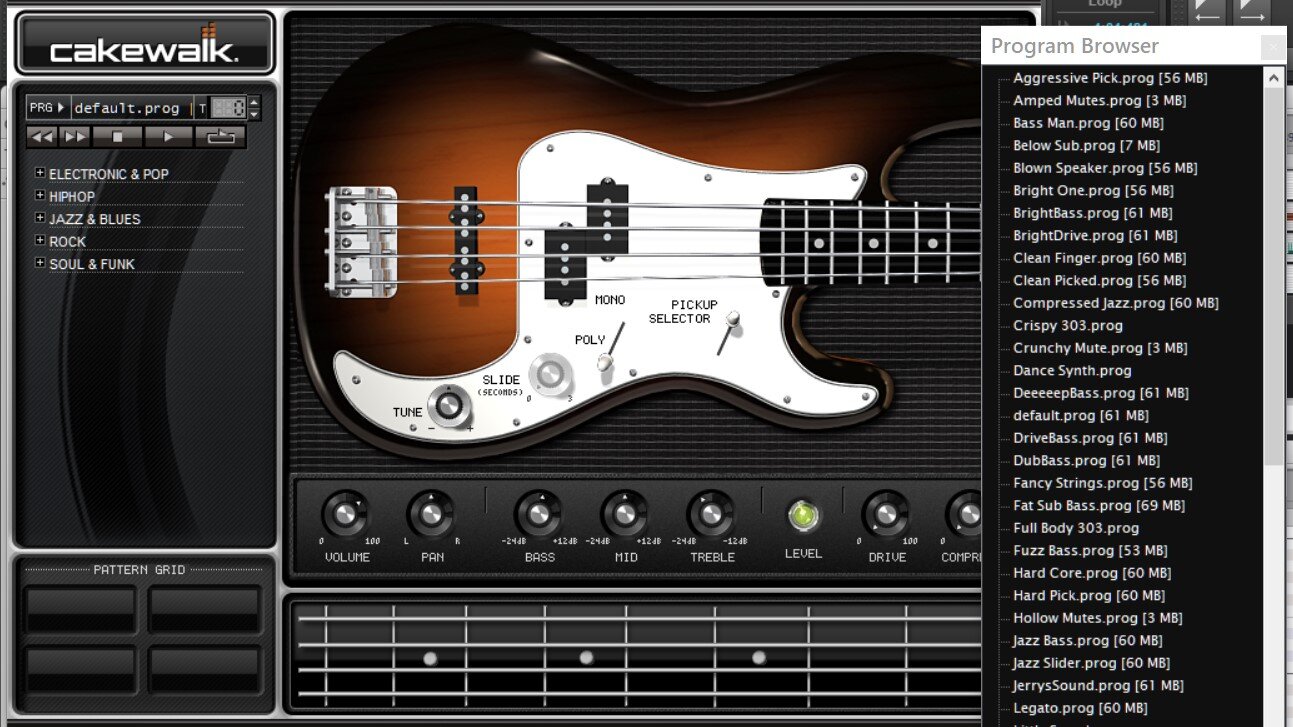
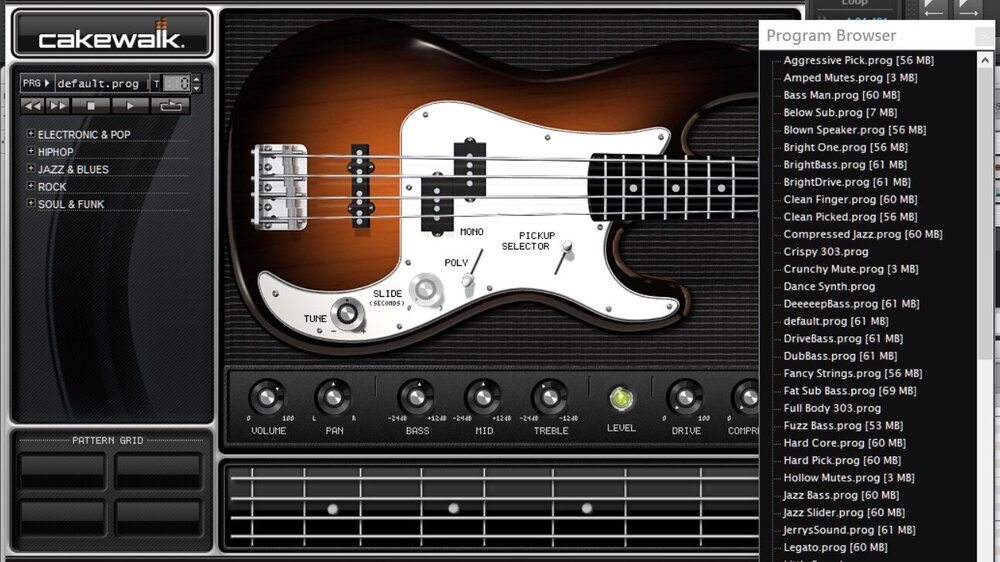
Trying out the demo of Rapture Pro, I'm learning about large pitch bends. I thought this would be easier, but I'm ashamed I have to ask for help on this. Rapture handles typical pitch bends (instrument bend range defaulted to 2), normally. However, I'm having difficulty managing larger pitch bends... First, in the Controller pane, I draw a Wheel line from 0 - 8,192. Then, once I set the UP knob higher than 2, that overrides every RPN level I'd set in the controller pane. Perfect for one static bend range throughout the track, but certainly not open to flexibility for multiple ranges programmed in the track. So I can't set varied ranges, because that UP knob set to 24; every pitch bend on the track will go the full two octaves. This setting doesn't leave the track open to a variety of pitch bends, just one set to 24 notes. May I please get some insight on this function? Is there another step I'm missing to set variable RPN's/bends in a Rapture instrument track? Screenshots included: a) Two test pitch bent notes, drawn to 8,192, each rising to the key of the next note, b) the Perform section of the instrument Element window, defaulted to 2. First note bend rises by one octave; the third note bend rises two octaves. Thank you in advance.
.jpg.34c62c53ba203fefd83d46520119a22c.jpg)
-

Cakewalk Sound Center doesn't respond to RPN + Wheel
Dave G replied to Dave G's topic in Cakewalk by BandLab
Good to know. After evaluating the Rapture Pro demo, I'm quite pleased. Also, I was able to create a two-octave pitch bend with a Pro instrument. I simply changed the bend range in the bottom of the Pro Elements window(s) and it worked. Better than dumping a bunch of RPN CC's all over the Controller pane. I do notice that Rapture crashed a few times via fatal error c0000005, and I'm already running as Administrator. I'll have to look for that to happen again. Besides that, I've been enjoying Cakewalk Sound Center all this time, but I sure wish I'd purchased Rapture Pro long ago. -
Cakewalk Sound Center doesn't respond to RPN + Wheel
Dave G replied to Dave G's topic in Cakewalk by BandLab
Thanks for the suggestion! That being said... What if you install Rapture Sessions/Pro without Sound Center already installed? Will it work independently, and could I still install my Digital Sound Factory expansion packs/add-ons into the Rapture folder? -
Cakewalk Sound Center doesn't respond to RPN + Wheel
Dave G replied to Dave G's topic in Cakewalk by BandLab
Again, I had no idea and was completely unaware of this structure all this time. I should've used Session instead of CSC all this time. I think I understand better now. I've installed Sessions and digging around through it now. Thanks for the clarification! -
Cakewalk Sound Center doesn't respond to RPN + Wheel
Dave G replied to Dave G's topic in Cakewalk by BandLab
Darn...that's news to me. All this time, I thought Cakewalk Sound Center was an instrument library synth in itself. ? So, to clarify, when you say "both of these synths", you mean Dimension Pro and Rapture? I do remember Rapture Sessions being one of Sonar's add-ons in the Command Center. If I'm understanding correctly, I could use the Rapture Sessions synth and do it from there, built into the synth rather than have to program it myself? EDIT: I've been researching the relation between Cakewalk Sound Center and Rapture Sessions. I'm going to go ahead and install Rapture Sessions and see where I can go from there in terms of pitch bends and other effects. -
Cakewalk Sound Center doesn't respond to RPN + Wheel
Dave G replied to Dave G's topic in Cakewalk by BandLab
I wish to pick up on this thread from last year, if I may. I haven't experimented with this technique as of late, nor have I resolved it. Thank you, Scook, for the valuable automation techniques above. I know how to create RPN + wheel/pitch bend data in the Controller Pane of a TTS-1 track. But this very same technique crashes my Cakewalk Sound Center track. I created a working automation lane for the Wheel. But the lane created for the RPN failed to work. On varied attempts to add an RPN automation lane, it behaved in different ways: 1) as a velocity event, 2) both nodes in the envelope were at different heights even with same values, 3) crashed the audio engine like before. It baffled me that this RPN automation lane would produce different results on various tries. How does one utilize RPN to widen the pitch bend range in Sound Center? Or can it just not be done? In the attached image, I'm attempting to bend the pitch of the first note an entire octave (to match the key of the second note, which comes in later) to confirm this to work. But that RPN simply isn't cooperating. I'm hoping that surely there is a way to create large pitch bends for a Sound Center instrument. Any clarity is appreciated. Thank you!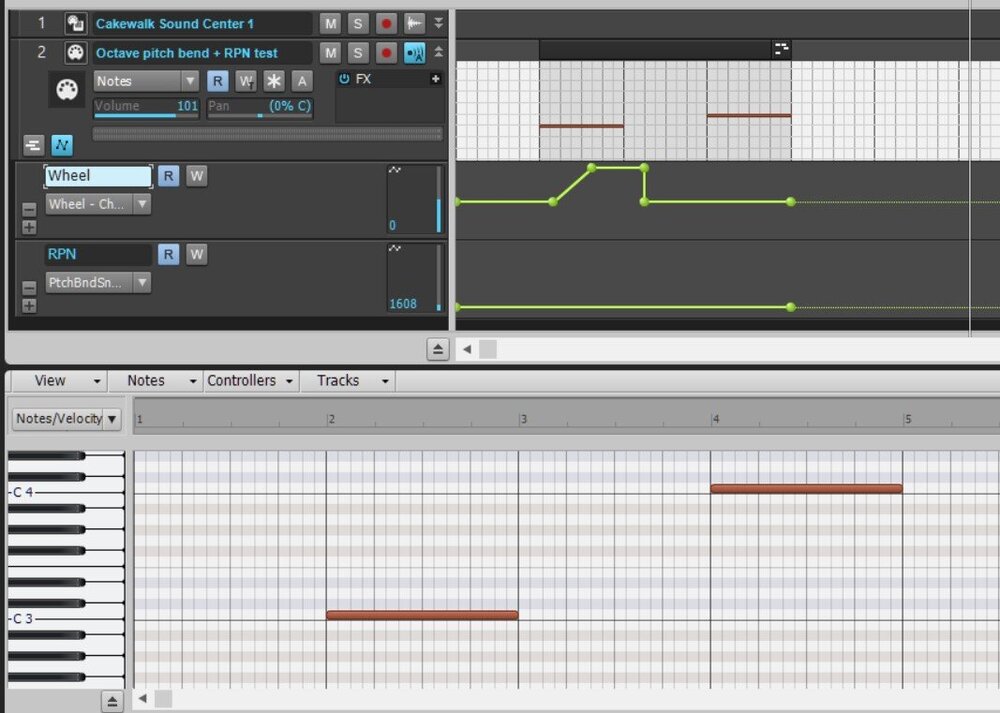
-
[ This isn't a Q&A post; simply an FYI from one semi-novice to others in regards to choosing the right General MIDI drum kit. ] In my experimenting with the SI Drums and Session Drummer 3 toms samples, I've noticed something interesting. First, quick reference of all toms notes on the GM keyboard: 50: High Tom 48: High-Mid Tom 47: Low-Mid Tom 45: Low Tom 43: High Floor Tom 41: Low Floor Tom Typically, the three tom drums (High Tom, Low Tom, Floor Tom) play two tones each: high and mid. Therefore, you have six tom sounds for some drum kits. However, some drum kits in the SI Drums and Session Drummer families only play three tom samples rather than six. They are: SI: Default, In Yo Face, and the two Nice kits SD3: Most of these drum kits (i.e. GroovyKit, Steven Slate_OldZepKit and DarkLordOfTheSeth) only offer three tom sounds Also, I've noticed that some drum kits' floor toms play at higher pitch than the high toms. I'm sure there are easier ways to discover this, as I simply drew all six notes onto my PRV and played them on loop through each kit. I know that these drum sounds can be tweaked infinitely. I also have Addictive Drums, but I like to use SI and SD3 occasionally. Just thought I'd share this info which I found useful for choosing a drum kit with all six toms sounds.
-
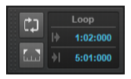
Looks like I was wrong. ? I thought it was the loop bar but yes, that's yellow. (I thought you might have chosen a custom color theme.) EDIT: On a Google search, this is what I found:
-
It looks like you have the Loop bar selected. That green bar is a selection of measures that are set to play in a loop. (The normal Selection bar is a subtle gray shade.) Up in your Loop module, make sure both of those buttons are disabled/deselected. That should remove the green bar.
-
Where to draw automation/controllers: Track pane or controller pane?
Dave G replied to Dave G's topic in Cakewalk by BandLab
Thanks to you both for the wealth of information. I guess part of the the confusion is that the same process can be worked in different ways, and the same result is achieved. It's just figuring out which way to do something. -
Excellent. Thanks for the assistance! ?
-
Thank you to all for your insight in this topic! I do apologize for not coming back to this sooner. I knew this would be a large field of discussion, so I wanted to give each response the time and attention it deserved to my best ability. This is a huge subject for me as I learn the workings of the software -- how to properly assess and determine volume/gain levels, use all the functions correctly, and still create a solid musical piece. There are occasional times I feel I might do something wrong and get in a rhythm, then realizing there was a more appropriate way to do something. I just felt discouraged that, even after watching literally dozens of tutorial videos, that I can't/couldn't be sure of the right and wrong way of doing something -- forgetting that I don't have a professional target audience, so just do it and have fun. But I guess part of the complexity is that everyone has their own process and I simply haven't fully developed mine yet. However, as I feel less overwhelmed and more prepared, I have been dedicating more time to "working, not worrying" -- actually getting things done on these MIDI projects without overthinking on any of the processes too much. And so... John: Your expertise is appreciated, as your information has always been useful in assisting others in their progress as well. I had just simply noticed that lowering the Gain knob has produced unwanted results in the sound of said instrument. I can't explain why, either it happens or it's just the way I hear it. This was first noticed that, as I lowered the Gain knob on a TTS-1 drums track, some kit pieces suddenly fell inaudible while others still stood out completely not in proportion to original level. ...I also have general-purpose desktop speakers (for now.) OutrageProductions: Addressing your feedback in conjunction with that from John, for my needs, I've taken to using the faders for volume balancing. I tend to have developed a good eye (and ear) to monitor the volume levels and prevent clipping. This is just the path I choose to use. Even so, I've learned to trust not only my own judgement but the expertise of those more experienced to guide me as I am still learning how this all works. And thank you for your link to the Cakewalk MIDI Basics video. I have seen several of his videos; his tutorials are concise and well done. Starship Krupa: Thanks for your wealth of information also. I seem to have gotten "bouncing tracks" confused with"freezing tracks". (Explained toward bottom.) I am familiar with XPand!2, and have always been intrigued by having a bigger library of interments to choose from. BDickens: Thank you for the Sound on Sound article. I have begun reading it and I will be sure to peruse that further as I go along. ALL: I understand I wasn't clear when I first mentioned "bouncing my final tracks to audio" in step 3, confusing that with freezing tracks. What I meant was, once my project is finished, the need to export it to a permanent format in which the instrument tracks, effects and elements therein can be "preserved", if possible (i.e. if, one day, I go back to a project and the instruments, plugins, or other parts are no longer available?) I just want to have a solid format (along with the final MP3) saved so that everything will always be there. In the old days (the 90's), when I finished a MIDI file, I would have my PC record the tracks via the Windows "What U Hear" setting and then save that file to an MP3. Ahhh...the old days. LOL. On another note, I've also learned from several sources that a synth's built-in volume control can be applied to compensate for having to adjust the Gain knob too much. I am well aware that, in order to take full advantage of this powerful software, I could use at least some knowledge of more of the controls, functions, plugins and effects. For now, I'm working with what I have and applying my learnings slowly and steadily. Thanks again to all. ?
-
This is all very valuable information. Thank you again for the responses! (I wish I could mark more than one of these for "Best Answer".) ☺️