

-
Posts
577 -
Joined
-
Last visited
Posts posted by murat k.
-
-
Thank you for the information Steve, you always trying to be helpful but If we already did what you say, I mean after the assignment, if we delete a synth which is prior from the drum synth on the list of the Synth Rack on the project, the assignments of the Out Ports are all changing. It should be consistent. That's why we are having trouble with Drum Maps all the time. It seems to be that the information of the assignment to the related synth is not storing in the project file. It can be resolved by storing the Output Port assignments of Drum Maps per synth in the project. Also this information should be stored in the Project Templates and the Track Templates.
-
The problem about Drum Maps is, we have to reassign Out Ports everytime only if we are not using a Project Template which we already have preassigned Out ports to the Synths. Even in that Project Template, when we delete a Synth, Drum Map's Out Port is changing. There should be a thing between the Drum Map and the Synth which makes the Out Port connection consistent. We are not having a trouble about Drum Maps. We are having a trouble to keep connection between the Synth and the Drum Map.
-

New Release just came out!
Cakefolk for the Cakewalk v.1.4.1
This project is at the beta stage. Do not hesitate to report any issues.
And if you want to support the development: https://www.patreon.com/cakefolkFIXED BUGS
- Now Cakefolk loads with less CPU Usage.
WHAT'S NEW
- Cakefolk Magic Mouse™ feature (see details below).
- Navigating enhancements (see details below).
-
New ProChannel FX commands.
Empty ProChannel with 1 + E .
Copy ProChannel with 1 + D .
Paste ProChannel with 1 + F . - Copy Clips as Linked Clips with Left Ctrl + Left Win.
- Plug-in Context Menu with Left Shift + Middle Click.
- Paste Now Time to the Notes View with Caps Lock + T .
-
Change Default Playback & Record Audio Device
Right Shift + Numpad 1 to 6 Change Audio Playback Device.
Right Shift + Numpad 7 to Numpad Multiplication Change Audio Record Device. -
Windows Volume Control Shortcuts
with Left Win & Mouse Wheel Up + Down. -
Exit Cakefolk™ with F12 + Insert.
OVERVIEW
This program is a plug-in for the Cakewalk software. You can do what you can't do in the Cakewalk with this program.
AVAILABLE FEATURES ON THE RELEASE V.1.4.0 :- Focusing Tracks by clicking on the Clips Pane.
- Selection Duration Helper for the Time Ruler Selection.
- Selection Duration Helper for selected clips.
- Right Mouse Button Selection implementation for all tracks in the project
- Isolating Used Tracks in the Selection Range
- Positioning the Now Time by clicking on the MIDI Controller section in the PRV.
- Bringing the Background Color Menu over the selected clip.
- Accidental Rename Preventer™ for the Media Browser.
- BandLab Assistant support.
- BandLab Mix Editor support.
-
Instrument Track to Audio Track Automations (ITATA)
ITATA Type 1: Without FX + Keep Sends & FX & ProChannel + Delete Instrument.
ITATA Type 2: With FX + Keep Sends + Delete Instrument Track + Reset ProChannel.
ITATA Type 3: With FX + Do not keep Sends + Delete Instrument Track.
ITATA Type 4: With FX + Do not keep Sends + Hide Instrument Track. -
Render Selected Clip(s)
Render selected clip.
Render selected multiple clips in one clip. -
FX Commands for the selected track.
Copy FX Bin.
Paste FX Bin.
Empty FX Bin.
Reset ProChannel.
Empty ProChannel.
Copy ProChannel.
Paste ProChannel. -
CAKEFOLK MAGIC MOUSE™
With Middle Click pressed state you can
pan left & right on
the Console View.
the Clips Pane.
the Piano Roll View .
the Staff View.
the Step Sequencer.
the Matrix View.
the Loop Construction View.
the Tempo View.
pan up & down on
the ProChannel.
Double Middle Click for Tools HUD Menu
With Left Click & Middle Click pressed state
on the Console View you can
Move WAI control.
on the Clips Pane you can
drag & copy selected clips when the cursor is at Move mode.
Clip Gain control when the cursor is at Selection mode over a clip.
on the Piano Roll View you can
drag & copy selected note.
drag & stretch multiple notes.
on the Staff View you can
drag & copy selected note on the same location.
on window move you can
disable automatic docking.
With Left Click & Right Click pressed state
on the Console View you can
change the order of the track.
on the Clips Pane you can
resize the Track Strip from the bottom edge.
change the order of the track when the cursor is at Selection mode.
on the Piano Roll View you can
combine selected notes in the note under the cursor.
With Middle Click & Left Click pressed state
on the Clips Pane you can
Split clip at the point under the cursor.
With Middle Click & Right Click pressed state you can
on the Clips Pane you can
delete selected clips.
With Right Click & Left Click pressed state you can back to the
previous zoom state (Default behavior).
With Right Click & Middle Click pressed state you can
fit selected content.
With Left Click & Mouse Wheel Up or Down Scroll
on the Console View you can
scroll tracks left & right.
on the Clips Pane you can
zoom horizontally.
on the Piano Roll View you can
zoom horizontally on
the Piano Roll View.
the Drum Grid Pane.
the MIDI Controller View.
on the Staff View you can
zoom vertically & horizontally.
on the Loop Construction View you can
zoom horizontally.
on the Tempo View you can
zoom horizontally.
With Right Click & Mouse Wheel Up or Down Scroll
on the Console View you can
narrow & widen tracks view.
on the Clips Pane you can
zoom vertically.
on the Piano Roll View you can
zoom vertically on
the Piano Roll View.
the Drum Grid Pane.
the MIDI Controller View.
on the Staff View you can
zoom vertically & horizontally.
on the Tempo View you can
zoom vertically. -
NAVIGATING ENHANCEMENTS
With Left Alt & Mouse Wheel Up or Down Scroll
on the Clips Pane you can
zoom horizontally.
on the Piano Roll View you can
zoom horizontally on
the Piano Roll View.
the Drum Grid Pane.
the MIDI Controller View.
on the Staff View you can
zoom vertically & horizontally.
on the Loop Construction View
zoom horizontally.
on the Tempo View you can
zoom horizontally.
With Left Shift & Mouse Wheel Up or Down Scroll
on the Console View you can
narrow & widen all strips.
on the Clips Pane you can
zoom vertically.
on the Piano Roll View you can
zoom Vertically on
the Piano Roll View.
the Drum Grid Pane.
the MIDI Controller View.
on the Staff View you can
zoom vertically & horizontally.
on the Tempo View you can
zoom vertically. -
CHANGING DEFAULT AUDIO PLAYBACK/RECORDING DEVICE
Right Shift + Numpad 0 to show Windows Classic Sound Options window.
Right Shift + Numpad 1 to 6 Change Audio Playback Device.
Right Shift + Numpad 7 to Numpad Multiplication Change Audio Recording Device. -
MISCELLANEOUS COMMANDS
Auto Arm & Disarm Audio & MIDI Tracks
Auto Arm & Disarm with R key on the keyboard.
Auto Disarm with Space key on the keyboard.
Copy Clips as Linked Clips with
Left Control & Left Win key on the keyboard.
Bring Plug-in Context Menu with
Left Shift & Middle Click.
Paste Now Time to the Notes View
Paste Now Time to the Notes View with Caps Lock + T.
Windows Volume Control Shortcuts with
Left Windows Key + Mouse Wheel Up-Down.
GENERAL USAGE
Run Cakefolk for the Cakewalk.exe before the Cakewalk.
Press Insert Key for Suspend the Cakefolk.
Press F12 + Insert Keys to exit the app.Further details see User Manual.pdf
Cakefolk™ for the Cakewalk
Created by Murat Karaca © 2021-
 3
3
-
After having a trouble everytime with drum maps, I quit using it and I started to use the Step Sequencer with templates. Now every drum synth I have has an individual step sequencer template. I created templates with loading a drum map only once. To saving the drum names on the template, the trick is, you need to rename it to be stored. Entering a character and then deleting it does the job. But the problem is you have to do this rename thing to every notes. So I wrote a program for that. You can use it.
Drum Maps to Step Sequencer.exe
After loading the file, just click on the top of the drum name list on the Step Sequencer and hit F1 & R keys on your keyboard to start renaming. It starts to convert drum map names into step sequencer drum names. Wait until it completes the job to the end of the list then hit F1 & E to exit the loop.
Now you can save the Step Sequencer template with drum names on it.
-
 1
1
-
1
-
-
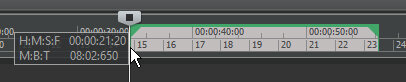
I've just added a new feature. Now you can see the duration from the time ruler after selection. Like this:
https://github.com/karacamurat/trackfocusingandselectionduration
-
Hi Craig,
You can do the same thing with Alt+Shift in Cakewalk. -
You're welcome. I realized that now I can Solo/Unsolo by clicking anywhere on The Clips Pane by collapsing The Media Browser. Two birds with one shot.
-
I've uploaded revised version with the script to the Github. I've removed the old files with the Github download link as you can see above.
-
We can create nested folders when saving a project template. But if we could see folders in this menu, we could access them.
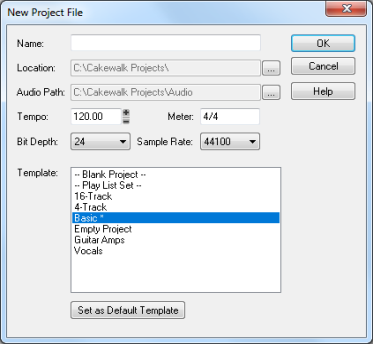
At now I use Media Browser in The Cakewalk to access these folders in the Project Templates folder. I open a template, shortly after that I save it as a project file in a different location. If I make some changes and forgot to save it in a different location, it saves on to that project template file. But if we have folders in that New Project File menu, we can directly load it from there and we would stay out of trouble.
-
Sure. But I have to change some things in the script first. Then I'll create a github page to publish source codes. I'll share the link when I've done that.
-
By the way I've made it.
Now you can select tracks with one click on the Clips Pane .
Take it as a Christmas gift from me.")
-
1
-
-
In Track View, when we select a clip and hit the shortcut of Solo/Unsolo command, it works pretty well for Soloing the track.
But if we want to Unsolo that track with the same actions, Cakewalk does not Un-Solo that track.
It does Unsolo the track we activated before.
The issue is when we select a clip in a track, that track is not activating by selecting a clip on the track.
I mean the track's name is not highlighting, not active.
We can also activate a track by double clicking the clips or double clicking the empty space belongs to that track. But another problem is happening after double clicking and activating the track.
When we do that, if we hit up and down buttons on the keyboard, we'll see it follows the last activated track's location.
So, this double clicking action on a clip is not working properly like we click on the track's name area.
Also I use double clicking for opening PRV View or Loop Construction View. I don't want to use it for activating the track.
Bottom line my request for that problem is:
If we could activate a track by selecting a clip on that track or activate with only One Click, like we do by selecting the track name, this issue and many of the issues related to that action will be solved automatically.-
1
-
-
In Cakewalk for now, after converting instrument track to dry audio track, copying all audio FX to dry audio track seemed to me a bit stepwise and I wrote a script to make it easier. You can copy & paste Multiple Audio FX by this shortcut script:
Copy & Paste Multiple FX.ahkCopy & Paste Multiple FX.exe
Just move the mouse cursor on the top of the FX Bin like that:
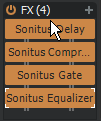
Shortcuts:
F6: Copy Multiple Audio FX
F7: Paste Multiple Audio FXYou can use these commands to apply multiple FX to dry audio track while waiting developers to make that feature.
-
In Chrome I use dark theme and I see all the sites with a dark theme like this. I recommend it.
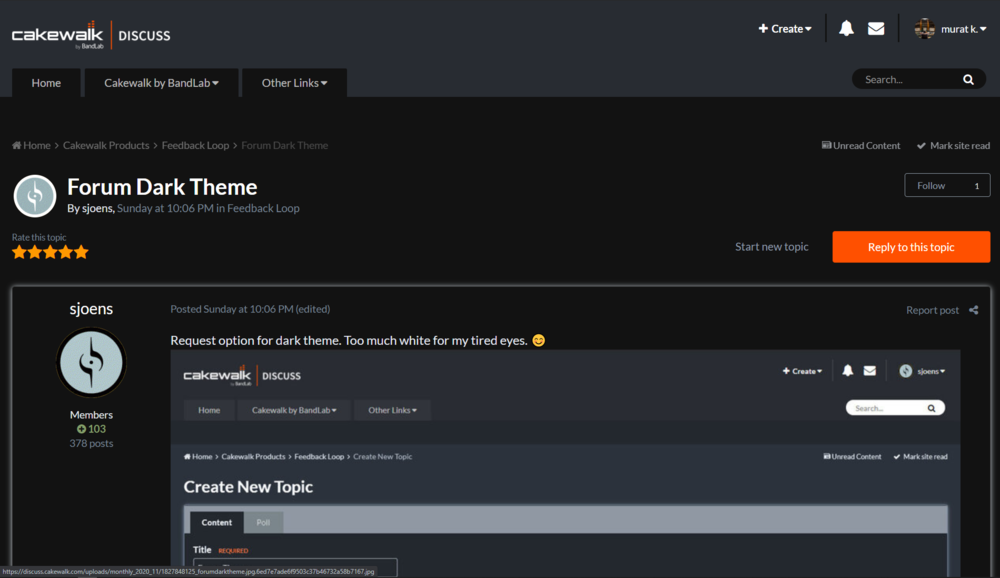
Of course it is not beautiful as sjoens did here. It just keeps your eyes safe.
-
Hi Terry,
If you freeze an Instrument Track and then you split that Instrument Track, you'll see there is an Audio Clip and a MIDI Clip separate from each other. When you freeze an Instrument track, it does not affect on CPU, it is just an Audio and a MIDI track. The only disadvantage is if you do some changes on the audio clip, you lose all the information after unfreezing the synth. But if you want to work with the Audio clip and keep the freezed Instrument Track at the same time, you can use this shortcut script. The script mutes the freezed synth and copies the audio information to an empty audio track. It works when you move the mouse cursor on the freezed instrument track's number with not selected status.
Script Shortcut: F5
Keyboard Bindings in Cakewalk: Toggle Track Mute for selected track: ALT+MFreezed Instrument Track with Audio Track.ahk Freezed Instrument Track with Audio Track.exe
-
I also use a shorcut for converting a specific MIDI Clip on an Instrument Track to an Audio Clip which uses Bounce to Track command. Just stretch the end of the MIDI clip till the sound disappears, select the clip and use the shorcut.
Script Shortcut:
F3
Keyboard Bindings in the Script:
Bounce to Tracks: Ctrl + BSelected MIDI Clip to Audio Clip.ahk Selected MIDI Clip to Audio Clip.exe
-
Hi Will,
Converting Instrument Track to an Audio Track with one single command can be useful. To achieve this in Cakewalk for now, you need to cut the audio after freezing the synth, and copy that audio into an audio track and then delete the instrument track. But if it means too many steps to you, I wrote a script to automate that process, you can use it if you want.
It works when you move the mouse cursor on the instrument track's number with not selected status.
As for always you can change the script's shortcut to your need and keyboard binding of Delete Track(s) to your settings by changing the script or load the exe file directly by using these settings:Script Shortcut: F4
My Keyboard Binding in Cakewalk: Shift + x for Delete Track(s)Freezed Instrument Track to Audio Track.ahk Freezed Instrument Track to Audio Track.exe
-
Yeah. Absolutely. We need the same height for the lanes with the track when we zoom.
As a workaround I use different shortcuts for different heights to achieve this with the Autohotkey.
If you want to use it, you can change the shortcuts to your needs by changing the script or also you can load the exe file directly.Shortcuts:
z & x : 1 bar (minimum) height.
z & c : 2 bar height.
z & v : 3 bar height.
z & b : 4 bar height.
z & d : 5 bar height.
z & f : 6 bar height.
z & g : 7 bar height.
z & e : 8 bar height.
z & r : Full Height and a lane.
z & t : Full Height
z & Space : 1.5 bar height (I use that in the PRV for the note height)
z & a : 1.25 bar height (I use that in the Drum Grid Pane for the note height) -
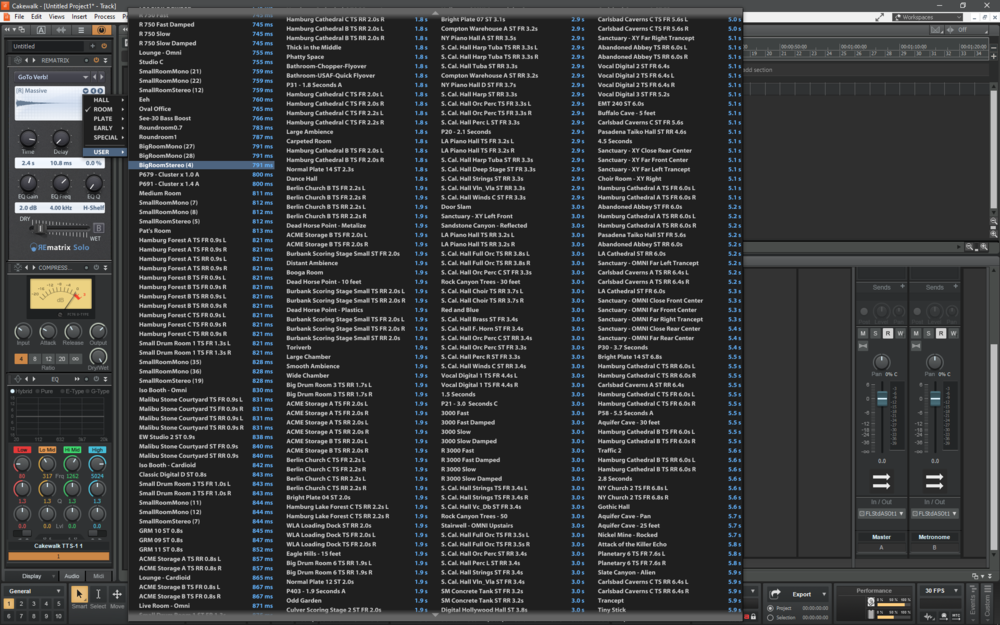
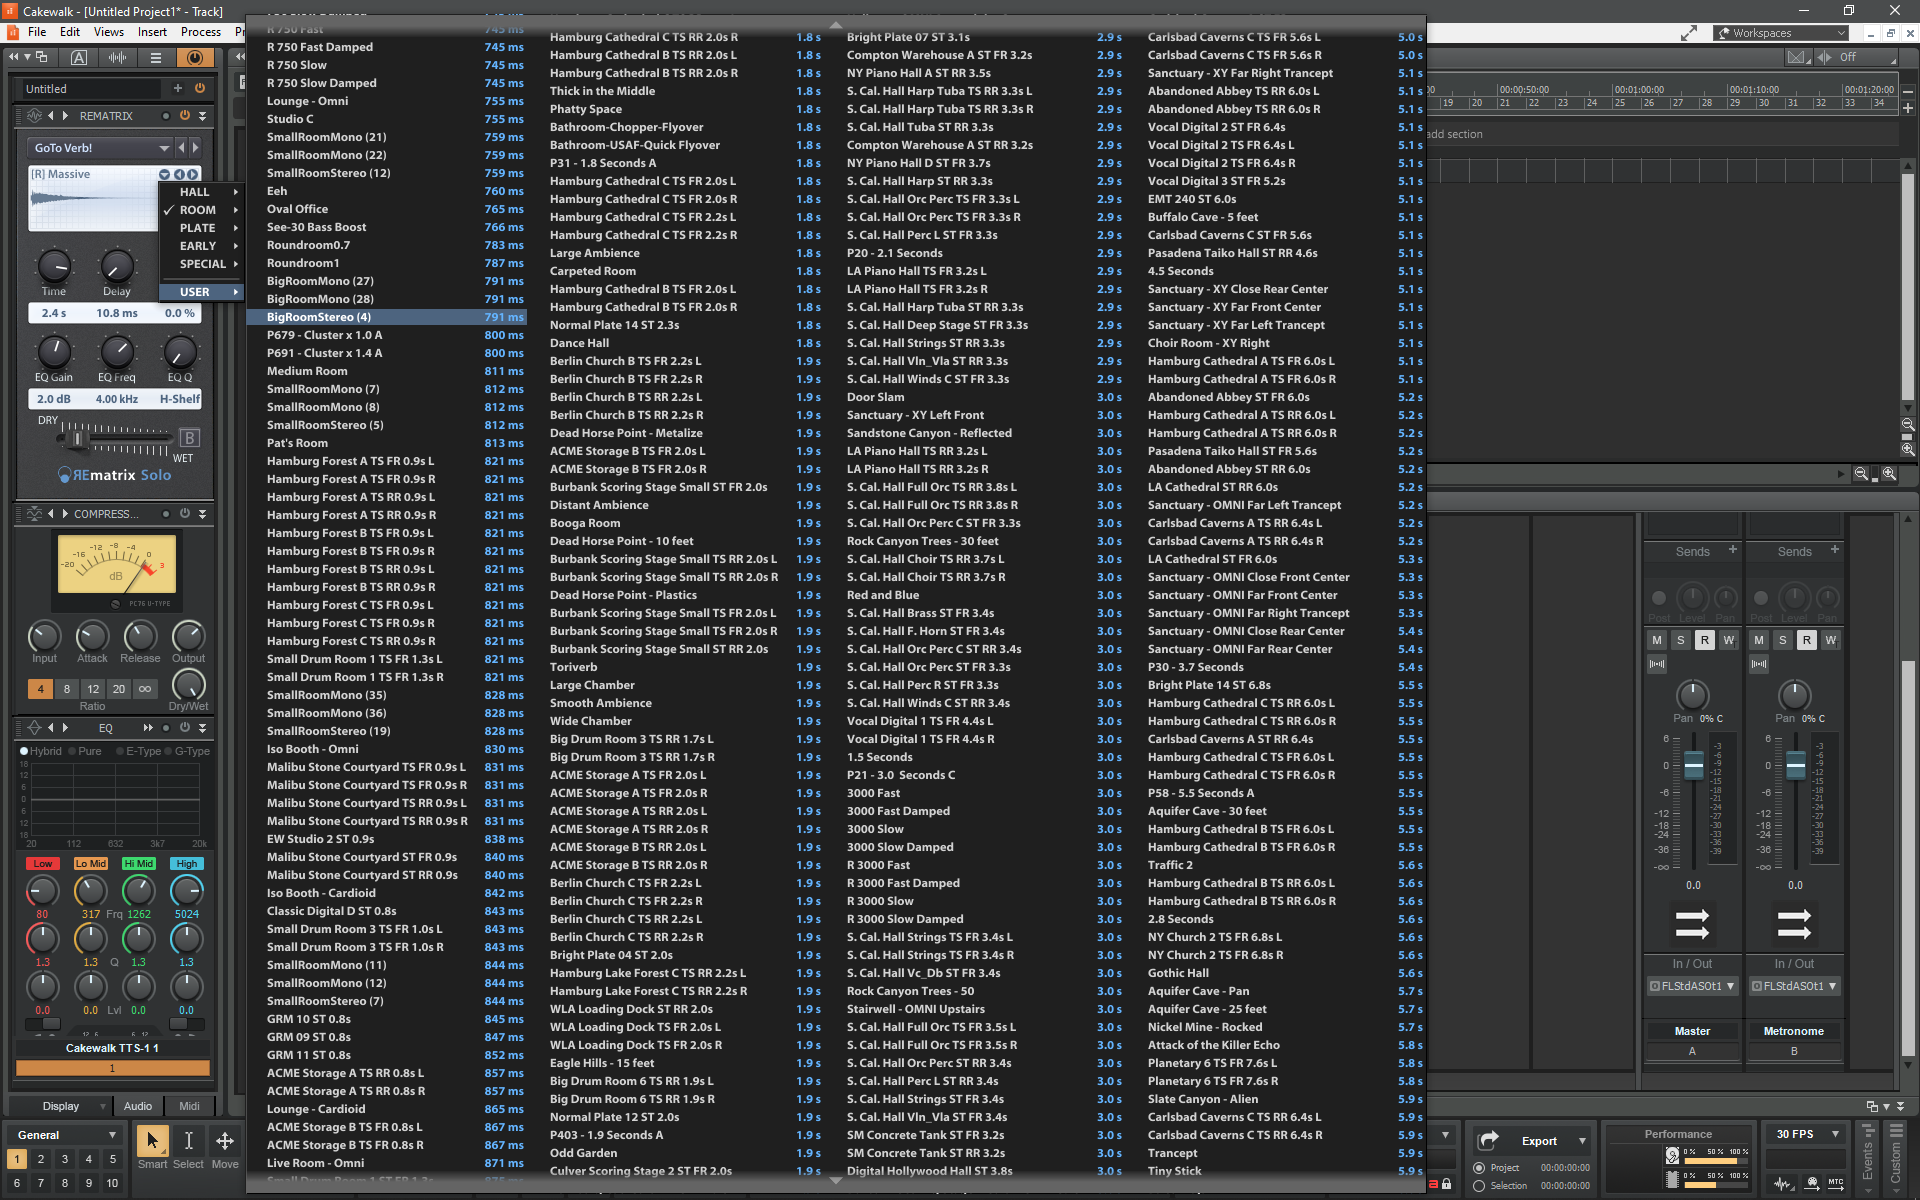
I imported all my Impulse Responses to the Rematrix Solo, even from that big list I can easily select any one of them with mousewheel scrolling. 4 bar column is also needed when the list gets bigger. We definitely need this kind of thing.
-
Good request. I hope the developers will make it possible. As a workaround I use a shortcut script with Autohotkey for that.
If you activate a track that you want to fit width by clicking the track name and a clip on that track or selecting multiple tracks by clicking the track number, with the shortcut key the script simulates these three steps in order: Hide Tracks not in Selection - Resizes and zooms tracks to see entire project - Unhide all tracks and buses, no zoom.
In this script:
Shift & Capslock triggers "fit to width" command.In my keyboard bindings for Cakewalk I use:
Alt+Q for the command "Hide Tracks not in Selection"
Shift + Z for the command "Resizes and zooms tracks to see entire project"
Alt + A for the command "Unhide all tracks and buses, no zoom"I am adding the script so you can change the script to your needs. Or you can directly load the exe file, if you use same shortcuts listed above, it will work.
Edit: I made a small change in the script to work for the tracks with opened lanes.
Note: This script fits selected track(s) to project width. If you want to fit width of a clip there is a command named "Show and Fit Selection" but all of these choices are also changing the height of the tracks. So we still need a command for to fit width without changing the height.
-
1
-
-
Thank you k23 for clarifying some things. I think this community needs more people like you. If we try much more to understand each other, that will bring the harmony. I believe we can achive it because that's what we do all the time as musicans. And there is no need to be offensive Will, we are all friends here, we use the same DAW.
-
2
-
-
Will, this works for Coloring Clips. Coloring Tracks is not a big deal in Cakewalk, it works fine.
I think I get it. People are not reading carefully. That's the problem here. Do not take it personal. I saw it so many times in this site. Someone comes with a great feature request, maybe which also exist in another software, but people disagree at the first time because they're misunderstanding. These feature requests on the list are picked carefully. Cakewalk needs it, all of them. We need it. I believe everyone of us here wants to see Cakewalk at the number one in the best DAW for this year categories. It's free but still no one I know uses it. I am kinda hesitating when I tell someone which DAW I use. Cakewalk is great but still has some things to improve you know that. I think these little things will improve the quality of your working comfort. For example number 17 is my favorite. I hope the developers will make these features as soon as possible.
-
Will improve the workflow Will.
I created an exe file. Now anyone can use without installing the Autohotkey.
-
Request Number 14 Update:
While waiting The Developers to release the new big update, I wrote a script for Bringing Color Menu Over The Clip with Autohotkey. The script clicks the background color setting in Clip Properties and brings The Color Menu over the clip. It works when you use The Inspector with it's default location but you can change the click location to anywhere if you want.
If you don't know about Autohotkey. It is easy to use, just install Autohotkey, load the attached file by double clicking it and press F12 when the clip is selected in Cakewalk. You can change the shortcut key by changing the beginning of the script.

Abandon all hope, ye who enter The Drum Map Manager
in Feedback Loop
Posted
I mentioned Project Templates and Track Templates for developers to see. Because each file type are storing information differently. For example Track Templates does not storing the color information of the folders. When they fix this this problem, it has to work in all file types in the Cakewalk.
Each synth we loaded in the project file can have a unique variable. And the Out Port assignments can be routed to that variable. Once we assign the out ports, it can be saved into the project file, so that now it can work without being linked to the Drum Map file. I am telling about storing routed Drum Maps in the project file. This can stay us out of trouble.