


-
Posts
3,353 -
Joined
-
Last visited
-
Days Won
8
Posts posted by Will.
-
-
1 hour ago, Sven said:
Thanks for everyone's feedback.
IgoRr, I already own a pair of Audio-Technica headphones (can't remember the model but they were expensive) and I think my Sony headphones are a little more comfortable then the AT's. When I'm travelling and my family isn't too noisy I prefer to use my Koss PortaPros because they are much more comfortable on my ears for long sessions. The Sony headphones sound more professional but the ear pressure gets to me eventually. But they do block out the noise nicely.
Are there any recommendations for closed headphones that feel more comfortable than the Sony or Audio-Technica brands?
I go with David, just because I own the Beyerdynamic DT 770 Pro which I paid $159 for on sweetwater. They are closed back and extremely surgical - abit too surgical actually (this is why they popular amongst the youth, I guess.) I've never mixed on them, but I do use them for LIVE monitoring - the my go-to headphones for monitoring.
My everyday listening headphones are the Sennheiser HD 280, I paid $95 for them, and also closed back. They are just enjoyable listening to.
-
Definitely celebrating it with those who celebrate this day.
-
Eid Mubarak to those celebrating.
-
59 minutes ago, mettelus said:
It won't be too long before one can hum/sing a melody into a cell phone and it can be snapped to key/tempo
Meh! That two years old already. It came and went again. Theres alot of Tiktok videos out with various software. AI is losing grip amongst the teens when it comes to music in the last 12 months. Its the older generations thats stumbling upon this today trying to figure it out.
I work regularly with teen producers and artist in the EDM and HipHop world, when I stumble across something I think its new - they laugh at me and say its old and im not even that old. 😂
I havent even fully tried this feature out, but apparently, Stem Separation is old now too - so I've been told the past week. 🤔
-
2 hours ago, Panu Pentikäinen said:
My PC has 8 cores, 16 logical processors, running at 4.75 GHz and it's glitching. Audio interface is RME UFX II, ASIO buffer 128-512 (same result with the largest buffer)
This is simply bad quality control from the synth manufacturer.I tested disabling Plug-In Load Balancing - no help.
Have you tried a lower sample rate with the oversampling turned off in serum and Sonar?
-
-
Make sure that your "Master bus" is set as your default bus. Right click and select both Default and Preview Bus (Preview Bus is for the Browser.)
-
26 minutes ago, pwalpwal said:
no wonder op is having issues (but why bother with port?)
🙆🏽♂️🤷🏻♂️
-
56 minutes ago, pwalpwal said:
there is a vsti port according to https://www.image-line.com/fl-studio-learning/fl-studio-online-manual/html/plugins/Sytrus.htm
Yes, thats because Sytrus does not come with every version of FL Studio. FL recently launched their effect store where you can buy their plugins indivually, but they are strictly native to FL Studio - ONLY! I do have Sytrus.
I own FL Studio and none of their native or addon and even their new plugins from their store has ever worked in Cakewalk or any other DAW.
-
Its working fine here.
-
 1
1
-
-
2 hours ago, Cobus Prinsloo said:
Thank you very much. So I should send the mini dump file to AirMusic then?
Correct'o. Tell them its causing Cakewalk to crash. Are you using the vst 2 or their new vst 3 version of The Riser?
Then second question: Are you using Sytrus as rewired?
-
Just now, pwalpwal said:
so if it's detected as a plugin crash, it uses the plugin name in the dump, rather than the song name? is that new or am i not keeping up 🤪
Most software does. Some just highlight them in more detail, I guess.
-
Just now, pwalpwal said:
ah i see it's in the filepath in the screenshot
Yes. Ski-pidi-papap-aah-do. 😂
-
Just now, pwalpwal said:
how can you tell from his post?
Sytrus is native to FL STUDIO - period.
-
2
-
-
On 3/25/2025 at 2:22 PM, Cobus Prinsloo said:
Unfortunately it looks like there's only a VST 2 version. I checked it with an FL Studio staff member. Pity, this is such a great synth.
Are you using "Sytrus" or The Riser. Your crash has an issue with "The Riser" which is an AirMusic product and Sytrus a FL strictly product.
Attach the mini dumb file here, for further assistance from Cakewalk developers.
-
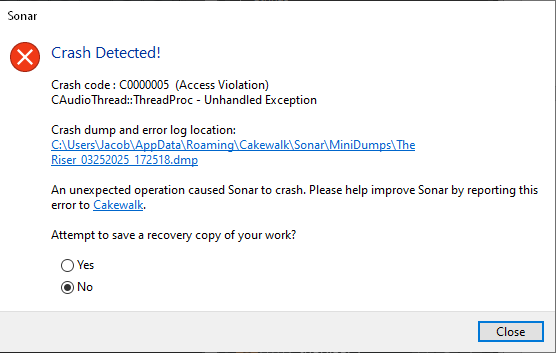
1 hour ago, Cobus Prinsloo said:
Hi all. I'm using Fruity Loops' Sytrus 3 vst synth and it has a lot of great sound presets. However, several of them always cause Sonar to crash as soon as I start playing (even if it's only one note). The crash note always states an "Access violation" (see screenshot).
I installed and tested this on another PC of mine with Cakewalk on, and there was no problem! In terms of specs and performance, this PC is not any better either.
I changed the oversampling settings inside Sytus, but that didn't seem to make a difference.
If you are using the VST3 version - report it to AirMusic.
-
1
-
-
It is a separate install, so you have to install it.
-
20 minutes ago, IgoRr said:
This is absolutely impossible, neither Cakewalk nor Sonar have such a setting, unless you yourself put a "Marker" at the 3rd minute, and mark it as "end of project". If you did not perform these actions, then Sonar itself will not implement such a scenario under any circumstances. I always have all tracks of different lengths, and such incidents have never happened in more than 30 years.
Hey, IgoRr. How you" This is not 100% accurate. Cakewalk also allows you to import cue markers. Depending on the file that was imported - it might have had an end marker where the file was added. I have had my fair share of frustrations on this and took me a while to figure what is happening. Not sure what is going on in @badt1mes project, but should this be this case where the sample have it written on and being used - it can be disabled here.
.png.5d101f7d73360c5f285da6d18391996c.png)
-
7 hours ago, T Boog said:
. I also think clip gain level has been a biggy for me.
Careful with clip gain. It is one of those tools - when it is not needed - it's not needed." It is the reason why most cry why their tracks do not compete with commercially released tracks.
If your recordings have enough headroom. Only use clip gain where one-word peaks to high on the meters - this is why I suggested "comping." Instead of "lowering" that problematic word with clip gain and potentially sucking its dynamics away, rather replace that word with the vocals that was recorded to be used for comping, incase a mistake or something does not sound right for a more cohesive sound.
If you know how to read your levels - you might notice that certain parts might look as if they are loud on the WAVEFORM, but your level meter and ears will tell you otherwise - DON'T EDIT or MIX VISUALLY too much.
Clip gain and the Gain knobs in the console view are great tools, but it should be respected. So, before you use it- GET IT RIGHT AT THE SOURCE FIRST.
-
3
-
 1
1
-
-
1 hour ago, Amberwolf said:
Do you mean an expander (or compander)? (sorry I don't know all the terminology)
A normal compressor is a "downwards" compressor and then you get compressors that are both downwards and upwards compressors. The Sonitus Compressor. Waves C1, RVox and MV2 are all both Down and Upwards compressors.
You can also use the LA2A and the 1176 Bluey with a fast attack and release to level out your vocals.
DOWNWARDS COMPRESSION:
.png.440be25321bbc5d20d19df31cb566bdc.png)
UPWARDS COMPRESSION:
.png.0a50f8cf70d65a288d55132d6a61e320.png)
-
1
-
1
-
-
On 3/4/2025 at 6:31 PM, T Boog said:
When I record vocals I usually go line by line or do punch ins. As we all know, slight changes in distance or angle to a condenser mic(esp the closer u are) changes the eq curve/tonality of each take.
This is where more knowledge on different genres will help you a lot - especially "rap" vocals who are recorded the exact same way. So, this is where my experience might help you in this scenario.
Recording TIP: Don't lean into the mic when recording stand up straight.
First let me say: Because you are your own "recording engineer" you will never be satisfied with a recording take. Don't focus too much on your "tonality" instead focus more on the "dynamic side of the take. This is what's more important when you're doing line-per-line recording - your dynamics.
Get a fix point where you stand or sit and just keep recording from start to end. Layer the vocals at least 3 times for the entire song. This is where the fun begins. Mute all other double vocal takes and Level the dynamics of your first takes with a compressor. Start with a 4:1 Ratio and slowly back out until you find that sweet dynamic level - this is where the magic will happen. This is where all your "Tonality" issue will vanish or a better way to put "will balance out."
Your first compressor should be downwards compression > followed by your EQ (you might also learn that you might not even need to EQ your vocals the more you learn this.) After your Downwards compression and EQ insert another compressor that can do UPWARDS compression. This will bring out all your soft words and will balance out the levels in your vocals by giving you a more constant dynamic range - which in return will give you that even tone you want. You might want to learn multiband compression too for both balancing the tonal aspect of the vocal and to level its dynamics.
Time to COPY and PASTE the same effects to the doubles we have. Use these for comping (Yes, we do comping with rap vocals too.) Listen to the original takes and the double and match the words/lines that sounds better than the original takes. CAUTION: DONT REPLACE BECAUSE YOU WANT TO AND BECAUSE ITS FUN - NO!! Replace the parts where it sounds as if the compressor hits too hard on a certain word. First practice with comping to understand it, before going crazy with it. It is a totally different form of art in music - it requires a trained ear.
If you happy with your results send them to an Aux track, or Bus, for further processing, to shape the overall vocal. Remember the EQ on the vocal track should only be done to remove low and high frequencies you can remove up to -1dB in the 220 - 440 range, just don't boost any frequencies here. As mentioned, you can boost, shape and glue the vocal on the Aux or Bus.
Theres times when I'll approach a rock vocal as what I'd do on a jazz vocal, or a Pop song as how I would do a RnB, or Metal vocal.
So, to take away from this: Don't focus too much on the tonal side when recording line-per-line. Where there might be a slight tonal change - compliment that take with some doubles from the other takes you did. You can stand 10 feet away from the mic and mix it to sound the same as the one that was taken a foot away - if you know how.
Hope this help.
-
2
-
-
4 minutes ago, Andrey_rbk said:
Fine. And if the project slows down or speeds up. What to do then?
Use the proper stretch tool. Right click on the wrench in the tools bar.
-
Literally all it does.
-
Groove clip does not stretch the file. It ONLY prep's it to be duplicated as an extended LOOP FILE.

Alternatives to Perfect Space
in Cakewalk by BandLab
Posted
Seeing that you still use Gibsons brand. Get the SIR1 convolution reverb - its free.