-
Posts
214 -
Joined
-
Last visited
-
Days Won
8
Everything posted by Morten Saether
-
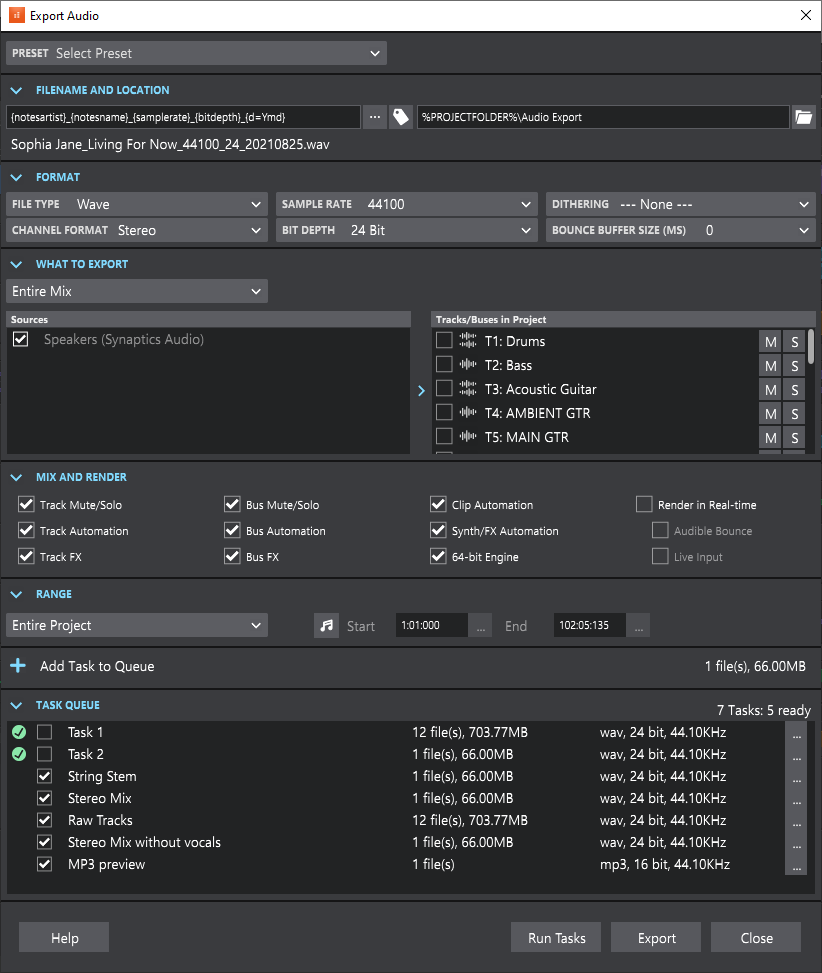
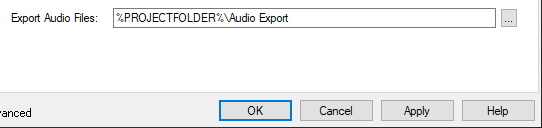
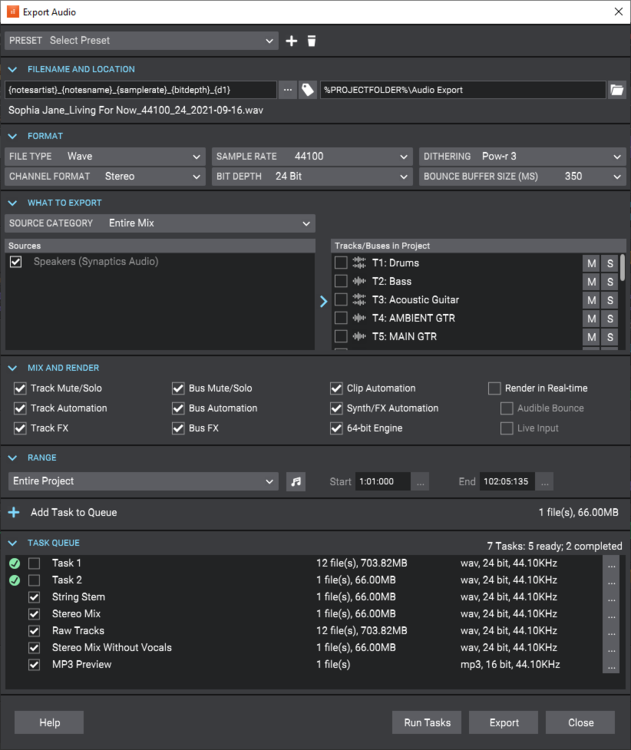
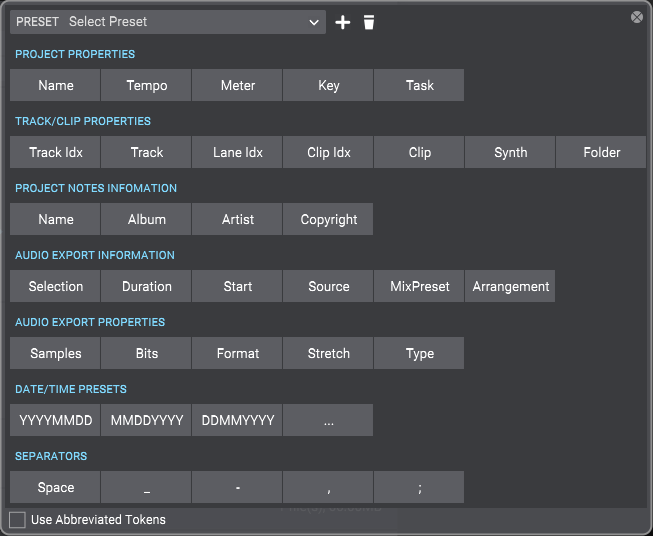
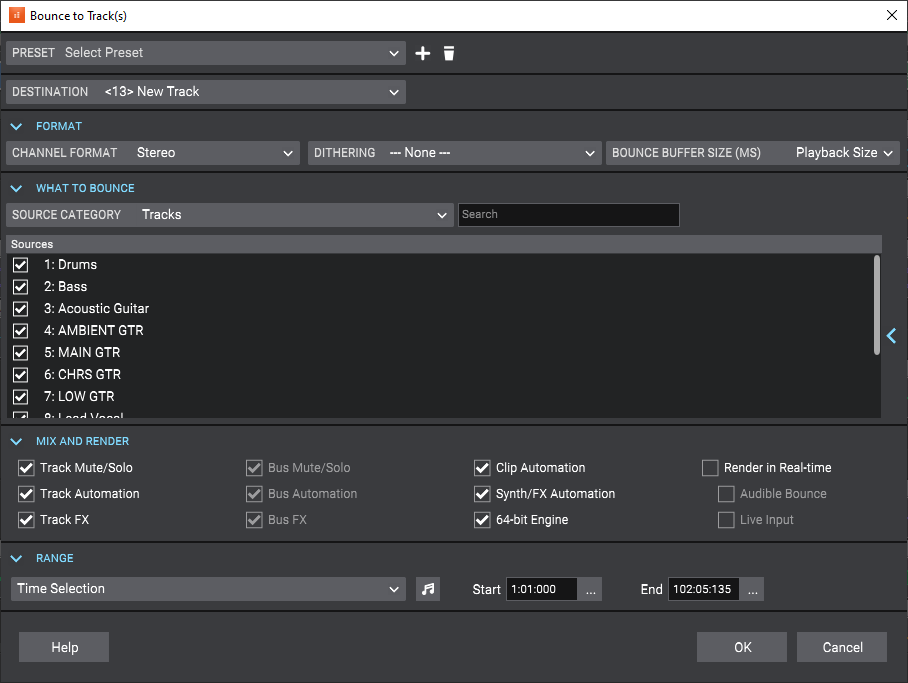
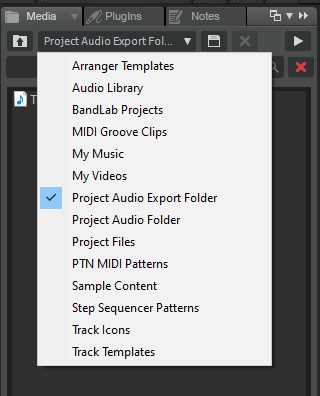
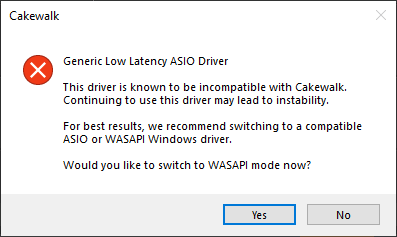
[UPDATE 4-Oct-2021: Cakewalk 2021.09 Update 1 (build 27.09.0.145) now available] Introduction The 2021.09 release introduces powerful new audio export capabilities including batch export, filename tokens, advanced stem export capabilities, fresh new intuitive Export Audio and bounce dialogs, a brand new AudioSnap transient detection algorithm, numerous enhancements and optimizations, and lots of bug fixes, all in keeping with our goal of making Cakewalk as reliable and enjoyable as possible. Please note that in order to automatically keep your activation status up to date, Cakewalk will renew your activation status whenever a new version of the application is installed and run for the first time, and when you sign in to BandLab from within Cakewalk. If you have never signed in to BandLab from within Cakewalk, you will be prompted once to sign in. The following highlights are intended to provide an overview of the more significant changes. Please also refer to the new features section of our documentation for more detailed information on the features. Please give us feedback on this release. We hope you like it! Update Oct 4 2021: 2021.09 Update 1 (build 27.09.0.145) Bug fixes Stability: S-Gear 2 VST3 plug-in crashes when inserted Intermittent crash when closing Arranger section context menu Exporting audio with plug-ins on a surround bus can hang the export while flushing plug-in buffers In rare cases certain plug-ins could hang export while flushing plug-in buffers Export: MP3 Export Options dialog does not show recalled task settings MP3 Export Options dialog should default to 256 kbps Changes to Notes Browser tab are not reflected in the ID3 MP3 Export Options dialog until Cakewalk restart Export as MIDI exporting whole project if selection at time zero Windows notification sound when opening Export Audio dialog in some projects Export Audio dialog uses default project sample rate instead of actual project sample rate Large bounce buffer sizes cause flatline audio when exporting or bouncing clips with 96K or higher sample rates Export task fails with no meaningful message if drive or path is invalid Export with External encoder was not functional Warn if duplicate filenames in export task queue Expand width of file overwrite prompt when exporting multiple files and make the list scrollable Export as MIDI File should not show audio track warning message Misc.: Bounce to Track(s) dialog forces render sample rate to 44100 always Bounce to Track(s) should always use project sample rate to prevent unnecessary sample rate conversion Bounce to Clips unexpectedly uses bounce buffer size from Export Audio dialog 2021.09 Highlights New export audio features Improved AudioSnap transient detection Misc. enhancements Bug fixes New export audio features The Export Audio feature has been greatly improved and optimized to handle the most demanding rendering tasks. Highlights: An intuitive new UI with collapsible panels to make it easier to get to the most commonly used features,. Task queues for export automation. Complete control over output file names using tag based file name presets. New additional export categories available: "Tracks Through Entire Mix" for track stems, exports the audio from each chosen track as heard through the main output. This is a useful way to create track stems as heard through master effects. "Track Folders" for any non-empty track folders. "Arranger sections" allows you to export each individual arrangement section as a separate audio file. Export uses significantly less memory and runs faster by eliminating making an extra copy of the project in memory. Support for setting the export buffer size independently from the audio driver buffer size. (can speed up export times) Convenient access to select and mute or solo tracks directly from the export UI. Set export time ranges or export entire project directly from the export UI. Automatic effects tail flushing is now part of export/bounce to prevent left over effects tails from leaking into exports or being heard. New default Export Audio Files folder setting in Edit > Preferences > File - Folder Locations. Toast notification on export completion with link to the completed render. More details: Related settings are organized into collapsible panels. The size, position and expanded state of each section is remembered once you close the dialog. The task queue allows you to create multiple export tasks and run them all as a batch. A task in the export queue contains the set of export settings including the mix settings, export file name, selection, location, and the time range. The export queue is saved in the project and can be recalled and re-executed. Any prompts appear at the time of adding the task, so you can run the whole queue without any user intervention. To batch export all tasks in the task queue, click Run Tasks. To export a single job with the current export settings, click Export. Filename and location are shown as two separate fields. Filename is the name of the file you want your exported audio to be called, and location is the directory where it should be saved. When you first open the dialog, the location will be set to the default location as specified in Edit > Preferences > File - Folder Locations under Export Audio Files. The default is \Audio Exports under the current project directory, where the current project folder is indicated by the %PROJECTFOLDER% environment variable. You can change the export directory by clicking on the browse location button , and this location will be remembered for the duration of the project’s session. You can change the global export location for all projects with the Export Audio Files path in Edit > Preferences > File - Folder Locations. Filename tokens. Filenames now support substitution tags for common project and export properties. You can type tags directly into the filename edit box, or use the filename builder pop-up to add them for you. You can still type while this pop-up is showing, so you can mix literal characters with tags, or use backspace to correct any mistakes. Filename presets let you save and recall custom filename formats. The filename itself now supports both literal characters and substitution tags (“tokens”). Substitution tags replace tags within the filename with common project and export properties. Each tag is contained within curly brackets. You can type in the tags directly into the filename edit box, or use the filename builder pop-up to add them for you. It’s worth mentioning that you can still type while this pop-up is showing, so you can mix literal characters with tags, or use backspace to correct any mistakes. A preview of the first audio export filename is shown below the filename edit box. The filename builder pop-up also support filename presets, so you can easily recall a formatted filename by selecting it from the drop-down. As with all Cakewalk presets, you can save new presets, replace existing ones, or delete one’s you don’t want. Export presets can now store a default filename. In the What to Export section, Track Folders has been added as a source category. This setting exports the tracks in each of the selected track folders as heard through the entire mix, as separate files. This provides yet another convenient way to export stems without modifying the source project. In addition to arrangements, individual Arranger sections are available as an export category. This allows you to export each individual section as a separate audio file. Under Format, the Bounce Buffer Size (ms) setting is used to specify the audio buffer size that will be used during export. This value defaults to use the current playback buffer size and can be changed to a max size of 350 ms. While small buffer sizes are useful to minimize latency, they add to CPU load and can slow down export operations significantly. A larger buffer size can speed up the export process in large projects by allowing the CPU to process data more efficiently. Caution: Some plugins can be unstable or crash with large buffer sizes so use this with caution. Depending on the plugins used, we recommend using moderate sizes like 50-100 msec rather than higher sizes. Also if you are using plugin automation, large buffer sizes will not sound smooth if you are using plugins that do not support sample accurate automation. The Bounce Buffer Size settings only applies when Render in Real-time is disabled. The playback latency buffer size is used when Render in Real-time is enabled. Tracks Through Entire Mix has been added as a new source category under What to Export. It exports individual tracks including all downstream bus effects and automation. The result is the same as if you solo one track at a time during export. When exporting multiple files as MP3 or Windows Media Advanced Streaming (WMA) format, the Export Options dialog box has a new Use These Settings for All option that lets you apply the same settings to all files instead of prompting for each file. Export works on the current project selection. The What to Export panel contains a fly-out project selection editor. This allows you to modify the current track selection and the mute and solo status of each track and bus, without exiting the Export Audio dialog box. This is especially convenient if you if you want to create several tasks, each with a different selection, or if you want to export multiple stems. Simply solo the tracks that you want to include in the stem, then add as a new task. A track that is checked means it’s included in the selection. If all the tracks are unchecked, that means there is no selection, and all tracks will be available. Changing the project selection changes which source items are available. A note about selection and the Tracks export category: When the source category is Tracks, the project selection has a special meaning: Having a project selection means there is also a time selection. So if you have tracks selected in your project selection, then all the tracks chosen in your audio source will be exported at exactly the length of the selection. In other words, the length of each tracks’ audio file will be the same. If you have nothing selected in your project, then no specific export time range has been set, and the length of each tracks’ audio file will be the length of each individual track. To the right of the What to export drop-down is a search filter, which lets you search for a particular track, bus, arrangement, section, or Mix Recall preset, should you have a large number of sources to search through. Tip: To quickly select all/none in the source list, hold down CTRL+SHIFT and click any checkbox. To select all, press CTRL+A. To check/uncheck the selected sources, press SPACEBAR. The Range panel specifies the time range to be exported. The drop-down provides the following choices: Entire Project = The entire length of the project. Time Selection = A specified time selection. The Start and End edit boxes allow you to manually enter the start and end times of the export range. Clicking the button to the left of the Start label will toggle between musical and absolute time. The buttons to the right of the Start and End edit boxes will allow you to choose a time based on defined project landmarks, such as the beginning of the project, the now time, or marker locations. Set Time Selection to Loop Range = Set the time selection to the current loop region. Set Time Selection to Punch Range = Set the time selection to the current punch region. Note: The 2021.09 installer will delete the old factory export presets and replace them with new and updated presets. If you have overwritten the factory preset names, those presets will be replaced. Other custom export presets will not be affected. Batch exporting audio files using task queues Using the Export button is fine if you have a single export. But what if you want to tweak your project and export again, or you want several different types of exports? You may want a task for exporting your stems, another task for exporting individual tracks, and another for exporting your final mix as a stereo file. You can now create multiple export tasks, such as stems or different file formats, and add them to an export queue. A task in the export queue contains the set of export settings including the mix settings, filename, location, selection, and the time range. You can add as many export tasks as you like, and run all export tasks as a batch without any user intervention. The task queue is per project and is saved with the project. Adding a task to the queue To create a task, simply go through the normal process of defining your export, then instead of clicking the Export button, click the Add Task to Queue button . This adds a task with the current settings to the task queue. If you are exporting multiple files as part of a task, a list of the filenames will be shown in a confirmation prompt. Any further prompts required for additional format settings will also be shown at this time… that way, you won’t get any prompts when you actually run the task. Once you’ve confirmed any prompts, enter a name for your new task. Simply type the name of the task in, and press ENTER. Tip: The name of the task can also be used in your filename by using the {taskname} tag. Repeat the above steps for any additional tasks you need. To the right of the task name you’ll see the number of files to be exported by each task, an estimated size (if it’s a wave file), and a summary of the file format. Editing tasks in the task queue You can update tasks that you already added to a task queue. To update an existing task: Do one of the following: Double-click on the task within the task list. Click the task’s menu button , then select Recall Task Settings. The task’s settings are recalled in the Export Audio dialog box. Make any desired edits to the current export settings. Click the task’s menu button , then select Update Task with Current Settings. The task is updated with the current settings. All other tasks in the task queue remain unchanged. Renaming a task To rename a task, do one of the following: Right-click the task and select Rename. Click the task’s menu button , then select Rename. Duplicating a task To duplicate an existing task: Do one of the following: Double-click on the task within the task list. Click the task’s menu button , then select Recall Task Settings. This recalls all the task settings in the Export Audio dialog box. [Optional] Make any desired edits to the current export settings. Click Add Task to Queue. Deleting tasks To delete a single task, right-click the task and select Delete, or click the task’s menu button , then select Delete. To delete multiple tasks, select the tasks that you want to delete (Tip: press CTRL+A to select all tasks), then right-click any selected task and select Delete. The task(s) is removed from the task queue. Executing task queue export To execute all checked tasks in the queue, click the Run Tasks button. The tasks in the queue are exported one after another. The status of each task is updated as the queue is executing, and a summary is shown in the task queue header. Once a task is completed, the task is unchecked. Checking a task resets it. Clicking on the Run Tasks button resets all checked tasks before executing each task. While the queue is running, the Run Tasks button changes to a Cancel button, which allows you to cancel the execution of the task queue at any time. The checked status of a task persists when opening/closing the Export Audio dialog box, and with the project. Resetting a completed task Tasks are automatically unchecked on successful completion. To reset a task so it will execute again the next time you click Run Tasks, simply check the task. Canceling an in-progress queue export While the queue is running, the Run Tasks button changes to a Cancel button, which allows you to cancel the execution of the task queue at any time. Opening a task’s export location To open a task’s export location, click the task’s menu button , then select Open Export Location. Using export filename tags and presets You can now use “tokens” to define filenames for exported audio files. Tokens allow you to use placeholder tags that automatically extract the corresponding information (such as the project name, artist, sample rate, bit depth, current date or time, etc.) from a project and adds it to the resulting filename. For example, instead of manually typing the project name and date into the filename edit box, you can enter the following: {projectname}_{d} This will automatically use the project’s name and the current date. Each token is enclosed by curly brackets (aka braces) e.g. {d}. Adding filename tags To enter a tag, do one of the following: Open the Tags panel and click a tag. You can still type while this pop-up is showing, so you can mix literal characters with tags, or use backspace to correct any mistakes. Type in the tags directly into the filename edit box. Be sure to enclose each token by curly brackets (aka braces) e.g. {d}. Tokens are case sensitive. A preview of the first audio export filename is shown below the filename edit box. To see all tokens that can be used to specify the filename, click the Build Filename Using Tags button to open the Tags pop-up panel. To add a tag, click a tag button, or manually type the tag in the filename edit box. Below are some common tokens: Project name = {projectname} or {P} Name field in Notes Browser = {notesname} or {N} Artist field in Notes Browser = {notesartist} or {A} Sample rate = {samplerate} or {sr} Bit depth = {bitdepth} or {bd} Channel format = {channelformat} or {cf} Track name = {trackname} or {T} Track number = {tracknumber} or {t} Date = {d} Tempo = {tempo} or {b} Meter / time signature = {meter} or {m} Key = {key} or {k} Task = {taskname} or {TN} Press the Build Filename Using Tags button to display all available tokens. Most tags have a long token and a short token. For example, the project name token can be {projectname} or {P}. Each tag’s tooltip shows its full and abbreviated tokens. To always use abbreviated tokens when you click a tag, select Use Abbreviated Tokens in the filename builder pop-up panel. You can freely use either format. Tokens can be combined as in the examples below: {notesartist}_{notesname}_{d} {notesartist}_{notesname}_{samplerate}_{bitdepth}_{channelformat}_{d=Ymd} You can combine tokens and regular text, as in the following example: Client Name_{samplerate}Hz_{bitdepth}b_{channelformat}_{d=Ymd} Saving filename presets You can save your custom export filename format as a preset in the filename tag panel. To open the filename tag panel, click the Build Filename Using Tags button next to the filename edit box. To save the current filename as a preset, type a name in the Presets combobox, then press ENTER or click the Create Preset button . To delete a preset, select the preset in the Presets combobox, then click the drop-down menu and select Delete Preset. By using filename tokens to define a naming scheme and saving the filename format as a preset, you can reuse the presets in any project without having to manually type a filename. Misc. export enhancements Improved support for exporting track stems Creating per track mixdowns commonly called track stems is a common post production requirement when exporting projects to audio. There are several convenient improvements to aid with the process of exporting stems without modifying the source project: Use Tracks Through Entire Mix in the What to Export section to quickly exports the audio from each chosen track as heard through the main output. This is a useful way to create track stems as heard through master effects. Aux track and sidechain track dependencies are now automatically included when exporting individual tracks as well as when soloing such tracks. Use Track Folders in the What to Export section, to export the tracks in each of the selected track folders as heard through the entire mix, as separate files. Use the fly-out project selection editor in the What to Export panel to modify the current track selection or set the mute and solo status of each track and bus, without exiting the Export Audio dialog box. This is a convenient way to create export tasks for stems. Simply solo the tracks that you want to include in the stem, then add as a new task. Improved handling of aux tracks and sidechains when exporting or soloing tracks When exporting with source category Tracks, sidechain or aux track sends or outputs are now properly included in the export for the track containing the sidechain. The same applies to aux tracks. When soloing a track that contains a sidechain plugin, any sends from other tracks in the project are now automatically included, similarly to how it behaves with sends to aux tracks. Automatic effects tails flushing during bounce Many VST plug-ins do not properly flush their effects tails via reset state transitions. In some cases, exporting multiple clips or arrangements could result in tails unexpectedly appearing in the export/bounce. To address this, Cakewalk now automatically flushes effects tails during export/bounce operations to prevent left over effects tails from leaking into exports or being heard. By default, tails are flushed until a threshold of -70dB is reached or 20 seconds of silence is detected, whichever occurs first. The dB threshold and max duration can be changed via the following variables in Edit > Preferences > Audio - Configuration File: BounceFlushTailsMaxDurationSec=n (0 to 60; default is 20; set to 0 to disable tails flushing) Effects tails maximum flush length while bouncing (seconds). BounceFlushTailsThresholdDb=n (-120 to -40; default is -70) Effects tails flush gain threshold while bouncing (dB). On export, the audio engine will first hard flush any effects tails from all active plug-ins referenced in the project, including track/bus effects, clip effects, effects chains, ProChannel as well as instruments. Flushing tails is done both pre and post bounce/export in order to prevent unwanted tails from sounding after a bounce or appearing in exports after playing a project. Effects tails flushing is done in efficiently using parallel processing when the multi processing engine is enabled and is normally very fast. Flushing progress is shown on the toolbar during the bounce. If you wish to disable this, set BounceFlushTailsMaxDurationSec to zero. Default ‘Export Audio Files’ folder A new Export Audio Files folder path has been added to Edit > Preferences > File - Folder Locations. This path is used as the default location when you open the Export Audio dialog box. The default path is %PROJECTFOLDER%\Audio Export, which is an \Audio Exports subfolder in the current project directory. The current project folder is indicated by the %PROJECTFOLDER% environment variable. Tip: If you change the folder path in the Export Audio dialog box, you can restore the %PROJECTFOLDER%\Audio Export path by opening Edit > Preferences > File - Folder Locations and clicking OK or Apply. There is also a new content location preset in the Media Browser to jump directly to the Project Audio Export Folder. This preset always takes you to %PROJECTFOLDER%\Audio Export. Toast notification with link to open export location Upon completion of a single export job via the Export button, a toast notification appears with a link to open the export location in Windows Explorer. Updated Bounce to Track(s) dialog box The Bounce to Tracks(s) dialog box has been redesigned similar to the Export Audio dialog box. Improved AudioSnap transient detection The transient detection algorithm has been greatly improved to more accurately detect audio transients in a variety of source material. Transients are useful when using audio snap and are also used for time stretching as well as when snapping to the transient pool. The AudioSnap transient detection method can now be specified in Edit > Preferences > Project - AudioSnap under Transient Detection. There are three methods: Magnitude Spectral (default for legacy projects) Multi-Resolution (default for new projects) Multi-Resolution is the new default transient detection method for new projects, and Spectral and Magnitude are the older legacy modes. The Multi-Resolution transient detection algorithm provides improved transient analysis that works well with most audio source material. The detection mode is stored in the project and older projects will continue to use Spectral until changed via Edit > Preferences > Project - AudioSnap. Note: The new transient analysis will not be used by default on previously saved projects. You must explicitly pick the Multi-Resolution algorithm from Edit > Preferences > Project - AudioSnap before this will take effect for that project. Once you resave the project with this change it will continue to use the new algorithm for all audio. When the detection method is changed, you will be prompted that project audio waveforms will be recomputed. After regeneration of the waveforms are complete, the new transients will be visible when switching the edit filter to Transients. The default transient threshold (available in the AudioSnap palette) is different for each transient detector mode. Note that any edited transients are retained when switching the transient detector mode. Misc. enhancements Mackie Control revspread VPot DataType On the Mackie Control surface, a VPot’s datatype defines the type of control being edited and how it should be displayed on the VPot LED halo. Currently, the Mackie Control surface supports a spread DataType for the LEDs that surround the VPots. The LEDs start in the middle for small values, then "spread" around the VPot for larger values. With certain parameter types, such as an equalizer "Q" setting, where a small Q value means a large spread, and a large Q value means a narrow spread, the VPots show the opposite in the LED spread, which is confusing. To address this, the Mackie Control surface now supports a new revspread VPot DataType that can be assigned in MackieControl.ini (C:\Program Files\Cakewalk\Shared Surfaces). With the revspread VPot DataType, high values show a narrow LED spread, and low values show a wide LED spread. This doesn't affect the actual numerical value being shown, just the way the LEDs spread around the VPot. For details, see the instructions in MackieControl.ini. Allow multiple MIDI files to be dragged into a project simultaneously You can now import multiple MIDI files into a project by dragging from Windows or the Media Browser. By default, multiple tracks are created. To import back-to-back instead, hold down CTRL+SHIFT when dragging the MIDI files into a project. ASIO driver compatibility checking Some ASIO drivers, such as Realtek ASIO, ASIO4All and Generic Low Latency ASIO Driver, are know to be incompatible with Cakewalk and can lead to instability or crashes. Cakewalk will now detect use of known incompatible ASIO drivers and warn the user to switch to a different native ASIO driver or WASAPI Shared mode for a better experience. Note: This warning doesn't prevent you from using these drivers. If you need to use them for some reason you can still select and use them. Latest release notes are here. See prior release notes. Check out all new features released to date. Previous release: 2021.06 Feature Overview 2021.04 Feature Overview 2021.01 Feature Overview 2020.11 Feature Overview 2020.09 Feature Overview 2020.08 Feature Overview 2020.05 Feature Overview 2020.04 Feature Overview 2020.01 Feature Overview 2019.11/12 Feature Overview 2019.09 Feature Overview 2019.07 Feature Overview


-
[UPDATE 4-Oct-2021: Cakewalk 2021.09 Update 1 (build 27.09.0.145) now available] We're pleased to announce the 2021.09 release! This release includes enhanced audio file export, batch exporting, filename tokens, completely redesigned Export Audio and bounce dialogs, improved AudioSnap transient detection, several bug fixes and lots of other enhancements and optimizations, all in keeping with our goal of making Cakewalk as reliable and enjoyable as possible. Please note that in order to automatically keep your activation status up to date, Cakewalk will renew your activation status whenever a new version of the application is installed and run for the first time, and when you sign in to BandLab from within Cakewalk. If you have never signed in to BandLab from within Cakewalk, you will be prompted once to sign in. Thanks, The Bakers For new feature details, see New Features. Should you need to revert to the 2021.06 release, you can download the Cakewalk 2021.06 Rollback installer. Update Oct 4 2021: 2021.09 Update 1 (build 27.09.0.145) Bug fixes Stability: S-Gear 2 VST3 plug-in crashes when inserted Intermittent crash when closing Arranger section context menu Exporting audio with plug-ins on a surround bus can hang the export while flushing plug-in buffers In rare cases certain plug-ins could hang export while flushing plug-in buffers Export: MP3 Export Options dialog does not show recalled task settings MP3 Export Options dialog should default to 256 kbps Changes to Notes Browser tab are not reflected in the ID3 MP3 Export Options dialog until Cakewalk restart Export as MIDI exporting whole project if selection at time zero Windows notification sound when opening Export Audio dialog in some projects Export Audio dialog uses default project sample rate instead of actual project sample rate Large bounce buffer sizes cause flatline audio when exporting or bouncing clips with 96K or higher sample rates Export task fails with no meaningful message if drive or path is invalid Export with External encoder was not functional Warn if duplicate filenames in export task queue Expand width of file overwrite prompt when exporting multiple files and make the list scrollable Export as MIDI File should not show audio track warning message Misc.: Bounce to Track(s) dialog forces render sample rate to 44100 always Bounce to Track(s) should always use project sample rate to prevent unnecessary sample rate conversion Bounce to Clips unexpectedly uses bounce buffer size from Export Audio dialog 2021.09 Highlights New export audio features Improved AudioSnap transient detection Misc. enhancements Bug fixes New export audio features The Export Audio feature has been greatly improved and optimized to handle the most demanding rendering tasks. Highlights: An intuitive new UI with collapsible panels to make it easier to get to the most commonly used features,. Task queues for export automation. Complete control over output file names using tag based file name presets. New additional export categories available: "Tracks Through Entire Mix" for track stems, exports the audio from each chosen track as heard through the main output. This is a useful way to create track stems as heard through master effects. "Track Folders" for any non-empty track folders. "Arranger sections" allows you to export each individual arrangement section as a separate audio file. Export uses significantly less memory and runs faster by eliminating making an extra copy of the project in memory. Support for setting the export buffer size independently from the audio driver buffer size. (can speed up export times) Convenient access to select and mute or solo tracks directly from the export UI. Set export time ranges or export entire project directly from the export UI. Automatic effects tail flushing is now part of export/bounce to prevent left over effects tails from leaking into exports or being heard. New default Export Audio Files folder setting in Edit > Preferences > File - Folder Locations. Toast notification on export completion with link to the completed render. More details: Related settings are organized into collapsible panels. The size, position and expanded state of each section is remembered once you close the dialog. The task queue allows you to create multiple export tasks and run them all as a batch. A task in the export queue contains the set of export settings including the mix settings, export file name, selection, location, and the time range. The export queue is saved in the project and can be recalled and re-executed. Any prompts appear at the time of adding the task, so you can run the whole queue without any user intervention. To batch export all tasks in the task queue, click Run Tasks. To export a single job with the current export settings, click Export. Filename and location are shown as two separate fields. Filename is the name of the file you want your exported audio to be called, and location is the directory where it should be saved. When you first open the dialog, the location will be set to the default location as specified in Edit > Preferences > File - Folder Locations under Export Audio Files. The default is \Audio Exports under the current project directory, where the current project folder is indicated by the %PROJECTFOLDER% environment variable. You can change the export directory by clicking on the browse location button , and this location will be remembered for the duration of the project’s session. You can change the global export location for all projects with the Export Audio Files path in Edit > Preferences > File - Folder Locations. Filename tokens. Filenames now support substitution tags for common project and export properties. You can type tags directly into the filename edit box, or use the filename builder pop-up to add them for you. You can still type while this pop-up is showing, so you can mix literal characters with tags, or use backspace to correct any mistakes. Filename presets let you save and recall custom filename formats. The filename itself now supports both literal characters and substitution tags (“tokens”). Substitution tags replace tags within the filename with common project and export properties. Each tag is contained within curly brackets. You can type in the tags directly into the filename edit box, or use the filename builder pop-up to add them for you. It’s worth mentioning that you can still type while this pop-up is showing, so you can mix literal characters with tags, or use backspace to correct any mistakes. A preview of the first audio export filename is shown below the filename edit box. The filename builder pop-up also support filename presets, so you can easily recall a formatted filename by selecting it from the drop-down. As with all Cakewalk presets, you can save new presets, replace existing ones, or delete one’s you don’t want. Export presets can now store a default filename. In the What to Export section, Track Folders has been added as a source category. This setting exports the tracks in each of the selected track folders as heard through the entire mix, as separate files. This provides yet another convenient way to export stems without modifying the source project. In addition to arrangements, individual Arranger sections are available as an export category. This allows you to export each individual section as a separate audio file. Under Format, the Bounce Buffer Size (ms) setting is used to specify the audio buffer size that will be used during export. This value defaults to use the current playback buffer size and can be changed to a max size of 350 ms. While small buffer sizes are useful to minimize latency, they add to CPU load and can slow down export operations significantly. A larger buffer size can speed up the export process in large projects by allowing the CPU to process data more efficiently. Caution: Some plugins can be unstable or crash with large buffer sizes so use this with caution. Depending on the plugins used, we recommend using moderate sizes like 50-100 msec rather than higher sizes. Also if you are using plugin automation, large buffer sizes will not sound smooth if you are using plugins that do not support sample accurate automation. The Bounce Buffer Size settings only applies when Render in Real-time is disabled. The playback latency buffer size is used when Render in Real-time is enabled. Tracks Through Entire Mix has been added as a new source category under What to Export. It exports individual tracks including all downstream bus effects and automation. The result is the same as if you solo one track at a time during export. When exporting multiple files as MP3 or Windows Media Advanced Streaming (WMA) format, the Export Options dialog box has a new Use These Settings for All option that lets you apply the same settings to all files instead of prompting for each file. Export works on the current project selection. The What to Export panel contains a fly-out project selection editor. This allows you to modify the current track selection and the mute and solo status of each track and bus, without exiting the Export Audio dialog box. This is especially convenient if you if you want to create several tasks, each with a different selection, or if you want to export multiple stems. Simply solo the tracks that you want to include in the stem, then add as a new task. A track that is checked means it’s included in the selection. If all the tracks are unchecked, that means there is no selection, and all tracks will be available. Changing the project selection changes which source items are available. A note about selection and the Tracks export category: When the source category is Tracks, the project selection has a special meaning: Having a project selection means there is also a time selection. So if you have tracks selected in your project selection, then all the tracks chosen in your audio source will be exported at exactly the length of the selection. In other words, the length of each tracks’ audio file will be the same. If you have nothing selected in your project, then no specific export time range has been set, and the length of each tracks’ audio file will be the length of each individual track. To the right of the What to export drop-down is a search filter, which lets you search for a particular track, bus, arrangement, section, or Mix Recall preset, should you have a large number of sources to search through. Tip: To quickly select all/none in the source list, hold down CTRL+SHIFT and click any checkbox. To select all, press CTRL+A. To check/uncheck the selected sources, press SPACEBAR. The Range panel specifies the time range to be exported. The drop-down provides the following choices: Entire Project = The entire length of the project. Time Selection = A specified time selection. The Start and End edit boxes allow you to manually enter the start and end times of the export range. Clicking the button to the left of the Start label will toggle between musical and absolute time. The buttons to the right of the Start and End edit boxes will allow you to choose a time based on defined project landmarks, such as the beginning of the project, the now time, or marker locations. Set Time Selection to Loop Range = Set the time selection to the current loop region. Set Time Selection to Punch Range = Set the time selection to the current punch region. Note: The 2021.09 installer will delete the old factory export presets and replace them with new and updated presets. If you have overwritten the factory preset names, those presets will be replaced. Other custom export presets will not be affected. Batch exporting audio files using task queues Using the Export button is fine if you have a single export. But what if you want to tweak your project and export again, or you want several different types of exports? You may want a task for exporting your stems, another task for exporting individual tracks, and another for exporting your final mix as a stereo file. You can now create multiple export tasks, such as stems or different file formats, and add them to an export queue. A task in the export queue contains the set of export settings including the mix settings, filename, location, selection, and the time range. You can add as many export tasks as you like, and run all export tasks as a batch without any user intervention. The task queue is per project and is saved with the project. Adding a task to the queue To create a task, simply go through the normal process of defining your export, then instead of clicking the Export button, click the Add Task to Queue button . This adds a task with the current settings to the task queue. If you are exporting multiple files as part of a task, a list of the filenames will be shown in a confirmation prompt. Any further prompts required for additional format settings will also be shown at this time… that way, you won’t get any prompts when you actually run the task. Once you’ve confirmed any prompts, enter a name for your new task. Simply type the name of the task in, and press ENTER. Tip: The name of the task can also be used in your filename by using the {taskname} tag. Repeat the above steps for any additional tasks you need. To the right of the task name you’ll see the number of files to be exported by each task, an estimated size (if it’s a wave file), and a summary of the file format. Editing tasks in the task queue You can update tasks that you already added to a task queue. To update an existing task: Do one of the following: Double-click on the task within the task list. Click the task’s menu button , then select Recall Task Settings. The task’s settings are recalled in the Export Audio dialog box. Make any desired edits to the current export settings. Click the task’s menu button , then select Update Task with Current Settings. The task is updated with the current settings. All other tasks in the task queue remain unchanged. Renaming a task To rename a task, do one of the following: Right-click the task and select Rename. Click the task’s menu button , then select Rename. Duplicating a task To duplicate an existing task: Do one of the following: Double-click on the task within the task list. Click the task’s menu button , then select Recall Task Settings. This recalls all the task settings in the Export Audio dialog box. [Optional] Make any desired edits to the current export settings. Click Add Task to Queue. Deleting tasks To delete a single task, right-click the task and select Delete, or click the task’s menu button , then select Delete. To delete multiple tasks, select the tasks that you want to delete (Tip: press CTRL+A to select all tasks), then right-click any selected task and select Delete. The task(s) is removed from the task queue. Executing task queue export To execute all checked tasks in the queue, click the Run Tasks button. The tasks in the queue are exported one after another. The status of each task is updated as the queue is executing, and a summary is shown in the task queue header. Once a task is completed, the task is unchecked. Checking a task resets it. Clicking on the Run Tasks button resets all checked tasks before executing each task. While the queue is running, the Run Tasks button changes to a Cancel button, which allows you to cancel the execution of the task queue at any time. The checked status of a task persists when opening/closing the Export Audio dialog box, and with the project. Resetting a completed task Tasks are automatically unchecked on successful completion. To reset a task so it will execute again the next time you click Run Tasks, simply check the task. Canceling an in-progress queue export While the queue is running, the Run Tasks button changes to a Cancel button, which allows you to cancel the execution of the task queue at any time. Opening a task’s export location To open a task’s export location, click the task’s menu button , then select Open Export Location. Using export filename tags and presets You can now use “tokens” to define filenames for exported audio files. Tokens allow you to use placeholder tags that automatically extract the corresponding information (such as the project name, artist, sample rate, bit depth, current date or time, etc.) from a project and adds it to the resulting filename. For example, instead of manually typing the project name and date into the filename edit box, you can enter the following: {projectname}_{d} This will automatically use the project’s name and the current date. Each token is enclosed by curly brackets (aka braces) e.g. {d}. Adding filename tags To enter a tag, do one of the following: Open the Tags panel and click a tag. You can still type while this pop-up is showing, so you can mix literal characters with tags, or use backspace to correct any mistakes. Type in the tags directly into the filename edit box. Be sure to enclose each token by curly brackets (aka braces) e.g. {d}. Tokens are case sensitive. A preview of the first audio export filename is shown below the filename edit box. To see all tokens that can be used to specify the filename, click the Build Filename Using Tags button to open the Tags pop-up panel. To add a tag, click a tag button, or manually type the tag in the filename edit box. Below are some common tokens: Project name = {projectname} or {P} Name field in Notes Browser = {notesname} or {N} Artist field in Notes Browser = {notesartist} or {A} Sample rate = {samplerate} or {sr} Bit depth = {bitdepth} or {bd} Channel format = {channelformat} or {cf} Track name = {trackname} or {T} Track number = {tracknumber} or {t} Date = {d} Tempo = {tempo} or {b} Meter / time signature = {meter} or {m} Key = {key} or {k} Task = {taskname} or {TN} Press the Build Filename Using Tags button to display all available tokens. Most tags have a long token and a short token. For example, the project name token can be {projectname} or {P}. Each tag’s tooltip shows its full and abbreviated tokens. To always use abbreviated tokens when you click a tag, select Use Abbreviated Tokens in the filename builder pop-up panel. You can freely use either format. Tokens can be combined as in the examples below: {notesartist}_{notesname}_{d} {notesartist}_{notesname}_{samplerate}_{bitdepth}_{channelformat}_{d=Ymd} You can combine tokens and regular text, as in the following example: Client Name_{samplerate}Hz_{bitdepth}b_{channelformat}_{d=Ymd} Saving filename presets You can save your custom export filename format as a preset in the filename tag panel. To open the filename tag panel, click the Build Filename Using Tags button next to the filename edit box. To save the current filename as a preset, type a name in the Presets combobox, then press ENTER or click the Create Preset button . To delete a preset, select the preset in the Presets combobox, then click the drop-down menu and select Delete Preset. By using filename tokens to define a naming scheme and saving the filename format as a preset, you can reuse the presets in any project without having to manually type a filename. Misc. export enhancements Improved support for exporting track stems Creating per track mixdowns commonly called track stems is a common post production requirement when exporting projects to audio. There are several convenient improvements to aid with the process of exporting stems without modifying the source project: Use Tracks Through Entire Mix in the What to Export section to quickly exports the audio from each chosen track as heard through the main output. This is a useful way to create track stems as heard through master effects. Aux track and sidechain track dependencies are now automatically included when exporting individual tracks as well as when soloing such tracks. Use Track Folders in the What to Export section, to export the tracks in each of the selected track folders as heard through the entire mix, as separate files. Use the fly-out project selection editor in the What to Export panel to modify the current track selection or set the mute and solo status of each track and bus, without exiting the Export Audio dialog box. This is a convenient way to create export tasks for stems. Simply solo the tracks that you want to include in the stem, then add as a new task. Improved handling of aux tracks and sidechains when exporting or soloing tracks When exporting with source category Tracks, sidechain or aux track sends or outputs are now properly included in the export for the track containing the sidechain. The same applies to aux tracks. When soloing a track that contains a sidechain plugin, any sends from other tracks in the project are now automatically included, similarly to how it behaves with sends to aux tracks. Automatic effects tails flushing during bounce Many VST plug-ins do not properly flush their effects tails via reset state transitions. In some cases, exporting multiple clips or arrangements could result in tails unexpectedly appearing in the export/bounce. To address this, Cakewalk now automatically flushes effects tails during export/bounce operations to prevent left over effects tails from leaking into exports or being heard. By default, tails are flushed until a threshold of -70dB is reached or 20 seconds of silence is detected, whichever occurs first. The dB threshold and max duration can be changed via the following variables in Edit > Preferences > Audio - Configuration File: BounceFlushTailsMaxDurationSec=n (0 to 60; default is 20; set to 0 to disable tails flushing) Effects tails maximum flush length while bouncing (seconds). BounceFlushTailsThresholdDb=n (-120 to -40; default is -70) Effects tails flush gain threshold while bouncing (dB). On export, the audio engine will first hard flush any effects tails from all active plug-ins referenced in the project, including track/bus effects, clip effects, effects chains, ProChannel as well as instruments. Flushing tails is done both pre and post bounce/export in order to prevent unwanted tails from sounding after a bounce or appearing in exports after playing a project. Effects tails flushing is done in efficiently using parallel processing when the multi processing engine is enabled and is normally very fast. Flushing progress is shown on the toolbar during the bounce. If you wish to disable this, set BounceFlushTailsMaxDurationSec to zero. Default ‘Export Audio Files’ folder A new Export Audio Files folder path has been added to Edit > Preferences > File - Folder Locations. This path is used as the default location when you open the Export Audio dialog box. The default path is %PROJECTFOLDER%\Audio Export, which is an \Audio Exports subfolder in the current project directory. The current project folder is indicated by the %PROJECTFOLDER% environment variable. Tip: If you change the folder path in the Export Audio dialog box, you can restore the %PROJECTFOLDER%\Audio Export path by opening Edit > Preferences > File - Folder Locations and clicking OK or Apply. There is also a new content location preset in the Media Browser to jump directly to the Project Audio Export Folder. This preset always takes you to %PROJECTFOLDER%\Audio Export. Toast notification with link to open export location Upon completion of a single export job via the Export button, a toast notification appears with a link to open the export location in Windows Explorer. If the toast notification has been closed you can reopen the project audio folder again by selecting the media browser content location preset Project Audio Export Folder. Updated Bounce to Track(s) dialog box The Bounce to Tracks(s) dialog box has been redesigned similar to the Export Audio dialog box. Improved AudioSnap transient detection The transient detection algorithm has been greatly improved to more accurately detect audio transients in a variety of source material. Transients are useful when using audio snap and are also used for time stretching as well as when snapping to the transient pool. The AudioSnap transient detection method can now be specified in Edit > Preferences > Project - AudioSnap under Transient Detection. There are three methods: Magnitude Spectral (default for legacy projects) Multi-Resolution (default for new projects) Multi-Resolution is the new default transient detection method for new projects, and Spectral and Magnitude are the older legacy modes. The Multi-Resolution transient detection algorithm provides improved transient analysis that works well with most audio source material. The detection mode is stored in the project and older projects will continue to use Spectral until changed via Edit > Preferences > Project - AudioSnap. Note: The new transient analysis will not be used by default on previously saved projects. You must explicitly pick the Multi-Resolution algorithm from Edit > Preferences > Project - AudioSnap before this will take effect for that project. Once you resave the project with this change it will continue to use the new algorithm for all audio. When the detection method is changed, you will be prompted that project audio waveforms will be recomputed. After regeneration of the waveforms are complete, the new transients will be visible when switching the edit filter to Transients. The default transient threshold (available in the AudioSnap palette) is different for each transient detector mode. Note that any edited transients are retained when switching the transient detector mode. Misc. enhancements Mackie Control revspread VPot DataType On the Mackie Control surface, a VPot’s datatype defines the type of control being edited and how it should be displayed on the VPot LED halo. Currently, the Mackie Control surface supports a spread DataType for the LEDs that surround the VPots. The LEDs start in the middle for small values, then "spread" around the VPot for larger values. With certain parameter types, such as an equalizer "Q" setting, where a small Q value means a large spread, and a large Q value means a narrow spread, the VPots show the opposite in the LED spread, which is confusing. To address this, the Mackie Control surface now supports a new revspread VPot DataType that can be assigned in MackieControl.ini (C:\Program Files\Cakewalk\Shared Surfaces). With the revspread VPot DataType, high values show a narrow LED spread, and low values show a wide LED spread. This doesn't affect the actual numerical value being shown, just the way the LEDs spread around the VPot. For details, see the instructions in MackieControl.ini. Allow multiple MIDI files to be dragged into a project simultaneously You can now import multiple MIDI files into a project by dragging from Windows or the Media Browser. By default, multiple tracks are created. To import back-to-back instead, hold down CTRL+SHIFT when dragging the MIDI files into a project. ASIO driver compatibility checking Some ASIO drivers, such as Realtek ASIO, ASIO4All and Generic Low Latency ASIO Driver, are known to be incompatible with Cakewalk and can lead to instability or crashes. Cakewalk will now detect use of known incompatible ASIO drivers and warn the user to switch to a different native ASIO driver or WASAPI Shared mode for a better experience. Note: This warning doesn't prevent you from using these drivers. If you need to use them for some reason you can still select and use them. Bug fixes Stability Crash Freezing Track with synth in project Crash when bouncing with sidechain FX Crash exporting user project as OMF Crash when cloning track with synth envelopes UI Aim Assist draws incorrectly after collapsing/expanding MultiDock Arm Tracks command arms hidden audio track in Instrument tracks Aim Assist can appear unexpectedly when turned off Selection module does not automatically update display after setting display times to SMPTE Misc. Process slide not sliding some track envelopes Paste Special behaves unexpectedly when combining Paste to One Track and Paste Into Existing Clips When the Snap module set to Measure or any value below that in the list, the Snap Value drop box fails to turn snap on/off Save Copy As MIDI interferes with project cwp save Last File 1-4 key bindings are all linked unexpectedly Unable to copy/paste multiple Arranger tracks between projects Modal message boxes do not always disable the main app window Cannot copy special selection with tempos from SONAR to Cakewalk Latest release notes are here. See prior release notes. Check out all new features released to date.
-
 @JayCee99 Use the new filename tags. For example: {trackname}-{tracknumber}
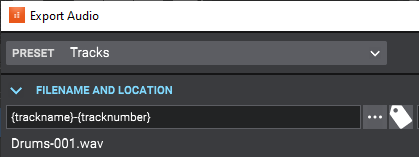
-
We're pleased to announce Early Access for 2021.09! This release includes enhanced audio file export, batch exporting, filename tokens, completely redesigned Export Audio and bounce dialogs, improved AudioSnap transient detection, several bug fixes and lots of other enhancements and optimizations. This is a huge update with major enhancements to audio export workflow, as well as improvements to AudioSnap transient detection, so we'd love to for you to check it out and offer feedback before we release the official public version. Please note that Early Access installers are update installers, which only update from a specific version. To install the 2021.09 Early Access build, you must be on the latest public release of 2021.06. Download Cakewalk 2021.09 EA installer Should you need to revert to the 2021.06 release, you can download the Cakewalk 2021.06 Rollback installer. If you haven't already done so, please read about the Early Access Program before participating. Please keep responses specific to problems or comments on this release. Unrelated bugs or feature requests should be posted in other threads or the feature request channel. Thanks again for your participation! The Bakers Updated to build 137 (release candidate for the 2021.09 update) We are very close to to releasing 2021.09. Please give this build a thorough workout and report any regressions in this thread. At this time only blocking issues or regressions will be investigated. Thank you for your great feedback so far! Build 137 contains the following fixes. Hang exporting project with arrangements containing IK Multimedia Plugins Bounce buffer size value was not respected in ASIO mode Exporting project with mono sidechain track send could cause problems flushing effects tails Exporting tracks with sidechains doesn't work if you don't make a direct track selection File Export dialog should default to Arrangements when launched from Arrangements Inspector Add new default config variables for "BounceFlushTailsMaxDurationSec" and "BounceFlushTailsThresholdDb" Improvements: Track Folders and Tracks Through Entire Mix options are now available in source category for Bounce To Tracks Dialog Ability to type full path into Export Filename field in Export Audio dialog Optimizations to speed up project loading with projects containing high track counts. Export audio is faster with UAD plugins Bounce to clip is now faster Export audio optimization to flush plugin by utilizing all available cores. (flushing is more than 4X faster now) Export audio shows progress bar while flushing plugins. UI Layout improvements in the export and bounce dialogs Articulation Map Editor UI improvements Improvements to track solo handling Improvements to handling of export for aux tracks and tracks with sidechains: You can now directly export single aux tracks or tracks containing plugins with sidechains from other tracks without needing to select all contributing tracks. To do this select the desired track and export or bounce with source category tracks or source entire mix. Incompatible ASIO driver detection Cakewalk will now detect use of known incompatible ASIO drivers and warn the user to switch to a different native ASIO driver or WASAPI Shared mode for a better experience. This is in response to many reports in the field of such drivers causing problems in Cakewalk. ASIO4All variants are currently flagged as being incompatible. Note: Users may still use these drivers but Cakewalk will not use them by default. Fixes: Hang when attempting to use Realtek ASIO driver Crash when cloning track with synth envelopes Track could be unexpectedly soloed in some projects in 2021.09 Update Sending to a sidechain from bus causes Metronome to be muted while soloing Flushing effects tails was not setting plugins to offline mode Unnecessary flushing of effects chains and plugins not part of mix Fix to installer for some users missing export presets Fix menus on some systems displaying garbled text Opening Bounce dialog with an aux track selected disregards selection and selects entire project Render properties dialogs can appear behind File Export dialog Crash exporting user project as OMF Close export toast messages when closing project 2021.09 Highlights New export audio features Improved AudioSnap transient detection Misc. enhancements Bug fixes New export audio features The Export Audio feature has been greatly improved and optimized to handle the most demanding rendering tasks. Highlights: An intuitive new UI with collapsible panels to make it easier to get to the most commonly used features,. Task queues for export automation. Complete control over output file names using tag based file name presets. New additional export categories available: "Tracks Through Entire Mix" for track stems, exports the audio from each chosen track as heard through the main output. This is a useful way to create track stems as heard through master effects. "Arranger sections" allows you to export each individual arrangement section as a separate audio file. Export uses significantly less memory and runs faster by eliminating making an extra copy of the project in memory. Support for setting the export buffer size independently from the audio driver buffer size. Convenient access to select and mute or solo tracks directly from the export UI. Set export time ranges or export entire project directly from the export UI. Automatic effects tail flushing is now part of export/bounce to prevent left over effects tails from leaking into exports or being heard. New default Export Audio Files folder setting in Edit > Preferences > File - Folder Locations. Toast notification on export completion with link to the completed render. More details: Related settings are organized into collapsible panels. The size, position and expanded state of each section is remembered once you close the dialog. The task queue allows you to create multiple export tasks and run them all as a batch. A task in the export queue contains the set of export settings including the mix settings, export file name, selection, location, and the time range. The export queue is saved in the project and can be recalled and re-executed. Any prompts appear at the time of adding the task, so you can run the whole queue without any user intervention. To batch export all tasks in the task queue, click Run Tasks. To export a single job with the current export settings, click Export. Filename and location are shown as two separate fields. Filename is the name of the file you want your exported audio to be called, and location is the directory where it should be saved. When you first open the dialog, the location will be set to the default location as specified in Edit > Preferences > File - Folder Locations under Export Audio Files. The default is \Audio Exports under the current project directory, where the current project folder is indicated by the %PROJECTFOLDER% environment variable. You can change the export directory by clicking on the browse location button , and this location will be remembered for the duration of the project’s session. You can change the global export location for all projects with the Export Audio Files path in Edit > Preferences > File - Folder Locations. Filename tokens. Filenames now support substitution tags for common project and export properties. You can type tags directly into the filename edit box, or use the filename builder pop-up to add them for you. You can still type while this pop-up is showing, so you can mix literal characters with tags, or use backspace to correct any mistakes. Filename presets let you save and recall custom filename formats. The filename itself now supports both literal characters and substitution tags (“tokens”). Substitution tags replace tags within the filename with common project and export properties. Each tag is contained within curly brackets. You can type in the tags directly into the filename edit box, or use the filename builder pop-up to add them for you. It’s worth mentioning that you can still type while this pop-up is showing, so you can mix literal characters with tags, or use backspace to correct any mistakes. A preview of the first audio export filename is shown below the filename edit box. The filename builder pop-up also support filename presets, so you can easily recall a formatted filename by selecting it from the drop-down. As with all Cakewalk presets, you can save new presets, replace existing ones, or delete one’s you don’t want. Export presets can now store a default filename. In the What to Export section, Track Folders has been added as a source category. This setting exports the tracks in each of the selected track folders as heard through the entire mix, as separate files. This provides yet another convenient way to export stems without modifying the source project. In addition to arrangements, individual Arranger sections are available as an export category. This allows you to export each individual section as a separate audio file. Under Format, the Bounce Buffer Size (ms) setting is used to specify the audio buffer size that will be used during export. This value defaults to use the current playback buffer size and can be changed to a max size of 350 ms. A larger buffer size can speed up the export process in large projects by allowing the CPU to process data more efficiently. The Bounce Buffer Size settings only applies when Render in Real-time is disabled. The playback latency buffer size is used when Render in Real-time is enabled. Tracks Through Entire Mix has been added as a new source category under What to Export. It exports individual tracks including all downstream bus effects and automation. The result is the same as if you solo one track at a time during export. When exporting multiple files as MP3 or Windows Media Advanced Streaming (WMA) format, the Export Options dialog box has a new Use These Settings for All option that lets you apply the same settings to all files instead of prompting for each file. Export works on the current project selection. The What to Export panel contains a fly-out project selection editor. This allows you to modify the current track selection and the mute and solo status of each track and bus, without exiting the Export Audio dialog box. This is especially convenient if you if you want to create several tasks, each with a different selection, or if you want to export multiple stems. Simply solo the tracks that you want to include in the stem, then add as a new task. A track that is checked means it’s included in the selection. If all the tracks are unchecked, that means there is no selection, and all tracks will be available. Changing the project selection changes which source items are available. A note about selection and the Tracks export category: When the source category is Tracks, the project selection has a special meaning: Having a project selection means there is also a time selection. So if you have tracks selected in your project selection, then all the tracks chosen in your audio source will be exported at exactly the length of the selection. In other words, the length of each tracks’ audio file will be the same. If you have nothing selected in your project, then no specific export time range has been set, and the length of each tracks’ audio file will be the length of each individual track. To the right of the What to export drop-down is a search filter, which lets you search for a particular track, bus, arrangement, section, or Mix Recall preset, should you have a large number of sources to search through. Tip: To quickly select all/none in the source list, hold down CTRL+SHIFT and click any checkbox. To select all, press CTRL+A. To check/uncheck the selected sources, press SPACEBAR. The Range panel specifies the time range to be exported. The drop-down provides the following choices: Entire Project = The entire length of the project. Time Selection = A specified time selection. The Start and End edit boxes allow you to manually enter the start and end times of the export range. Clicking the button to the left of the Start label will toggle between musical and absolute time. The buttons to the right of the Start and End edit boxes will allow you to choose a time based on defined project landmarks, such as the beginning of the project, the now time, or marker locations. Set Time Selection to Loop Range = Set the time selection to the current loop region. Set Time Selection to Punch Range = Set the time selection to the current punch region. Note: The 2021.09 Early Access installer will delete the old factory export presets and replace them with new and updated presets. If you have overwritten the factory preset names, those presets will be replaced. Other custom export presets will not be affected. Batch exporting audio files using task queues Using the Export button is fine if you have a single export. But what if you want to tweak your project and export again, or you want several different types of exports? You may want a task for exporting your stems, another task for exporting individual tracks, and another for exporting your final mix as a stereo file. You can now create multiple export tasks, such as stems or different file formats, and add them to an export queue. A task in the export queue contains the set of export settings including the mix settings, filename, location, selection, and the time range. You can add as many export tasks as you like, and run all export tasks as a batch without any user intervention. The task queue is per project and is saved with the project. Adding a task to the queue To create a task, simply go through the normal process of defining your export, then instead of clicking the Export button, click the Add Task to Queue button . This adds a task with the current settings to the task queue. If you are exporting multiple files as part of a task, a list of the filenames will be shown in a confirmation prompt. Any further prompts required for additional format settings will also be shown at this time… that way, you won’t get any prompts when you actually run the task. Once you’ve confirmed any prompts, enter a name for your new task. Simply type the name of the task in, and press ENTER. Tip: The name of the task can also be used in your filename by using the {taskname} tag. Repeat the above steps for any additional tasks you need. To the right of the task name you’ll see the number of files to be exported by each task, an estimated size (if it’s a wave file), and a summary of the file format. Editing tasks in the task queue You can update tasks that you already added to a task queue. To update an existing task: Do one of the following: Double-click on the task within the task list. Click the task’s menu button , then select Recall Task Settings. The task’s settings are recalled in the Export Audio dialog box. Make any desired edits to the current export settings. Click the task’s menu button , then select Update Task with Current Settings. The task is updated with the current settings. All other tasks in the task queue remain unchanged. Renaming a task To rename a task, do one of the following: Right-click the task and select Rename. Click the task’s menu button , then select Rename. Duplicating a task To duplicate an existing task: Do one of the following: Double-click on the task within the task list. Click the task’s menu button , then select Recall Task Settings. This recalls all the task settings in the Export Audio dialog box. [Optional] Make any desired edits to the current export settings. Click Add Task to Queue. Deleting tasks To delete a single task, right-click the task and select Delete, or click the task’s menu button , then select Delete. To delete multiple tasks, select the tasks that you want to delete (Tip: press CTRL+A to select all tasks), then right-click any selected task and select Delete. The task(s) is removed from the task queue. Executing task queue export To execute all checked tasks in the queue, click the Run Tasks button. The tasks in the queue are exported one after another. The status of each task is updated as the queue is executing, and a summary is shown in the task queue header. Once a task is completed, the task is unchecked. Checking a task resets it. Clicking on the Run Tasks button resets all checked tasks before executing each task. While the queue is running, the Run Tasks button changes to a Cancel button, which allows you to cancel the execution of the task queue at any time. The checked status of a task persists when opening/closing the Export Audio dialog box, and with the project. Resetting a completed task Tasks are automatically unchecked on successful completion. To reset a task so it will execute again the next time you click Run Tasks, simply check the task. Canceling an in-progress queue export While the queue is running, the Run Tasks button changes to a Cancel button, which allows you to cancel the execution of the task queue at any time. Opening a task’s export location To open a task’s export location, click the task’s menu button , then select Open Export Location. Using export filename tags and presets You can now use “tokens” to define filenames for exported audio files. Tokens allow you to use placeholder tags that automatically extract the corresponding information (such as the project name, artist, sample rate, bit depth, current date or time, etc.) from a project and adds it to the resulting filename. For example, instead of manually typing the project name and date into the filename edit box, you can enter the following: {projectname}_{d} This will automatically use the project’s name and the current date. Each token is enclosed by curly brackets (aka braces) e.g. {d}. Adding filename tags To enter a tag, do one of the following: Open the Tags panel and click a tag. You can still type while this pop-up is showing, so you can mix literal characters with tags, or use backspace to correct any mistakes. Type in the tags directly into the filename edit box. Be sure to enclose each token by curly brackets (aka braces) e.g. {d}. Tokens are case sensitive. A preview of the first audio export filename is shown below the filename edit box. To see all tokens that can be used to specify the filename, click the Build Filename Using Tags button to open the Tags pop-up panel. To add a tag, click a tag button, or manually type the tag in the filename edit box. Below are some common tokens: Project name = {projectname} or {P} Name field in Notes Browser = {notesname} or {N} Artist field in Notes Browser = {notesartist} or {A} Sample rate = {samplerate} or {sr} Bit depth = {bitdepth} or {bd} Channel format = {channelformat} or {cf} Track name = {trackname} or {T} Track number = {tracknumber} or {t} Date = {d} Tempo = {tempo} or {b} Meter / time signature = {meter} or {m} Key = {key} or {k} Task = {taskname} or {TN} Press the Build Filename Using Tags button to display all available tokens. Most tags have a long token and a short token. For example, the project name token can be {projectname} or {P}. Each tag’s tooltip shows its full and abbreviated tokens. To always use abbreviated tokens when you click a tag, select Use Abbreviated Tokens in the filename builder pop-up panel. You can freely use either format. Tokens can be combined as in the examples below: {notesartist}_{notesname}_{d} {notesartist}_{notesname}_{samplerate}_{bitdepth}_{channelformat}_{d=Ymd} You can combine tokens and regular text, as in the following example: Client Name_{samplerate}Hz_{bitdepth}b_{channelformat}_{d=Ymd} Saving filename presets You can save your custom export filename format as a preset in the filename tag panel. To open the filename tag panel, click the Build Filename Using Tags button next to the filename edit box. To save the current filename as a preset, type a name in the Presets combobox, then click the drop-down menu and select Save Preset. To delete a preset, select the preset in the Presets combobox, then click the drop-down menu and select Delete Preset. By using filename tokens to define a naming scheme and saving the filename format as a preset, you can reuse the presets in any project without having to manually type a filename. Misc. export enhancements Improved handling of aux tracks and sidechains when exporting or soloing tracks When exporting with source category Tracks, sidechain or aux track sends or outputs are now properly included in the export for the track containing the sidechain. The same applies to aux tracks. Please note that it is still necessary for the sending tracks to be included in the tracks exported. This limitation may be removed in the future. When soloing a track that contains a sidechain plugin, any sends from other tracks in the project are now automatically included, similarly to how it behaves with sends to aux tracks. Default ‘Export Audio Files’ folder A new Export Audio Files folder path has been added to Edit > Preferences > File - Folder Locations. This path is used as the default location when you open the Export Audio dialog box. The default path is %PROJECTFOLDER%\Audio Export, which is an \Audio Exports subfolder in the current project directory. The current project folder is indicated by the %PROJECTFOLDER% environment variable. Tip: If you change the folder path in the Export Audio dialog box, you can restore the %PROJECTFOLDER%\Audio Export path by opening Edit > Preferences > File - Folder Locations and clicking OK or Apply. Toast notification with link to open export location Upon completion of a single export job via the Export button, a toast notification appears with a link to open the export location in Windows Explorer. Updated Bounce to Track(s) dialog box The Bounce to Tracks(s) dialog box has been redesigned similar to the Export Audio dialog box. Improved AudioSnap transient detection The transient detection algorithm has been greatly improved to more accurately detect audio transients in a variety of source material. Transients are useful when using audio snap and are also used for time stretching as well as when snapping to the transient pool. The AudioSnap transient detection method can now be specified in Edit > Preferences > Project - AudioSnap under Transient Detection. There are three methods: Magnitude Spectral (default for legacy projects) Multi-Resolution (default for new projects) Multi-Resolution is the new default transient detection method for new projects, and Spectral and Magnitude are the older legacy modes. The Multi-Resolution transient detection algorithm provides improved transient analysis that works well with most audio source material. The detection mode is stored in the project and older projects will continue to use Spectral until changed via Edit > Preferences > Project - AudioSnap. NOTE: The new transient analysis will not be used by default on previously saved projects. You must explicitly pick the Multi-Resolution algorithm from Edit > Preferences > Project - AudioSnap before this will take effect for that project. Once you resave the project with this change it will continue to use the new algorithm for all audio. When the detection method is changed, you will be prompted that project audio waveforms will be recomputed. After regeneration of the waveforms are complete, the new transients will be visible when switching the edit filter to Transients. The default transient threshold (available in the AudioSnap palette) is different for each transient detector mode. Note that any edited transients are retained when switching the transient detector mode. Misc. enhancements Mackie Control revspread VPot DataType On the Mackie Control surface, a VPot’s datatype defines the type of control being edited and how it should be displayed on the VPot LED halo. Currently, the Mackie Control surface supports a spread DataType for the LEDs that surround the VPots. The LEDs start in the middle for small values, then "spread" around the VPot for larger values. With certain parameter types, such as an equalizer "Q" setting, where a small Q value means a large spread, and a large Q value means a narrow spread, the VPots show the opposite in the LED spread, which is confusing. To address this, the Mackie Control surface now supports a new revspread VPot DataType that can be assigned in MackieControl.ini (C:\Program Files\Cakewalk\Shared Surfaces). With the revspread VPot DataType, high values show a narrow LED spread, and low values show a wide LED spread. This doesn't affect the actual numerical value being shown, just the way the LEDs spread around the VPot. For details, see the instructions in MackieControl.ini. Allow multiple MIDI files to be dragged into a project simultaneously You can now import multiple MIDI files into a project by dragging from Windows or the Media Browser. By default, multiple tracks are created. To import back-to-back instead, hold down CTRL+SHIFT when dragging the MIDI files into a project. Bug fixes Stability Crash Freezing Track with synth in project Crash when bouncing with sidechain FX UI Aim Assist draws incorrectly after collapsing/expanding MultiDock Arm Tracks command arms hidden audio track in Instrument tracks Aim Assist can appear unexpectedly when turned off Selection module does not automatically update display after setting display times to SMPTE Misc. Process slide not sliding some track envelopes Paste Special behaves unexpectedly when combining Paste to One Track and Paste Into Existing Clips When the Snap module set to Measure or any value below that in the list, the Snap Value drop box fails to turn snap on/off Save Copy As MIDI interferes with project cwp save Last File 1-4 key bindings are all linked unexpectedly Unable to copy/paste multiple Arranger tracks between projects Modal message boxes do not always disable the main app window Cannot copy special selection with tempos from SONAR to Cakewalk


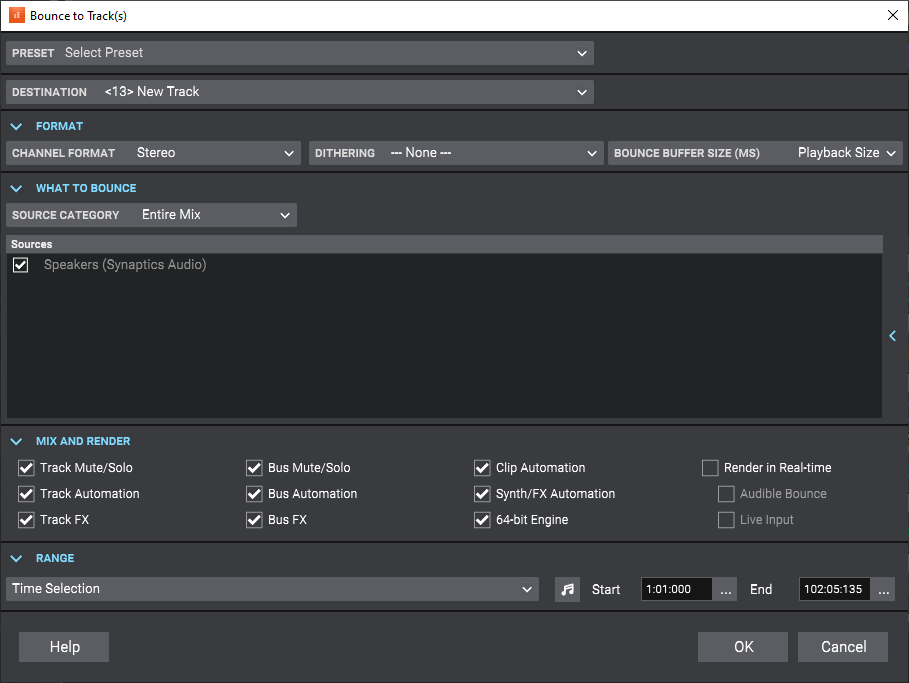
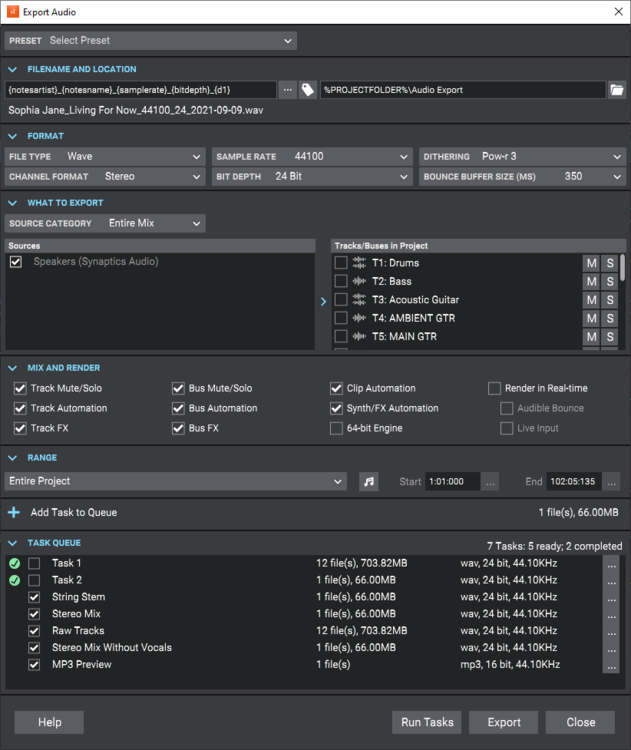

-
I'm not able to reproduce the issue in your project. Do you get the same results if you remove all plug-ins or start from a blank project? Are you able to record a short video that shows the problem?
-
See if there is any automation data or other hidden events that could affect the project duration. If there are no other events that affects the duration, can you please send us a project that exposes the issue?
-
The "Entire Project" setting refers to the project duration, not the track selection. "Entire Project" means the same as having a duration of 0, which automatically selects the entire project duration. When using a task queue, "Entire project" always uses the current full duration of the project, not the duration when the task was created.
-
A key difference is that CbB lets you store the project selection and track mute/solo state with each task in the queue. This makes it much easier to export different stems by simply soloing tracks. Cubase only uses the active state at the time of export, which is much more limited.
-
Hold down CTRL+SHIFT and click any checkbox to all select all/none. You can also use CTRL+A to select all, then press SPACEBAR to toggle the selection state.
-
[UPDATE 22-Sep-2021: version 2021.09 has been released] We're pleased to announce Early Access for 2021.09! This release introduces enhanced audio file export, including batch exporting, filename tokens, and a completely redesigned Export Audio dialog box, improved AudioSnap transient detection, lots of other enhancements and optimizations, and several bug fixes. This is a huge update with major enhancements to audio export workflow, as well as improvements to AudioSnap transient detection, so we'd love to for you to check it out and offer feedback before we drop the official public version. Please note that Early Access installers are update installers, which only update from a specific version. To install the 2021.09 Early Access build, you must be on the latest public release of 2021.06. Download Cakewalk 2021.09 EA installer Should you need to revert to the 2021.06 release, you can download the Cakewalk 2021.06 Rollback installer. If you haven't already done so, please read about the Early Access Program before participating. Please keep responses specific to problems or comments on this release. Unrelated bugs or feature requests should be posted in other threads or the feature request channel. Thanks again for your participation! The Bakers Update September 5 2021: 2021.09 Early Access build 27.09.0.114 Bug fixes Fixed a regression with exporting task queues when the task was created with no selection made, leading to an empty exported file. Export toast notification now respects the Show Toast Notifications setting in Edit > Preferences > Customization - Display. Update September 4 2021: 2021.09 Early Access build 27.09.0.112 Bug fixes Bouncing or exporting audio in real time could cause a crash or unexpected behavior in some projects due to a race condition. Update September 3 2021: 2021.09 Early Access build 27.09.0.111 Export Audio dialog changes In the What to Export section, Track Folders has been added as a source category. This setting exports the tracks in each of the selected track folders as heard through the entire mix, as separate files. This provides yet another convenient way to export stems without modifying the source project. In the Format section, the Bounce Buffer Size settings only applies when Render in Real-time is disabled. The playback latency buffer size is used when Render in Real-time is enabled. Clicking the blank space in a section header no longer expands/collapses the panel. In the filename tag pop-up panel, the DATE 1-5 buttons have been streamlined to 3 buttons (plus custom): YYYYMMDD MMDDYYYY DDMMYYYY Improved handling of aux tracks and sidechains when exporting or soloing tracks When exporting with source category Tracks, sidechain or aux track sends or outputs are now properly included in the export for the track containing the sidechain. The same applies to aux tracks. Please note that it is still necessary for the sending tracks to be included in the tracks exported. When soloing a track that contains a sidechain plugin, any sends from other tracks in the project are now automatically included, similarly to how it behaves with sends to aux tracks. Bug fixes File export and bounce MIDI data sent to soft synths was not rendered properly when exporting the entire project if the now time was non zero When using a bounce buffer size higher than the playback buffer size, the buffer size was incorrectly computed when using mono plugins leading to missing data in the bounce. Sidechains are not rendered when fast bouncing with Bounce/Export source category is set to Tracks. Aux tracks are not rendered with export as Tracks. Collapsed filename summary not updating after recalling task. Tooltips hidden in Export Audio dialog if toast notification is visible. Tooltip can hide Overwrite Existing File prompt in Export Audio dialog. Bounce Buffer Size cannot be set to zero by manual entry. Tracks in selection are excluded from bounce/export unexpectedly. Step Sequencer clips render incorrectly with fast bounce (Render in Real-time disabled). Misc. Unable to copy/paste multiple Arranger tracks between projects. Modal message boxes do not always disable the main app window. Export video does not include audio. Should you need to revert to the 2021.06 release, you can download the Cakewalk 2021.06 Rollback installer. Update August 27 2021: 2021.09 Early Access build 27.09.0.099 Bug fixes File export File export with Split Mono channel format no longer working Cannot run task with Tracks Through Entire Mix source category Subsequent export complete toast notifications not showing after dismissing Settings not recalled correctly when using DSD format Sample Rate should not be editable when format is DSD Cancel button in Export Audio dialog unresponsive during task execution Misc. Controls in Offset Tempo Map dialog are not legible Effect bin menus have dark background Cannot copy special selection with tempos from SONAR to Cakewalk Should you need to revert to the 2021.06 release, you can download the Cakewalk 2021.06 Rollback installer. 2021.09 Highlights New export audio features Improved AudioSnap transient detection Misc. enhancements Bug fixes New export audio features The Export Audio feature has been greatly improved and optimized to handle the most demanding rendering tasks. Highlights: An intuitive new UI with collapsible panels to make it easier to get to the most commonly used features,. Task queues for export automation. Complete control over output file names using tag based file name presets. New additional export categories available: "Tracks Through Entire Mix" for track stems, exports the audio from each chosen track as heard through the main output. This is a useful way to create track stems as heard through master effects. "Arranger sections" allows you to export each individual arrangement section as a separate audio file. Export uses significantly less memory and runs faster by eliminating making an extra copy of the project in memory. Support for setting the export buffer size independently from the audio driver buffer size. Setting a higher export buffer size can significantly speed up export operations. (Max size is 350 msec). Convenient access to select and mute or solo tracks directly from the export UI. Set export time ranges or export entire project directly from the export UI. Automatic effects tail flushing is now part of export/bounce to prevent left over effects tails from leaking into exports or being heard. New default Export Audio Files folder setting in Edit > Preferences > File - Folder Locations. Toast notification on export completion with link to the completed render. More details: Related settings are organized into collapsible panels. The size, position and expanded state of each section is remembered once you close the dialog. The task queue allows you to create multiple export tasks and run them all as a batch. A task in the export queue contains the set of export settings including the mix settings, export file name, selection, location, and the time range. The export queue is saved in the project and can be recalled and re-executed. Any prompts appear at the time of adding the task, so you can run the whole queue without any user intervention. To batch export all tasks in the task queue, click Run Tasks. To export a single job with the current export settings, click Export. Filename and location are shown as two separate fields. Filename is the name of the file you want your exported audio to be called, and location is the directory where it should be saved. When you first open the dialog, the location will be set to the default location as specified in Edit > Preferences > File - Folder Locations under Export Audio Files. The default is \Audio Exports under the current project directory, where the current project folder is indicated by the %PROJECTFOLDER% environment variable. You can change the export directory by clicking on the browse location button , and this location will be remembered for the duration of the project’s session. You can change the global export location for all projects with the Export Audio Files path in Edit > Preferences > File - Folder Locations. Filename tokens. Filenames now support substitution tags for common project and export properties. You can type tags directly into the filename edit box, or use the filename builder pop-up to add them for you. You can still type while this pop-up is showing, so you can mix literal characters with tags, or use backspace to correct any mistakes. Filename presets let you save and recall custom filename formats. The filename itself now supports both literal characters and substitution tags (“tokens”). Substitution tags replace tags within the filename with common project and export properties. Each tag is contained within curly brackets. You can type in the tags directly into the filename edit box, or use the filename builder pop-up to add them for you. It’s worth mentioning that you can still type while this pop-up is showing, so you can mix literal characters with tags, or use backspace to correct any mistakes. A preview of the first audio export filename is shown below the filename edit box. The filename builder pop-up also support filename presets, so you can easily recall a formatted filename by selecting it from the drop-down. As with all Cakewalk presets, you can save new presets, replace existing ones, or delete one’s you don’t want. Export presets can now store a default filename. In addition to arrangements, individual Arranger sections are available as an export category. This allows you to export each individual section as a separate audio file. Under Format, the Bounce Buffer Size (ms) setting is used to specify the audio buffer size that will be used during export. A larger buffer size will speed up the export process, but will use more memory. Specifying zero will use the current playback buffer size. Tracks Through Entire Mix has been added as a new source category under What to Export. It exports individual tracks including all downstream bus effects and automation. The result is the same as if you solo one track at a time during export. When exporting multiple files as MP3 or Windows Media Advanced Streaming (WMA) format, the Export Options dialog box has a new Use These Settings for All option that lets you apply the same settings to all files instead of prompting for each file. Export works on the current project selection. The What to Export panel contains a fly-out project selection editor. This allows you to modify the current track selection and the mute and solo status of each track and bus, without exiting the Export Audio dialog box. This is especially convenient if you if you want to create several tasks, each with a different selection, or if you want to export multiple stems. Simply solo the tracks that you want to include in the stem, then add as a new task. A track that is checked means it’s included in the selection. If all the tracks are unchecked, that means there is no selection, and all tracks will be available. Changing the project selection changes which source items are available. A note about selection and the Tracks export category: When the source category is Tracks, the project selection has a special meaning: Having a project selection means there is also a time selection. So if you have tracks selected in your project selection, then all the tracks chosen in your audio source will be exported at exactly the length of the selection. In other words, the length of each tracks’ audio file will be the same. If you have nothing selected in your project, then no specific export time range has been set, and the length of each tracks’ audio file will be the length of each individual track. To the right of the What to export drop-down is a search filter, which lets you search for a particular track, bus, arrangement, section, or Mix Recall preset, should you have a large number of sources to search through. Tip: To quickly select all/none in the source list, hold down CTRL+SHIFT and click any checkbox. To select all, press CTRL+A. To check/uncheck the selected sources, press SPACEBAR. The Range panel specifies the time range to be exported. The drop-down provides the following choices: Entire Project = The entire length of the project. Time Selection = A specified time selection. The Start and End edit boxes allow you to manually enter the start and end times of the export range. Clicking the button to the left of the Start label will toggle between musical and absolute time. The buttons to the right of the Start and End edit boxes will allow you to choose a time based on defined project landmarks, such as the beginning of the project, the now time, or marker locations. Loop Range = The current loop region. Only available if Loop is enabled. Punch Range = The current punch region. Only available if Punch is enabled. Batch exporting audio files using task queues Using the Export button is fine if you have a single export. But what if you want to tweak your project and export again, or you want several different types of exports? You may want a task for exporting your stems, another task for exporting individual tracks, and another for exporting your final mix as a stereo file. You can now create multiple export tasks, such as stems or different file formats, and add them to an export queue. A task in the export queue contains the set of export settings including the mix settings, filename, location, selection, and the time range. You can add as many export tasks as you like, and run all export tasks as a batch without any user intervention. The task queue is per project and is saved with the project. Adding a task to the queue To create a task, simply go through the normal process of defining your export, then instead of clicking the Export button, click the Add Task to Queue button . This adds a task with the current settings to the task queue. If you are exporting multiple files as part of a task, a list of the filenames will be shown in a confirmation prompt. Any further prompts required for additional format settings will also be shown at this time… that way, you won’t get any prompts when you actually run the task. Once you’ve confirmed any prompts, enter a name for your new task. Simply type the name of the task in, and press ENTER. Tip: The name of the task can also be used in your filename by using the {taskname} tag. Repeat the above steps for any additional tasks you need. To the right of the task name you’ll see the number of files to be exported by each task, an estimated size (if it’s a wave file), and a summary of the file format. Editing tasks in the task queue You can update tasks that you already added to a task queue. To update an existing task: Do one of the following: Double-click on the task within the task list. Click the task’s menu button , then select Recall Task Settings. The task’s settings are recalled in the Export Audio dialog box. Make any desired edits to the current export settings. Click the task’s menu button , then select Update Task with Current Settings. The task is updated with the current settings. All other tasks in the task queue remain unchanged. Renaming a task To rename a task, do one of the following: Right-click the task and select Rename. Click the task’s menu button , then select Rename. Duplicating a task To duplicate an existing task: Do one of the following: Double-click on the task within the task list. Click the task’s menu button , then select Recall Task Settings. This recalls all the task settings in the Export Audio dialog box. [Optional] Make any desired edits to the current export settings. Click Add Task to Queue. Deleting tasks To delete a single task, right-click the task and select Delete, or click the task’s menu button , then select Delete. To delete multiple tasks, select the tasks that you want to delete (Tip: press CTRL+A to select all tasks), then right-click any selected task and select Delete. The task(s) is removed from the task queue. Executing task queue export To execute all checked tasks in the queue, click the Run Tasks button. The tasks in the queue are exported one after another. The status of each task is updated as the queue is executing, and a summary is shown in the task queue header. Once a task is completed, the task is unchecked. Checking a task resets it. Clicking on the Run Tasks button resets all checked tasks before executing each task. While the queue is running, the Run Tasks button changes to a Cancel button, which allows you to cancel the execution of the task queue at any time. The checked status of a task persists when opening/closing the Export Audio dialog box, and with the project. Resetting a completed task Tasks are automatically unchecked on successful completion. To reset a task so it will execute again the next time you click Run Tasks, simply check the task. Canceling an in-progress queue export While the queue is running, the Run Tasks button changes to a Cancel button, which allows you to cancel the execution of the task queue at any time. Opening a task’s export location To open a task’s export location, click the task’s menu button , then select Open Export Location. Using export filename tags and presets You can now use “tokens” to define filenames for exported audio files. Tokens allow you to use placeholder tags that automatically extract the corresponding information (such as the project name, artist, sample rate, bit depth, current date or time, etc.) from a project and adds it to the resulting filename. For example, instead of manually typing the project name and date into the filename edit box, you can enter the following: {projectname}_{d} This will automatically use the project’s name and the current date. Each token is enclosed by curly brackets (aka braces) e.g. {d}. Adding filename tags To enter a tag, do one of the following: Open the Tags panel and click a tag. You can still type while this pop-up is showing, so you can mix literal characters with tags, or use backspace to correct any mistakes. Type in the tags directly into the filename edit box. Be sure to enclose each token by curly brackets (aka braces) e.g. {d}. Tokens are case sensitive. A preview of the first audio export filename is shown below the filename edit box. To see all tokens that can be used to specify the filename, click the Build Filename Using Tags button to open the Tags pop-up panel. To add a tag, click a tag button, or manually type the tag in the filename edit box. Below are some common tokens: Project name = {projectname} or {P} Name field in Notes Browser = {notesname} or {N} Artist field in Notes Browser = {notesartist} or {A} Sample rate = {samplerate} or {sr} Bit depth = {bitdepth} or {bd} Channel format = {channelformat} or {cf} Track name = {trackname} or {T} Track number = {tracknumber} or {t} Date = {d} Tempo = {tempo} or {b} Meter / time signature = {meter} or {m} Key = {key} or {k} Task = {taskname} or {TN} Press the Build Filename Using Tags button to display all available tokens. Most tags have a long token and a short token. For example, the project name token can be {projectname} or {P}. Each tag’s tooltip shows its full and abbreviated tokens. To always use abbreviated tokens when you click a tag, select Use Abbreviated Tokens in the filename builder pop-up panel. You can freely use either format. Tokens can be combined as in the examples below: {notesartist}_{notesname}_{d} {notesartist}_{notesname}_{samplerate}_{bitdepth}_{channelformat}_{d=Ymd} You can combine tokens and regular text, as in the following example: Client Name_{samplerate}Hz_{bitdepth}b_{channelformat}_{d=Ymd} Saving filename presets You can save your custom export filename format as a preset in the filename tag panel. To open the filename tag panel, click the Build Filename Using Tags button next to the filename edit box. To save the current filename as a preset, type a name in the Presets combobox, then click the drop-down menu and select Save Preset. To delete a preset, select the preset in the Presets combobox, then click the drop-down menu and select Delete Preset. By using filename tokens to define a naming scheme and saving the filename format as a preset, you can reuse the presets in any project without having to manually type a filename. Note: The public 2021.09 release will include several factory filename presets. Misc. export enhancements Default ‘Export Audio Files’ folder A new Export Audio Files folder path has been added to Edit > Preferences > File - Folder Locations. This path is used as the default location when you open the Export Audio dialog box. The default path is %PROJECTFOLDER%\Audio Export, which is an \Audio Exports subfolder in the current project directory. The current project folder is indicated by the %PROJECTFOLDER% environment variable. Tip: If you change the folder path in the Export Audio dialog box, you can restore the %PROJECTFOLDER%\Audio Export path by opening Edit > Preferences > File - Folder Locations and clicking OK or Apply. Toast notification with link to open export location Upon completion of a single export job via the Export button, a toast notification appears with a link to open the export location in Windows Explorer. Updated Bounce to Track(s) dialog box The Bounce to Tracks(s) dialog box has been redesigned similar to the Export Audio dialog box. Improved AudioSnap transient detection The transient detection algorithm has been greatly improved to more accurately detect audio transients in a variety of source material. Transients are useful when using audio snap and are also used for time stretching as well as when snapping to the transient pool. The AudioSnap transient detection method can now be specified in Edit > Preferences > Project - AudioSnap under Transient Detection. There are three methods: Magnitude Spectral (default for legacy projects) Multi-Resolution (default for new projects) Multi-Resolution is the new default transient detection method for new projects, and Spectral and Magnitude are the older legacy modes. The Multi-Resolution transient detection algorithm provides improved transient analysis that works well with most audio source material. The detection mode is stored in the project and older projects will continue to use Spectral until changed via Edit > Preferences > Project - AudioSnap. NOTE: The new transient analysis will not be used by default on previously saved projects. You must explicitly pick the Multi-Resolution algorithm from Edit > Preferences > Project - AudioSnap before this will take effect for that project. Once you resave the project with this change it will continue to use the new algorithm for all audio. When the detection method is changed, you will be prompted that project audio waveforms will be recomputed. After regeneration of the waveforms are complete, the new transients will be visible when switching the edit filter to Transients. The default transient threshold (available in the AudioSnap palette) is different for each transient detector mode. Note that any edited transients are retained when switching the transient detector mode. Misc. enhancements Mackie Control revspread VPot DataType On the Mackie Control surface, a VPot’s datatype defines the type of control being edited and how it should be displayed on the VPot LED halo. Currently, the Mackie Control surface supports a spread DataType for the LEDs that surround the VPots. The LEDs start in the middle for small values, then "spread" around the VPot for larger values. With certain parameter types, such as an equalizer "Q" setting, where a small Q value means a large spread, and a large Q value means a narrow spread, the VPots show the opposite in the LED spread, which is confusing. To address this, the Mackie Control surface now supports a new revspread VPot DataType that can be assigned in MackieControl.ini (C:\Program Files\Cakewalk\Shared Surfaces). With the revspread VPot DataType, high values show a narrow LED spread, and low values show a wide LED spread. This doesn't affect the actual numerical value being shown, just the way the LEDs spread around the VPot. For details, see the instructions in MackieControl.ini. Allow multiple MIDI files to be dragged into a project simultaneously You can now import multiple MIDI files into a project by dragging from Windows or the Media Browser. By default, multiple tracks are created. To import back-to-back instead, hold down CTRL+SHIFT when dragging the MIDI files into a project. Bug fixes Stability Crash Freezing Track with synth in project Crash when bouncing with sidechain FX UI Aim Assist draws incorrectly after collapsing/expanding MultiDock Arm Tracks command arms hidden audio track in Instrument tracks Aim Assist can appear unexpectedly when turned off Selection module does not automatically update display after setting display times to SMPTE Misc. Process slide not sliding some track envelopes Paste Special behaves unexpectedly when combining Paste to One Track and Paste Into Existing Clips When the Snap module set to Measure or any value below that in the list, the Snap Value drop box fails to turn snap on/off Save Copy As MIDI interferes with project cwp save Last File 1-4 key bindings are all linked unexpectedly
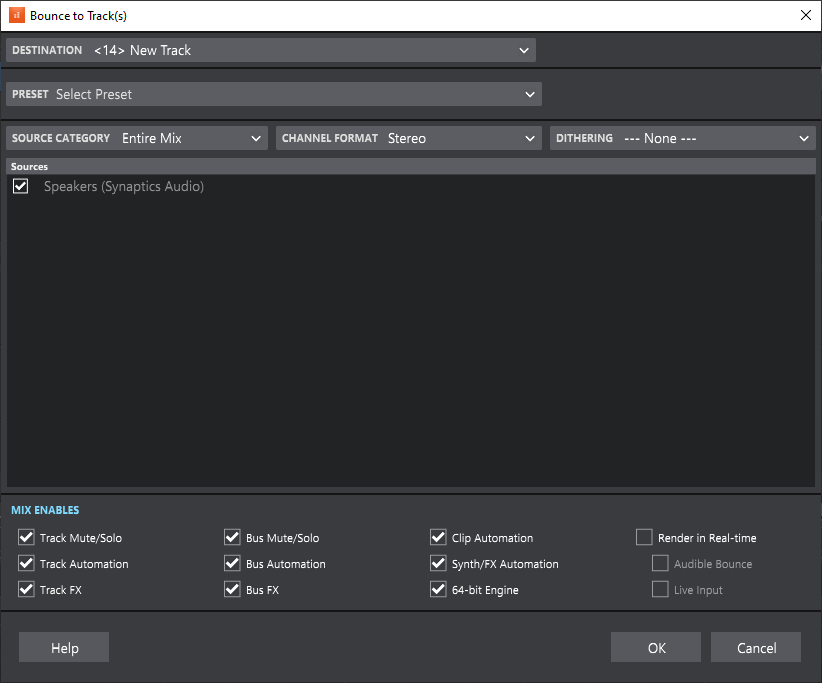
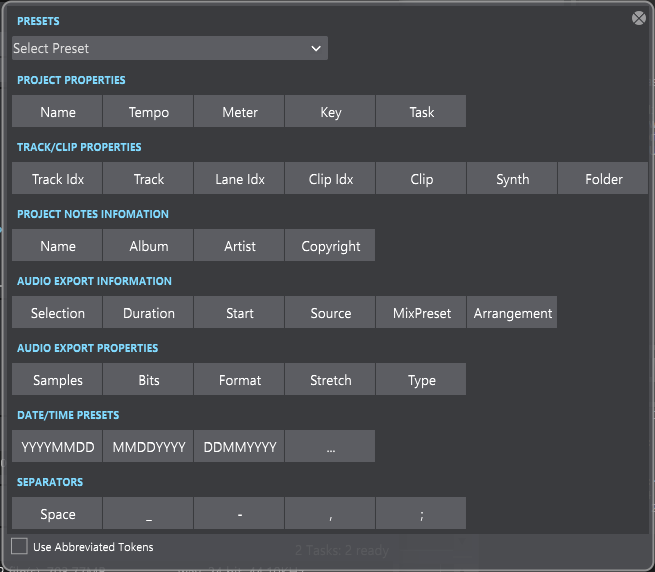
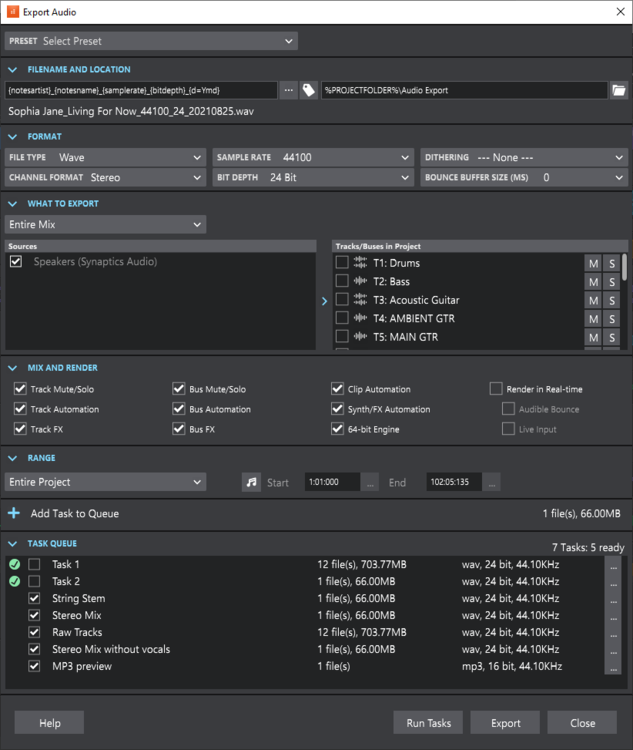
- 324 replies
-
- 19
-

-

-

-
2021.06 Feature Overview [Updated 6-Aug-2021]
Morten Saether replied to Morten Saether's topic in Cakewalk by BandLab
Fixed. Thanks, Morten -
[UPDATE 6-Aug-2021: Cakewalk 2021.06 Update 3 (build 27.06.0.058) is now available] Introduction The 2021.06 release introduces improved input/output port naming, improved dropout management, several Arranger enhancements, Tempo track grid lines, shape smoothing options when using the Freehand tool on envelope shapes, improved VST3 support, lots of other enhancements and optimizations, and over 25 bug fixe, all in keeping with our goal of making Cakewalk as reliable and enjoyable as possible. Please note that in order to automatically keep your activation status up to date, Cakewalk will renew your activation status whenever a new version of the application is installed and run for the first time, and when you sign in to BandLab from within Cakewalk. If you have never signed in to BandLab from within Cakewalk, you will be prompted once to sign in. The following highlights are intended to provide an overview of the more significant changes. Please also refer to the new features section of our documentation for more detailed information on the features. Please give us feedback on this release. We hope you like it! Update August 6 2021: 2021.06 Update 3 (build 27.06.0.058) Bug fixes In-app Google authentication not working Projects with tracks containing embedded synths in the FX rack can hang on load if aux tracks are also present Pressing spacebar/play fails to start project in Play List Update July 29 2021: 2021.06 Update 2 (build 27.06.0.057) "Modern Standby" support and improved Power Management Added support for "Modern Standby" a new power management feature introduced in Windows 10 build 2004. Modern Standby mode is supported by some PC's (typically modern laptops). Modern standby is different from the traditional sleep modes and has to be specially handled by the application in order to suspend and resume hardware properly. Improved handling for resuming from a sleep state in Windows. Cakewalk will additionally reload the driver if necessary, if the driver requests a restart or it stops responding. Suspend and resume are properly handled when a dialog box is open. Handle VST instruments that change output counts If a VST instrument changes its output count, ports in projects previously saved with the instrument could become offset by the change in outputs. This could cause projects to stop playing through other virtual instruments until their instrument track inputs were reassigned. Cakewalk will now detect change in outputs on opening a project and automatically reassign ports appropriately with no user intervention required. Bug fixes Fixed crash when exporting single track with "-" in track name and filename Intermittent crash when adding new articulation trigger event Wedge Force Matcha plug-in hangs on changing presets in 2021.06 release Projects saved with older version of Omnisphere open with input ports assigned to incorrect instruments SPACEBAR does not start playback when using Vienna Ensemble Pro in host mode SHIFT+right-click toggle for Inline Piano Roll causes unexpected lasso selection Regression: New projects from templates are flagged as dirty in version 2021.06 Extra Synth Instances inserted when adding all synth audio outputs for Split Instrument Track Alt+T shortcut in Track view View menu cut off slightly Arranger sections are not focused immediately after a drag/draw operation (F2 to rename fails) Nudging a fully selected MIDI clip nudges notes, not the whole clip Update July 13 2021: 2021.06 Update 1 (build 27.06.0.053) Enhancements for input and output port names When using Friendly Names for audio devices (Edit > Preferences > Audio - Devices) , use the vertical bar character (|) to separate left/right/stereo channel names. When using Friendly Names, menus only show L/R/S descriptors and not channel numbers. (Channels can be named using the vertical bar character in the friendly name). Channel numbers are only shown in the port menu and not in the actual port name field to make the readout more compact. The full name is always shown in the tooltip. Channel numbers in menus are separated from the port name, using a columnar layout. You can choose to display the port channel information as a prefix or suffix to the port names shown in the menu. Set this via the Display Channels as Prefix in Port Menus option in Edit > Preferences > Customization - Display. Port names and tooltips for sends and aux tracks have been improved. Finer choices for tempo decimation The TempoImportDecimationResolution Cakewalk.ini variable affects how tempo envelope shapes are preserved when opening Cakewalk 2021.04 (and later) projects in earlier versions. The TempoMapDecimationResolution variable specifies the minimum time resolution for each tempo map entry when creating tempo envelope curves and lines. Both these variables can now be set to values smaller than 60 ticks. The values are as follows: 1 = 240 ticks (16th Note) 2 = 120 ticks (32nd Note) 3 = 60 ticks (64th Note) 4 = 30 ticks (128th Note) 5 = 15 ticks (256th Note) 6 = 12 ticks (320th Note) 7 = 6 ticks (640th Note) 8 = 3 ticks (1280th Note) Cakewalk responds to PC sleep / wakeup The audio engine stops if/when Windows tells Cakewalk it is about to suspend/hibernate. If Cakewalk receives a Wakeup notification (i.e. you've awakened from suspend or hibernate), it will restart the audio engine. Note: Some audio drivers may not respond properly to a wakeup notification, which will cause the audio engine to fail to restart. Bug fixes Not all horizontal grid lines showing on Tempo track when using Tempo Track Show/Hide Tempo Track Show/Hide shortcut (ALT+T) is not shown in Track view View menu Display All Times as SMPTE does not persist as expected Extra tempo node added at end when inserting tempo after last tempo node Synth port numbers appear unexpectedly after using Replace Synth Spacing in Input picker inconsistent for inputs above 9 In ASIO mode, the input port menu reported the number of stereo channels rather than the actual hardware channel count In-app Update fails to launch if user path has Unicode characters 2021.06 Highlights New features Improved input/output port naming for hardware and software ports In Cakewalk all ports are grouped into stereo pairs of channels. In order to make it easier to associate these pairs with the physical channels exposed by the hardware or virtual instrument, the port naming conventions have been improved. Audio and soft synth input and output ports now include a channel number prefix before the port name. Additionally, port names now always show the actual names of the referenced channels. (previously only the first channel name would be shown). Since many instruments have different names for channels or even dynamic names, the channel index can be used to identify a specific instrument output more easily. When using user defined device names (Use friendly names to represent audio drivers) you can now specify both the left and right channels in the stereo pair by using the pipe symbol “|” to delimit the channel names. For example, entering a friendly name of “Guitar|Voice” may show 1: Guitar, 2: Voice, 1+2: Guitar + Voice in the menus. Input/output prefixes are not shown in port names when using friendly driver names. Port names have been shortened to skip the device vendor name for greater legibility in the Track view, Console view and Inspector. The tooltip for the name will show the full form of the name. Port names are no longer compacted. With the smarter port naming, in most cases there should be no need to use friendly names to shorten the strings, unless you wish to use instrument names for the ports. Edit Filter values and MIDI channels are no longer compacted, which makes it easier to read parameter names in most cases. In the Console view Hardware Outs section, hardware out names now show channel indexes as well as channel names in ASIO mode. Sends now show shortened port names and use port numbering when applicable. Improved dropout management In version 2019.09 we introduced Dropout Analytics to allow diagnosing and resolving common causes of audio dropouts. While dropout messages may be useful to diagnose the cause of problems, they can be intrusive to workflow when small audio interruptions are inconsequential, such as when editing projects, loading and saving sessions, playing back in a live scenario, etc. In this release we manage dropouts more intelligently throughout the application by masking certain categories of dropout notifications when they are less important. The following dropout codes are considered maskable since they are caused by CPU load issues, while other dropouts are caused by system events that cannot be resumed from easily: Dropout code 1: Audio processing took longer than the buffers allotted time slice. Dropout code 3: Driver did not request audio buffers for over DropoutMsec milliseconds. Possible driver overload. Dropouts are masked in the following scenarios The application is idling (transport is not running) Performing various editing operations Performing real time bounce/export/freeze (rendered data will be free of glitches even if the audio playback contains glitches, as long as you are not rendering external hardware inserts) Playing back via the Play List view Opening and closing views Opening and closing documents Operating screen sets Mix Recall Handling dropouts during playback and recording Under normal conditions, Cakewalk always stops playback or recording if too many late buffers are encountered while playing. However there may be circumstances where a dropout that stops playback is disruptive, such as when doing an unattended recording or playing back in a live scenario. To handle these cases, a new MaskDropoutDetection option in Edit > Preferences > Audio - Configuration File can be used to suppress the engine stopping due to dropouts. Setting MaskDropoutDetection to True will activate dropout masking during playback and recording. When activated, Cakewalk will continue playback and recording after it encounters a maskable dropout. This can prevent unwanted interruption of playback or a lost take while recording. Notes: If the dropouts are extreme, recorded audio may contain glitches. Please follow the normal dropout diagnosis procedure for minimizing dropouts. The Play List view will always ignore dropouts irrespective of this setting. Only CPU load related dropouts are masked. Other dropouts such as driver requested stops or disk underruns will still cause playback to stop. Create new arrangement based on existing arrangement You can now quickly create a new arrangement by selecting sections in an existing arrangement. To do so, select the desired sections in the Arranger Inspector’s Arrangements pane, then right-click in the Arrangements pane and select New Arrangement From Selection. Insert committed arrangement at the Now Time You can now insert a committed arrangement into the existing project at the Now Time. To do so, right-click the Commit Arrangement to Project button in the Arranger Inspector and select Insert Committed Arrangement. Sections for the inserted arrangement are added to new Arranger track. Any other existing Arranger tracks, sections and arrangements remain unaffected. Any existing events after the Now Time will be shifted over to make room for the inserted arrangement. As with the Commit Arrangement to Project command, holding down the SHIFT key while selecting the command will cause the events under the arrangement sections to be copied as linked clips. Optional grid lines in the Tempo track To show grid lines in the Tempo track, right-click in the Tempo track and select Show Grid Lines. Specify shape smoothing behavior when using the Freehand tool on automation envelopes You can specify how shape smoothing works when using the Freehand tool on envelope shapes. To do so, click the Track view Options menu, point to Freehand Smoothing, then select one of the following options: Smooth. Uses the existing fit-to-curve functionality. This is the default setting. As Drawn (Linear). Joins the nodes up with linear shapes. As Drawn (Jumps). Leaves the nodes as is, making them jump shapes. Replace synth on a single Instrument track When inserting a multi-output soft synth with the Instrument Track Per Output option enabled, Cakewalk creates multiple Instrument tracks that share a single instance of the soft synth. You can now replace the soft synth on an individual Instrument track without affecting other Instrument tracks that share the same soft synth instance. To do so, right-click the Instrument track strip and select Replace Synth for This Track Only. Replace Synth now handles output port mismatch When replacing a synth with a different synth that has fewer outputs, you can now replace with multiple instances of the new synth in order to account for the extra outputs. Note Names in the Piano Roll view persist per track When assigning a custom Note Names setting in the Piano Roll view (right-click the piano keyboard or note label pane), the setting now persists on a per track basis. Closing and re-opening the Piano Roll view remembers the last setting used for each track. The settings are with the project. Articulation Map Editor: optional time offset and duration override for ‘New Note’ transforms In the Articulation Map Editor, you can now offset the start time and override the duration of New Note output events in the Transform Existing MIDI Events section. Time Offset (T). A positive time delay in MBT that will be applied to the new note. Duration Override (D). A replacement duration for the new note. If left at 0:00:000, the new note will inherit the duration of the original note. Reorder multiple tracks simultaneously You can reorder multiple tracks simultaneously by dragging in the Track pane. To do so, select the tracks that you want to reorder, then drag any selected track. Restrictions: You can’t move the selection on or before tracks within the selection (i.e. trying to move it onto itself) You can’t move a selection containing track folders into a track folder (nested folders are currently not supported) If a track folder is selected (whether or not all the tracks within the folder are selected), the whole track folder is moved, unless you are moving selected tracks from within a single track folder out of the track folder. ‘Duplicate Selected Clip(s) as Linked Clips’ command To duplicate the selected clip(s) as linked clips, press CTRL+SHIFT+D. Improved VST3 support Support for VST3’s new MIDI CC learn functionality. This is used by any VST3 plug-ins that utilize MIDI learn via CCs. VST audio buses (inputs/outputs) are now disabled by default and enabled on demand based on which tracks utilize the buses. With instruments that have many outputs this can save memory and CPU. Added support for IPlugInterfaceSupport and IProcessContextRequirements and IComponentHandlerBusActivation Misc. enhancements ALT+mouse wheel now zooms in the Piano Roll view Drum Grid pane Improved font rendering in new menus Behavior changes Insert Tempo Change dialog defaults to ‘Change the Most Recent Tempo’ The Insert Tempo Change dialog box defaults to Change the Most Recent Tempo, unless clicking the Insert Tempo Change button in the Tempo Inspector, in which case it defaults to Insert a New Tempo. Optimizations Improved app startup time when using WASAPI driver mode With some multichannel audio devices, app startup could be very slow in earlier versions while Cakewalk tried to evaluate the number of output channels. This information is now cached to allow the app to start up quickly. Latest release notes are here. See prior release notes. Check out all new features released to date. Previous release: 2021.04 Feature Overview 2021.01 Feature Overview 2020.11 Feature Overview 2020.09 Feature Overview 2020.08 Feature Overview 2020.05 Feature Overview 2020.04 Feature Overview 2020.01 Feature Overview 2019.11/12 Feature Overview 2019.09 Feature Overview 2019.07 Feature Overview

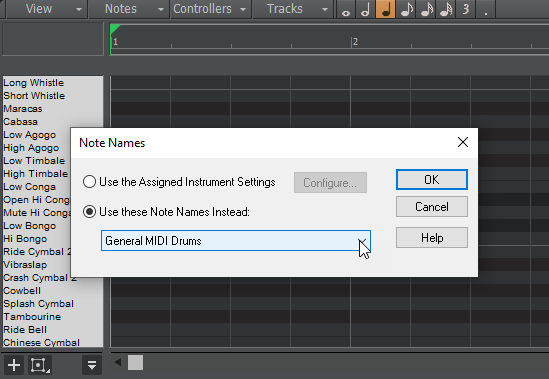
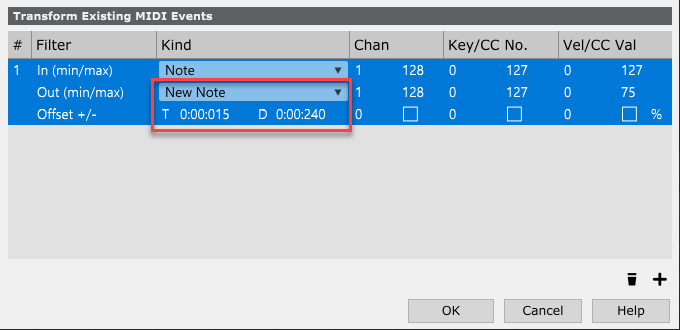
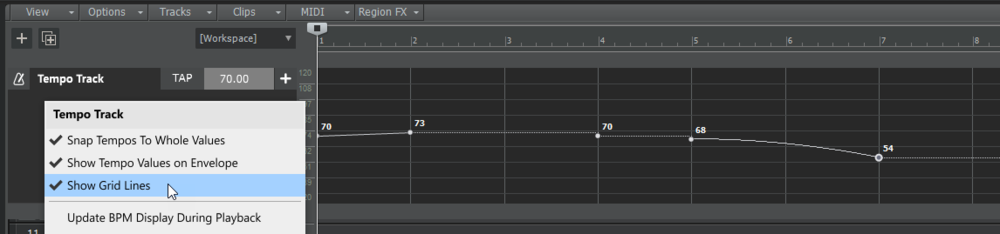

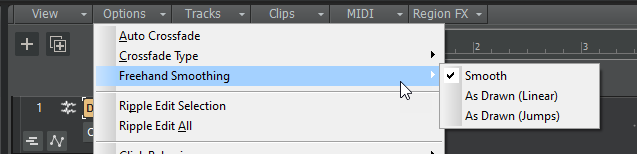
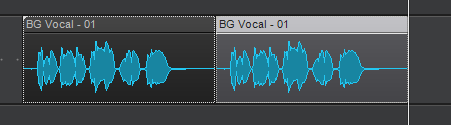
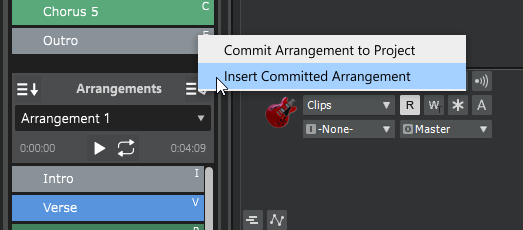

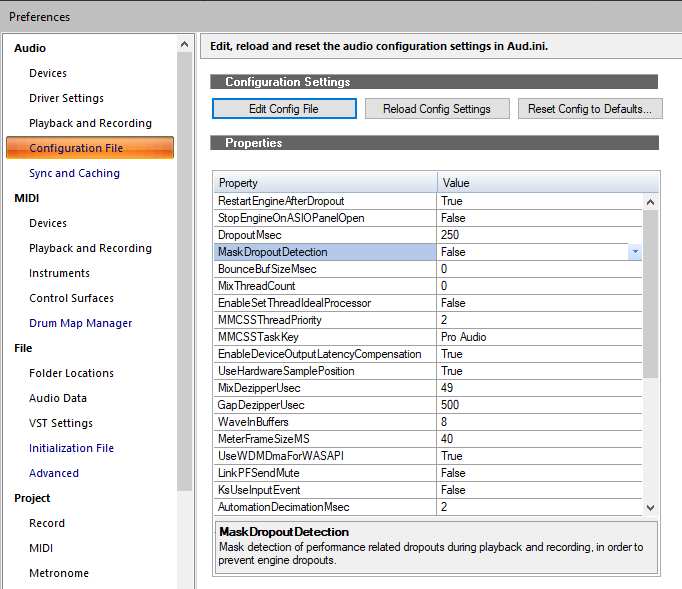

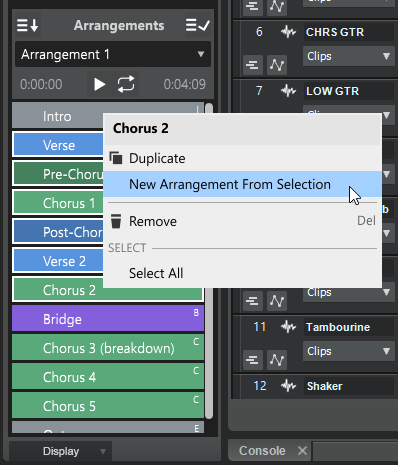

-
Hi all - please use this topic to post feedback specific to 2021.06. Release-specific feedback is valuable to us, and consolidating it in a single topic is extremely helpful. Thanks in advance! 2021.06 Release Notes
-
[UPDATE 6-Aug-2021: Cakewalk 2021.06 Update 3 (build 27.06.0.058) now available] We're pleased to announce the 2021.06 release! This release introduces improved input/output port naming, improved dropout management, several Arranger enhancements, Tempo track grid lines, shape smoothing options when using the Freehand tool on envelope shapes, improved VST3 support, lots of other enhancements and optimizations, and over 25 bug fixes, all in keeping with our goal of making Cakewalk as reliable and enjoyable as possible. Please note that in order to automatically keep your activation status up to date, Cakewalk will renew your activation status whenever a new version of the application is installed and run for the first time, and when you sign in to BandLab from within Cakewalk. If you have never signed in to BandLab from within Cakewalk, you will be prompted once to sign in. Thanks, The Bakers For new feature details, see New Features. Should you need to revert to the 2021.04 release, you can download the Cakewalk 2021.04 Rollback installer. Update August 6 2021: 2021.06 Update 3 (build 27.06.0.058) Bug fixes In-app Google authentication not working Projects with tracks containing embedded synths in the FX rack can hang on load if aux tracks are also present Pressing spacebar/play fails to start project in Play List Should you need to revert to the 2021.06 release, you can download the Cakewalk 2021.06 Rollback installer. Update July 29 2021: 2021.06 Update 2 (build 27.06.0.057) "Modern Standby" support and improved Power Management Added support for "Modern Standby" a new power management feature introduced in Windows 10 build 2004. Modern Standby mode is supported by some PC's (typically modern laptops). Modern standby is different from the traditional sleep modes and has to be specially handled by the application in order to suspend and resume hardware properly. Improved handling for resuming from a sleep state in Windows. Cakewalk will additionally reload the driver if necessary, if the driver requests a restart or it stops responding. Suspend and resume are properly handled when a dialog box is open. Handle VST instruments that change output counts If a VST instrument changes its output count, ports in projects previously saved with the instrument could become offset by the change in outputs. This could cause projects to stop playing through other virtual instruments until their instrument track inputs were reassigned. Cakewalk will now detect change in outputs on opening a project and automatically reassign ports appropriately with no user intervention required. Bug fixes Fixed crash when exporting single track with "-" in track name and filename Intermittent crash when adding new articulation trigger event Wedge Force Matcha plug-in hangs on changing presets in 2021.06 release Projects saved with older version of Omnisphere open with input ports assigned to incorrect instruments SPACEBAR does not start playback when using Vienna Ensemble Pro in host mode SHIFT+right-click toggle for Inline Piano Roll causes unexpected lasso selection Regression: New projects from templates are flagged as dirty in version 2021.06 Extra Synth Instances inserted when adding all synth audio outputs for Split Instrument Track Alt+T shortcut in Track view View menu cut off slightly Arranger sections are not focused immediately after a drag/draw operation (F2 to rename fails) Nudging a fully selected MIDI clip nudges notes, not the whole clip Should you need to revert to the 2021.06 release, you can download the Cakewalk 2021.06 Rollback installer. Update July 13 2021: 2021.06 Update 1 (build 27.06.0.053) Enhancements for input and output port names When using Friendly Names for audio devices (Edit > Preferences > Audio - Devices) , use the vertical bar character (|) to separate left/right/stereo channel names. When using Friendly Names, menus only show L/R/S descriptors and not channel numbers. (Channels can be named using the vertical bar character in the friendly name). Channel numbers are only shown in the port menu and not in the actual port name field to make the readout more compact. The full name is always shown in the tooltip. Channel numbers in menus are separated from the port name, using a columnar layout. You can choose to display the port channel information as a prefix or suffix to the port names shown in the menu. Set this via the Display Channels as Prefix in Port Menus option in Edit > Preferences > Customization - Display. Port names and tooltips for sends and aux tracks have been improved. Finer choices for tempo decimation The TempoImportDecimationResolution Cakewalk.ini variable affects how tempo envelope shapes are preserved when opening Cakewalk 2021.04 (and later) projects in earlier versions. The TempoMapDecimationResolution variable specifies the minimum time resolution for each tempo map entry when creating tempo envelope curves and lines. Both these variables can now be set to values smaller than 60 ticks. The values are as follows: 1 = 240 ticks (16th Note) 2 = 120 ticks (32nd Note) 3 = 60 ticks (64th Note) 4 = 30 ticks (128th Note) 5 = 15 ticks (256th Note) 6 = 12 ticks (320th Note) 7 = 6 ticks (640th Note) 8 = 3 ticks (1280th Note) Cakewalk responds to PC sleep / wakeup The audio engine stops if/when Windows tells Cakewalk it is about to suspend/hibernate. If Cakewalk receives a Wakeup notification (i.e. you've awakened from suspend or hibernate), it will restart the audio engine. Note: Some audio drivers may not respond properly to a wakeup notification, which will cause the audio engine to fail to restart. Bug fixes Not all horizontal grid lines showing on Tempo track when using Tempo Track Show/Hide Tempo Track Show/Hide shortcut (ALT+T) is not shown in Track view View menu Display All Times as SMPTE does not persist as expected Extra tempo node added at end when inserting tempo after last tempo node Synth port numbers appear unexpectedly after using Replace Synth Spacing in Input picker inconsistent for inputs above 9 In ASIO mode, the input port menu reported the number of stereo channels rather than the actual hardware channel count In-app Update fails to launch if user path has Unicode characters Should you need to revert to the 2021.06 release, you can download the Cakewalk 2021.06 Rollback installer. 2021.06 Highlights New features Improved input/output port naming for hardware and software ports In Cakewalk all ports are grouped into stereo pairs of channels. In order to make it easier to associate these pairs with the physical channels exposed by the hardware or virtual instrument, the port naming conventions have been improved. Audio and soft synth input and output ports now include a channel number prefix before the port name. Additionally, port names now always show the actual names of the referenced channels. (previously only the first channel name would be shown). Since many instruments have different names for channels or even dynamic names, the channel index can be used to identify a specific instrument output more easily. When using user defined device names (Use friendly names to represent audio drivers) you can now specify both the left and right channels in the stereo pair by using the pipe symbol “|” to delimit the channel names. For example, entering a friendly name of “Guitar|Voice” may show 1: Guitar, 2: Voice, 1+2: Guitar + Voice in the menus. Input/output prefixes are not shown in port names when using friendly driver names. Port names have been shortened to skip the device vendor name for greater legibility in the Track view, Console view and Inspector. The tooltip for the name will show the full form of the name. Port names are no longer compacted. With the smarter port naming, in most cases there should be no need to use friendly names to shorten the strings, unless you wish to use instrument names for the ports. Edit Filter values and MIDI channels are no longer compacted, which makes it easier to read parameter names in most cases. In the Console view Hardware Outs section, hardware out names now show channel indexes as well as channel names in ASIO mode. Sends now show shortened port names and use port numbering when applicable. Improved dropout management In version 2019.09 we introduced Dropout Analytics to allow diagnosing and resolving common causes of audio dropouts. While dropout messages may be useful to diagnose the cause of problems, they can be intrusive to workflow when small audio interruptions are inconsequential, such as when editing projects, loading and saving sessions, etc. In this release we manage dropouts more intelligently throughout the application by masking certain categories of dropout notifications when they are less important. The following dropout codes are considered maskable since they are caused by CPU load issues, while other dropouts are caused by system events that cannot be resumed from easily: Dropout code 1: Audio processing took longer than the buffers allotted time slice. Dropout code 3: Driver did not request audio buffers for over DropoutMsec milliseconds. Possible driver overload. Dropouts are masked in the following scenarios The application is idling (transport is not running) Performing various editing operations Performing real time bounce/export/freeze (rendered data will be free of glitches even if the audio playback contains glitches, as long as you are not rendering external hardware inserts) Playing back using the Play List view Opening and closing views Opening and closing documents Operating screen sets Mix Recall Handling dropouts during playback and recording Under normal conditions, Cakewalk always stops playback or recording if too many late buffers are encountered while playing. However there may be circumstances where a dropout that stops playback is disruptive, such as when doing an unattended recording or playing back in a live scenario. To handle these cases, a new MaskDropoutDetection option in Edit > Preferences > Audio - Configuration File can be used to suppress dropouts. Setting this value to True will activate dropout masking during playback and recording. When activated, Cakewalk will continue playback and recording after it encounters a maskable dropout. This can prevent unwanted interruption of playback or a lost take while recording. Notes: If the dropouts are extreme, recorded audio may contain glitches. Please follow the normal dropout diagnosis procedure for minimizing dropouts. The Play List view will always ignore dropouts irrespective of this setting. Only CPU load related dropouts are masked. Other dropouts such as driver requested stops or disk underruns will still cause playback to stop. Create new arrangement based on existing arrangement You can now quickly create a new arrangement by selecting sections in an existing arrangement. To do so, select the desired sections in the Arranger Inspector’s Arrangements pane, then right-click in the Arrangements pane and select New Arrangement From Selection. Insert committed arrangement at the Now Time You can now insert a committed arrangement into the existing project at the Now Time. To do so, right-click the Commit Arrangement to Project button in the Arranger Inspector and select Insert Committed Arrangement. Sections for the inserted arrangement are added to new Arranger track. Any other existing Arranger tracks, sections and arrangements remain unaffected. Any existing events after the Now Time will be shifted over to make room for the inserted arrangement. As with the Commit Arrangement to Project command, holding down the SHIFT key while selecting the command will cause the events under the arrangement sections to be copied as linked clips. Optional grid lines in the Tempo track To show grid lines in the Tempo track, right-click in the Tempo track and select Show Grid Lines. Specify shape smoothing behavior when using the Freehand tool on automation envelopes You can specify how shape smoothing works when using the Freehand tool on envelope shapes. To do so, click the Track view Options menu, point to Freehand Smoothing, then select one of the following options: Smooth. Uses the existing fit-to-curve functionality. This is the default setting. As Drawn (Linear). Joins the nodes up with linear shapes. As Drawn (Jumps). Leaves the nodes as is, making them jump shapes. Replace synth on a single Instrument track When inserting a multi-output soft synth with the Instrument Track Per Output option enabled, Cakewalk creates multiple Instrument tracks that share a single instance of the soft synth. You can now replace the soft synth on an individual Instrument track without affecting other Instrument tracks that share the same soft synth instance. To do so, right-click the Instrument track strip and select Replace Synth for This Track Only. Replace Synth now handles output port mismatch When replacing a synth with a different synth that has fewer outputs, you can now replace with multiple instances of the new synth in order to account for the extra outputs. Note Names in the Piano Roll view persist per track When assigning a custom Note Names setting in the Piano Roll view (right-click the piano keyboard or note label pane), the setting now persists on a per track basis. Closing and re-opening the Piano Roll view remembers the last setting used for each track. The settings are with the project. Articulation Map Editor: optional time offset and duration override for ‘New Note’ transforms In the Articulation Map Editor, you can now offset the start time and override the duration of New Note output events in the Transform Existing MIDI Events section. Time Offset (T). A positive time delay in MBT that will be applied to the new note. Duration Override (D). A replacement duration for the new note. If left at 0:00:000, the new note will inherit the duration of the original note. Reorder multiple tracks simultaneously You can reorder multiple tracks simultaneously by dragging in the Track pane. To do so, select the tracks that you want to reorder, then drag any selected track. Restrictions: You can’t move the selection on or before tracks within the selection (i.e. trying to move it onto itself) You can’t move a selection containing track folders into a track folder (nested folders are currently not supported) If a track folder is selected (whether or not all the tracks within the folder are selected), the whole track folder is moved, unless you are moving selected tracks from within a single track folder out of the track folder. ‘Duplicate Selected Clip(s) as Linked Clips’ command To duplicate the selected clip(s) as linked clips, press CTRL+SHIFT+D. Improved VST3 support Support for VST3’s new MIDI CC learn functionality. This is used by any VST3 plug-ins that utilize MIDI learn from CCs. VST audio buses (inputs/outputs) are now disabled by default and enabled on demand based on which tracks utilize the buses. With instruments that have many outputs this can save memory and CPU. Added support for IPlugInterfaceSupport and IProcessContextRequirements and IComponentHandlerBusActivation Misc. enhancements ALT+mouse wheel now zooms in the Piano Roll view Drum Grid pane Improved font rendering in new menus Behavior changes Insert Tempo Change dialog defaults to ‘Change the Most Recent Tempo’ The Insert Tempo Change dialog box defaults to Change the Most Recent Tempo, unless clicking the Insert Tempo Change button in the Tempo Inspector, in which case it defaults to Insert a New Tempo. Optimizations Improved app startup time when using WASAPI driver mode With some multichannel audio devices, app startup could be very slow in earlier versions while Cakewalk tried to evaluate the number of output channels. This information is now cached to allow the app to start up quickly. Bug fixes Stability Cakewalk crashes if AWS is down Crash in CCmdAddTempoTrackTempo after wiping tracks UI ASIO Input and output port names and indexes are incorrect if preceding audio devices deselected in preferences Adding Time Signature change from Meter/Key view causes Now Time to jump unexpectedly When no markers are selected, clicking empty space in the Markers view shows Lock unexpectedly Unexpected behavior in localized Kind of Event dialog (Event List) Clip Fade Attenuation not drawing as expected Tempo track Tempo track does not respond to commas for decimals Delete Hole not working with Tempo track Undo of Cut/Delete loses Tempo track selection "No change" tempo entries being removed REGRESSION: Nudging MIDI notes with absolute time not respecting tempo changes Extract tempo using Melodyne, AudioSnap & Fit To Improvisation should not use "smooth shapes" Arranger Commit Arrangement losing tempo entries Incorrect Arranger section numbering when inserting sections in the Inspector Buses are selected unexpectedly after moving Arranger section Articulation Maps Reassigning an articulation using the Choose dialog not working Sign-in Sign-in using Google authorization with device verification may not work in some locales Misc. Track templates ignore phase settings MIDI input ports not assigned correctly after saving as track template Undo of delete instrument track not working with drum maps in project Drag Moving a MIDI clip crops it Strips menu in Console view hides Instrument tracks unexpectedly with MIDI tracks Process > Slide produces unexpected results with envelopes Exclusive Solo does not initially work as expected after export Automation to MIDI controllers: Incorrect conversion for pitch wheel Spurious dropouts on project load/close/bounce Dropout (12) after creating Region FX clip with stereo then mono FX in bin Saving MIDI File loses last controller event Control surfaces not supporting Aux Sends ARA plug-ins losing transport sync HUD Add Track should not remember previous instrument count Some plug-in posted Windows messages are lost when using Piano Roll Zoom In/Out Vertical controls Known issues Incorrect font sizes in Articulation Maps dialogs. A small number of users have reported seeing unreadable text in plug-in menus. We are currently investigating and hope to release a fix soon. In the meantime, we have made a temporary workaround available. If you are experiencing this problem, add the following variable in Cakewalk.ini (Edit > Preferences > File - Initialization File). EnableStandardTextLayouts=1 To disable again, set the variable to EnableStandardTextLayouts=0 or delete the variable. Latest release notes are here. See prior release notes. Check out all new features released to date.
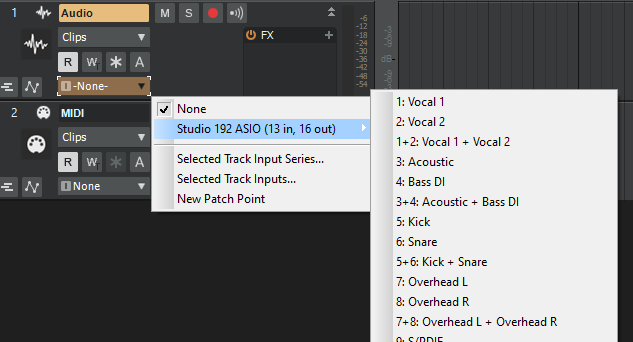


-
[Updated 24-Jun-2021] We're pleased to announce Early Access for 2021.06! This release introduces improved input/output port naming, improved dropout management, several Arranger enhancements, Tempo track grid lines, shape smoothing options when using the Freehand tool on envelope shapes, improved VST3 support, lots of other enhancements and optimizations, and over 25 bug fixes. We'd love for you to check it out before we drop the official public version. Please note that Early Access installers are update installers, which only update from a specific version. To install the 2021.06 Early Access build, you must be on the latest public release of 2021.04. Download Cakewalk 2021.06 EA installer Should you need to revert to the 2021.04 release, you can download the Cakewalk 2021.04 Rollback installer. If you haven't already done so, please read about the Early Access Program before participating. Please keep responses specific to problems or comments on this release. Unrelated bugs or feature requests should be posted in other threads or the feature request channel. Thanks again for your participation! The Bakers 2021.06 Highlights New features Improved input/output port naming for hardware and software ports In Cakewalk all ports are grouped into stereo pairs of channels. In order to make it easier to associate these pairs with the physical channels exposed by the hardware or virtual instrument, the port naming conventions have been improved. Audio and soft synth input and output ports now include a channel number prefix before the port name. Additionally, port names now always show the actual names of the referenced channels. (previously only the first channel name would be shown). Since many instruments have different names for channels or even dynamic names, the channel index can be used to identify a specific instrument output more easily. When using user defined device names (Use friendly names to represent audio drivers) you can now specify both the left and right channels in the stereo pair by using the pipe symbol “|” to delimit the channel names. For example, entering a friendly name of “Guitar|Voice” may show 1: Guitar, 2: Voice, 1+2: Guitar + Voice in the menus. Port names have been shortened to skip the device vendor name for greater legibility in the Track view, Console view and Inspector. The tooltip for the name will show the full form of the name. Port names are no longer compacted. With the smarter port naming, in most cases there should be no need to use friendly names to shorten the strings, unless you wish to use instrument names for the ports. Edit Filter values and MIDI channels are no longer compacted, which makes it easier to read parameter names in most cases. In the Console view Hardware Outs section, hardware out names now show channel indexes as well as channel names in ASIO mode. Sends now show shortened port names and use port numbering when applicable. Improved dropout management In version 2019.09 we introduced Dropout Analytics to allow diagnosing and resolving common causes of audio dropouts. While dropout messages may be useful to diagnose the cause of problems, they can be intrusive to workflow when small audio interruptions are inconsequential, such as when editing projects, loading and saving sessions, etc. In this release we manage dropouts more intelligently throughout the application by masking certain categories of dropout notifications when they are less important. The following dropout codes are considered maskable since they are caused by CPU load issues, while other dropouts are caused by system events that cannot be resumed from easily: Dropout code 1: Audio processing took longer than the buffers allotted time slice. Dropout code 3: Driver did not request audio buffers for over DropoutMsec milliseconds. Possible driver overload. Dropouts are masked in the following scenarios The application is idling (transport is not running) Performing various editing operations Performing real time bounce/export/freeze (rendered data will be free of glitches even if the audio playback contains glitches, as long as you are not rendering external hardware inserts) Playing back using the Play List view Opening and closing views Opening and closing documents Operating screen sets Mix Recall Handling dropouts during playback and recording Under normal conditions, Cakewalk always stops playback or recording if too many late buffers are encountered while playing. However there may be circumstances where a dropout that stops playback is disruptive, such as when doing an unattended recording or playing back in a live scenario. To handle these cases, a new MaskDropoutDetection option in Edit > Preferences > Audio - Configuration File can be used to suppress dropouts. Setting this value to True will activate dropout masking during playback and recording. When activated, Cakewalk will continue playback and recording after it encounters a maskable dropout. This can prevent unwanted interruption of playback or a lost take while recording. Notes: If the dropouts are extreme, recorded audio may contain glitches. Please follow the normal dropout diagnosis procedure for minimizing dropouts. The Play List view will always ignore dropouts irrespective of this setting. Only CPU load related dropouts are masked. Other dropouts such as driver requested stops or disk underruns will still cause playback to stop. Create new arrangement based on existing arrangement You can now quickly create a new arrangement by selecting sections in an existing arrangement. To do so, select the desired sections in the Arranger Inspector’s Arrangements pane, then right-click in the Arrangements pane and select New Arrangement From Selection. Insert committed arrangement at the Now Time You can now insert a committed arrangement into the existing project at the Now Time. To do so, right-click the Commit Arrangement to Project button in the Arranger Inspector and select Insert Committed Arrangement. Sections for the inserted arrangement are added to new Arranger track. Any other existing Arranger tracks, sections and arrangements remain unaffected. Any existing events after the Now Time will be shifted over to make room for the inserted arrangement. As with the Commit Arrangement to Project command, holding down the SHIFT key while selecting the command will cause the events under the arrangement sections to be copied as linked clips. Optional grid lines in the Tempo track To show grid lines in the Tempo track, right-click in the Tempo track and select Show Grid Lines. Specify shape smoothing behavior when using the Freehand tool on automation envelopes You can specify how shape smoothing works when using the Freehand tool on envelope shapes. To do so, click the Track view Options menu, point to Freehand Smoothing, then select one of the following options: Smooth. Uses the existing fit-to-curve functionality. This is the default setting. As Drawn (Linear). Joins the nodes up with linear shapes. As Drawn (Jumps). Leaves the nodes as is, making them jump shapes. Replace synth on a single Instrument track When inserting a multi-output soft synth with the Instrument Track Per Output option enabled, Cakewalk creates multiple Instrument tracks that share a single instance of the soft synth. You can now replace the soft synth on an individual Instrument track without affecting other Instrument tracks that share the same soft synth instance. To do so, right-click the Instrument track strip and select Replace Synth for This Track Only. Note Names in the Piano Roll view persist per track When assigning a custom Note Name setting in the Piano Roll view (right-click the piano keyboard or note label pane), the setting now persists on a per track basis. Closing and re-opening the Piano Roll view remembers the last setting used for each track. The settings are with the project. Articulation Map Editor: optional time offset and duration override for ‘New Note’ transforms In the Articulation Map Editor, you can now offset the start time and override the duration of New Note output events in the Transform Existing MIDI Events section. Time Offset (T). A positive time delay in MBT that will be applied to the new note. Duration Override (D). A replacement duration for the new note. If left at 0:00:000, the new note will inherit the duration of the original note. Reorder multiple tracks simultaneously You can reorder multiple tracks simultaneously by dragging in the Track pane. To do so, select the tracks that you want to reorder, then drag any selected track. Restrictions: You can’t move the selection on or before tracks within the selection (i.e. in effect trying to move it onto itself) You can’t move a selection containing track folders into a track folder (nested folders are currently not supported) If a track folder is selected (whether or not all the tracks within the folder are selected or not), the whole track folder is moved, unless you are moving selected tracks from within a single track folder out of the track folder. ‘Duplicate Selected Clip(s) as Linked Clips’ command To duplicate the selected clip(s) as linked clips, press CTRL+SHIFT+D. Improved VST3 support Support for VST3’s new MIDI CC learn functionality. This is used by any VST3 plug-ins that utilize MIDI learn from CCs. VST audio buses (inputs/outputs) are now disabled by default and enabled on demand based on which tracks utilize the buses. With instruments that have many outputs this can save memory and CPU. Added support for IPlugInterfaceSupport and IProcessContextRequirements and IComponentHandlerBusActivation Misc. enhancements ALT+mouse wheel now zooms in the Piano Roll view Drum Grid pane Improved font rendering in new menus Behavior changes Insert Tempo Change dialog defaults to ‘Change the Most Recent Tempo’ The Insert Tempo Change dialog box defaults to Change the Most Recent Tempo, unless clicking the Insert Tempo Change button in the Tempo Inspector, in which case it defaults to Insert a New Tempo. Optimizations Improved app startup time when using WASAPI driver mode With some multichannel audio devices, app startup could be very slow in earlier versions while Cakewalk tried to evaluate the number of output channels. This information is now cached to allow the app to start up quickly. Bug fixes Stability Cakewalk crashes if AWS is down Crash in CCmdAddTempoTrackTempo after wiping tracks UI ASIO Input and output port names and indexes are incorrect if preceding audio devices deselected in preferences Adding Time Signature change from Meter/Key view causes Now Time to jump unexpectedly When no markers are selected, clicking empty space in the Markers view shows Lock unexpectedly Unexpected behavior in localized Kind of Event dialog (Event List) Clip Fade Attenuation not drawing as expected Tempo track Tempo track does not respond to commas for decimals Delete Hole not working with Tempo track Undo of Cut/Delete loses Tempo track selection "No change" tempo entries being removed REGRESSION: Nudging MIDI notes with absolute time not respecting tempo changes Extract tempo using Melodyne, AudioSnap & Fit To Improvisation should not use "smooth shapes" Arranger Commit Arrangement losing tempo entries Incorrect Arranger section numbering when inserting sections in the Inspector Buses are selected unexpectedly after moving Arranger section Articulation Maps Reassigning an articulation using the Choose dialog not working Misc. Track templates ignore phase settings MIDI input ports not assigned correctly after saving as track template Undo of delete instrument track not working with drum maps in project Drag Moving a MIDI clip crops it Strips menu in Console view hides Instrument tracks unexpectedly with MIDI tracks Process > Slide produces unexpected results with envelopes Exclusive Solo does not initially work as expected after export Automation to MIDI controllers: Incorrect conversion for pitch wheel Spurious dropouts on project load/close/bounce Known issues The following issues are known and will be addressed before the public release: Incorrect font sizes in Articulation Maps dialogs. A small number of users have reported seeing unreadable text in plug-in menus. We are currently investigating and hope to release a fix soon. In the meantime, we have made a temporary workaround available. If you are experiencing this problem, add the following variable in Cakewalk.ini (Edit > Preferences > File - Initialization File). EnableStandardTextLayouts=1 To disable again, set the variable to EnableStandardTextLayouts=0 or delete the variable.
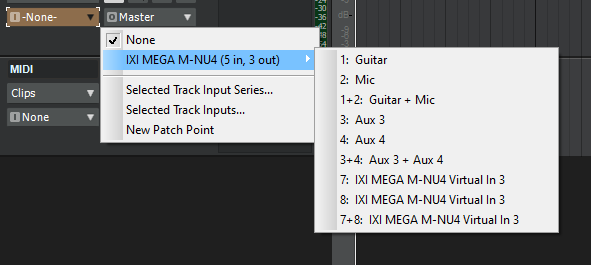
- 140 replies
-
- 35
-
-
-
[UPDATE 14-May-2021: Cakewalk 2021.04 Update 1 Release Candidate 1 (build 27.04.0.170) is now available] We plan to release 2021.04 Update 1 in the near future. Please test recording in this build and verify that normal, loop, punch and combinations thereof are working as expected. We appreciate users helping make Cakewalk better by reporting crashes to us as well as plug-in vendors when necessary. Update May 14 2021: 2021.04 Update 1 RC1 (build 27.04.0.170) Improved Error Detection Using a DAW with many plug-ins can sometimes result in stability issues and crashes. It can be a difficult to troubleshoot issues like this. To assist, we have made several improvements to our error handling. Enhanced error detection is now integrated into the DAW. This feature is opt-in for now and may be enabled by adding the ExceptionHandlingSeverity value to the Cakewalk.ini initialization file. We appreciate users helping make Cakewalk better by reporting crashes to us as well as plug-in vendors when necessary. To control the error detection sensitivity, you can now add a new ExceptionHandlingSeverity value in Preferences > File - Initialization File. Valid values for this setting are: 1 - Unhandled errors are caught (default) 3 - All access violations are detected and unhandled exceptions are caught 5 - Unhandled errors and heap corruption is detected 7 - Unhandled errors, all access violations and heap corruption errors are caught (this is the strictest error detection mode) The error detection dialog has been redesigned and now has links to the crash dump file as well as a link to log an error report with Cakewalk directly. In addition to the crash dump file, a text log of relevant data specific to the session is also listed. Please include the log file as well as the dump file when submitting errors. The error detection dialog has a direct link to log an issue with customer service. We encourage you to report issues and include relevant information about the crash including the log and dump file. When applicable, the crash dialog allows you the option of continuing after a crash. Please note that the behavior after resuming is not guaranteed and is provided as a last resort to access project information when a crash occurs. It should only be used in cases where the crash is known to be continuable. If you have enabled ExceptionHandlingSeverity, to go back to the default value you can delete this variable. To troubleshoot problems that may arise when using plugins we recommend users set this value to 7 which provides the highest error detection capabilities. Bug fixes Recording: Recorded audio clips placed late on timeline by the ASIO record latency. Punch recording writes wave file data past the end of the punch region. Punch Recorded clips punched out too early in projects containing containing synths. Punch in recording occurs late with Aux or synth tracks. Last take punches out too early when loop and punch out regions coincide. Various improvements to punch and loop recording. BandLab integration: Instrument tracks upload to BandLab as separate audio and MIDI tracks when frozen. Track Mute state does not persist when uploading to BandLab. Revision description not setting project notes when downloading a revision. Browse BandLab Projects dialog does not display Unicode double byte characters. Tempo track: Process > Fit to Time supports Tempo track when Tempo Map is selected under Modify by Changing. Tempo track tempo not being set by New Project dialog. Tempo nodes are selected when selecting an Arranger section, even if Arranger Exclude is enabled on the Tempo track. Loading pre Tempo track projects by default will not attempt to create envelope shapes from the tempo map. Tempo node delete can delete selected clips. Deleting Arranger section clears the tempo envelope. Tempo nodes being added past the end of the project when loading older projects. Offset Tempo Map doesn't respect time selection. Default envelope shape for tempo track should be Jump (when using Clear All). Arranger Tracks: Deleting multiple Arranger sections doesn't work after changing section colors. Unexpected behavior with overlap threshold when not using Split MIDI Notes / Non-Destructive MIDI Editing. Articulation Maps: Articulation selected unexpectedly in some cases. Selecting a clip with articulations should partially select articulations outside the clip extents. Unexpected behavior using CTRL + right button drag articulation selection. Cut & paste articulation can cause overlapped articulations. UI: Misc. menu issues on multi-monitor systems when the monitors have significantly different resolution/scale settings: Menus not appearing. Menus appearing on the wrong monitor. Incorrectly sized menus Track view no longer visible in Keyboard Shortcut category dropdown. Piano Roll view Aim Assist line slightly off when left is scrolled beyond zero. Staff view not updating after nudging nodes. Misc.: Preferences > File - Initialization File saves a blank Cakewalk.ini entry which prevents adding new options. Please note that Early Access installers are update installers, which only update from a specific version. To install the 2021.04 Update 1 Early Access RC1 build, you must be on the latest public release of 2021.04 or 2021.04 Update 1 Early Access. Download Cakewalk 2021.04 Update 1 RC1 installer Should you need to revert to the 2021.01 release, you can download the Cakewalk 2021.01 Rollback installer.
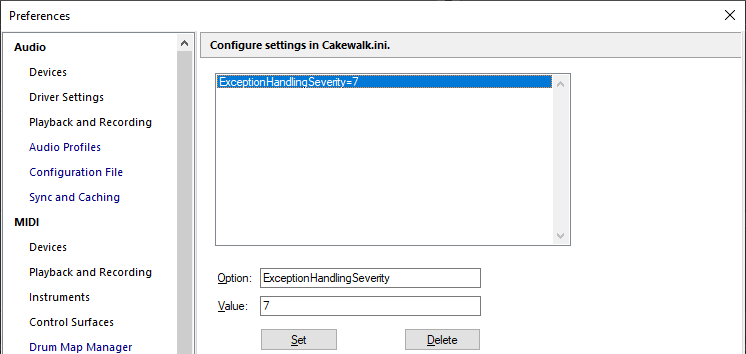
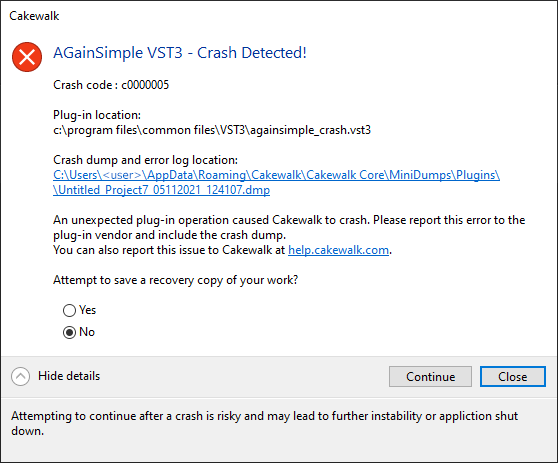
-
The default shortcut is ALT+T. ALT+SHIFT+5 shows/hides both the Tempo track and Tempo inspector.
-
[UPDATE 17-May-2021: Cakewalk 2021.04 Update 1 (build 27.04.0.175) is now available] Introduction The 2021.04 release integrates BandLab library access directly within Cakewalk, introduces a new Tempo track and Tempo Inspector, PC2A T-Type Leveling Amplifier ProChannel module, automation enhancements, Arranger enhancements, lots of other enhancements and optimizations, and over 80 bug fixes, all in keeping with our goal of making Cakewalk as reliable and enjoyable as possible. Please note that in order to automatically keep your activation status up to date, Cakewalk will renew your activation status whenever a new version of the application is installed and run for the first time, and when you sign in to BandLab from within Cakewalk. If you have never signed in to BandLab from within Cakewalk, you will be prompted once to sign in. The following highlights are intended to provide an overview of the more significant changes. Please also refer to the new features section of our documentation for more detailed information on the features. Please give us feedback on this release. We hope you like it! Update May 17 2021: 2021.04 Update 1 (build 27.04.0.175) Automatic activation refresh Cakewalk will now auto check and renew your activation status whenever a new version of the application is installed and run for the first time. It will also do this when you sign in to BandLab from within Cakewalk. You will see a "Cakewalk activation has been refreshed" message on starting the application for the first time. If you were not signed in to BandLab, you will be prompted to sign in, after which it will auto renew the activation status. Note that you must have an active internet connection for the automatic renewal process to work. As long as you stay logged in to BandLab within Cakewalk, and use Cakewalk occasionally, it will automatically stay activated with no further user intervention required. Improved error detection Using a DAW with many plug-ins can sometimes result in stability issues and crashes. It can be a difficult to troubleshoot issues like this. To assist, we have made several improvements to our error handling. Enhanced error detection is now integrated into the DAW. This feature is opt-in and may be enabled by adding the ExceptionHandlingSeverity value to the Cakewalk.ini initialization file. We appreciate users helping make Cakewalk better by reporting crashes to us as well as plug-in vendors when necessary. To control the error detection sensitivity, you can now add a new ExceptionHandlingSeverity value in Preferences > File - Initialization File. Valid values for this setting are: 1 - Only unhandled errors are caught (default) 3 - All memory access violations are detected and unhandled exceptions are caught. [May occasionally flag cases that are benign] 5 - Unhandled errors and heap corruption is detected 7 - Unhandled errors, memory access violations and heap corruption errors are caught (this is the strictest error detection mode and may occasionally flag errors that are benign) The error detection dialog has been redesigned and now has links to the crash dump file as well as a link to log an error report with Cakewalk directly. In addition to the crash dump file, a text log of relevant data specific to the session is also listed. Please include the log file as well as the dump file when submitting errors. The error detection dialog has a direct link to log an issue with customer service. We encourage you to report issues and include relevant information about the crash including the log and dump file. When applicable, the crash dialog allows you the option of continuing after a crash. Please note that the behavior after resuming is not guaranteed and is provided as a last resort to access project information when a crash occurs. It should only be used in cases where the crash is known to be continuable. If you have enabled ExceptionHandlingSeverity, to go back to the default value you can delete this variable. To troubleshoot problems that may arise when using plugins we recommend users set this value to 7 which provides the highest error detection capabilities. Bug fixes Recording: Recorded audio clips placed late on timeline by the ASIO record latency. Punch recording writes wave file data past the end of the punch region. Punch Recorded clips punched out too early in projects containing containing synths. Punch in recording occurs late with Aux or synth tracks. Last take punches out too early when loop and punch out regions coincide. Various improvements to punch and loop recording. BandLab integration: Instrument tracks upload to BandLab as separate audio and MIDI tracks when frozen. Track Mute state does not persist when uploading to BandLab. Revision description not setting project notes when downloading a revision. Browse BandLab Projects dialog does not display Unicode double byte characters. Tempo track: Process > Fit to Time supports Tempo track when Tempo Map is selected under Modify by Changing. Tempo track tempo not being set by New Project dialog. Tempo nodes are selected when selecting an Arranger section, even if Arranger Exclude is enabled on the Tempo track. Loading pre Tempo track projects by default will not attempt to create envelope shapes from the tempo map. Tempo node delete can delete selected clips. Deleting Arranger section clears the tempo envelope. Tempo nodes being added past the end of the project when loading older projects. Offset Tempo Map doesn't respect time selection. Default envelope shape for tempo track should be Jump (when using Clear All). Delete Hole and Ripple Edit don't work with Tempo track. Arranger Tracks: Deleting multiple Arranger sections doesn't work after changing section colors. Unexpected behavior with overlap threshold when not using Split MIDI Notes / Non-Destructive MIDI Editing. Articulation Maps: Articulation selected unexpectedly in some cases. Selecting a clip with articulations should partially select articulations outside the clip extents. Unexpected behavior using CTRL + right button drag articulation selection. Cut & paste articulation can cause overlapped articulations. UI: Misc. menu issues on multi-monitor systems when the monitors have significantly different resolution/scale settings: Menus not appearing. Menus appearing on the wrong monitor. Incorrectly sized menus Track view no longer visible in Keyboard Shortcut category dropdown. Piano Roll view Aim Assist line slightly off when left is scrolled beyond zero. Staff view not updating after nudging nodes. Misc.: Preferences > File - Initialization File saves a blank Cakewalk.ini entry which prevents adding new options. Note: Custom user themes saved in the public release of 2021.04 or Update 1 Early Access should be updated and resaved in Theme Editor after installing 2021.04 Update 1. Specifically, the following items should be updated: Meter/Key view: Insert Delete Properties 2021.04 Highlights Integrated BandLab library access The 2021.04 release introduces a major update to BandLab integration, with support for downloads and uploads and tracking revision state directly from within Cakewalk. Subsequent uploads to BandLab of a modified project are automatically tracked as revisions to the parent project. There is also support for importing clips and MIDI tracks from BandLab projects. The brand new Library view (File > Browse BandLab Projects) now allows you to navigate your projects on BandLab and set revision and song properties directly from within Cakewalk . Here are some of the benefits of BandLab library integration in Cakewalk: Easily publish Cakewalk projects, stems and mixes to your BandLab library Quickly open BandLab projects in Cakewalk Collaborate easily by sharing audio tracks via the BandLab cloud Bring projects started on mobile into Cakewalk for VST effects and advanced editing Fly in vocals or other parts for a Cakewalk project from iOS and Android Curate your music as playlists that you can play anywhere from your mobile device To publish the current project to your BandLab library, select File > Publish to BandLab or choose Export | BandLab from the export module on the toolbar. When publishing to BandLab, a project may be uploaded as a new project, or as a revision to an existing BandLab project. BandLab projects always point to the latest revision. Use the Upload Settings to pick the combination of project assets you wish to upload to the BandLab project. Tracks and buses are mixed down prior to uploading to BandLab. To open a BandLab project, select File > Browse BandLab Projects. You may open as a new Cakewalk project or import into an existing project. Note that revisions are only tracked if you open as a new Cakewalk project. Use the Download Settings options to select the types of assets from the BandLab project you wish to download and open. IMPORTANT: Cakewalk is no longer compatible with projects downloaded via BandLab Assistant. As of version 2021.04, BandLab Assistant should no longer be used for project integration. If you have multiple BandLab user accounts and would like to sign in as a different user, select Help > Sign Out from BandLab, then select Help > Sign In to BandLab to sign in with a different account. Tempo track The new envelope based Tempo track replaces the Tempo view and provides an overview of the project tempo. In the Tempo track, tempo changes are represented by envelope shapes. You edit the project’s tempo map the same way you edit automation envelopes. If a project has a single fixed tempo, the Tempo track shows a straight horizontal line. You create tempo changes by adding envelope nodes and editing their values. You can expand the Tempo track to give yourself more room to work, and adjust the range of values for the Tempo track. To show the Tempo track, do one of the following: Click the Track view View menu and select Tempo Track Show/Hide Select Views > Tempo or press ALT+SHIFT+5 (this also opens the Tempo Inspector) The Tempo track automatically zooms vertically to fit the tempo range each time the tempo envelope is modified. To zoom vertically, drag up/down in the tempo scale with the left mouse button To scroll vertically, drag in the tempo scale with the right mouse button To auto-zoom to fit the envelope, double-click the tempo scale The new Project > Offset Tempo Map command lets you speed up or slow down the entire tempo map. For additional options, right-click the Tempo track. Tip: There is a new workspace named Tempo that has a layout suitable for tempo editing. Note: Your old custom workspaces have no knowledge of the new Tempo track, so you must resave the workspaces if you want to store the state of the Tempo track. Tempo Inspector The Tempo Inspector shows a list of all tempo changes defined in the project’s tempo map, and allows you to edit each tempo change BPM, time position, and curve type. To show/hide the Tempo Inspector, click the Show/Hide Tempo Inspector button at the top of the Inspector pane. To show both the Tempo Inspector and Tempo track, select Views > Tempo or press ALT+SHIFT+5. PC2A T-Type Leveling Amplifier ProChannel module PC2A T-Type Leveling Amplifier is meticulously modeled after a legendary vintage electro-optical tube compressor. This compressor, known for its automatic gain control characteristics, delivers vintage sound with incredibly warm and rich compression. It is revered by audio engineers worldwide for its trademark sound, and has been used on countless hit records since the late 1960s. It is one of the true classics in the audio recording industry. Enhancements Loop current arrangement You can now loop the current arrangement indefinitely by enabling the Loop Enable/Disable button in the Arranger Inspector. Plug-in menu improvements Plug-in menus have been greatly enhanced to make it easier and faster to find and select plug-ins: Plug-in menus show color coded plug-in types (DX/VST2/VST3/32 bit) Large plug-in menus can now show over 1,000 plug-ins Multiple columns appear when applicable Clearer fonts Supports mouse wheel scrolling Supports keyboard navigation: HOME / END PAGE UP / PAGE DOWN Press any alpha-numeric key to go to the first plug-in beginning with that character; press the same character again to go to the next plug-in, etc. Improved automation envelope UI The appearance of automation envelopes has been updated: Automation envelopes are slightly thinner Nodes are smaller and no longer have a gradient Selected nodes are larger and outlined Ghosted envelopes no longer show nodes Show values on automation envelopes You can now optionally show values on envelopes. To show/hide values on automation envelopes, click the Track view View menu and select Display > Show Values on Envelopes. Track Manager preset support The Track Manager dialog box now has support for per-project presets. This is useful if you have a large project and you want to hide all other tracks apart from a certain group of tracks. For example, on a rock project you could have a "Drums only" or "Guitars" preset; on an orchestral project, you may wish to have a "Strings Section" preset that hides all tracks apart from your strings tracks. Note: Tracks within the Tracks Manager presets are "opted-out" - i.e. it remembers which tracks you want to hide, rather than which tracks you want to show (to avoid not being able to see newly created tracks). To open the Track Manager, click the Track view Tracks menu and select Track Manager or press the H key. Convert MIDI continuous controller (CC) events to/from automation envelopes You can convert back and forth between MIDI continuous controller (CC) events and automation envelopes. The existing Track view Clips > Convert MIDI Controllers To Envelopes command lets you convert all CC events on all selected tracks to automation envelopes. You now also have finer control with the ability to convert an individual CC type on a Piano Roll controller lane. You can also convert MIDI automation envelopes back to CC events. You can also choose to convert only a selected part of your CC events / automation envelope and back again. Converting MIDI controllers to envelopes: In the Piano Roll view Controller pane, click the name/label of the CC type that you want to convert to an envelope. Right-click the highlighted CC name/label and select Convert MIDI to Envelopes. Cakewalk converts the Piano Roll view controller data to a Track view envelope that controls the same parameter. Converting envelopes to MIDI controllers: This can be useful, for example, if you want to use the Transform tool in the Piano Roll view Controller pane. In the Clips pane, show the envelope that you want to convert to MIDI controller events. Select the time range that contain the controller data you want to convert, or clear the selection if you want to convert the entire envelope. Right-click envelope and select Convert to MIDI Events. Conversion uses the current Snap to Grid setting as a resolution for discrete CC events: If Snap is off, the resolution is the last selected snap setting If Snap is not set to a musical value (e.g. samples), the resolution is 1/32nd note Waveform outlines You can now optionally show waveform outlines in the Clips pane. To show/hide waveform outlines, click the Track view View menu and select Display > Show Waveform Outlines. Known issue: Waveform outline may not display correctly wherever there are tempo changes or clip mute regions, resulting in incomplete waveform outlines and/or vertical lines. The number of tempo changes, muted clip regions, zoom level and vertical waveform size all affect the severity of the issue. This will be fixed before the final release. UI theme compatibility checker IMPORTANT: The Inspector header has a new Show/Hide Tempo Inspector button . In addition to the new button, the other header buttons have been resized. Custom user themes must be updated in order to show the header buttons properly. When you select a theme in Edit > Preferences > Customization - Themes, or launch Cakewalk with an old custom user theme active, Cakewalk checks to make sure the custom theme is compatible with the current version of Cakewalk. A user theme is considered incompatible if Cakewalk contains new or resized UI elements that have not been updated in the theme. If the selected theme needs to be updated, Cakewalk will show a Custom Theme Incompatibility warning, and ask if you want to continue to use the theme: If you click Yes, some UI elements might be corrupted until the theme is updated and resaved in Theme Editor. If you click No, Cakewalk will revert to the factory Mercury theme. Improved plug-in exception handling / crash reporting NOTE: Plug-in crashes should always be first reported to the manufacturer's support channels to allow them to diagnose these issues. There are several improvements to error reporting to help diagnose plug-in or application crashes: Cakewalk now distinguishes between plug-in and application crashes and will list the plug-in name where available in the crash dialog. For easier reporting , the crash dump file when generated is now displayed as a hyperlink allowing you to click to open the location of the file. The application also intercepts and reports errors that would previously result in the application silently shutting down. You will now get a dump file where possible and the ability to save your current work in these scenarios. Behavior changes Disable Arranger Preview if project does not support it To reinforce that Arranger Preview is not supported in projects that contain video, ReWire synths, and active Region FX, Arranger Preview is now disabled in such projects. Optimizations High resolution plug-in automation improvements Plug-in automation envelopes were previously being decimated at a uniform 50 msec interval. The automation rendering process has been redesigned to render at a much higher resolution of (default = 5 msec) and also make automation sample accurate (for VST3). For VST2 (or VST3 plug-ins that do not support sample accurate automation) the rendering will be buffer accurate. These improvements allows for much tighter sync when automating plug-in parameters synced to rhythm even at higher latencies. The higher resolution rendering also makes automating filter sweeps audibly smoother and without aliasing artifacts. The decimation interval can be changed via the audio configuration property AutomationDecimationMsec (2-30) in preferences. Accurate automation writing via MIDI remote control Writing automation for plug-in parameters automated via MIDI remote control is more accurate and curves should be smoothly represented. Windows 10 high DPI rendering option (experimental feature) Note: This feature is experimental, so please report back if you notice any improvements or problems when using it. This feature will only benefit users with high DPI displays such as 4K monitors, and may not be noticeable unless your Windows display scaling setting is > 100%. Cakewalk 2021.04 introduces a new experimental Cakewalk.ini variable that enables improved high DPI rendering on Windows 10 build 1809 (October 2018) and above. When enabled, the rendering quality of text and other GDI-based primitives automatically improve when the window is displayed on a high-DPI monitor. All Cakewalk UI is potentially affected, including menus and dialogs, but plug-in windows are created without high DPI rendering improvements to avoid UI issues. To enable Windows 10 DPI awareness, add the following variable in Cakewalk.ini (Edit > Preferences > File - Initialization File). EnableWin10DPIAwareness=1 To disable again, set the variable to EnableWin10DPIAwareness=0. Latest release notes are here. See prior release notes. Check out all new features released to date. Previous release: 2021.01 Feature Overview 2020.11 Feature Overview 2020.09 Feature Overview 2020.08 Feature Overview 2020.05 Feature Overview 2020.04 Feature Overview 2020.01 Feature Overview 2019.11/12 Feature Overview 2019.09 Feature Overview 2019.07 Feature Overview
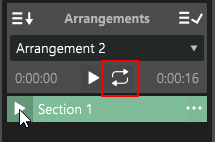
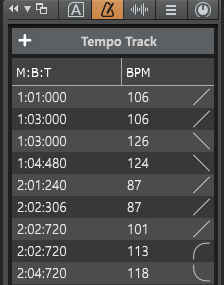


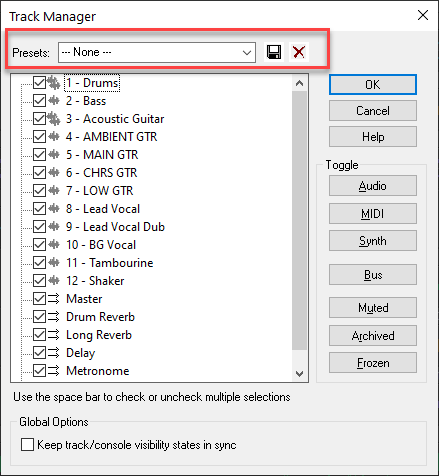
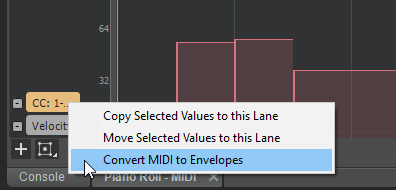


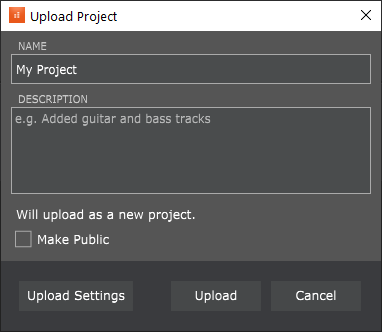
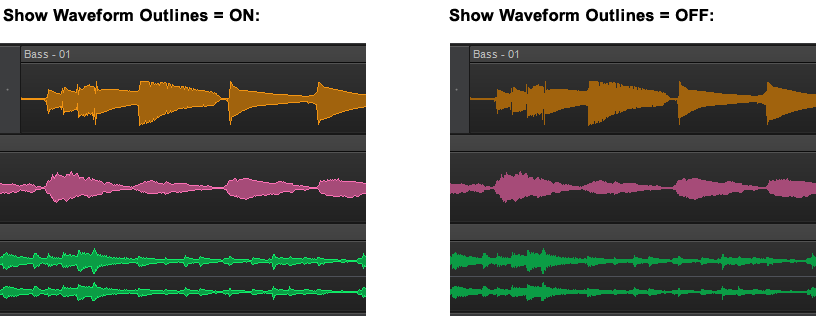

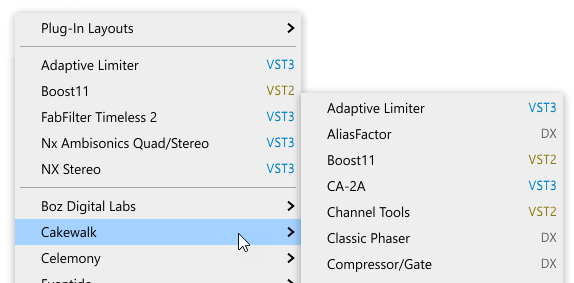

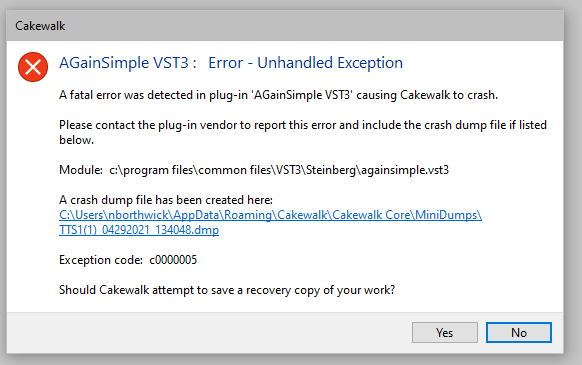

- 1 reply
-
- 2
-
-
[UPDATE 17-May-2021: Cakewalk 2021.04 Update 1 (build 27.04.0.175) is now available] Hi all - please use this topic to post feedback specific to 2021.04. Release-specific feedback is valuable to us, and consolidating it in a single topic is extremely helpful. Thanks in advance! 2021.04 Release Notes
-
[UPDATE 17-May-2021: Cakewalk 2021.04 Update 1 (build 27.04.0.175) now available] We're pleased to announce the 2021.04 release! This release integrates BandLab library access directly within Cakewalk, introduces a new Tempo track and Tempo Inspector, PC2A T-Type Leveling Amplifier ProChannel module, automation enhancements, Arranger enhancements, lots of other enhancements and optimizations, and over 80 bug fixes, all in keeping with our goal of making Cakewalk as reliable and enjoyable as possible. Please note that in order to automatically keep your activation status up to date, Cakewalk will renew your activation status whenever a new version of the application is installed and run for the first time, and when you sign in to BandLab from within Cakewalk. If you have never signed in to BandLab from within Cakewalk, you will be prompted once to sign in. Thanks, The Bakers For new feature details, see New Features. Should you need to revert to the 2021.01 release, you can download the Cakewalk 2021.01 Rollback installer. Update May 17 2021: 2021.04 Update 1 (build 27.04.0.175) Automatic activation refresh Cakewalk will now auto check and renew your activation status whenever a new version of the application is installed and run for the first time. It will also do this when you sign in to BandLab from within Cakewalk. You will see a "Cakewalk activation has been refreshed" message on starting the application for the first time. If you were not signed in to BandLab, you will be prompted to sign in, after which it will auto renew the activation status. Note that you must have an active internet connection for the automatic renewal process to work. As long as you stay logged in to BandLab within Cakewalk, and use Cakewalk occasionally, it will automatically stay activated with no further user intervention required. Improved error detection Using a DAW with many plug-ins can sometimes result in stability issues and crashes. It can be a difficult to troubleshoot issues like this. To assist, we have made several improvements to our error handling. Enhanced error detection is now integrated into the DAW. This feature is opt-in for now and may be enabled by adding the ExceptionHandlingSeverity value to the Cakewalk.ini initialization file. We appreciate users helping make Cakewalk better by reporting crashes to us as well as plug-in vendors when necessary. To control the error detection sensitivity, you can now add a new ExceptionHandlingSeverity value in Preferences > File - Initialization File. Valid values for this setting are: 1 - Unhandled errors are caught (default) 3 - All access violations are detected and unhandled exceptions are caught 5 - Unhandled errors and heap corruption is detected 7 - Unhandled errors, all access violations and heap corruption errors are caught (this is the strictest error detection mode) The error detection dialog has been redesigned and now has links to the crash dump file as well as a link to log an error report with Cakewalk directly. In addition to the crash dump file, a text log of relevant data specific to the session is also listed. Please include the log file as well as the dump file when submitting errors. The error detection dialog has a direct link to log an issue with customer service. We encourage you to report issues and include relevant information about the crash including the log and dump file. When applicable, the crash dialog allows you the option of continuing after a crash. Please note that the behavior after resuming is not guaranteed and is provided as a last resort to access project information when a crash occurs. It should only be used in cases where the crash is known to be continuable. If you have enabled ExceptionHandlingSeverity, to go back to the default value you can delete this variable. To troubleshoot problems that may arise when using plugins we recommend users set this value to 7 which provides the highest error detection capabilities. Bug fixes Recording: Recorded audio clips placed late on timeline by the ASIO record latency. Punch recording writes wave file data past the end of the punch region. Punch Recorded clips punched out too early in projects containing containing synths. Punch in recording occurs late with Aux or synth tracks. Last take punches out too early when loop and punch out regions coincide. Various improvements to punch and loop recording. BandLab integration: Instrument tracks upload to BandLab as separate audio and MIDI tracks when frozen. Track Mute state does not persist when uploading to BandLab. Revision description not setting project notes when downloading a revision. Browse BandLab Projects dialog does not display Unicode double byte characters. Tempo track: Process > Fit to Time supports Tempo track when Tempo Map is selected under Modify by Changing. Tempo track tempo not being set by New Project dialog. Tempo nodes are selected when selecting an Arranger section, even if Arranger Exclude is enabled on the Tempo track. Loading pre Tempo track projects by default will not attempt to create envelope shapes from the tempo map. Tempo node delete can delete selected clips. Deleting Arranger section clears the tempo envelope. Tempo nodes being added past the end of the project when loading older projects. Offset Tempo Map doesn't respect time selection. Default envelope shape for tempo track should be Jump (when using Clear All). Delete Hole and Ripple Edit don't work with Tempo track. Arranger Tracks: Deleting multiple Arranger sections doesn't work after changing section colors. Unexpected behavior with overlap threshold when not using Split MIDI Notes / Non-Destructive MIDI Editing. Articulation Maps: Articulation selected unexpectedly in some cases. Selecting a clip with articulations should partially select articulations outside the clip extents. Unexpected behavior using CTRL + right button drag articulation selection. Cut & paste articulation can cause overlapped articulations. UI: Misc. menu issues on multi-monitor systems when the monitors have significantly different resolution/scale settings: Menus not appearing. Menus appearing on the wrong monitor. Incorrectly sized menus Track view no longer visible in Keyboard Shortcut category dropdown. Piano Roll view Aim Assist line slightly off when left is scrolled beyond zero. Staff view not updating after nudging nodes. Misc.: Preferences > File - Initialization File saves a blank Cakewalk.ini entry which prevents adding new options. Note: Custom user themes saved in the public release of 2021.04 or Update 1 Early Access should be updated and resaved in Theme Editor after installing 2021.04 Update 1. Specifically, the following items should be updated: Meter/Key view: Insert Delete Properties 2021.04 Highlights Integrated BandLab library access The 2021.04 release introduces a major update to BandLab integration, with support for downloads and uploads and tracking revision state directly from within Cakewalk. Subsequent uploads to BandLab of a modified project are automatically tracked as revisions to the parent project. There is also support for importing clips and MIDI tracks from BandLab projects. The brand new Library view (File > Browse BandLab Projects) now allows you to navigate your projects on BandLab and set revision and song properties directly from within Cakewalk . Here are some of the benefits of BandLab library integration in Cakewalk: Easily publish Cakewalk projects, stems and mixes to your BandLab library Quickly open BandLab projects in Cakewalk Collaborate easily by sharing audio tracks via the BandLab cloud Bring projects started on mobile into Cakewalk for VST effects and advanced editing Fly in vocals or other parts for a Cakewalk project from iOS and Android Curate your music as playlists that you can play anywhere from your mobile device To publish the current project to your BandLab library, select File > Publish to BandLab or choose Export | BandLab from the export module on the toolbar. When publishing to BandLab, a project may be uploaded as a new project, or as a revision to an existing BandLab project. BandLab projects always point to the latest revision. Use the Upload Settings to pick the combination of project assets you wish to upload to the BandLab project. Tracks and buses are mixed down prior to uploading to BandLab. To open a BandLab project, select File > Browse BandLab Projects. You may open as a new Cakewalk project or import into an existing project. Note that revisions are only tracked if you open as a new Cakewalk project. Use the Download Settings options to select the types of assets from the BandLab project you wish to download and open. IMPORTANT: Cakewalk is no longer compatible with projects downloaded via BandLab Assistant. As of version 2021.04, BandLab Assistant should no longer be used for project integration. If you have multiple BandLab user accounts and would like to sign in as a different user, select Help > Sign Out from BandLab, then select Help > Sign In to BandLab to sign in with a different account. Tempo track The new envelope based Tempo track replaces the Tempo view and provides an overview of the project tempo. In the Tempo track, tempo changes are represented by envelope shapes. You edit the project’s tempo map the same way you edit automation envelopes. If a project has a single fixed tempo, the Tempo track shows a straight horizontal line. You create tempo changes by adding envelope nodes and editing their values. You can expand the Tempo track to give yourself more room to work, and adjust the range of values for the Tempo track. To show the Tempo track, do one of the following: Click the Track view View menu and select Tempo Track Show/Hide Select Views > Tempo or press ALT+SHIFT+5 (this also opens the Tempo Inspector) The Tempo track automatically zooms vertically to fit the tempo range each time the tempo envelope is modified. To zoom vertically, drag up/down in the tempo scale with the left mouse button To scroll vertically, drag in the tempo scale with the right mouse button To auto-zoom to fit the envelope, double-click the tempo scale The new Project > Offset Tempo Map command lets you speed up or slow down the entire tempo map. For additional options, right-click the Tempo track. Tip: There is a new workspace named Tempo that has a layout suitable for tempo editing. Note: Your old custom workspaces have no knowledge of the new Tempo track, so you must resave the workspaces if you want to store the state of the Tempo track. Tempo Inspector The Tempo Inspector shows a list of all tempo changes defined in the project’s tempo map, and allows you to edit each tempo change BPM, time position, and curve type. To show/hide the Tempo Inspector, click the Show/Hide Tempo Inspector button at the top of the Inspector pane. To show both the Tempo Inspector and Tempo track, select Views > Tempo or press ALT+SHIFT+5. PC2A T-Type Leveling Amplifier ProChannel module PC2A T-Type Leveling Amplifier is meticulously modeled after a legendary vintage electro-optical tube compressor. This compressor, known for its automatic gain control characteristics, delivers vintage sound with incredibly warm and rich compression. It is revered by audio engineers worldwide for its trademark sound, and has been used on countless hit records since the late 1960s. It is one of the true classics in the audio recording industry. Enhancements Loop current arrangement You can now loop the current arrangement indefinitely by enabling the Loop Enable/Disable button in the Arranger Inspector. Plug-in menu improvements Plug-in menus have been greatly enhanced to make it easier and faster to find and select plug-ins: Plug-in menus show color coded plug-in types (DX/VST2/VST3/32 bit) Large plug-in menus can now show over 1,000 plug-ins Multiple columns appear when applicable Clearer fonts Supports mouse wheel scrolling Supports keyboard navigation: HOME / END PAGE UP / PAGE DOWN Press any alpha-numeric key to go to the first plug-in beginning with that character; press the same character again to go to the next plug-in, etc. Improved automation envelope UI The appearance of automation envelopes has been updated: Automation envelopes are slightly thinner Nodes are smaller and no longer have a gradient Selected nodes are larger and outlined Ghosted envelopes no longer show nodes Show values on automation envelopes You can now optionally show values on envelopes. To show/hide values on automation envelopes, click the Track view View menu and select Display > Show Values on Envelopes. Track Manager preset support The Track Manager dialog box now has support for per-project presets. This is useful if you have a large project and you want to hide all other tracks apart from a certain group of tracks. For example, on a rock project you could have a "Drums only" or "Guitars" preset; on an orchestral project, you may wish to have a "Strings Section" preset that hides all tracks apart from your strings tracks. Note: Tracks within the Tracks Manager presets are "opted-out" - i.e. it remembers which tracks you want to hide, rather than which tracks you want to show (to avoid not being able to see newly created tracks). To open the Track Manager, click the Track view Tracks menu and select Track Manager or press the H key. Convert MIDI continuous controller (CC) events to/from automation envelopes You can convert back and forth between MIDI continuous controller (CC) events and automation envelopes. The existing Track view Clips > Convert MIDI Controllers To Envelopes command lets you convert all CC events on all selected tracks to automation envelopes. You now also have finer control with the ability to convert an individual CC type on a Piano Roll controller lane. You can also convert MIDI automation envelopes back to CC events. You can also choose to convert only a selected part of your CC events / automation envelope and back again. Converting MIDI controllers to envelopes: In the Piano Roll view Controller pane, click the name/label of the CC type that you want to convert to an envelope. Right-click the highlighted CC name/label and select Convert MIDI to Envelopes. Cakewalk converts the Piano Roll view controller data to a Track view envelope that controls the same parameter. Converting envelopes to MIDI controllers: This can be useful, for example, if you want to use the Transform tool in the Piano Roll view Controller pane. In the Clips pane, show the envelope that you want to convert to MIDI controller events. Select the time range that contain the controller data you want to convert, or clear the selection if you want to convert the entire envelope. Right-click envelope and select Convert to MIDI Events. Conversion uses the current Snap to Grid setting as a resolution for discrete CC events: If Snap is off, the resolution is the last selected snap setting If Snap is not set to a musical value (e.g. samples), the resolution is 1/32nd note Waveform outlines You can now optionally show waveform outlines in the Clips pane. To show/hide waveform outlines, click the Track view View menu and select Display > Show Waveform Outlines. Known issue: Waveform outline may not display correctly wherever there are tempo changes or clip mute regions, resulting in incomplete waveform outlines and/or vertical lines. The number of tempo changes, muted clip regions, zoom level and vertical waveform size all affect the severity of the issue. This will be fixed before the final release. UI theme compatibility checker IMPORTANT: The Inspector header has a new Show/Hide Tempo Inspector button . In addition to the new button, the other header buttons have been resized. Custom user themes must be updated in order to show the header buttons properly. When you select a theme in Edit > Preferences > Customization - Themes, or launch Cakewalk with an old custom user theme active, Cakewalk checks to make sure the custom theme is compatible with the current version of Cakewalk. A user theme is considered incompatible if Cakewalk contains new or resized UI elements that have not been updated in the theme. If the selected theme needs to be updated, Cakewalk will show a Custom Theme Incompatibility warning, and ask if you want to continue to use the theme: If you click Yes, some UI elements might be corrupted until the theme is updated and resaved in Theme Editor. If you click No, Cakewalk will revert to the factory Mercury theme. Improved plug-in exception handling / crash reporting NOTE: Plug-in crashes should always be first reported to the manufacturer's support channels to allow them to diagnose these issues. There are several improvements to error reporting to help diagnose plug-in or application crashes: Cakewalk now distinguishes between plug-in and application crashes and will list the plug-in name where available in the crash dialog. For easier reporting , the crash dump file when generated is now displayed as a hyperlink allowing you to click to open the location of the file. The application also intercepts and reports errors that would previously result in the application silently shutting down. You will now get a dump file where possible and the ability to save your current work in these scenarios. For more information about crash reporting, click here. Behavior changes Disable Arranger Preview if project does not support it To reinforce that Arranger Preview is not supported in projects that contain video, ReWire synths, and active Region FX, Arranger Preview is now disabled in such projects. Optimizations High resolution plug-in automation improvements Plug-in automation envelopes were previously being decimated at a uniform 50 msec interval. The automation rendering process has been redesigned to render at a much higher resolution of (default = 5 msec) and also make automation sample accurate (for VST3). For VST2 (or VST3 plug-ins that do not support sample accurate automation) the rendering will be buffer accurate. These improvements allows for much tighter sync when automating plug-in parameters synced to rhythm even at higher latencies. The higher resolution rendering also makes automating filter sweeps audibly smoother and without aliasing artifacts. The decimation interval can be changed via the audio configuration property AutomationDecimationMsec (2-30) in preferences. Accurate automation writing via MIDI remote control Writing automation for plug-in parameters automated via MIDI remote control is more accurate and curves should be smoothly represented. Windows 10 high DPI rendering option (experimental feature) Note: This feature is experimental, so please report back if you notice any improvements or problems when using it. This feature will only benefit users with high DPI displays such as 4K monitors, and may not be noticeable unless your Windows display scaling setting is > 100%. Cakewalk 2021.04 introduces a new experimental Cakewalk.ini variable that enables improved high DPI rendering on Windows 10 build 1809 (October 2018) and above. When enabled, the rendering quality of text and other GDI-based primitives automatically improve when the window is displayed on a high-DPI monitor. All Cakewalk UI is potentially affected, including menus and dialogs, but plug-in windows are created without high DPI rendering improvements to avoid UI issues. To enable Windows 10 DPI awareness, add the following variable in Cakewalk.ini (Edit > Preferences > File - Initialization File). EnableWin10DPIAwareness=1 To disable again, set the variable to EnableWin10DPIAwareness=0. Bug fixes Stability Crash loading custom plug-in layouts Multichannel WAV files from Behringer X32 mixer crash on import to 24 bit Crash on close of attached project Crash when adding some plug-ins from track template Crash when writing plug-in automation on top of existing automation User reported crash with AmpleSound Cloudrum Crash drag exporting MIDI to browser Dragging a MIDI clip to Kontakt causes crash Crash after moving Arranger Section AmpleSound VST3 plug-ins crash when trying to play attached MIDI file Crash swapping Sections in attached project Null Pointer Crash splitting Section UI FX Chain assigned controls not working after project reopen Aim Assist is not visible when moving the mouse in the Piano Roll time ruler Drag move of Step Sequencer clip crops unexpectedly Clip outlines in the Piano Roll are practically invisible in the Tungsten theme Dimmed envelopes difficult to see in Tungsten Hide Muted Clips in Piano Roll does not hide MIDI CCs Ripple Edit turns off unexpectedly after bouncing clip SHIFT-drag of split point causes other clips to crop unexpectedly Drawing error when changing sample rate Velocity of muted and hidden clips can be edited within Piano Roll Unexpected behavior when adding notes in Piano Roll when muted clips are hidden Scrollbar in Piano Roll track list no longer working Drag drop move MIDI selection doesn't shrink the destination clip to the events extent Reassign Control menu does not use Choose Parameter Choose parameters dialog does not show for effects on instrument tracks Context Menu for Select Module causes module to disappear Drag and Drop of MIDI file creates unexpected extra MIDI clip MIDI Ports from synths should not be exposed to their own inputs Regression: Unable to move punch point ends on timeline Cut/Copy/Paste does not work with envelopes when nodes are lasso selected Changing the Track's output MIDI channel does not update Arpeggiator UI Keyboard Shortcut for Record Arm does not work for Synth Audio Output tracks Quick Group engage of Console Emulator fails to load modules as expected Clip gain waveform preview incorrect when tempo changes are involved Unable to use UP/DOWN keys to move to audio tracks after opening/closing a plug-in window Automation Latch Write Automation becomes stuck when quick grouping Quick-group latch automation results in overwrite automation faders until saving and re-opening the project Envelope related time selection issues SHIFT+drag multiple envelope nodes not respecting horizontal lock Node not pasted when copying multiple nodes including Jump shapes ESC to cancel drag multiple envelope nodes clears the node selection Plug-ins Insert effect not working for audio clips Systems with high plug-in counts can fail to show all plug-ins 2021.01 Update exposes internal Style Dial parameters VST plug-in automation rendering is not accurate Cakewalk incorrectly reporting sample rate to VST2 plug-in after project sample rate is changed Dragging an effect from one track to another goes to the wrong index Nomad Factory FX included with SONAR Platinum do not show as assignable parameters in FX Chains When Custom Layout does not contain plug-in, MRU fails to load Plug-in Menu MRU shows duplicate entries when plug-ins are loaded from different places Cakewalk loses keystrokes when plug-in hosted by Waves StudioRack has focus Plug-in automation written via MIDI control not writing as expected Arranger Arranger section without data copy operations fail. Arranger inspector: Prevent moving a section against itself Arrangement playback timer does not match project playback timer Show/Hide Arranger should show shortcut in Track View View menu Copy of Arranger section not working as expected in some projects Deleting section with Overlap Threshold enabled deletes markers unexpectedly Articulation Maps Articulation Chase Notes/CC does not respect order of events within the articulation Error changing articulation event to keyaft event in event list Modifying Section Length changes project Time Signature Unexpectedly Move section with overwrite & leading notes sometimes fails to move the correct part of the clip Misc. Changing tempo during playback causes synth audio to cut out Convert MIDI to Envelopes not working for multiple lanes with different channels Punch in recording occurs late with Aux or synth tracks Quantize can quantize MIDI behind frozen instrument tracks Save / Save As .mid file should ignore selection - only Export should use selection Save As MIDI using selection after doing Export as MIDI with selection Incorrect folder behavior when inserting a synth Add Track for Split Instrument Tracks does not respect track count Bounce to Clip(s) not always deleting original clips after bounce Changing Preview Bus in Browser is not respected by files played previously Bounce to clip(s) not working with Arpeggiator if MIDI event channel doesn't match Arpeggiator MIDI Channel Track templates cause project image in Browser to disappear unexpectedly Regression: Adding synth tracks when current track is in a folder causes tracks to be incorrectly created Sign-in view fails on Windows 7 Latest release notes are here. See prior release notes. Check out all new features released to date.


-
[CLOSED] Cakewalk 2021.04 Early Access 2
Morten Saether replied to Morten Saether's topic in Early Access Program
@Stefan Bornhorst This has been fixed for the next release. You will see the correct text if you change the language to English. -
[UPDATE 7-May-2021: Cakewalk 2021.04 Update 1 Early Access is now available] Our sincerest thanks to those of you who have provided feedback on Early Access 1 - your support this week has been fantastic! We've addressed all issues reported by Early Access 1 testers and found opportunities for additional refinements as well. We invite you to try out the latest updates in EA2. Please note that Early Access installers are update installers, which only update from a specific version. To install the 2021.04 EA2 build, you must be on the latest public release of 2021.01 or 2021.04 Early Access 1. The 2021.04 EA2 build can be downloaded and installed from within Cakewalk by going to Help > Check for Updates, then clicking the Download Now link in the "Early Access Available" toast notification. Download Cakewalk 2021.04 EA2 installer Should you need to revert from the 2021.04 EA2 build to the public 2021.01 release, you can download the Cakewalk 2021.01 Rollback installer. If you haven't already done so, please read about the Early Access Program before participating. Thanks again for your participation! The Bakers View list of updates in Early Access 1 Early Access 2 Highlights Behavior Changes BandLab integration: The File > Browse BandLab Projects and File > Publish to BandLab commands are now key bindable Tempo track: Option to not update BPM display in the Tempo track header during playback/recording. To prevent the BPM display from updating during playback, right-click the Tempo track and disable Update BPM Display During Playback. Tip: Disable Update BPM Display During Playback if you want to use tap tempo during playback. Plug-in menus: Plug-in menus now support keyboard navigation: HOME / END PAGE UP / PAGE DOWN Press any alpha-numeric key to go to the first plug-in beginning with that character; press the same character again to go to the next plug-in, etc. Waveform outlines You can now optionally show waveform outlines in the Clips pane. To show/hide waveform outlines, click the Track view View menu and select Display > Show Waveform Outlines. Known issue: Waveform outline may not display correctly wherever there are tempo changes or clip mute regions, resulting in incomplete waveform outlines and/or vertical lines. The number of tempo changes, muted clip regions, zoom level and vertical waveform size all affect the severity of the issue. This will be fixed before the final release. View list of updates in Early Access 1 Bug fixes Stability Crash closing Cakewalk after opening Upload Projects dialog BandLab integration Upload Settings fail to persist after closing and reopening Cakewalk Upload Track Mixdowns to BandLab causes mixdowns to be muted unexpectedly Tempo track Cannot click/create a node and drag immediately / crashes occasionally UI Regression: Unable to move punch point ends on timeline Cut/Copy/Paste does not work with envelopes when nodes are lasso selected Increase plug-in type text color contrast in plug-in menus Changing the Track's output MIDI channel does not update Arpeggiator UI Keyboard Shortcut for Record Arm does not work for Synth Audio Output tracks Quick Group engage of Console Emulator fails to load modules as expected Arranger Incorrect sections and arrangements combo box colors in Arranger Inspector Copy of Arranger section not working as expected in some projects Automation Latch Write Automation becomes stuck when quick grouping Quick-group latch automation results in overwrite automation faders until saving and re-opening the project Envelope related time selection issues Clicking on a automation node does not clear selected tempo nodes & vice versa Misc. Changing Preview Bus in Browser is not respected by files played previously Bounce to clip(s) not working with Arpeggiator if MIDI event channel doesn't match Arpeggiator MIDI Channel Track templates cause project image in Browser to disappear unexpectedly Regression: Adding synth tracks when current track is in a folder causes tracks to be incorrectly created Early Access 1 Highlights New features Note: Screenshots may not reflect actual UI in latest build. Integrated BandLab library access The 2021.04 release introduces a major update to BandLab integration, with support for downloads and uploads and tracking revision state directly from within Cakewalk. Subsequent uploads to BandLab of a modified project are automatically tracked as revisions to the parent project. There is also support for importing clips and MIDI tracks from BandLab projects. The brand new Library view (File > Browse BandLab Projects) now allows you to navigate your projects on BandLab and set revision and song properties directly from within Cakewalk . Here are some of the benefits of BandLab library integration in Cakewalk: Easily publish Cakewalk projects, stems and mixes to your BandLab library Quickly open BandLab projects in Cakewalk Collaborate easily by sharing audio tracks via the BandLab cloud Bring projects started on mobile into Cakewalk for VST effects and advanced editing Fly in vocals or other parts for a Cakewalk project from iOS and Android Curate your music as playlists that you can play anywhere from your mobile device To publish the current project to your BandLab library, select File > Publish to BandLab or choose Export | BandLab from the export module on the toolbar. When publishing to BandLab, a project may be uploaded as a new project, or as a revision to an existing BandLab project. BandLab projects always point to the latest revision. Use the Upload Settings to pick the combination of project assets you wish to upload to the BandLab project. Tracks and buses are mixed down prior to uploading to BandLab. To open a BandLab project, select File > Browse BandLab Projects. You may open as a new Cakewalk project or import into an existing project. Note that revisions are only tracked if you open as a new Cakewalk project. Use the Download Settings options to select the types of assets from the BandLab project you wish to download and open. Note: The Help button in the Browse BandLab Projects dialog box will not launch the correct help topic until Cakewalk 2021.04 has been officially released. IMPORTANT: Cakewalk is no longer compatible with projects downloaded via BandLab Assistant. As of version 2021.04, BandLab Assistant should no longer be used for project integration. If you have multiple BandLab user accounts and would like to sign in as a different user, select Help > Sign Out from BandLab, then select Help > Sign In to BandLab to sign in with a different account. Tempo track The new envelope based Tempo track replaces the Tempo view and provides an overview of the project tempo. In the Tempo track, tempo changes are represented by envelope shapes. You edit the project’s tempo map the same way you edit automation envelopes. If a project has a single fixed tempo, the Tempo track shows a straight horizontal line. You create tempo changes by adding envelope nodes and editing their values. You can expand the Tempo track to give yourself more room to work, and adjust the range of values for the Tempo track. To show the Tempo track, do one of the following: Click the Track view View menu and select Tempo Track Show/Hide Select Views > Tempo or press ALT+SHIFT+5 (this also opens the Tempo Inspector) The Tempo track automatically zooms vertically to fit the tempo range each time the tempo envelope is modified. To zoom vertically, drag up/down in the tempo scale with the left mouse button To scroll vertically, drag in the tempo scale with the right mouse button To auto-zoom to fit the envelope, double-click the tempo scale The new Project > Offset Tempo Map command lets you speed up or slow down the entire tempo map. For additional options, right-click the Tempo track. Tip: There is a new workspace named Tempo that has a layout suitable for tempo editing. Note: Your old custom workspaces have no knowledge of the new Tempo track, so you must resave the workspaces if you want to store the state of the Tempo track. Tempo Inspector The Tempo Inspector shows a list of all tempo changes defined in the project’s tempo map, and allows you to edit each tempo change BPM, time position, and curve type. To show/hide the Tempo Inspector, click the Show/Hide Tempo Inspector button at the top of the Inspector pane. To show both the Tempo Inspector and Tempo track, select Views > Tempo or press ALT+SHIFT+5. PC2A T-Type Leveling Amplifier ProChannel module PC2A T-Type Leveling Amplifier is meticulously modeled after a legendary vintage electro-optical tube compressor. This compressor, known for its automatic gain control characteristics, delivers vintage sound with incredibly warm and rich compression. It is revered by audio engineers worldwide for its trademark sound, and has been used on countless hit records since the late 1960s. It is one of the true classics in the audio recording industry. Enhancements Loop current arrangement You can now loop the current arrangement indefinitely by enabling the Loop Enable/Disable button in the Arranger Inspector. Plug-in menu improvements Plug-in menus have been greatly enhanced to make it easier and faster to find and select plug-ins: Plug-in menus show color coded plug-in types (DX/VST2/VST3/32 bit) Large plug-in menus can now show over 1,000 plug-ins Multiple columns appear when applicable Clearer fonts Supports mouse wheel scrolling Supports keyboard navigation: HOME / END PAGE UP / PAGE DOWN Press any alpha-numeric key to go to the first plug-in beginning with that character; press the same character again to go to the next plug-in, etc. Improved automation envelope UI The appearance of automation envelopes has been updated: Automation envelopes are slightly thinner Nodes are smaller and no longer have a gradient Selected nodes are larger and outlined Ghosted envelopes no longer show nodes Show values on automation envelopes You can now optionally show values on envelopes. To show/hide values on automation envelopes, click the Track view View menu and select Display > Show Values on Envelopes. Track Manager preset support The Track Manager dialog box now has support for per-project presets. This is useful if you have a large project and you want to hide all other tracks apart from a certain group of tracks. For example, on a rock project you could have a "Drums only" or "Guitars" preset; on an orchestral project, you may wish to have a "Strings Section" preset that hides all tracks apart from your strings tracks. Note: Tracks within the Tracks Manager presets are "opted-out" - i.e. it remembers which tracks you want to hide, rather than which tracks you want to show (to avoid not being able to see newly created tracks). To open the Track Manager, click the Track view Tracks menu and select Track Manager or press the H key. Convert MIDI continuous controller (CC) events to/from automation envelopes You can convert back and forth between MIDI continuous controller (CC) events and automation envelopes. The existing Track view Clips > Convert MIDI Controllers To Envelopes command lets you convert all CC events on all selected tracks to automation envelopes. You now also have finer control with the ability to convert an individual CC type on a Piano Roll controller lane. You can also convert MIDI automation envelopes back to CC events. You can also choose to convert only a selected part of your CC events / automation envelope and back again. Converting MIDI controllers to envelopes: In the Piano Roll view Controller pane, click the name/label of the CC type that you want to convert to an envelope. Right-click the highlighted CC name/label and select Convert MIDI to Envelopes. Cakewalk converts the Piano Roll view controller data to a Track view envelope that controls the same parameter. Converting envelopes to MIDI controllers: This can be useful, for example, if you want to use the Transform tool in the Piano Roll view Controller pane. In the Clips pane, show the envelope that you want to convert to MIDI controller events. Select the time range that contain the controller data you want to convert, or clear the selection if you want to convert the entire envelope. Right-click envelope and select Convert to MIDI Events. Conversion uses the current Snap to Grid setting as a resolution for discrete CC events: If Snap is off, the resolution is the last selected snap setting If Snap is not set to a musical value (e.g. samples), the resolution is 1/32nd note UI theme compatibility checker IMPORTANT: The Inspector header has a new Show/Hide Tempo Inspector button . In addition to the new button, the other header buttons have been resized. Custom user themes must be updated in order to show the header buttons properly. When you select a theme in Edit > Preferences > Customization - Themes, or launch Cakewalk with an old custom user theme active, Cakewalk checks to make sure the custom theme is compatible with the current version of Cakewalk. A user theme is considered incompatible if Cakewalk contains new or resized UI elements that have not been updated in the theme. If the selected theme needs to be updated, Cakewalk will show a Custom Theme Incompatibility warning, and ask if you want to continue to use the theme: If you click Yes, some UI elements might be corrupted until the theme is updated and resaved in Theme Editor. If you click No, Cakewalk will revert to the factory Mercury theme. Behavior changes Disable Arranger Preview if project does not support it To reinforce that Arranger Preview is not supported in projects that contain video, ReWire synths, and active Region FX, Arranger Preview is now disabled in such projects. Optimizations High resolution Plug-in Automation improvements Plug-in automation envelopes were previously being decimated at a uniform 50 msec interval. The automation rendering process has been redesigned to render at a much higher resolution of (default = 5 msec) and also make automation sample accurate (for VST3). For VST2 (or VST3 plug-ins that do not support sample accurate automation) the rendering will be buffer accurate. These improvements allows for much tighter sync when automating plug-in parameters synced to rhythm even at higher latencies. The higher resolution rendering also makes automating filter sweeps audibly smoother and without aliasing artifacts. The decimation interval can be changed via the audio configuration property AutomationDecimationMsec (2-30) in preferences. Accurate automation writing via MIDI remote control Writing automation for plug-in parameters automated via MIDI remote control is more accurate and curves should be smoothly represented. Bug fixes Stability Crash loading custom plug-in layouts Multichannel WAV files from Behringer X32 mixer crash on import to 24 bit Crash on close of attached project Crash when adding some plug-ins from track template Crash when writing plug-in automation on top of existing automation User reported crash with AmpleSound Cloudrum Crash drag exporting MIDI to browser Dragging a MIDI clip to Kontakt causes crash Crash after moving Arranger Section AmpleSound VST3 plug-ins crash when trying to play attached MIDI file Crash swapping Sections in attached project UI FX Chain assigned controls not working after project reopen Aim Assist is not visible when moving the mouse in the Piano Roll time ruler Drag move of Step Sequencer clip crops unexpectedly Clip outlines in the Piano Roll are practically invisible in the Tungsten theme Dimmed envelopes difficult to see in Tungsten Hide Muted Clips in Piano Roll does not hide MIDI CCs Ripple Edit turns off unexpectedly after bouncing clip. SHIFT-drag of split point causes other clips to crop unexpectedly Drawing error when changing sample rate Velocity of muted and hidden clips can be edited within Piano Roll Unexpected behavior when adding notes in Piano Roll when muted clips are hidden Scrollbar in Piano Roll track list no longer working Drag drop move MIDI selection doesn't shrink the destination clip to the events extent Reassign Control menu does not use Choose Parameter Choose parameters dialog does not show for effects on instrument tracks Context Menu for Select Module causes module to disappear Drag and Drop of MIDI file creates unexpected extra MIDI clip MIDI Ports from synths should not be exposed to their own inputs Plug-ins Insert effect not working for audio clips Systems with high plug-in counts can fail to show all plug-ins 2021.01 Update exposes internal Style Dial parameters VST plug-in automation rendering is not accurate Cakewalk incorrectly reporting sample rate to VST2 plug-in after project sample rate is changed Dragging an effect from one track to another goes to the wrong index Nomad Factory FX included with SONAR Platinum do not show as assignable parameters in FX Chains When Custom Layout does not contain plug-in, MRU fails to load Plug-in Menu MRU shows duplicate entries when plug-ins are loaded from different places Cakewalk loses keystrokes when plug-in hosted by Waves StudioRack has focus Plug-in automation written via MIDI control not writing as expected Arranger Arranger section without data copy operations fail. Arranger inspector: Prevent moving a section against itself Arrangement playback timer does not match project playback timer Show/Hide Arranger should show shortcut in Track View View menu Articulation Maps Articulation Chase Notes/CC does not respect order of events within the articulation Error changing articulation event to keyaft event in event list Modifying Section Length changes project Time Signature Unexpectedly Move section with overwrite & leading notes sometimes fails to move the correct part of the clip Misc. Changing tempo during playback causes synth audio to cut out Convert MIDI to Envelopes not working for multiple lanes with different channels Punch in recording occurs late with Aux or synth tracks Quantize can quantize MIDI behind frozen instrument tracks Save / Save As .mid file should ignore selection - only Export should use selection Save As MIDI using selection after doing Export as MIDI with selection Incorrect folder behavior when inserting a synth Add Track for Split Instrument Tracks does not respect track count Bounce to Clip(s) not always deleting original clips after bounce Sign-in view fails on Windows 7

- 201 replies
-
- 12
-
-
-
[CLOSED] Cakewalk 2021.04 Early Access
Morten Saether replied to Morten Saether's topic in Early Access Program
@Jaime Ramírez Select the tempo(s) you want to delete, then right-click and select Delete, or press the DELETE key. You cannot delete the first tempo. -
[CLOSED] Cakewalk 2021.04 Early Access
Morten Saether replied to Morten Saether's topic in Early Access Program
@Esteban Villanova You can make a time selection by dragging in the Tempo track, press CTRL+C to copy to the clipboard, then click in the Tempo track where you want to paste, and finally press CTRL+V. -
[CLOSED] Cakewalk 2021.04 Early Access
Morten Saether replied to Morten Saether's topic in Early Access Program
Please keep post in this thread focused on new features and enhancements in the 2021.04 Early Access release. Off-topic posts will be deleted. Feature requests should be directed to the Feedback Loop forum.