msmcleod
-
Posts
6,931 -
Joined
-
Last visited
-
Days Won
36
Everything posted by msmcleod
-
 Click on the articulation section - in 2021.01 it will send out the key switch events. Transforms are only applied during playback.
 -
@Eamon McMullen - glad to hear you had success with setting your DM1000 up. It looks like the "keyboard shortcuts" section of buttons on the HUI weren't implemented in the MackieControl.dll - I'm not sure if this was an oversight, or simply because they were missing on my HUI emulator. I'll look into it.
-
I had a couple of MIDI hardware projects based on the Arduino, but the 16Mhz clock was too slow to scale up to anything worthwhile... the Teensy looks very good.
-
-
The version of Melodyne that comes with CbB is the trial version, not Essentials. IIRC, during the trial it behaves like Melodyne Studio Edition. I believe the trial period is 30 days. At the end of the trial, Cakewalk functions that use Melodyne will continue to work (e.g. Audio to MIDI, tempo extraction), but you can't use the editing features in a region FX unless you purchase a full version ( e.g. Essentials, Assistant, Editor or Studio ). This page gives an overview of the differences: https://shop.celemony.com/cgi-bin/WebObjects/CelemonyShop
-
For 99% cases I recommend you keep "Non-destructive MIDI editing" checked. Non-destructive MIDI editing is probably a misnomer nowadays. What it actually means, is that if you copy/paste part of a MIDI clip (or split it), instead of removing the MIDI events, it makes a copy of the whole clip and slip edits the ends to match the new duration. This allows you to slip edit the ends to "retrieve" the rest of the clip if you want. There are two other options that are destructive, even when this option is checked: Split MIDI Notes - this splits the notes at the boundaries, so that you don't have to slip edit them back into view if they start a bit early. However slip editing the original back into view will result in two notes (the note at the original time, and the note at the split time). It's up to you to then "heal" the split note in the PRV (CTRL + ALT will bring up the 'glue' tool and allow you to glue the notes back together by swiping over the split while the left mouse button is down). The new "Arranger Section Event Overlap Threshold" setting - when doing a section move, this will actively remove notes from one clip and place them in another if they're deemed part of the overlap. Of course, when I say destructive, it's all relative... you can always undo.
-
Can you not just create a project template from the old project, and use that moving forward?
-
I've got a Compute Stick, and it struggles with just running Windows, never mind plugins. I bought it primarily for testing browser compatibility for a website... it's been pretty useless for anything else.
-
You can't create a new account, but if you contact support@cakewalk.com they can help reset the password of your old account so you can access your old software.
-
https://www.screentogif.com/
-
Should be ok... I normally boot Clonezilla from a CD, but you can also boot from a USB stick. If you're using the image method (as shown in the gifs), you'll need a spare disk to write the image to. I use an internal 4TB HDD for my backups, and unplug the SATA/power cables to it when I'm not doing backups... but you could equally use an external USB disk. Stating the obvious... but make sure you turn off the machine between backing up & replacing the new drive for the restore.
-
I highly recommend their tape emulator: https://www.hornetplugins.com/plugins/hornet-tape/ ... the Swiss (Studer A80) and American 2 (MCI JH24) models are especially good. A real steal at €10
- 1 reply
-
- 1
-

-
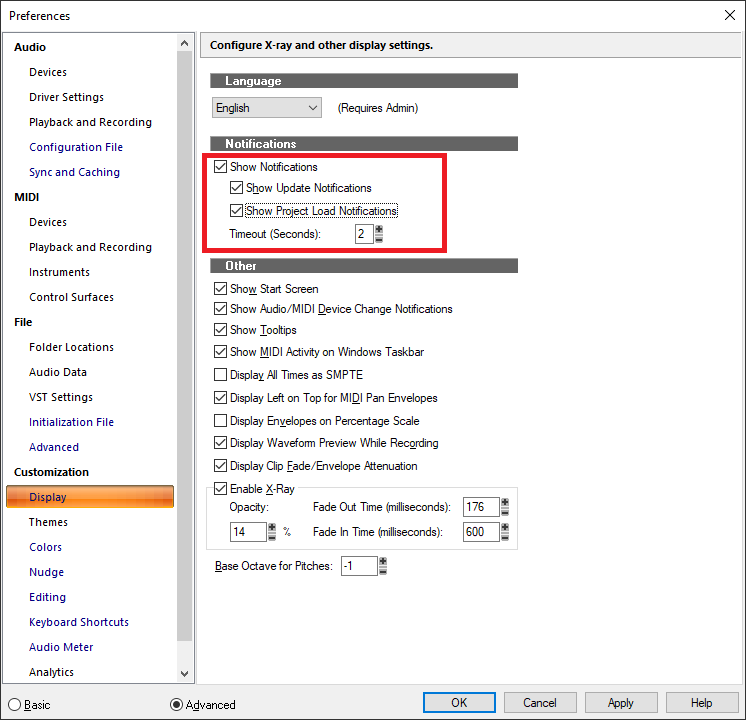
Have you disabled notifications?
-
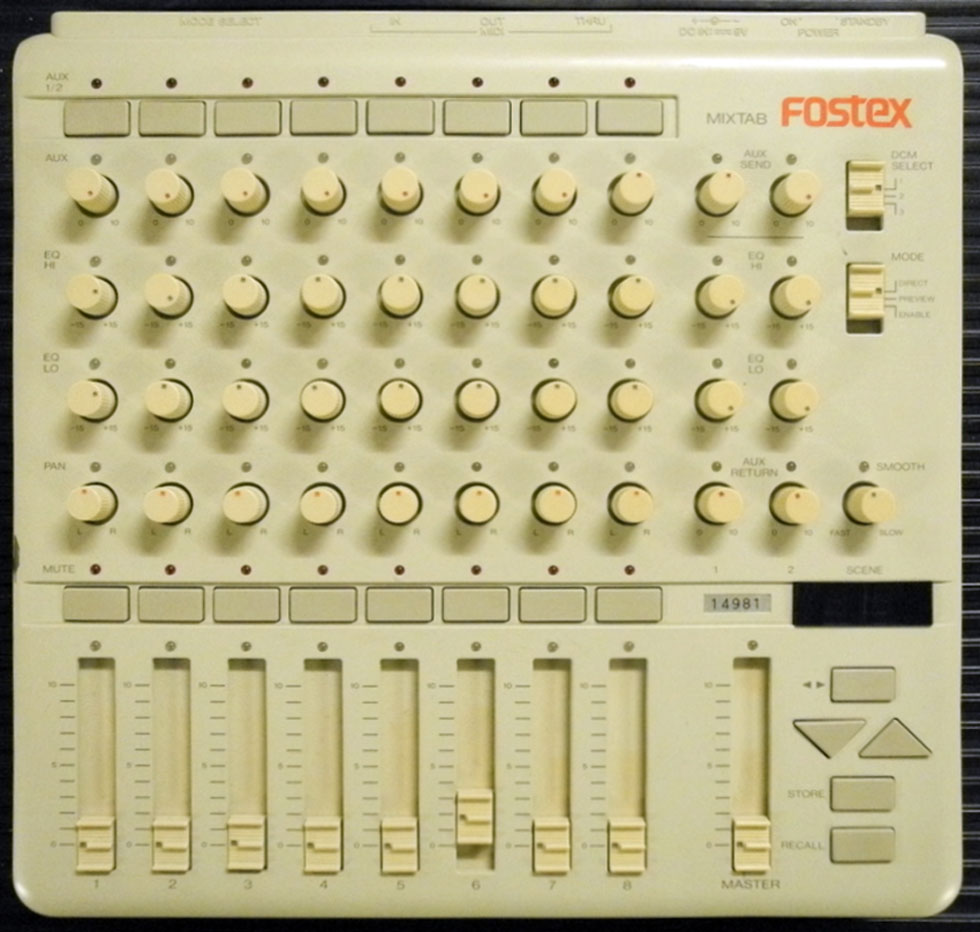
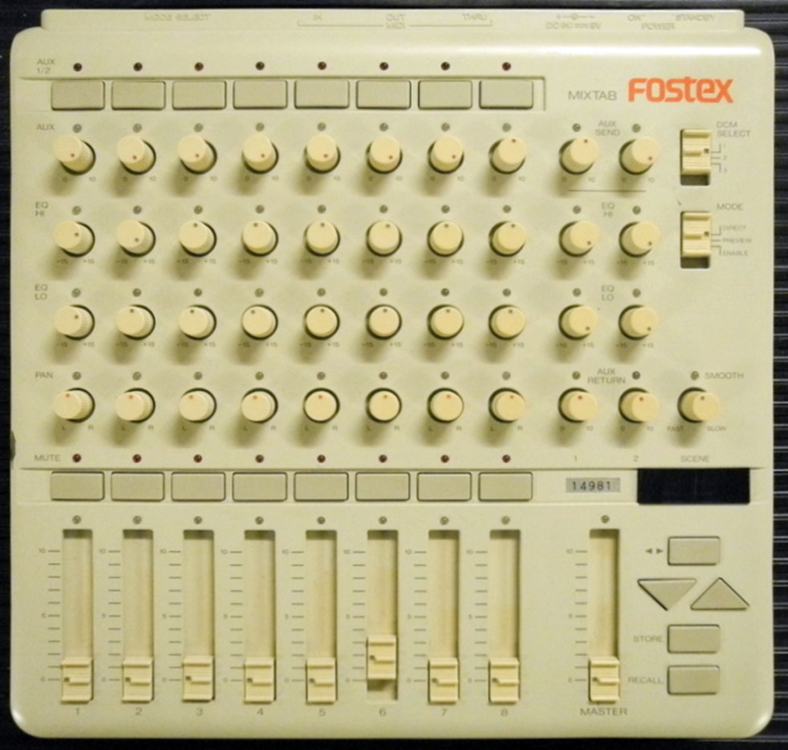
Aha... yes, I use SYSEX for my XG synths as well. I've got 3 x XG units in my synth rack atm... the MU10, MU100R, and my Korg NX5R has an XG daughterboard in it too. I also use SYSEX for my Roland CM-64, as it can't hold patches after it's powered off. I actually use my MU10 as a mixer/fx unit for my Kawai K1R and Yamaha TX81Z - they're connected to the two analog inputs on the MU10, and I use SYSEX to control the stereo chorus/reverb level on them ( the MU10 is sitting next to the CM-64 in my rack ). Everything in my rack is connected to the Fostex DCM100 which is controlled by a MixTab:
-
Exactly... it's by far the easiest way:
-
I did some animated gif's on using clonezilla a while back... the option names have changed slightly since then, but it's basically the same: Backup: Restore:
-
CbB currently doesn't support SYSEX to VSTi's at present, but NRPN / NPN should work fine with Articulation Maps - they're just a specialised CC. In the MIDI spec: CC #98 = NRPN (LSB), #99 = NRPN (MSB) CC #100 = RPN (LSB), #101 = RPN (MSB). Within the Articulation Map editor, you should use CC #99 for NRPN, and CC#101 for RPN, using an event type of "CC" for 7 bit values, and "CC 14 bit" for 14 bit values. When choosing "CC 14 bit", CbB will automatically split the value up into CC #98/99 for NRPN and CC#100/101 for RPN ( the same goes for CC's #0 .. #31 ). As far as SYSEX is concerned, at the time it was deemed largely unnecessary due to the vast majority of users being likely to use VSTi's / sample libraries with keyswitch support, or failing that, mapping across MIDI channels. In any case, for hardware synths, you can normally work around this by using the existing SYSEX bank functionality and sending the SYSEX out either on project load, or at the start of the project. This is how I did things in the past when my rig was all hardware.... I'd send the SYSEX out on project load to configure my synths with the correct sounds / MIDI channel mappings etc, and from then on everything could be done using standard MIDI messages. There wouldn't be a huge amount of work to support SYSEX in Articulation Maps, but it's certainly not insignificant. SYSEX support for VSTi's would be a bigger job though, as all the existing SYSEX functionality would need to be updated to handle VSTi's that may/may not support it. We'd only consider doing this work if we felt enough users were going to benefit from it.
-
AFAIK the HUI protocol supports 8 channels, and devices with more than that actually present themselves as multiple HUI controllers (with separate MIDI IN/OUT devices for each bank of 8 faders). I guess you could try adding 3 x MackieControl surfaces in preferences (all set to HUI mode) and see if this works, but I've no way of testing this configuration. The surfaces should be added so the MIDI ports match the units from left to right (e.g. the first surface is channels 1-8, the second 9-16 etc).
-
contact support@cakewalk.com
-
You shouldn't need to run Cakewalk via the assistant. Does it work running Cakewalk directly?
-
Very true - the drop-out code is pretty accurate as the cause of the drop-out, but that's not to say that it's the underlying cause of the dropout. For example: if MS is downloading a huge update in the background, or running a virus scan it could cause this drop-out. I've also had similar issues in the past when my audio interface was plugged into the wrong USB port or PCI slot (i.e. one that is sharing the same IRQ as the disk controller). But if it was working before, but has suddenly started happening, I'd check to see what other processes may be hammering your disk.
-
He mean's the Windows desktop... but it could equally be dragged to a standard Windows folder. BTW - you can do the same with MIDI clips, and they're saved as Standard MIDI files.
-
Drag the audio clip you're playing along to, to the time ruler. This will extract a tempo map of your audio. You can then use the metronome count-in.
-
Yeah, I do a similar thing, but maybe 1 - 3 times a month, depending on what I've installed/upgraded. My projects get backed up to the cloud at the end of each session, so it's pretty easy to get back to where I was even if my image is a month old. My system drive takes 30 mins, but my drive with all my libraries on it... that's closer to 2.5 hours.
-
Loop recording bug/change of behaviour
msmcleod replied to Chris Boshuizen's topic in Cakewalk by BandLab
The single file for multiple clips is a left-over from the days where the audio files for all projects were store in a single folder. To cut down the number of files in this folder, Cakewalk would store all the clips in a single file. However, the clips within the file are meant to be separate and distinct. The fact that you can drop the file into your project and get the behaviour you want, is probably an unintended side-effect.