dougalex
-
Posts
192 -
Joined
-
Last visited
Everything posted by dougalex
-
Trying to brainstorm and, while not the elegant feature you are looking for, I thought of this possibility: 1] Bounce all clips to one clip 2] Make manual splits at beginning and end of the wanted sections 3] Select all the unwanted blank clips in between the wanted sections 4] Delete the blank clips using Ripple edit
-

Shift key not locking in time when dragging clips from one track to another
dougalex replied to PJH's topic in Cakewalk Sonar
FYI... The Constrained Dragging feature works fine here. I tested with both left and right shift key. -
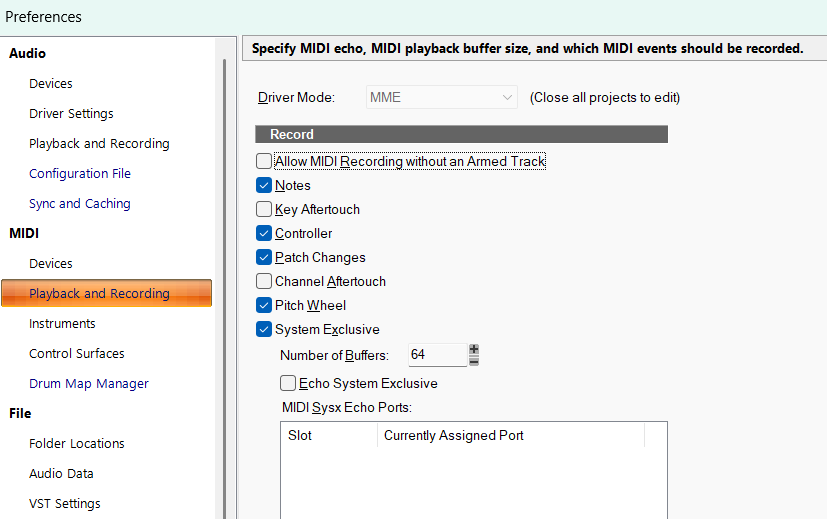
I did not read carefully but thought I should add this to the discussion in case could be relevant: See the option "Allow MIDI Recording without an Armed Track"
-
Using Sonar for recording and playback
dougalex replied to Forlænget Spilletid's topic in Cakewalk Sonar
I think he is doing a "virtual sound check" or "mix outside the box" , if so, then each Sonar track/channel gets routed back to the mixer "Card input" in a one-to-one scheme. In Sonar it would be: Track1 Output is soundcard Out1 Track2 Output is soundcard Out2 Track3 Output is soundcard Out3 etc -
Using Sonar for recording and playback
dougalex replied to Forlænget Spilletid's topic in Cakewalk Sonar
I think you are doing what Midas/Behringer calls "virtual sound check"? The Midas routing for the Card Out is AES50 (the raw stage box inputs), right? If so, then yeah I would hope you get back the same level (assuming all Sonar gain and fader volume are at the default level) As @Bristol_Jonesey suggested, definitely try the playback with "record enable" off. (Following) -
BTW, you probably have suggestions for these type of tools as well, but... I have utilized abemeda to catalog all my external drives and it has really made my life easier. And for local drive I use master-seeker (really fast file search)


-
I did some more testing and one key is: After creating/naming/saving the initial empty project, and then, importing my 32 audio files... THEN, I have to do one initial "Save as..." (not "Save") and click "Yes" when it asks to overwrite the project file. Then I get no unwanted copies of audio files.
-
Hummm.... I found that box "Always copy imported audio files" was already unchecked.
-
Maybe someone has encountered this situation and tell me the "secret" to stop Sonar from duplicating all audio files when create a new project with imported audio files. I create a new project and import 32 audio files. I think I have done this properly so that Sonar will continue to "reference the audio files from their current location". Then at some point, after I have already named/saved the project, upon a subsequent save, Sonar decides to copy all the files to my C-drive. The fix is easy: I just delete the new duplicates and on next open of project I tell Sonar to find the original files on my external drive. But I clearly need someone to explain the proper procedure that would avoid me having to delete the duplicates
-
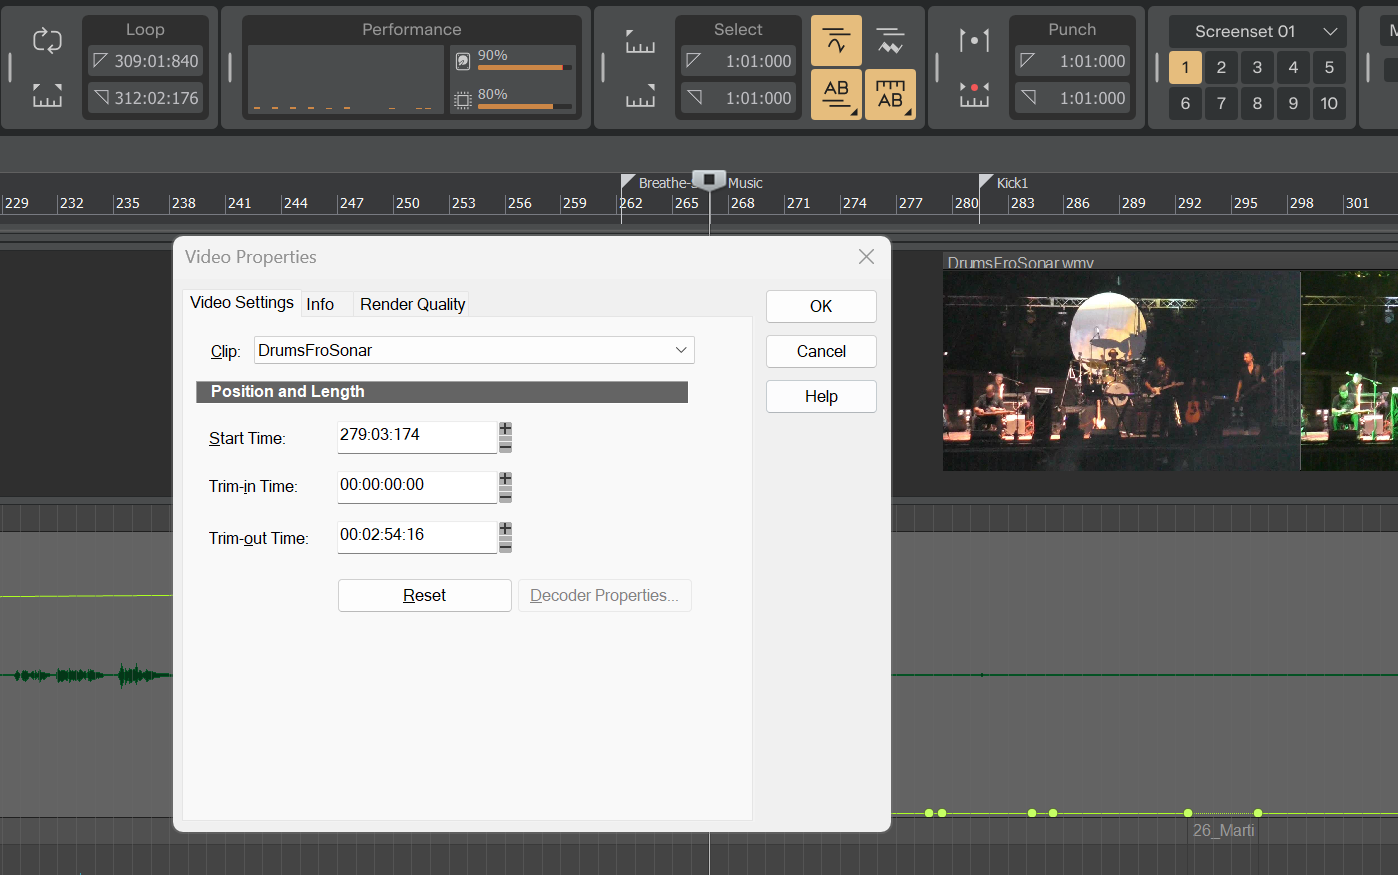
Trying to find way to move video start point
dougalex replied to norfolkmastering's topic in Cakewalk Sonar
@57Gregy I wanted to also mention: I am typically importing the video with its related audio so... I move (mouse drag) that related audio track (from the video import) to get it placed so that it syncs up correctly with Sonar tracks. Then in the track inspector I can just copy that audio start time, then paste it in the Video Properties Start Time. -
Trying to find way to move video start point
dougalex replied to norfolkmastering's topic in Cakewalk Sonar
I move video start point by changing Start Time in Video Properties I find that wmv file type works well for me VLC and other free options should convert you video to wmv (I use Vegas Pro video editor so I do not need to use conversion tools)
-
Trying to find way to move video start point
dougalex replied to norfolkmastering's topic in Cakewalk Sonar
I change video position by changing Start Time in Video Properties (I always convert video to wmv file because other formats do not function as well, or at all, with Sonar)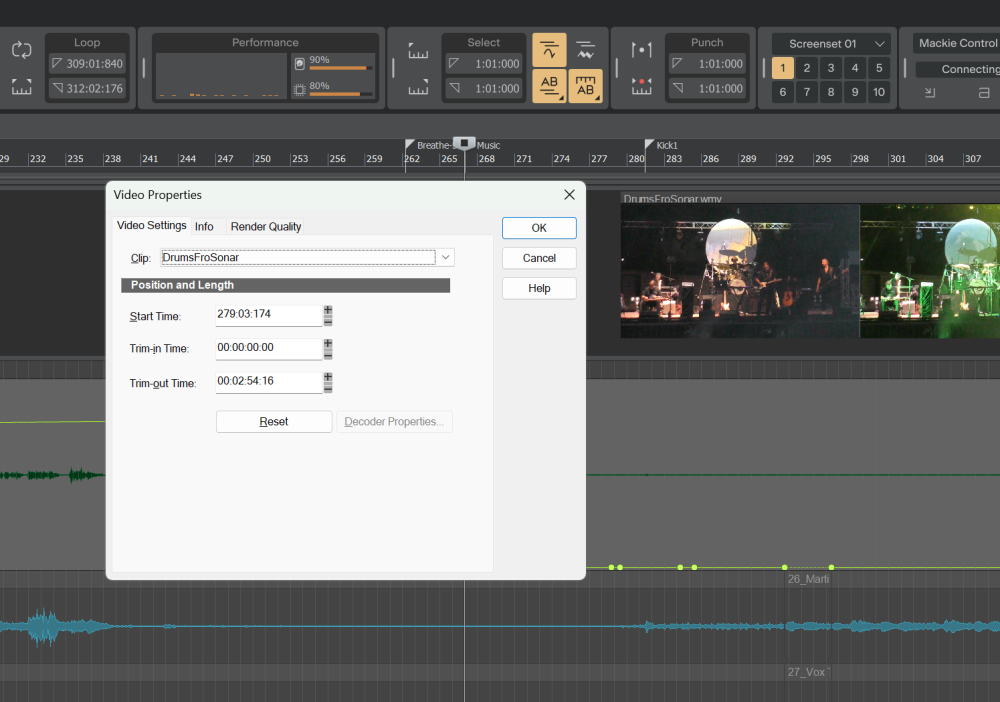
-
Yes but from the first time I got the license request pop up, SynthMaster was never showing in any list in Plugin Manager, neither as Included or Excluded. But fortunately, without me knowingly doing anything, Sonar is now opening without that "pop up asking me to enter my license key for SynthMasterPlayer".
-
Without me knowingly doing anything, thankfully Sonar is now opening without that "pop up asking me to enter my license key for SynthMasterPlayer". (We'll see if that remains the case)
-
A recent "Gig Performer" update installed KV331 Audio SynthMaster Player on my computer. Now when I open Sonar, I get a pop up to enter my license key for SynthMaster. Gig Performer told me it is a special version of SynthMaster that only works with Gig Performer and there is no license key provided directly to the user. I cannot yet find SynthMaster listed anywhere in Sonar plugin manager, therefore I cannot "exclude" SynthMaster. So at this point I am stuck "dismissing the pop up requesting the SynthMaster license key" everytime I open Sonar.
-
When there are no midi tracks, and the user tries to open Piano Roll View, Staff View, or Step Sequencer View, RATHER THAN DOING ABSOLUELY NOTHING (very confusing), the program should have a pop up that asks "Add midi track?" (and maybe give option for either Midi Track or Instrument Track). Notice that Cakewalk by BandLab had Piano Roll View, Staff View, and Step Sequencer View menu items "greyed out" when there were no midi tracks. But Sonar does NOT have those menu items "greyed out" when there are no midi tracks. (So the user is, in effect, invited to click on a menu that "does nothing" in that situation). The "nice" thing to do is: Rather than just be "greyed out" when there are no midi tracks, leave the menu active. And when user tries to open Piano Roll View, Staff View, or Step Sequencer View when there are no midi tracks... just have a pop up to give user option to either add a midi track or cancel. At the very least there should be a pop up that says "Add midi track before selecting Piano Roll View, Staff View, or Step Sequencer View" (as opposed to "doing nothing")
-
- 3
-

-
Thx for brainstorming! But alas, I tried it and can't punch-in record with that Arranger workaround.
-
I tried but does not stop at all when in punch-in record mode (which defeats my intended workflow) 😑
-
What is the deal with Sonar and Next
dougalex replied to DescendingIntoVertigo's topic in Cakewalk Sonar
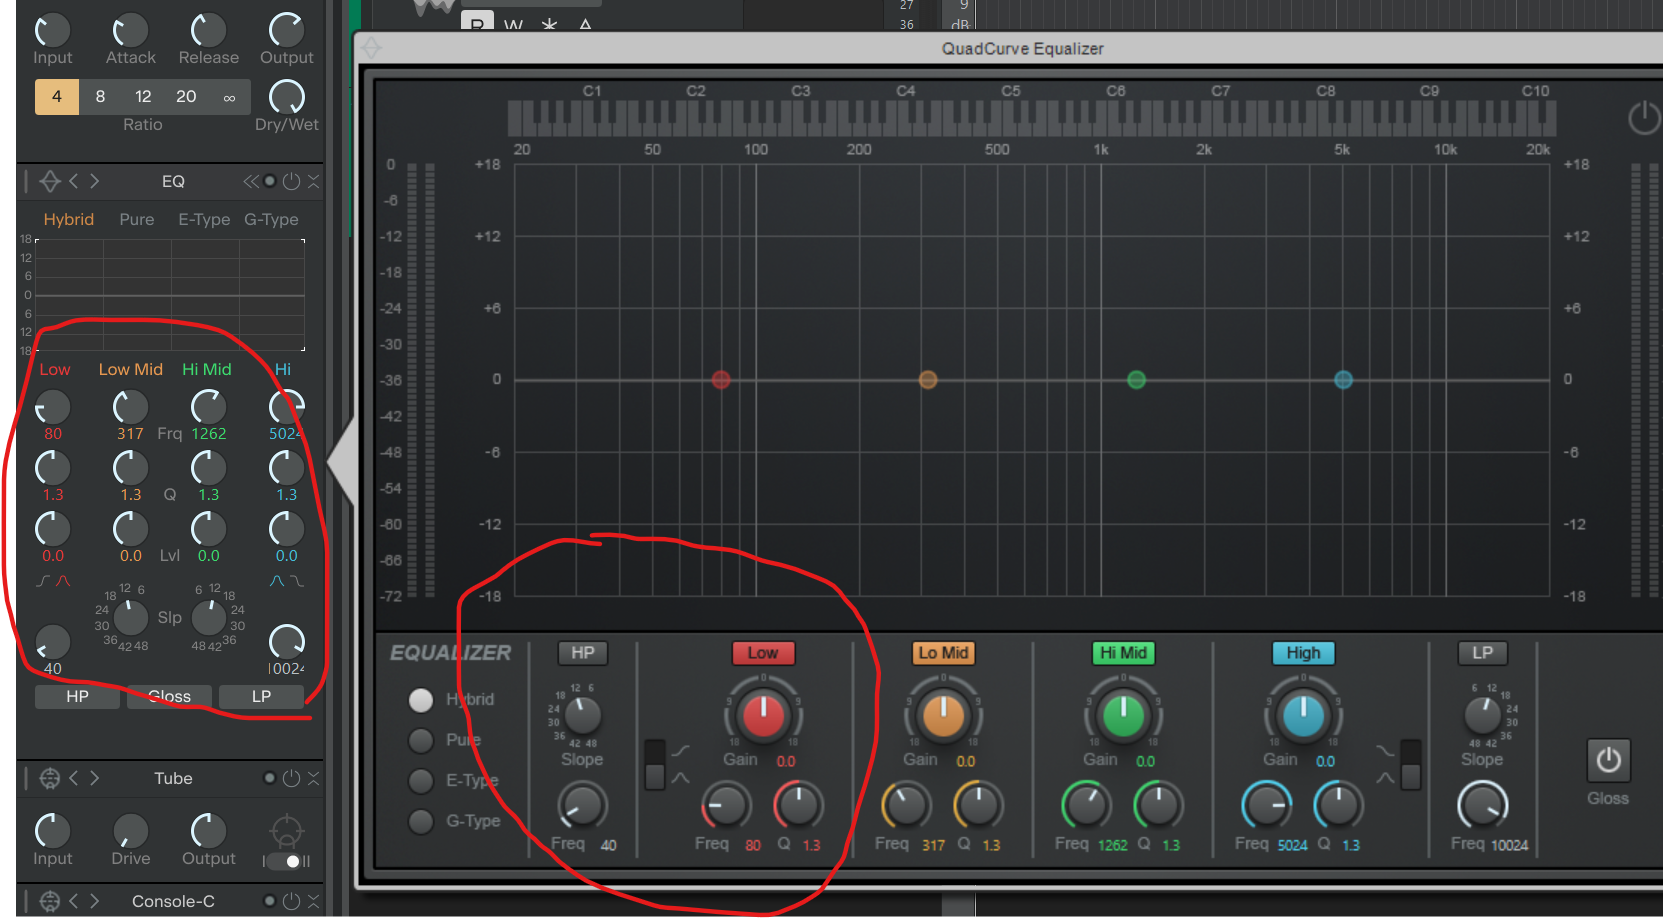
I see "very flat look" on the left and more of a "3D look" on the right (on both the knobs and the buttons)
-
What is the deal with Sonar and Next
dougalex replied to DescendingIntoVertigo's topic in Cakewalk Sonar
@Noel Borthwick I am VERY happy with new Sonar including the graphics, but I was just curious to know more about this aspect: When I expand the QuadCurve Equalizer it seems to have some "3D look" (as opposed to a "flat look" used elsewhere in the GUI). Just wondered why that is? -
I think that would be too abrupt - unless it add secondary option "Play x seconds/beats after punch out before auto-stop-and rewind"
-
I really found my preferred method to be noticeably better because it feels like an engineer is there stopping the transport for you, so you can focus on the current take, and prepare for the next take, without breaking your concentration to have to stop the transport. Since transport stops automatically, after each take, it is cued up for me to either hit spacebar "to listen to the take", or "r" to "record another take". i.e. its automatically always cued up and ready to either "listen again" or "do another take"... and never have to "manually stop the transport".
-
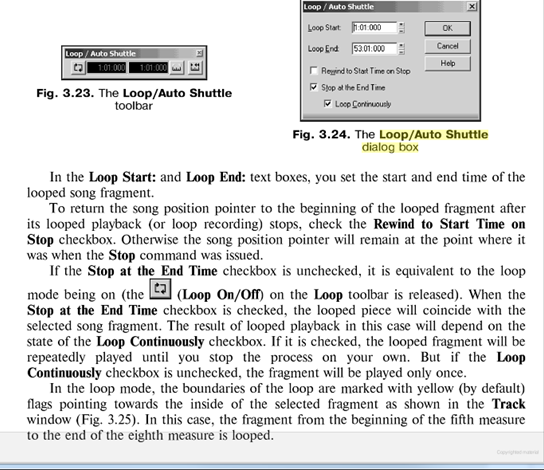
Below please see an image of the actual dialog box I am talking about, as shown in a old Sonar manual To get the workflow I wanted: Uncheck "Loop Continuously" So instead of "Loop once and stop", the option is actually called "Loop Continuously" option, which can be on or off. If it can be added back, I think it would be more straightforward if it was added back as a checkbox option called "Play once and stop"
-
My method (when it was an option) had the pleasant feeling like there is an engineer automatically stopping the playback for you (freeing you up be completely focused on what just happened in the current take, and think about the preparation for the next take) You get a nice automatic pause in silence, gather yourself, and when ready for next take, just one keypress ("r") to try again. And there is no alternating between "spacebar" (manual stop) and "r"... rather it is simplified to just pressing "r" when ready. In my method there is no need to think about "stopping the playback" rather you only decide "let me hear that" (press spacebar for play) or "just do another take" (press "r") No getting mixed up because in my workflow spacebar is only "listen to playback" (i.e. not also used for stop).
-
A loop feature that got removed (maybe around Sonar 7 or 8 ) was a checkbox option for "Loop once and stop" which was fantastic for doing a punch-in ALL BY YOURSELF (particularly a difficult riff that you need a moment to prepare yourself and/or practice between takes). I would set my punch-in range, then set my loop range (with proper cushion before and after punch-in range), then hit "r" when I was ready to try the take after the take, it would stop at end of loop AND the play head would position itself back at the beginning of the loop range So I take a moment to gather myself (or practice the riff) and when I am ready for the next attempt, I simply hit "r" Without "Loop once and stop" I would have to manually stop the transport if I needed more time (wait in silence) before I tried the next take I loved that workflow: Just hitting "r" when I was ready to try the next take, knowing it would stop automatically, and wait for me to hit "r" again when I was ready to try the next take.