
Mike Z
-
Posts
48 -
Joined
-
Last visited
Everything posted by Mike Z
-
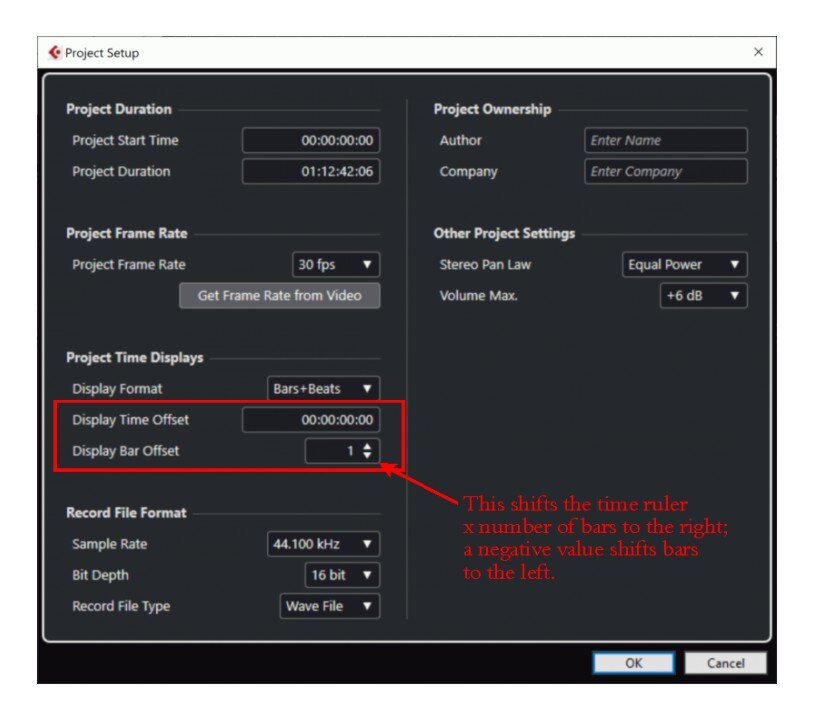
This is from Cubase 10.5 LE: This option is offered on a project-by-project basis. The default setting is 0, when I changed it to 1 as shown, the timer ruler ended up like this:
-
Thanks, I didn't realize Cubase has that option. I just tried it and it works exactly like I expected: the time ruler now starts at 0 and proceeds from there. When I tried it on an existing project, it even asked if I wanted to shift the clips to the new start position, or leave them as they are.
-
Thanks, but I'm not looking for a count-in before the recording starts, I'm looking for a count-in before the playing starts, while recording, so that early notes get recorded. Exactly. A musical score starts at measure 1, not measure 2. Yet every DAW forces songs to start at measure 2 or later to allow early notes to be recorded.
-
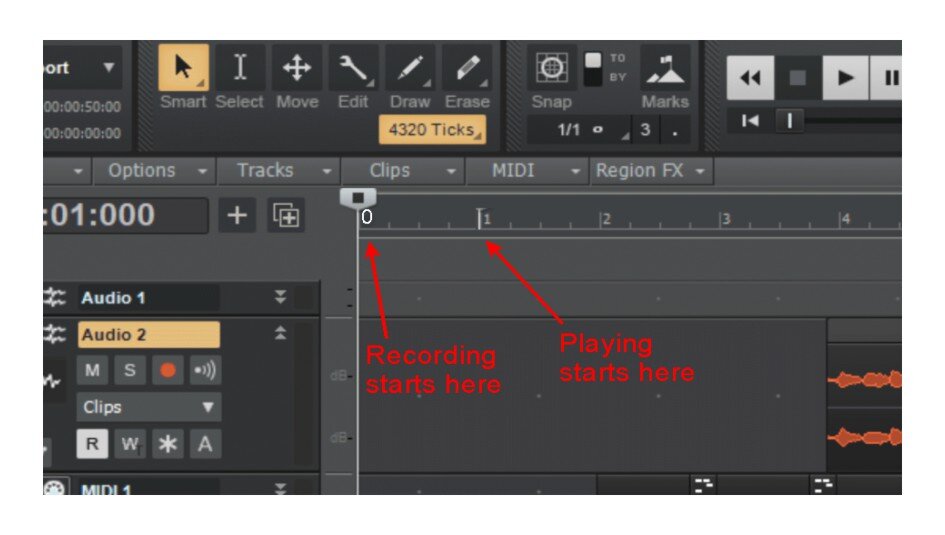
I don't want a count-in before recording, I want recording to start before playing so I get the dead air space before measure 1. This is what I've already been doing, beginning at measure 2. What I'm suggesting is that the song should start at measure 1, with a bit of room for grace note/pickup notes before that.
-
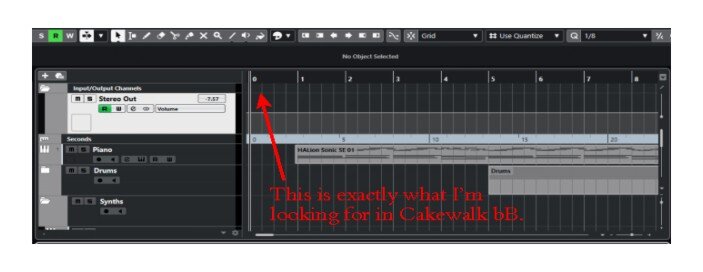
I've been thinking about this for awhile now, haven't seen it on any DAW yet. I would like my projects to start at measure 0 instead of the usual measure 1. The reason is that I always like to have a bit of silence between hitting the Record button and starting to play. Sometimes there's a grace note or pickup note before the bar, other times it's just an eager note that hits a little early. I don't like cleaning those up because it can add to the organic feel of songs. If all notes hit at exactly the same time it can sound too mechanical imho. Normally, I wait until measure 2 to start recording. That means all the measures in the song are advanced by 1 (eg. a 16 bar phrase starts at measure 2 and ends at bar 17). I can't imagine this would be difficult to implement; it probably should be an "opt-in" feature since many people will want to stick with the way it's always been. Just a check box in Preferences to start the Time Ruler at Measure 0 instead of 1. I realize this is a minor issue, I could live without it (have for a long time now) but it would help me stay organized a bit.
-
I can't help with the Novation keyboard, but i spent some time learning how to configure an Oxygen Pro 49 to use with CbB. here's what I learned, maybe you can modify the approach to use on the Novation. The rest of the thread has some good info on ACT and control surface mapping, which is relevent for you as well.
-
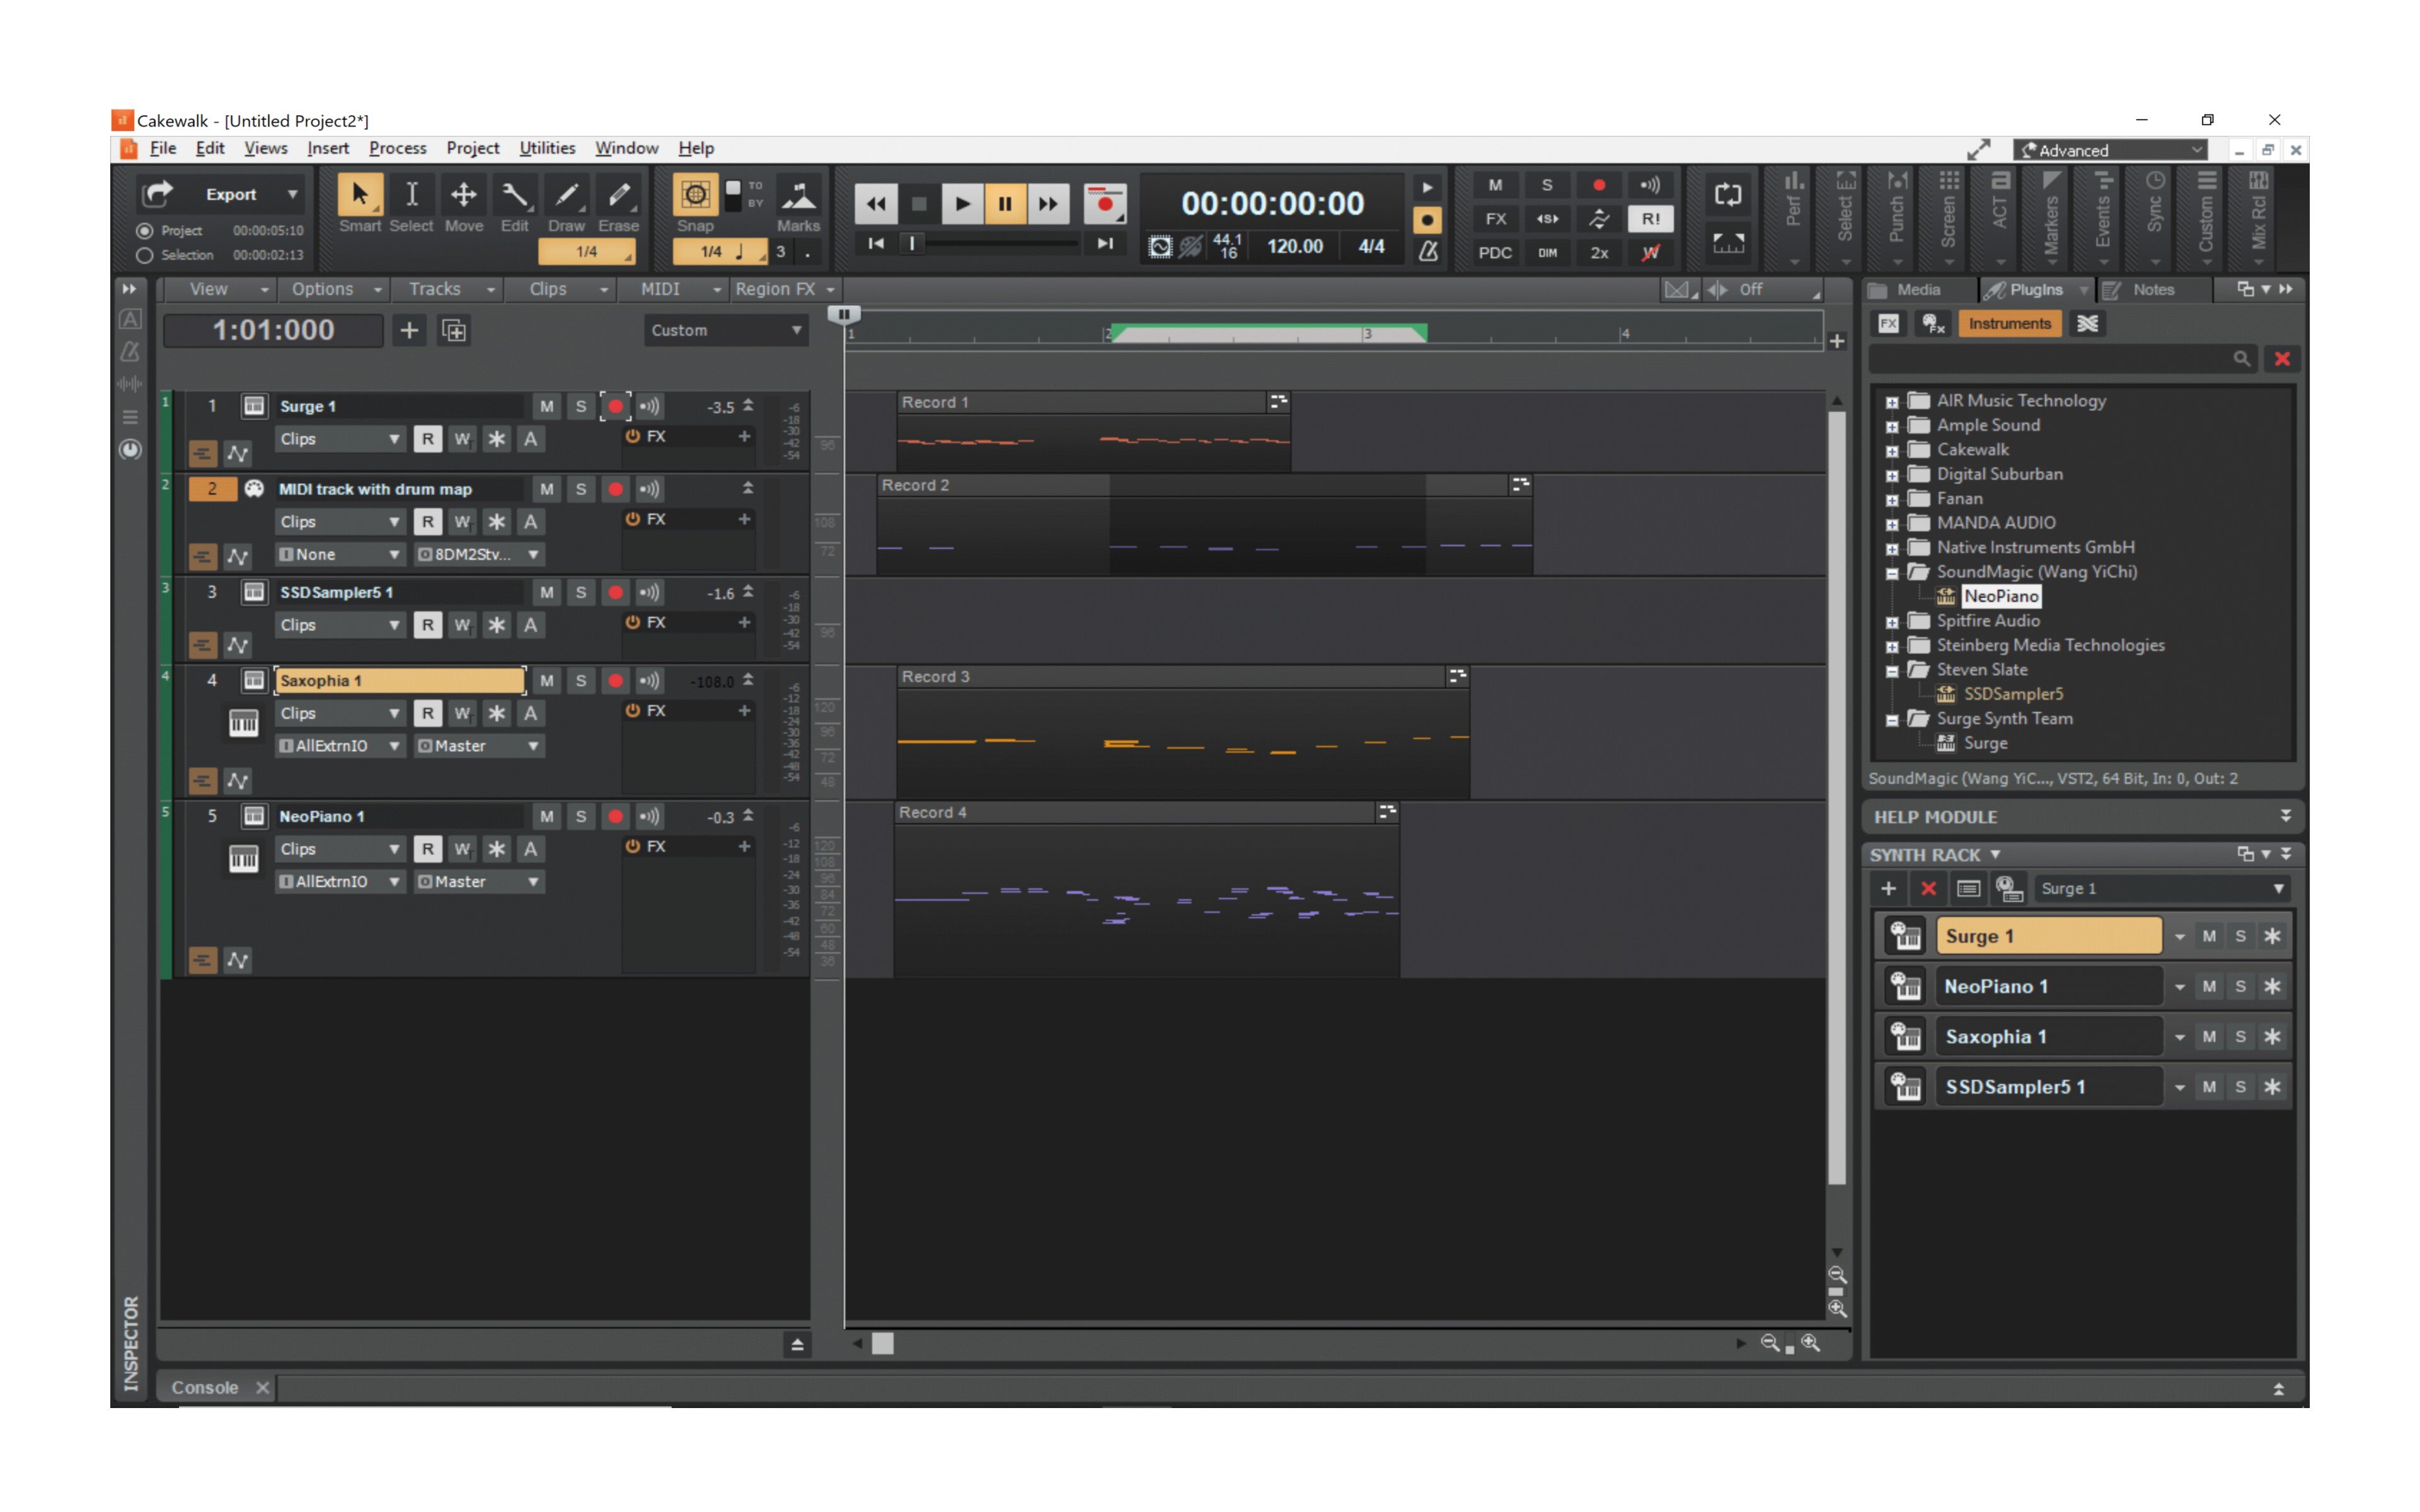
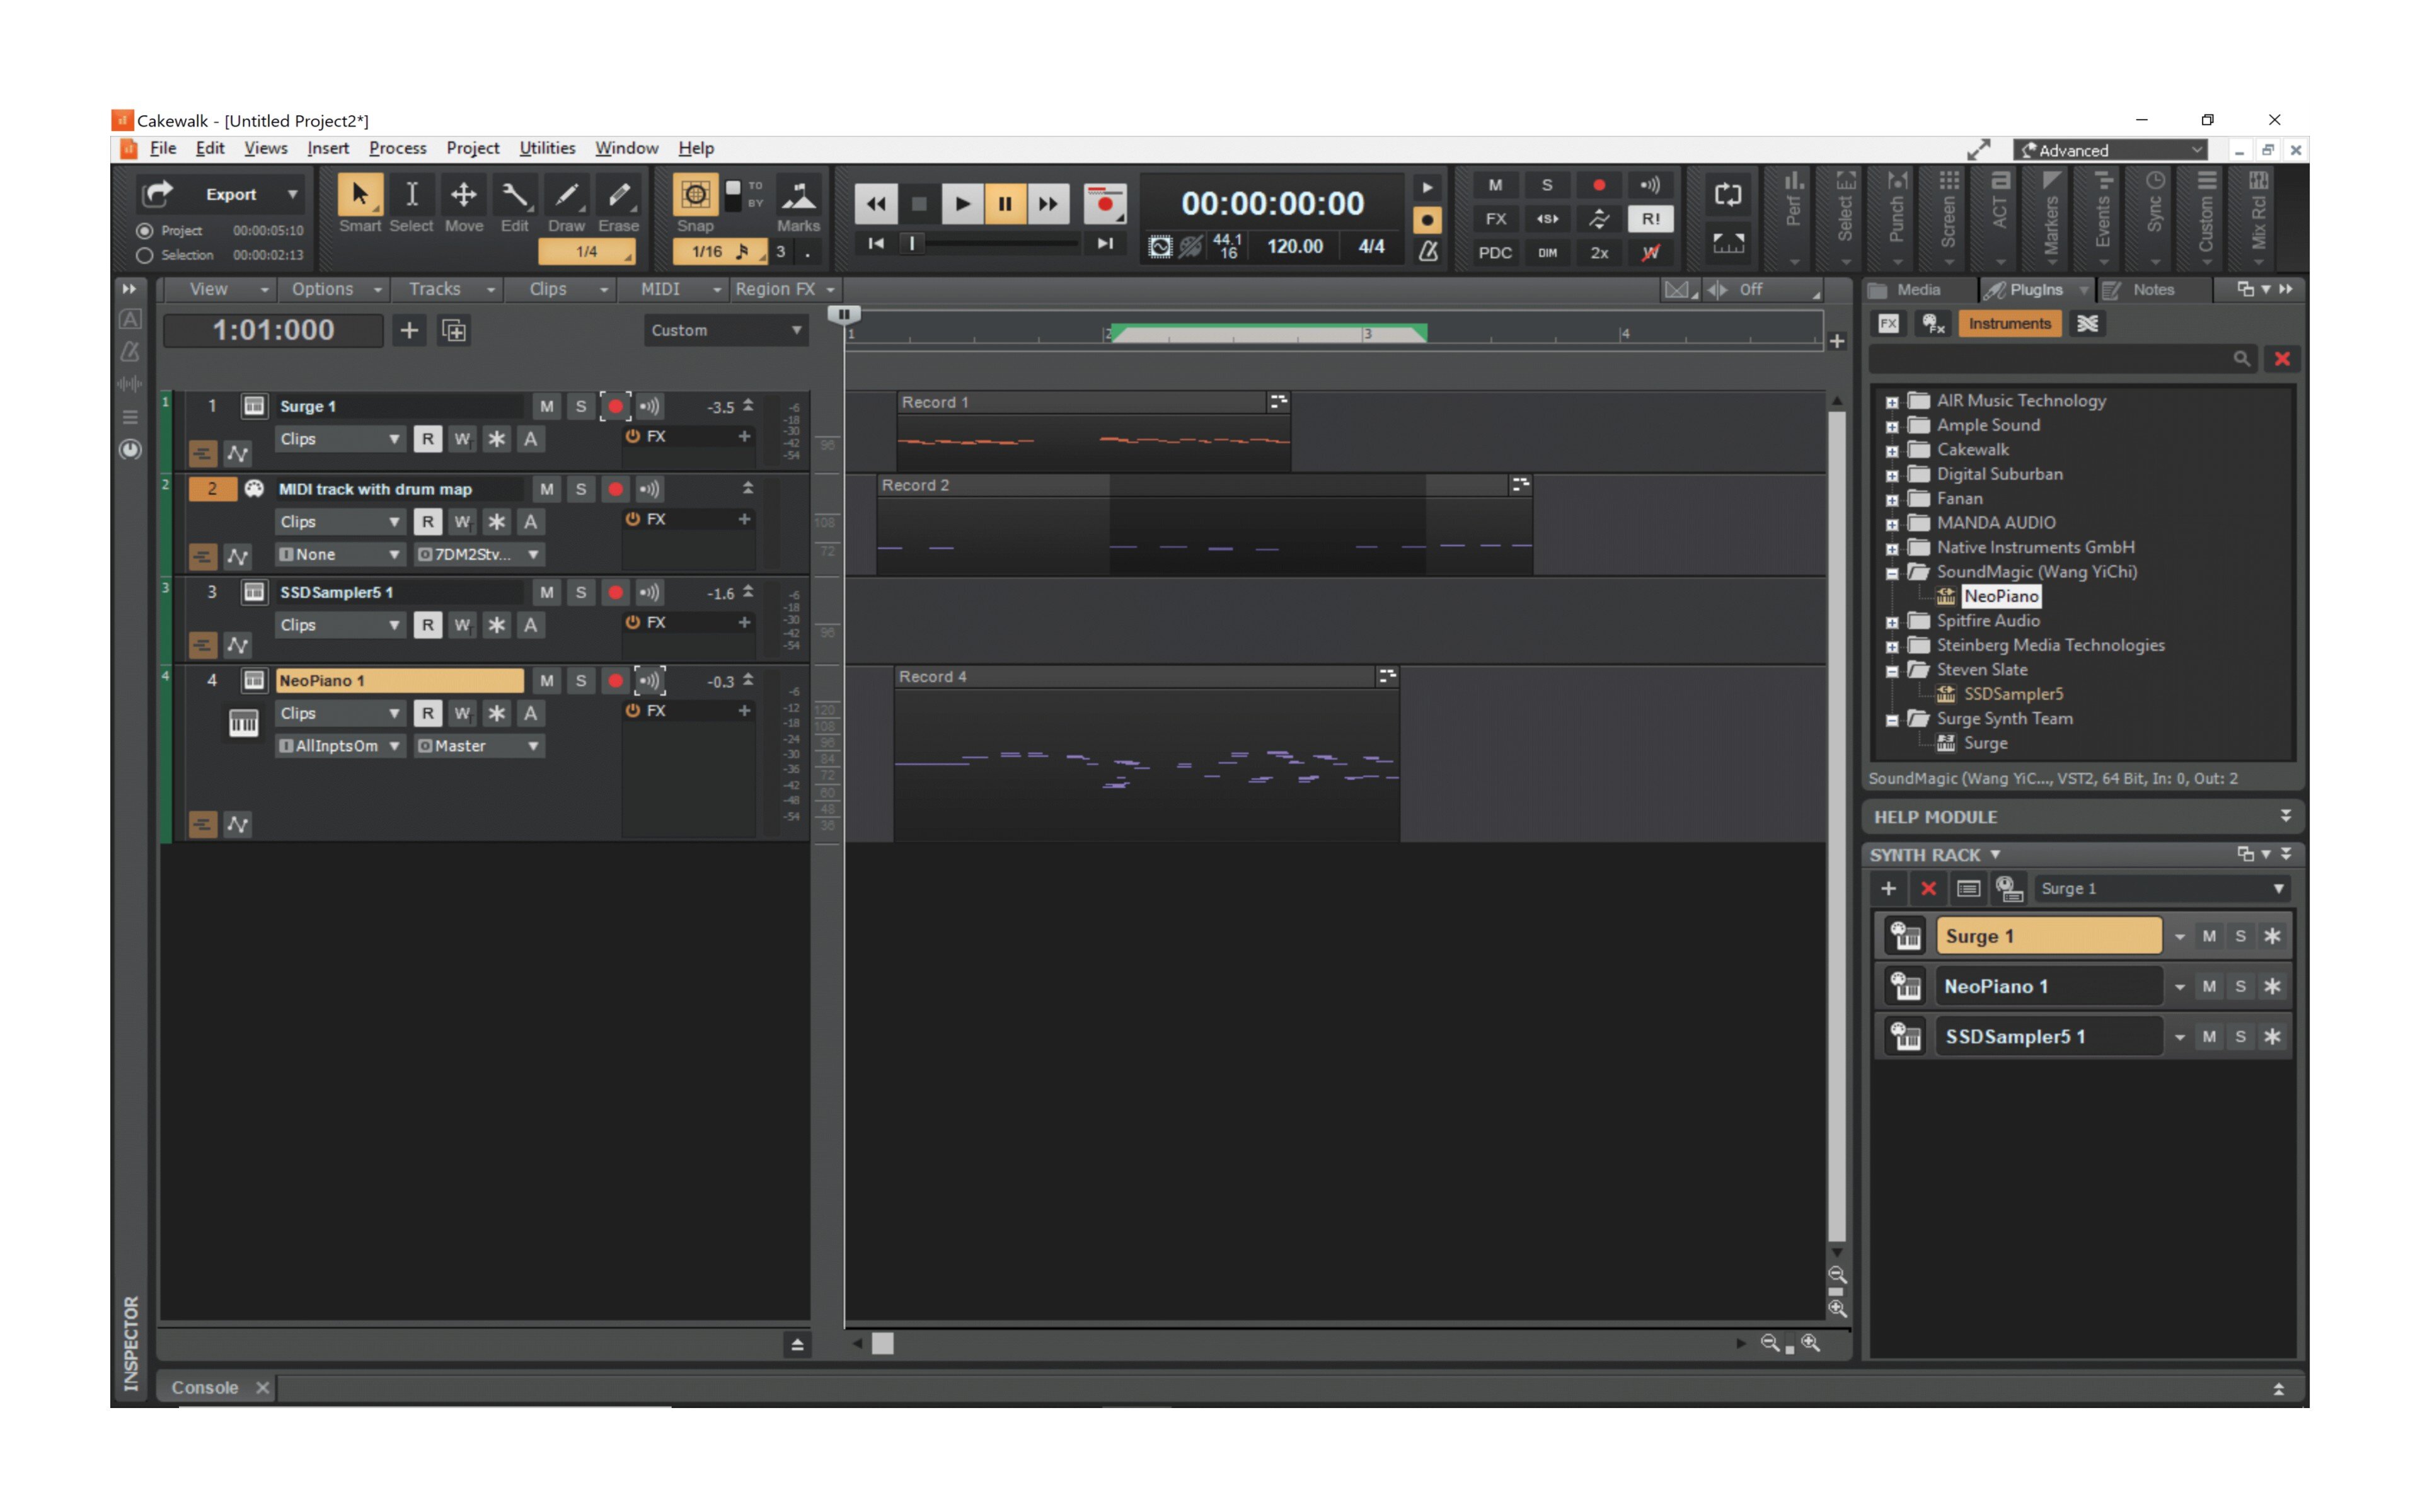
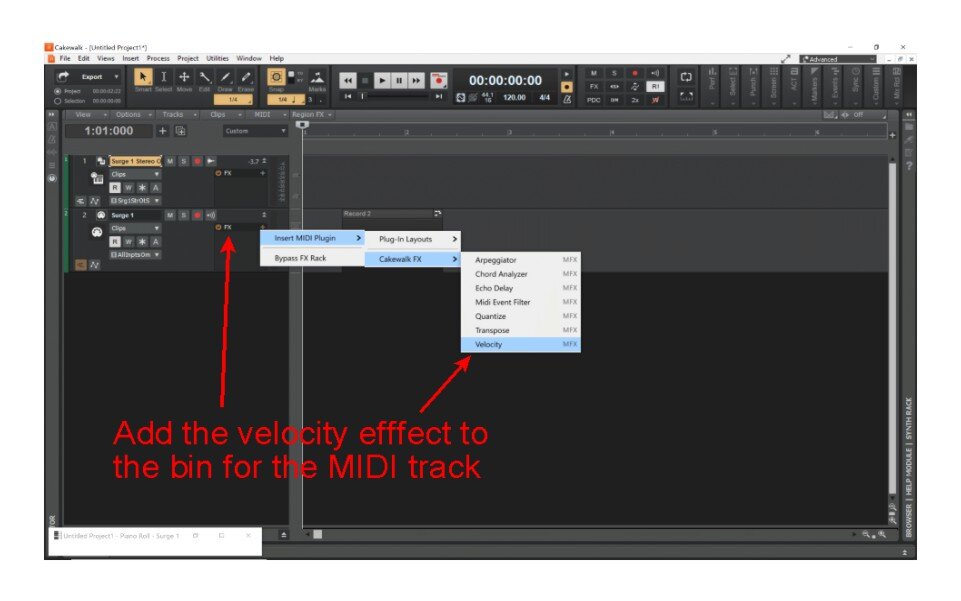
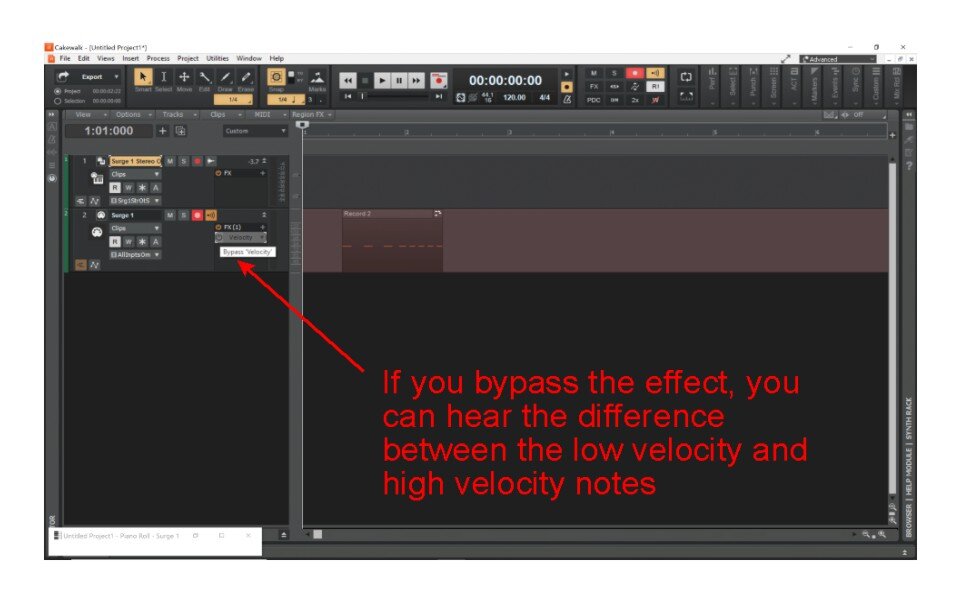
Here are some screen shots. Note that I picked a synth patch where velocity is very noticeable, notes played softly sound very soft and notes where I hit the keys hard sound very different. When I play it back with the effect bypassed I can hear the difference in note velocity (both loudness and timbre) but when the effect is activated the notes all sound the same.
-
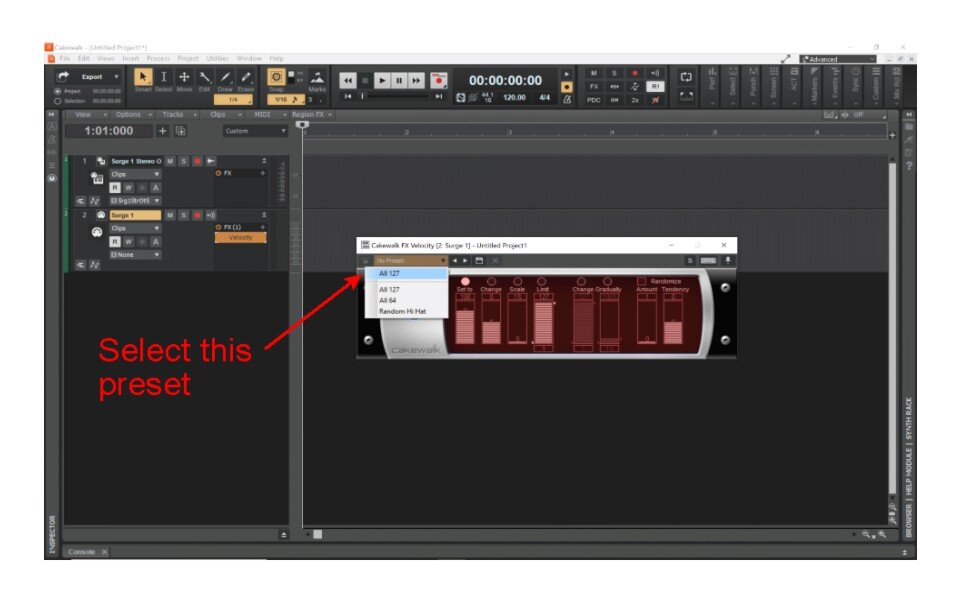
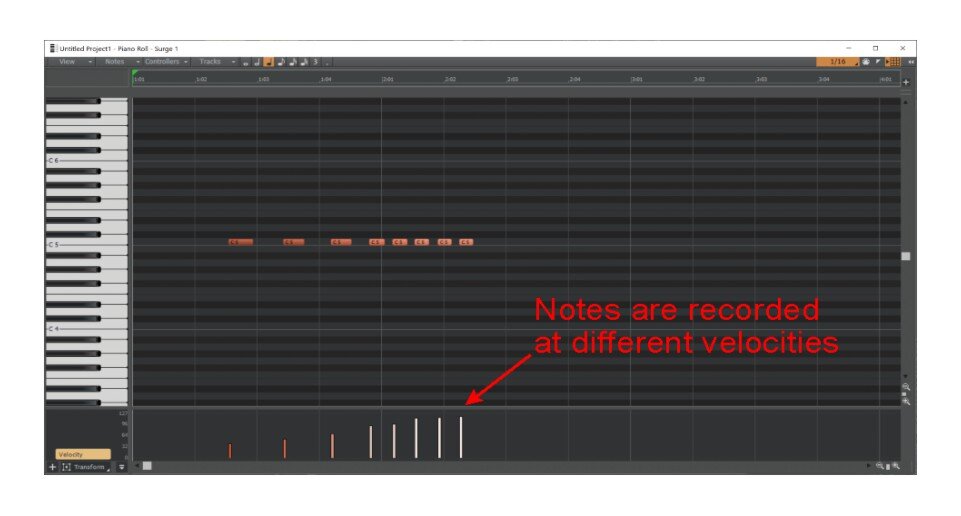
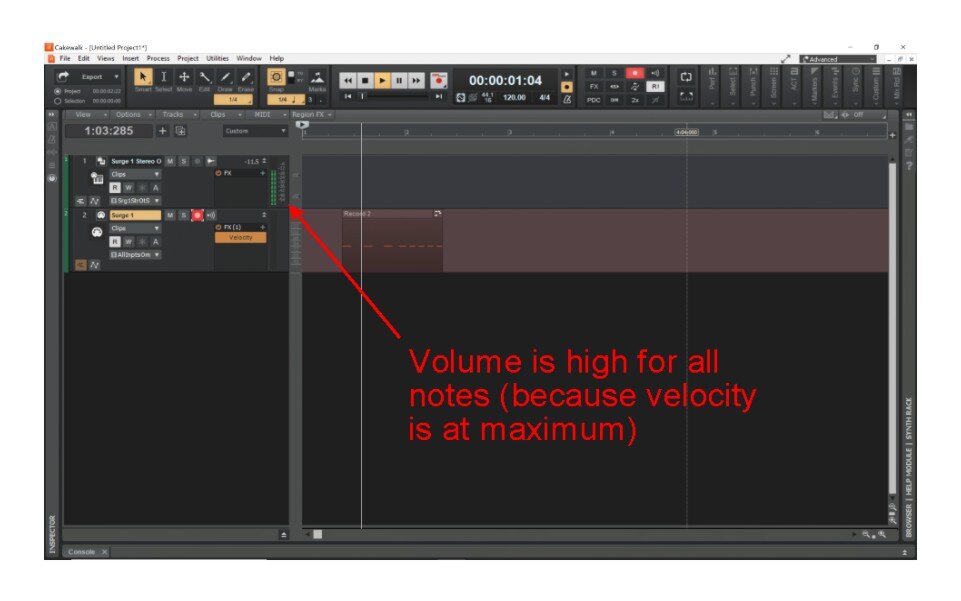
I just tried this, I don't know all the ways to use the Velocity plugin but if you click on the top left of the plugin (Presets) you should find a preset named "All 127". Select that and it will set all velocity of all notes to 127, the highest setting. The nice part of this is that it doesn't actually change the velocity of the notes, for example if you look in the piano roll view and expand the bottom section, you'll see that the notes all stay at the same velocity from when you recorded them. But with the plugin activated they play back at the same maximum velocity. You can see in the volume meter for the track that the notes are playing back at maximum velocity.
-

Cakewalk By Bandlab Touch Screen Compatible?
Mike Z replied to Michayl Asaph Myers's topic in Cakewalk by BandLab
I have a Dell laptop with touch screen, and CbB works perfectly by touch. -
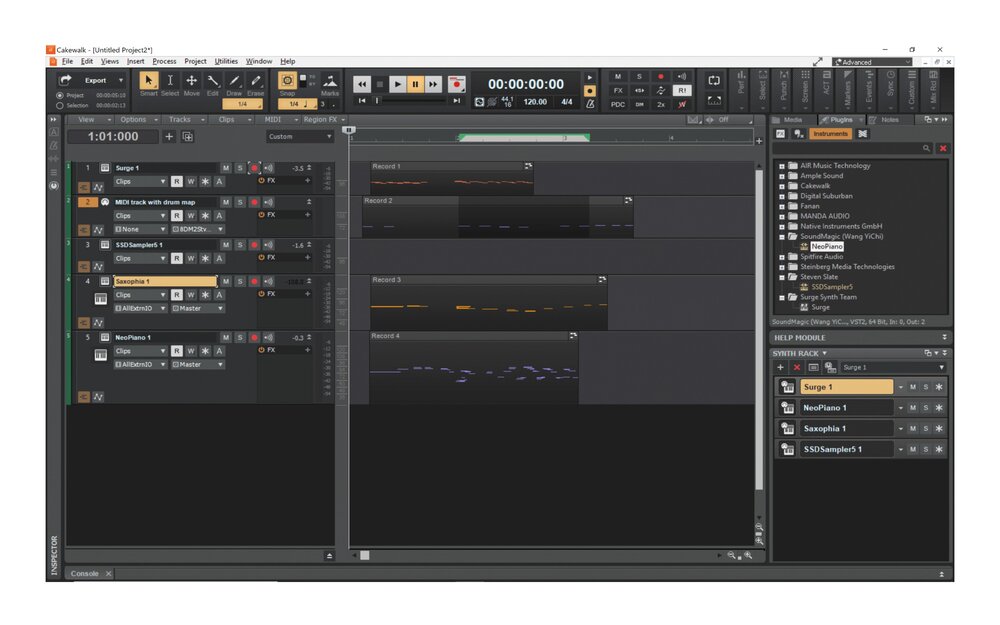
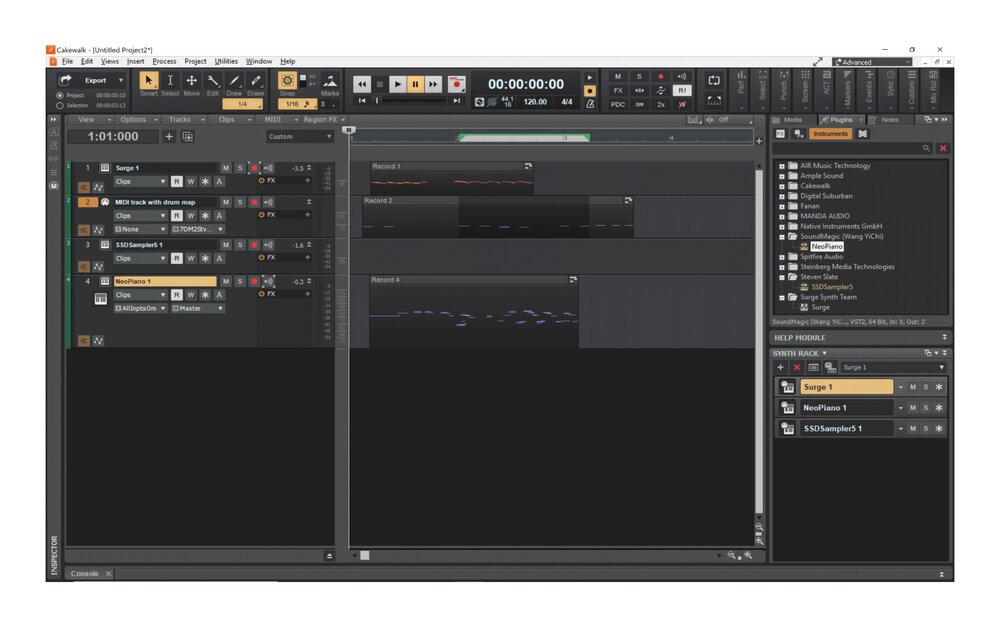
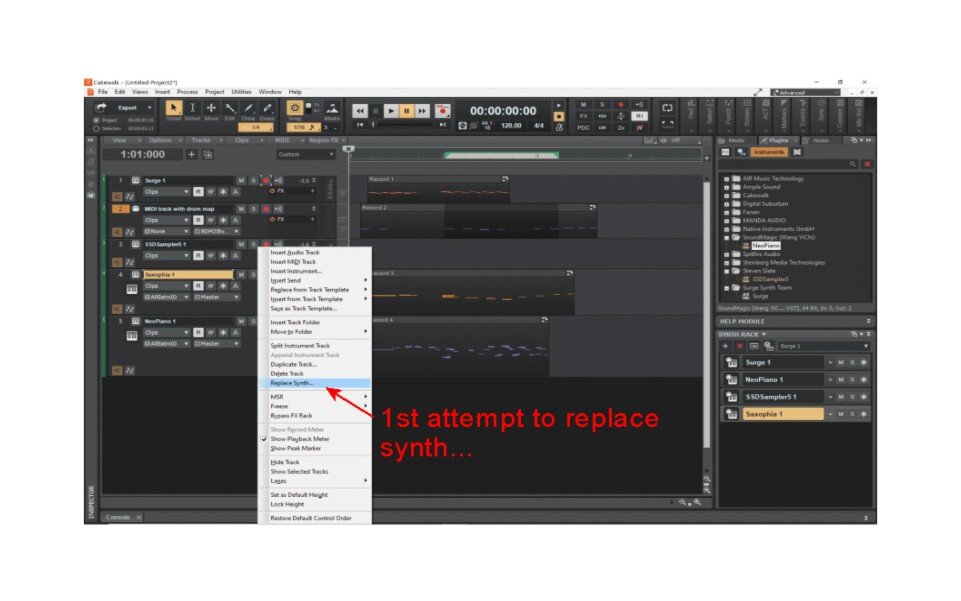
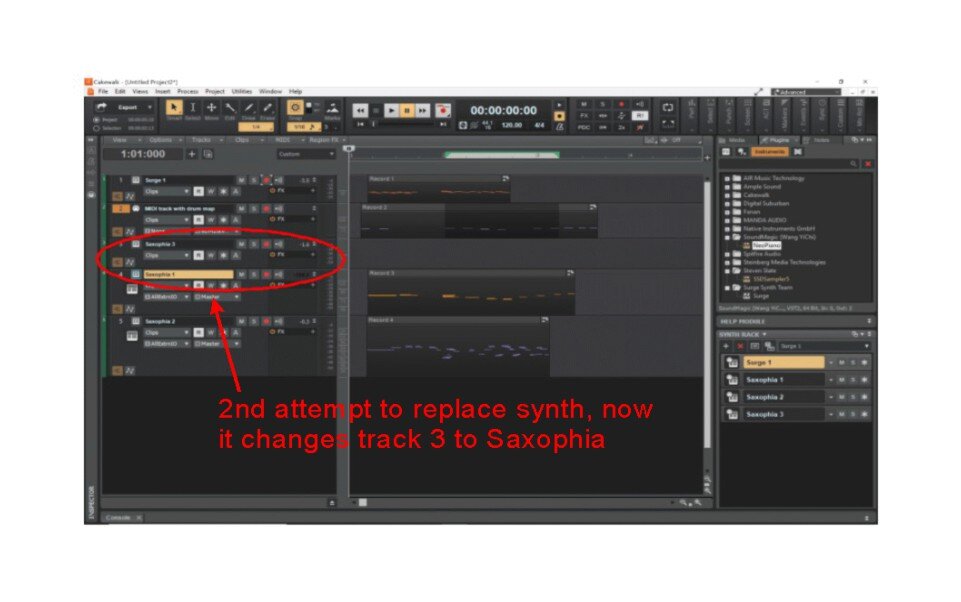
@Astraios @msmcleod I tried duplicating this issue, here's what I found: -with no drum map everything worked as I expected; Deleting a track, then Undeleting returned the synth track properly, all settings back , etc. -when I added a MIDI track and drum map (Steven Slate Drums), deleted a synth track and Undeleted it, the track returned but the same instrument as the track immediately after it (Piano 1 in this case). -If I right click --> Replace synth and select the original synth (Saxophia), now the track has Steven Slate as the instrument even though is still is labelled as the original instrument -right click again, select Replace synth again...this time it actually replaces the synth with Saxophia, but it also replaces Steven Slate with Saxophia. Both tracks seem linked together now.


-
In the plugin manager dialog, click a little lower on MIDI Effects (MFX). That should display your GR6 MFX on the middle field (Registered Plugins). If it doesn't show up on the far right field (Plugin Menu Layout) then you'll need to click on "Add Plugin" to add it to the menu tree. Also, I believe on the Effects rack in the browser, Guitar Rig 6 will show up under audio effects, while the MFX version will show up under MIDI effects. (I don't have the MFX version so I'm guessing here, but I think that's how it works)
-
Trying To Set Up New M-Audio Oxygen PRO controller
Mike Z replied to Mark Morgon-Shaw's topic in Instruments & Effects
If you mean setting the DAW type on the keyboard to Bitwig, I believe the only fix is to change it to MPC or Reason or Ableton. Any other DAW types I tried had various odd issues (especially when panning). -
Enhancement: track view collapse take lanes with track
Mike Z replied to David Beard's topic in Feedback Loop
Bumping and adding my support for this request. Collapsing the track should also collapse the automation/take lanes associated with it. -
Accessing QUADCURVE EQUALIZER Panel from the Tiny EQ
Mike Z replied to murat k.'s topic in Feedback Loop
I'm definitely a supporter of this idea. -
Electronic drum kit not showing up in MIDI devices
Mike Z replied to Kira's topic in Cakewalk by BandLab
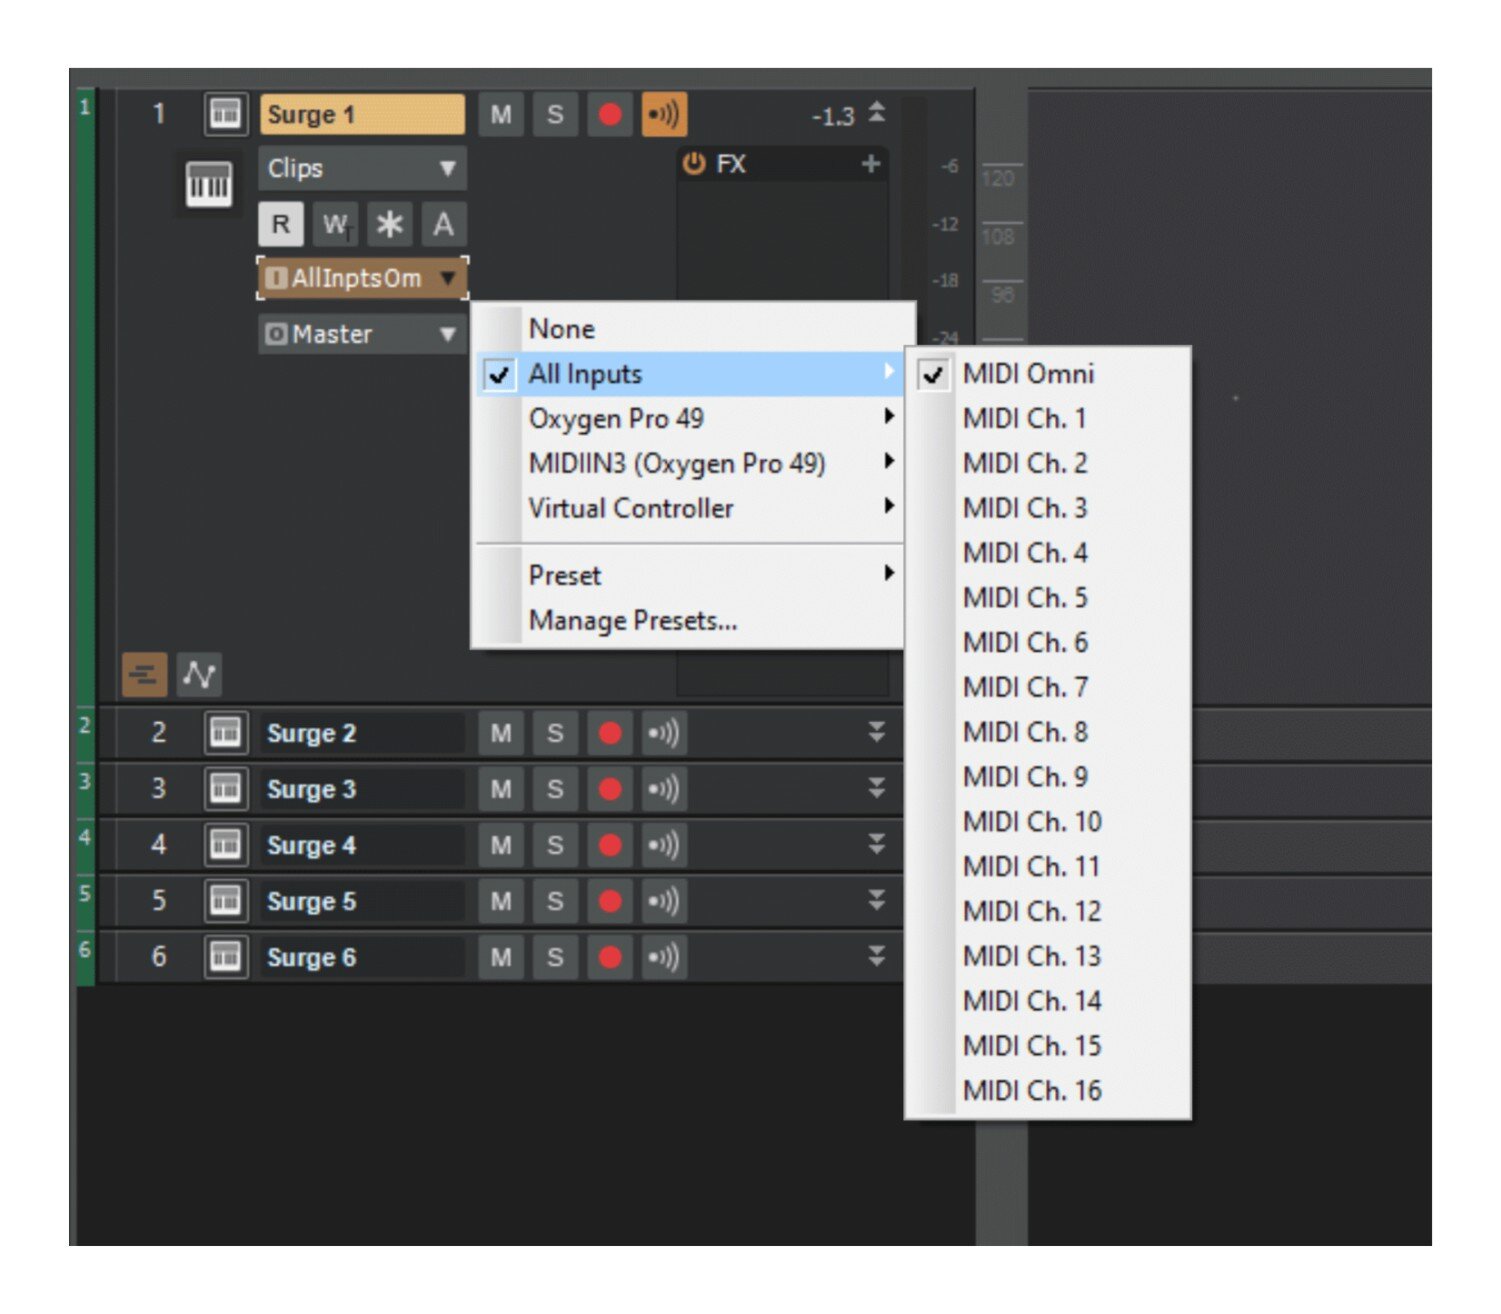
I'm not 100% certain (going by memory here, don't actually have my e-kit connected right now) but I think if you use a MIDI cable to connect your Alesis kit to your audio interface you should be able to set your track input as "All Inputs --> MIDI omni" and that'll accept MIDI notes/commands from just about any MIDI device. I think that's what I did last time I tried this.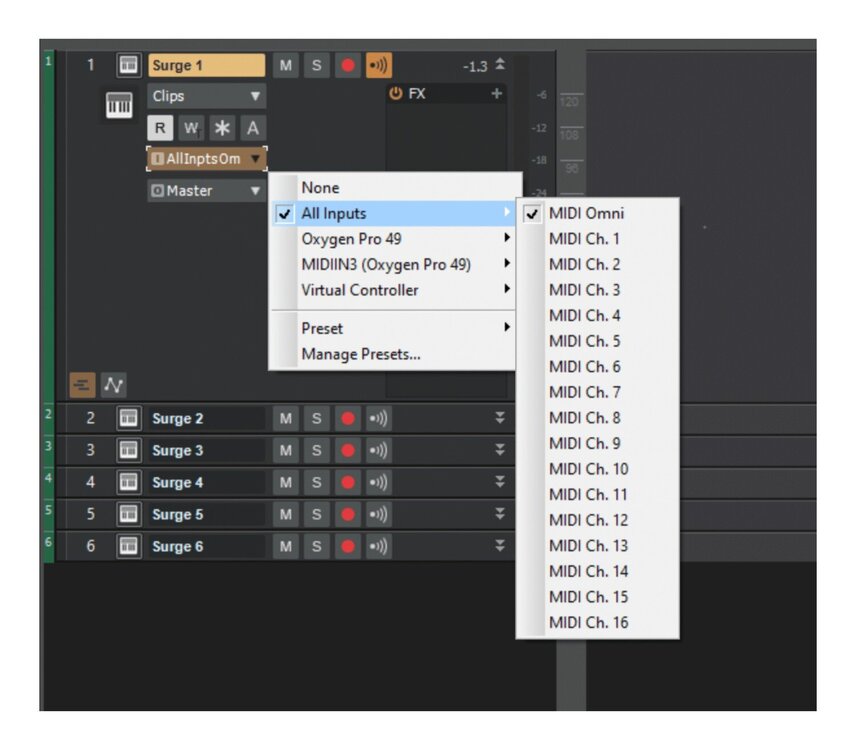
-
There's definitely an issue getting meters to toggle properly with a key binding. I assigned a shortcut to "Show/Hide All Meters" and it worked... but only to turn on meters. It never turns them off again. And if I assign the shortcut to "Options | Meter Options | Track Playback" or "Options | Meter Options | Track Record" it doesn't do anything. Strangely enough, if you assign a key to "Reset All Meters" that seems to work.
-
Your Casio keyboard will definitely work for recording, but maybe not the way you think. It sends MIDI information to the computer, those are the lines/bars you see on the track view after recording. Those notes by themselves don't have an sound; you need to select a virtual instrument to actually play the notes and produce some audio. You have a few basic instruments included with CbB: try using the SI Electric Piano. From the menu, click Insert -> New Soft Synth and select Cakewalk -> SI Electric Piano; from the dialog box check Simple Instrument Track. After the new track is created, drag the MIDI notes from the first track onto the new track. That should give you some sound.
-
I haven't noticed anything different with TTS-1 after the latest update. Here are some obvious things to try: make sure the track is armed before recording; make sure input echo is on (button next to the track arm button).
-
Thanks for posting this, I didn't realize there was a new update. I really love this synth, I spent days and days exploring the capabilities of Surge and there's still so much to learn.
-
Cakewalk Version 2021.04 installed plugin instruments
Mike Z replied to Bassist's topic in Instruments & Effects
Hi Richard, if Breverb and Boost are in the same folder as your SI instruments they should all be available to you. Note that FX and instruments are shown separately on the browser. This might be why you don't see the SIs. Try this: From the menu click Insert -> Soft Synth... (3rd option down). You should see a list of available synths sorted by manufacturer. Hover over Cakewalk to see what's there; you should see TTS-1, SI Bass, SI Drums, etc. If you don't see them there then we'll try something else.
-
Trying To Set Up New M-Audio Oxygen PRO controller
Mike Z replied to Mark Morgon-Shaw's topic in Instruments & Effects
Glad you got yours working. It's a great keyboard and I was frustrated that I couldn't find step-by-step instructions like this. I tried it with Cubase and it worked immediately but CbB was a little more complicated. -
Trying To Set Up New M-Audio Oxygen PRO controller
Mike Z replied to Mark Morgon-Shaw's topic in Instruments & Effects
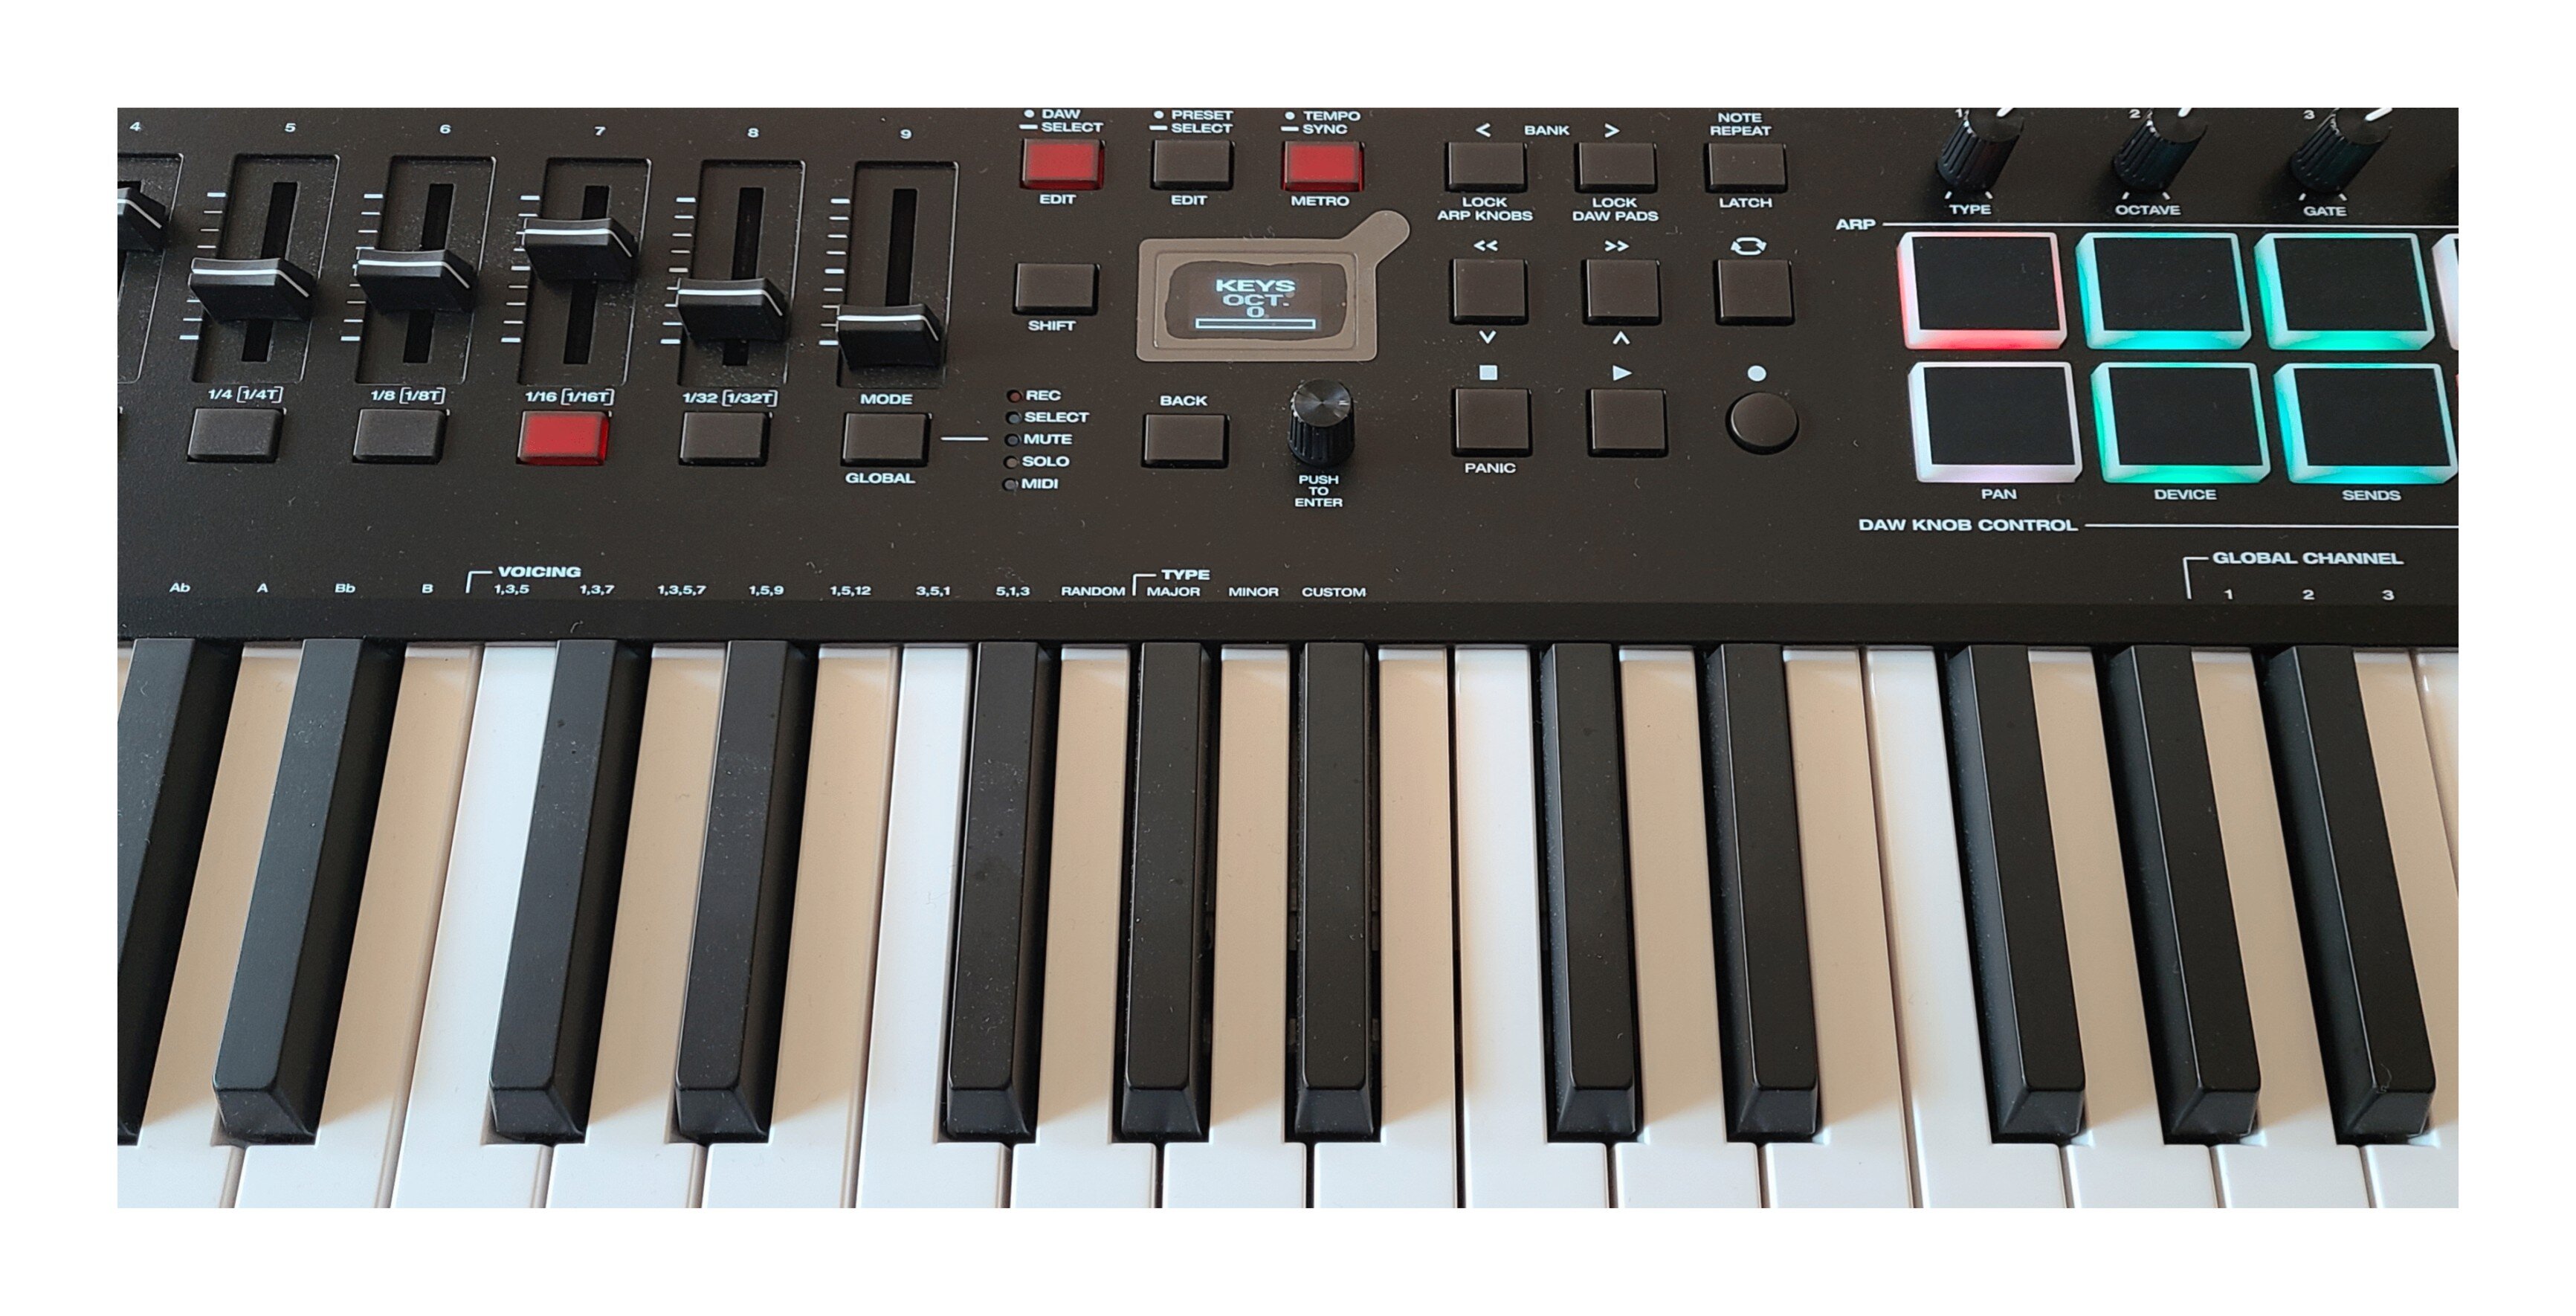
I bought my M-Audio Oxygen Pro 49 a couple days ago and almost went insane trying to get it to work with Cakewalk. This thread in particular was very helpful in getting me on the right track; I've spent a lot of time trying different options and making notes on what worked and what didn't. For anyone else confused about it, I posted detailed instructions below. One important note that might be helpful: the problem some guys here are having with the pan knobs (2% or 98%) is solved by setting the DAW mode on the keyboard to MPC or Ableton or Reason. Setting the DAW type to anything else (PT or Studio1 or Reaper or FL etc.) will cause this issue. Also, as others here have mentioned, when setting the ACT on CbB you must have a project open; make sure the project has a decent number of tracks because you can only assign a control to a track if there's an active track open. I started with a small project with only 7 tracks and couldn't assign a fader to track 8 until I opened a larger project. And, as mentioned above, the Oxygen Pro uses MIDI inputs 1 and 3 (Oxygen Pro 49 and MIDIIN3) for presets and DAW, respectively. If you leave MIDIIN2 and MIDIIN4 checked as MIDI devices, problems can develop so only enable 1 and 3. Here's what I did to get it working: 1. Plug the USB connector into the Oxy Pro and your computer (don’t start Cakewalk yet) and turn the power switch on. 2. Set the OS - press Shift and Global and the display will show “GLOBE” with “G CHAN” underneath. - Rotate the Encoder knob until you see “PC” displayed; press the Encoder to select. - Rotate the Encoder again until you see “Win”, press the Encoder again. - Press the Back button 3. Set DAW mode - Press and hold the DAW button until the display shows “DAW” - rotate the Encoder until you see MPC (or Ableton, or Reason) - press the Encoder to select 4. Set up Cakewalk - Start up CbB - Open a project (pick any project, ideally one with 8 or more tracks) - Click Edit – Preferences - Click MIDI – Devices - Inputs: Check Oxygen Pro xx and MIDIIN3; Do not check MIDIIN2 or MIDIIN4 - Outputs: Check Oxygen Pro xx and MIDIIN3; again, don’t check MIDIIN2 or MIDIIN4 - Click Apply - Click Control Surfaces; You should have at least one controller named ACT MIDI Controller; set the In Port to MIDIIN3 - Click “Add New Controller” (yellowish icon) and select “Mackie Control” as the Controller/Surface; set the input port also to MIDIIN3 - Click Apply and Close; At this point you should be able to get MIDI notes out of the Oxy Pro. The next step is to map the transport buttons using the ACT feature in Cakewalk. 5. Map buttons - From the menu click Utilities – ACT MIDI Controller -1 - The ACT map will pop up - From the Presets field, select M-Audio Oxygen Pro 49 (Preset 10) - Each control may be assigned using MIDI learn. For examply, to set up the Stop button, click on the empty box below where it says C32 Stop; you should see “MIDI learn...” - On the Oxy Pro keyboard, press the Stop button and the MIDI learn message will disappear. - Repeat for each button you want to assign. - Close the ACT window